One of the main pain points of heavy Ural motorcycles is the ignition system. Although currently motorcycles produced by IMZ are equipped with Italian-made Ducati Energia electronic ignition, only about three percent of the bikes produced today are sold in the Russian Federation. Most of the owners travel across the country using outdated mechanical ignition in the Ural. Electronic one has a number of advantages.
How to check electronic ignition on a Ural motorcycle
CHECKING THE IGNITION SYSTEM OF MOTORCYCLES “URAL”, “DNEPR”
Checking the serviceability of the ignition system begins with assessing the serviceability of the breaker. When the ignition advance machine is operating, there should be no jamming, and the springs should not dangle in the ears. Next, using a tester, you need to measure the resistance of the primary winding, it should be 6 ohms. Then check the secondary circuit. To do this, you need to connect the device to the high voltage terminals. The secondary winding resistance should be 10 kOhm. Check the resistance between ground and each terminal. Then you need to ring the high voltage wires and spark plug caps. The resistance of the wires should tend to zero, the resistance of the spark plug caps should be about 2 kOhm. At the same time, you need to unscrew the spark plugs and adjust the gap between the electrodes.
MAINTENANCE OF THE IGNITION SYSTEM OF MOTORCYCLES “URAL”, “DNEPR”
Maintenance of the ignition system consists of checking the spark plugs, adjusting the gaps between the electrodes, checking and, if necessary, adjusting the gap between the breaker contacts, and setting the ignition timing.
The gap between the spark plug electrodes is checked using a feeler gauge. The gap should be 0.6 mm. With an increased gap, the formation of an electric spark is difficult; with a small gap, carbon deposits can form on the electrodes, which can bridge the spark gap. In this case, the electrical discharge occurs not between the electrodes of the spark plug, but along the soot. In both cases, interruptions in engine operation are observed. The gap between the spark plug electrodes is adjusted by bending the side electrode.
The reliability of engine operation largely depends on the accuracy of adjustment of the gaps between the breaker contacts and on the cleanliness of the contact surfaces. Before you start adjusting the gaps, you need to remove carbon deposits and dirt using a special abrasive plate or a file, blow with compressed air and wipe with suede slightly moistened with clean gasoline.
The gap between the breaker contacts is checked and adjusted in the following order:
— turning the crankshaft with the trigger lever, set the maximum gap between the contacts of the breaker (the fiber riser should be at the top of the cam) and check its size with a feeler gauge. The normal gap between contacts is 0.4 - 0.6 mm;
— in case of a discrepancy in the gap size, loosen screw I (Fig. 6.26) securing the fixed contact riser and, by turning the adjusting screw 6, which has an eccentric head, in one direction or another, set the normal gap between the contacts of the breaker.
The normal operation of the engine, its durability and efficiency largely depend on the correct installation of the ignition. In the case of late ignition, the working mixture in the cylinder ignites when the piston is at top dead center or later. In this case, the mixture does not have time to burn completely before the exhaust valve opens and is pushed into the exhaust manifold in a burning state. The final combustion occurs in the exhaust pipe. This leads to loss of engine power, overheating, increased fuel consumption, and burnout of exhaust pipes and mufflers. In the case of early ignition, the working mixture ignites prematurely, causing a sharp increase in gas pressure before the piston reaches top dead center. There is interference with the movement of the piston. The load on the parts of the crank mechanism increases sharply. The temperature in the cylinder at the moment of fuel combustion becomes much higher than with normal advance. This leads, as practice shows, to burning out the piston crown. Therefore, ignition adjustment should be given priority attention.
To make it easier to set the ignition timing, there are marks on the outer surface of the engine flywheel with the letters “B” - top dead center, “P” - late ignition and “P” - early ignition, and there is a hole with a mark on the engine crankcase near the oil filler neck. When checking the ignition with the PM05 breaker, you must adhere to this
sequences. Remove the cover and the breaker slider. Check and, if necessary, adjust the play of the ignition timing cable. The play in the advance lever cable in the “early” position should be 3 mm. The backlash is adjusted with a stop screwed into the steel bushing of the breaker body, against which the flexible sheath of the cable rests. Having previously loosened the lock nut, tightened or unscrewed the stop, change the length of the cable, achieving the required play. After adjustment, tighten the locknut.
When checking early ignition, set the lever on the steering wheel to the “early” position. Then connect the test light with one contact to the low voltage terminal of the ignition coil, and the other to ground. Turn on the ignition and slowly turn the crankshaft with the start pedal until the mark on the engine crankcase and the mark on the flywheel, marked with the letter “P,” coincide. If the control light comes on before the marks match or does not light up after the marks match, then the ignition must be adjusted. To do this, on the left on the movable disk of the breaker (Fig. 6.30) there is an adjusting screw 5 for the early ignition timing with a lock nut and an eccentric head, which fits into the cutout of the breaker body. Then, without turning off the ignition, after loosening the lock nut, use a screwdriver to turn the screw in one direction or another until the light comes on, i.e. start of opening. Next, holding screw 5 in this position, tighten the locknut. The maximum ignition timing on the crankshaft is 32 - 36° to top dead center.
Rice. 6.30. Breaker-distributor PM05: 1 — stop for adjusting cable play; 2 — late ignition adjusting screw; 3 - adjusting screw for the gap between the breaker contacts; 4 — riser fastening screw; 5 — ignition timing adjusting screw.
When checking late ignition, set the timing lever to the “later” position. Turn on the ignition and turn the crankshaft until the marks on the crankcase coincide with the mark on the flywheel, marked with the letter “P”. If the light does not light up, the ignition delay must be adjusted. To do this, there is a screw 2 with a lock nut on the bottom right side of the breaker housing. By first loosening the lock nut of the screw and turning it in one direction or the other, set the moment when the control lamp lights up (the beginning of the contacts opening), then tighten the lock nut. The retarded ignition in this case is 4 – 8° before top dead center. After this, turn the crankshaft one more revolution and make sure that the ignition is installed correctly. The moment of opening the breaker contacts must occur when the marks coincide with the corresponding position of the lever on the steering wheel.
Five random articles about motorcycles:
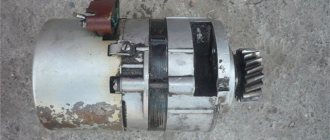
Installation of alternating current generator G421 on IZH-49 and IZH-350. Adapter flange drawing and modified electrical diagram
Instead of a constant variable, IZH-49 motorcycles, as you know, have long been out of production.
But many still do not want to part with them, because these reliable, unpretentious machines are well adapted to difficult operating conditions. Serious difficulties, perhaps, are created only by the DC electrical equipment system, which includes several complex devices. requiring special care. I simplified this system by converting it to alternating current based on the model of the Voskhod motorcycle, that is, I used its electrical circuit, the G-421 generator and the B-300 coil. The only difficulty in the conversion is installing the generator. For it, you need to machine the adapter flange shown in the figure from any steel. which we fasten with M6-15 screws through holes with a diameter of 6.5 mm on the right half of the crankcase instead of the previous generator. We place the generator rotor on the right axle shaft of the crankshaft and screw it with an old bolt shortened by 15 mm. Then install the piston like this. so that it is 4 mm n... Read more >>
Installing the Day-Night switch on the IZH Jupiter 5 motorcycle
Traffic rules require: during daylight hours, a motorcycle must have low beam headlights on.
To prevent other lamps from burning uselessly, loading the battery and generator, it is advisable to introduce a “Day-Night” switch. For this purpose, I additionally installed the same switch on the IZ Jupiter 5 as for the turn indicators, inserting it into the gap in the black wire coming from pin 6 of the ignition switch, as shown in the figure. In the “Day” position (the switch is off), only the low one is lit headlights, in the “Night” position (the switch is on), the lighting system operates as usual.B. BOBKOVMoscow region, Lopatino village Connection diagram for the Day-Night switch: 1 - ignition switch; 2 - additional switch. 1988N07P33 Read more >>
Disadvantages of the 12V system and ways to improve it
The 12-volt 12-volt electrical system on motorcycles solved many problems in one fell swoop.
With the same dimensions of the generators, it was possible to almost double their power. It has become possible to use the same optical elements of headlights on motorcycles as on cars, and this is not only economically feasible, but also very beneficial for traffic safety, since motorcyclists finally have good bright light at their disposal. But the topic of our conversation today is about the shortcomings of the system, about ways to improve it. And again, as last time (“Behind the Wheel,” 1988, No. 3), we will talk mainly about the instruments of IZH motorcycles, the most popular ones. Object number one is the battery. To be honest, its durability is often inferior to that of a 6-volt one. And the fault is not the generator, everything is in order here, there are no complaints about it. The most complaints are caused by the operation of the relay regulator, which mainly... Read more >>
IZhi for a multi-day race. IZH M12, IZH 64M
Izhevsk Machine-Building Plant is a pioneer of the domestic motorcycle industry.
He was one of the first in our country to start making sports motorcycles. For all-around competitions, the plant currently produces two main models of special machines. One of them, IZH-64M, is intended mainly for a wide range of athletes. It has the same engine as the popular motorcycle IZH Planet 2, only boosted. This simplifies operation and the supply of spare parts. Rice. IZH M12 Another model, IZH-M12, has higher performance, designed for important competitions such as national championships. The new machine developed the solutions inherent in the design of the IZH-M10, which brought the plant a large FIM gold medal at the international six-day competition in 1967. The IZH-M12 engine (single-cylinder with two-channel purging) is manufactured in three modifications - classes 250, 350 and 500 cm3. They differ in cylinder diameter (corresponding... Read more >>
If the thread for the spark plug in the cylinder head of IZH-Jupiter-3, 4 or 5 has broken
Installing a liner in the head If the IZH-Jupiter-3, “4” or “5” motorcycles have a broken thread for a spark plug in the cylinder head, install a liner, as is customary, (see figure), but only of a larger length so that you can use spark plugs with a long (19 mm) threaded part - A17DV, A17D1 and others intended for Muscovites and Lada cars.
We make the fitting from brass and screw it in with BF-2 glue. Installing the fitting in the head. Many years of operation of engines with these spark plugs has shown that they work no worse than with standard ones. Moscow, E. CLOGS 1988N06P33 Read more >>
login registration forgot your password?
Motorcycle goods store About the store Terms and return procedure
Contactless ignition system for motorcycle Ural, Dnepr
Solving the problem of the reliability of the ignition system on my Ural motorcycle, I came to the conclusion that it was necessary to install a BSZ...
Having considered the huge abundance of options for contactless ignition systems, both on the market and on the Internet, I decided to make for myself the simplest option for the electronic part. Namely, use a Zhiguli Hall sensor and switch. The reason for choosing this particular combination was that I like to travel far and for a long time, and you must admit that if a specific unit specifically for a motorcycle fails along the way, it is not always possible to find a replacement for Saurman or an opto sensor somewhere in the outback, just as it is not always possible to carry it with you contact ignition kit in reserve. And spare parts for Zhiguli can be found in any village.
Search for BSZ kit
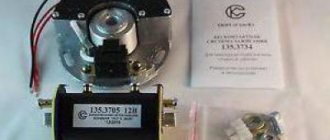
So, the choice has been made, all that remains is to implement it. I went to the market. I bought a switch for a VAZ 2108, a Hall sensor and a piece of wiring from a VAZ 2107 distributor. I bought a two-terminal coil from Oka. I also needed an old breaker housing to make a mounting panel for the Hall sensor that I had.
How to make a butterfly for BSZ
The simplest, but not the most correct option was to make a modulator butterfly, ordering it from a turner, which could be rigidly fixed to the shaft. In this case, the ignition timing would remain constant all the time. Of course, it would be possible to add an additional FUOZ unit (ignition timing generator) to this option, but, based on my concept of “reliability in simplicity,” this option also did not suit me. I wanted the engine to work as it should, without complicating the electronic part, so I went to the market again and bought a new Ural cam with a centrifugal regulator. I approached the selection of the cam responsibly and bought the most reliable one, not a Chinese one.
We make a plate for the hall sensor
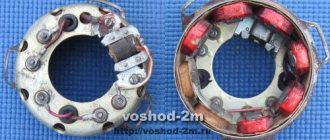
I took the old body from the breaker, removed all the insides from it, and sawed off the vertical walls to a horizontal plane. The result is a plate like this.
Next, having thought about how to secure the Hall sensor, I decided to “sink” it and secure it at the bottom of the plate, fortunately there was 3 mm of free space under the plate, just right for attaching the sensor. This mounting option seemed to me the most rigid, plus the sensor mounting screws will not be unscrewed due to engine vibrations, since they will rest against the housing. I made the necessary cut in the plate along the width of the sensor, drilled two holes and cut an M3 thread. I installed the Hall sensor on the plate and secured it with M3 screws with countersunk heads.
We manufacture a modulator for BSZ
I measured the vertical distance from the slot in the sensor to the edge of the plate. I got distances from the bottom edge of the sensor slot of 6 mm from the top of 10 mm. I installed the plate on the motorcycle, installed the cam with the centrifugal regulator in place, looked at how the lower edge of the cam sits in relation to the plate, it should be approximately at the same level. I transferred the distance from the plate to the center of the slot in the sensor to the cam body. In my case it turned out to be 8 mm. Marked a horizontal line. The curtains will be welded at this level. I left the marking line for release.
I measured the distance from the center of the shaft on which the cam sits to the Hall sensor housing through the slot - 28-29mm. I decided that the diameter of the butterfly should be 54 mm, so that there would be a gap of 2 mm between the edge of the curtain and the sensor body. Somewhere on the BSZ discussion forums I read that for the switch to work properly, a 2/1 cycle is required. That is, two parts of the sector are closed, one part is open. It turns out 120 degrees metal, 60 degrees slot.
Determined the central axis of the cam. If you look at the cam directly in the center of the hole, you will see that the cam is not round. Only two parts are round, and two seem to have been ground off. The axis passes through the centers of both rounded parts, i.e. where the contacts remain open. Using simple calculations, I marked four vertical lines on the cam. Got clear boundaries of sectors horizontally and vertically.
I ordered a mandrel from a turner - a round metal washer 8 mm thick, 54 mm in diameter and with an internal hole of 22 mm, so that the round part of the cam would fit tightly into the washer, without play. The sectors for the modulator were first cut out of cardboard. I did this with the metal: I cut out a round piece from a 1 mm sheet of iron with a chisel, and drilled a hole in the center for an M8 bolt. I drove a bolt into this hole, tightened it with a nut, inserted it into the drill, turned on the drill and carefully sanded the edges of the workpiece with a file to the desired diameter and shape.
I marked the resulting workpiece into 4 sectors, two at 120 degrees and two at 60 degrees. I carefully sawed one marked side into two halves, put both parts together, and made a cut along the remaining line. Got the required sectors. Next, holding the sectors again in a vice, I made it as on a paper blank, and drank the required shape under the welding site.
After all these manipulations I went to the welder. Well, everything is simple there. We inserted the cam into the mandrel turned by a lathe. We laid the petals on the mandrel, oriented them along the marked lines and welded them to the eccentric. The most difficult part of the BSZ butterfly modulator was ready.
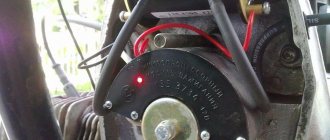
Installing BSZ on a motorcycle
Installation on the motorcycle did not take long. The old ignition had already been removed. In its place I installed a plate with a Hall sensor and put the butterfly modulator in place.
I determined the places where the switch will be located (in my case, near the battery) and the ignition coil (under the front of the tank).
I used silicone wires from the coil to the spark plugs with automobile rubber tips (more than once they helped me out in heavy rain). I ran the wiring to the switch from the Hall sensor, having first lengthened it a little.
I connected the plus of the switch and the ignition coil to the standard wiring wire, which used to go to the breaker, and the minus of the switch to the housing, using the switch mounting bolt. The negative wire of the coil was connected to terminal No. 1 of the switch, as indicated in the diagram. He turned on the ignition and cranked the engine. There was a spark. All that was left was to turn on the ignition.
We set the ignition for the first time with the BSZ butterfly modulator.
We set the ignition almost as described in the manual, but with some adjustments due to the fact that we now have no contacts. The opening moment is determined by the spark on the spark plug when the modulator curtain passes through the Hall sensor.
So. We set the crankshaft to mark P (early ignition, first mark, complete alignment of the arrow on the crankshaft and the marks in the center of the window). We unscrew the spark plug from the left cylinder, put on a high-voltage wire, and provide the spark plug with reliable ground. We move the weights as far as they will go and by turning the body of the plate with the Hall sensor we catch the moment of the spark. Having caught the position of the plate at which the spark jumps, we tighten it with three screws. We check again to make sure that the angle is not knocked down when tightening. The spark should jump at the moment of maximum divergence of the weights. The next step is to check the advance angle on the second cylinder. We rotate the crankshaft 360 degrees (a full turn) until the marks and marks P coincide. And we check for the presence of a spark at the point where the weights are completely separated. (We do not touch the plate with the Hall sensor) If a spark appears at the moment of complete divergence, then you can congratulate you, everything was done correctly.
Contactless ignition systems
Not so long ago you could only find a homemade device. The reason is the lack of proper supply in stores. Craftsmen in garages remade the contactless unit from other motorcycle models and assembled it from individual parts. This is a rather complex activity that requires skills. Now you can purchase a ready-made kit without any problems.
There are many advantages to using ready-made products. At a minimum, they have been tested in the Urals, which guarantees reliable operation. It is also much easier to install a ready-made unit than to make it yourself. The following sets can be found on the market:
- "SoveK". Under this brand you can find regular contactless ignition, as well as a more advanced microprocessor ignition. The assembly can be supplied with or without a bobbin. Easy to install and practically does not respond to voltage changes;
- "Saruman." Quite an interesting and reliable assembly. There are two sensor options available here; there can be a conventional Hall sensor, or a modern optical one. There is protection against voltage surges, especially high current. To simplify setting the ignition, there is a light indication.
Using ready-made kits is currently the best option.
Troubleshooting problems with the ignition system on a Ural motorcycle
Checking the ignition system, first of all, occurs with an initial check of the functionality of the breaker. It is important to pay attention to the operation of the incendiary advance machine , in which various complaints are undesirable. The resistance of the primary winding, which is measured by the tester, must be at least 6 ohms. Next, the secondary winding is checked, for which the tester is connected to the high voltage connections. The voltage of such a winding should be exactly 10 kOhm.
Repair of Ural and Dnepr motorcycles , like many others, cannot be done without all these manipulations aimed at optimizing its operation. Checking the ignition does not end there. Next, the spark plug caps and high voltage wires ring. Resistance indicators, in these cases, should vary. The plug caps should have approximately 2 kOhm, and the wires should have almost zero (this is an important aspect). During these manipulations, the problem will be found and eliminated.
Ignition adjustment and repair in the Urals and Dnieper
The ignition on a motorcycle can be checked by following the following procedure:
- We take the most ordinary incandescent lamp, which is naturally working. We connect one end of the wire contact to ground, and connect the second, which comes from the breaker, to the terminal. Setting the ignition on Dnepr and Ural motorcycles is done by turning the crankshaft until the marks on the crankcase and on the flywheel, which has the letter “P,” completely coincide. Next, turn on the ignition, while retracting the automatic weights to the very end. Under this circumstance, the incandescent lamp should light up instantly. If this does not happen, i.e. the lamp does not light up, or this happened before the weights were completely retracted, then ignition adjustment is necessary.
- We loosen the screws on the breaker. Next, you need to move the weights to the very end and slowly turn the breaker structure until the incandescent lamp starts to burn. This happens exactly the same as when contacts are closed, when a spark jumps between the electrodes of the spark plug itself. After carrying out these procedures, the structure of the breaker and its position must be securely fixed using fastening screws. It is worth noting that in all MT models, the ignition timing must be at least 34 degrees before dead center.
Adjusting the ignition of a Ural motorcycle
In general, installing an ignition on Ural and Dnepr motorcycles significantly increases the main technical indicators of this motorcycle. The ignition setting allows you to easily start the motorcycle even in the coldest time of the year, when consistently negative temperatures prevail. In addition, the ignition installation of the Ural motorcycle allows you to optimize and normalize the operation of the engine, increase the spark phase, which has a positive effect on the exhaust gases that come out of the motorcycle pipe. Simply put, these gases become less harmful to human health and the environment.
Ignition adjustment
Conclusion
With proper adjustment and installation of the ignition, the amount of fuel consumed is significantly reduced. If the battery has insufficient voltage, the motorcycle engine will be started in any case, naturally, provided that the Dnepr motorcycle ignition has been installed. Older models of the Ural motorcycle generally do not have electronic ignition, which is a definite problem for its owners. You shouldn’t despair, because you can completely adjust the ignition yourself, without going to specialized salons. This should be done at least because contactless ignition can significantly improve engine performance and also make it easier to start your bike.
How to set up electronic ignition on Ural motorcycles
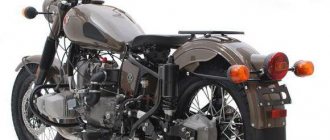
Ural motorcycles produced after the 90s have a contactless ignition system. But the predecessors of the happy owners of new iron horses also roam the expanses of Russia.
Ural motorcycles produced after the 90s have a contactless ignition system. But the predecessors of the happy owners of new iron horses also roam the expanses of Russia.
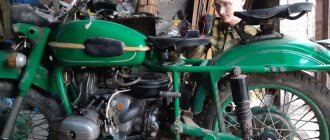
In the outback you can still see a rarity - a three-wheeled toiler based on the M-72. These older motorcycle models have a contact type ignition system.
Leave it to mechanics or install electronics
Perhaps not all older motorcycle models are running. The Ural motorcycle sits and rusts in my grandfather’s barn because it won’t start.
The wheels are spinning, the engine is not jammed. Maybe the spark goes into the ground, as they say. In short, you need to look at the spark generation system. But even a working motorcycle, with a contact ignition system, causes unexpected and unpleasant problems for its owner:
- won't start when you really need it;
- with new oil rings in the engine, the spark plugs become covered with soot;
- there is no required engine power when driving with maximum load;
- the maximum speed is not reached;
- The battery is slightly discharged and the engine does not start.
Tuning a Ural motorcycle with your own hands - this article will help you decide in which direction to modernize your Ural.
The contact ignition system creates a lot of problems, especially when the moving parts in it have already worn out, backlash has appeared, and the geometry of the elements has changed.
The solution is simple - all cam ignition is thrown out, a modern electronic non-contact type spark generation system is installed. You will no longer have to deal with the thankless task of cleaning contacts and endlessly adjusting the gaps in the breaker. All this is possible thanks to the simple, but quite reliable design of the motorcycle. For example, it is quite easy to set the thermal gap and adjust the valves in the Urals with your own hands, using only your own tools from the garage. This way you will gain valuable experience and save money on visiting the workshop.
What does the contactless ignition system on the Ural and Dnepr motorcycle provide?
- No headaches for the motorcycle owner when operating it;
- Starting the engine in wet and cold weather;
- Failure-free operation of the ignition system;
- Increased driving characteristics of the motorcycle as a whole;
- Increased candle life;
- Starting the engine when the battery voltage drops to 6 volts;
- Constant, not changing over time, ignition timing;
- The ignition coil cannot overheat.
- Powerful, required color, sparking.
Settings
Now we adjust the ignition timing. We install the motor in accordance with the marks, connect all the wires. Next you need to adjust the position of the sensors. Next, we attach all the elements and check for sparking. If everything is fine, then you should drive 10-20 kilometers and check the set angle again.
If necessary, adjustments are made, but if everything is done correctly, this will not be necessary. Knowing how to do contactless ignition on your motorcycle, you will not wonder how much this work costs in a workshop.
Briefly about the contactless ignition system
The contactless system, installed on all vehicles, includes:
- modulator i.e. Converter of magnetic flux into electrical impulses;
- magnetic flux sensors (for example, a Hall sensor);
- an ignition coil, slightly different in design from the traditional one;
- switch that distributes sparking;
- switching wires, terminals, fasteners.
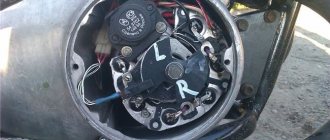
The operating principle of a contactless ignition system is not complicated. A rotating plate mounted on the shaft, with its petals, opens and closes the path of magnetic flux (the magnetic field is formed by an installed magnet), which fixes the Hall sensor.
How to make an ATV from the Urals - this article will certainly be of interest to lovers of boxer engines and creators of real garage monsters.
These field breaks depend on the position of the distributor shaft. A pulse from a Hall sensor (or a similar one) occurs at a certain moment when the piston is at the required point for sparking. Next, instantly, the impulse is transmitted to the switch and to the ignition coil. The result is the formation of a spark in the spark plugs.
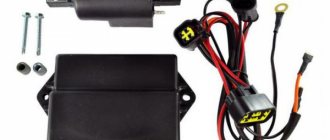
To mount the ignition system on a motorcycle, you need to either make its individual elements (modulator, plate) with your own hands, or purchase ready-made ESZ kits such as Saruman or Sovek.
Electronic ignition systems from Sovek and Saruman, equipment, features and differences.
If you don’t want to make electronic ignition elements for your Ural motorcycle yourself, you can purchase a kit ready for installation. Advantages of ready-made ignition systems:
- manufacturing takes place in a factory;
- the technical control procedure does not involve checking individual elements, but testing the performance of the entire system as a whole;
The most common and available for purchase are sez produced by SoveK and Saruman.
1. "Saruman". The package includes two options - with an optical sensor or with a Hall sensor. Any configuration includes an ignition unit, a platform for installing a sensor, a modulator with a flow interruption curtain, installation wires and installation instructions.
Features of the Saruman set:
- separate ignition timing generator (IAF);
- built-in system protection against generator overvoltage;
- LED indication to facilitate ignition setting
- microprocessor firmware is made for a specific motorcycle model;
- waterproof, locking connectors;
2. "SoveK". Several ignition system options are available. Microprocessor type and regular contactless.
The configuration can be with or without an ignition coil. Includes an ignition module, a modulator, and a switch with built-in FUOS.
Technical features of the Sovek kit:
- microprocessor module can work with various ignition coils;
- sparking is ensured both at low (6 volts) and at high voltage (16 volts) in the on-board network.
Installation
It should be noted that there are quite a few ways to install electronic ignition on a Ural. It all depends on the model. You need to start by dismantling the old breaker and switch located under the saddle. Sometimes it is necessary to replace the ignition coil. Next, a modulator is mounted on the camshaft, a sensor is attached to the cover, and a new switch is installed. All that remains is to adjust the ignition timing.
I’m going to install BSZ, but which is better - Staro Oskolskoye or UKTUS. What are their pros and cons? What are the differences?
dearg, the uktus is better in all respects, except for the price. I drove both. The motor with the Uktus seems completely different after the Stary Oskol one. Much easier to gain momentum. It's all about the automatic OZ.
If I install the UKTUS, will the tachometer from the VAZ-2106 work the same as with a standard ignition or will it need to be redone?
Replacing spark plugs before installing electronic ignition systems
Spark plugs are the last element of the spark generation system in any engine. They work under conditions of high pressure and temperature.
Sparking occurs on them when a high voltage pulse is applied. Therefore, it is not possible to test them, without a test bench, in domestic conditions.
The serviceability of a working spark plug can only be judged visually - by carbon deposits on its tip or presence on the “skirt”. To ensure reliable engine operation, change spark plugs according to the motorcycle operating rules, without expecting them to work forever.
Choose the correct heat rating when purchasing spark plugs. Set the gap in the spark plug electrodes to 0.7-0.8 mm.
We hope that these problems with the spark plugs are not observed and, after purchasing (manufacturing) a non-contact type ignition system and replacing the spark plugs, we begin adjustment work.
Features of the electronic system
If you prefer to service your motorcycle with your own hands, then this ignition for the Urals will be an ideal option for you. It is much easier to maintain. There is no need to adjust the gaps on the contacts, which significantly reduces the time of service work. Also, the ignition timing does not change during operation.
Also, a huge advantage of this ignition option for a Ural motorcycle is that the spark plugs last longer. Thanks to more efficient spark formation, the load on them is significantly less.
Immediately after installing the new unit, you will notice an increase in engine efficiency. Fuel consumption is reduced and it becomes more responsive on the road. Also important is the absence of problems at low temperatures and wet weather.
Setting up and adjusting the ignition on Dnepr and Ural motorcycles.
The procedure for adjustment and tuning is the same for all motorcycle models. Features are associated only with the specifically installed electronic ignition system. General order:
- We install an electronic ignition system on a motorcycle;
- We set the ignition timing by turning the shaft and aligning the stamped arrow on the flywheel with the mark on the engine crankcase;
- We connect the wires according to the manufacturer’s diagram;
- Without turning the shaft, we adjust the position of: module, flow sensors (Hall, optical), modulator;
- We secure the elements of the ignition system.
- We rotate the shaft and control the formation of a spark;
- We adjust the optimal ignition timing after a test run.
When using 92 grade gasoline on motorcycles, we make adjustments from the standard ignition timing adjustment. We put it out a little earlier.
Installing an electronic ignition system will allow trouble-free operation of the motorcycle in any weather and climatic conditions.
Mechanical or electronic
Initially, these motorcycles had mechanical ignition. Unlike BSZ, this option has low reliability. The reason is in the mechanical elements of the structure; they wear out over a certain mileage, which leads to regular failures. And you have to adjust the ignition on the Ural motorcycle much more often
The electronic ignition system on a motorcycle does not have such problems. There are practically no interacting elements here. Therefore, the service life is significantly longer. Also, thanks to improved spark formation, there are fewer problems with engine operation. The owner is also relieved of the need to regularly clean the contacts. All this leads to the massive spread of BSZ on this model.