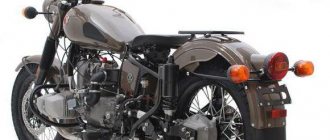
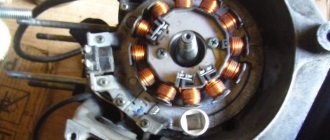
This is the kind of generator you want to see on a motorcycle.
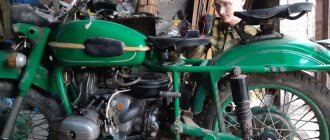
And this is what the generator of a Ural or Dnepr motorcycle usually looks like when it has been in operation.
- Let's get started. We disassemble the generator, clean the covers, degrease and prime. With this process everything is clear and does not cause any difficulties.
After the generator is disassembled, you can check the condition of the bearings, oil seal, and brushes. It's better to change it right away. Remove the bearings either with a puller or carefully cut them with a grinder.
Check: Winding on the rotor (armature). Winding on the stator. Checking for breakdown, ground, interturn short circuit and open circuit can be carried out by “continuity” using a multimeter. You can also check the diode bridge with a multimeter. More on this further...
Theory of generator operation and performance testing.
Theory.
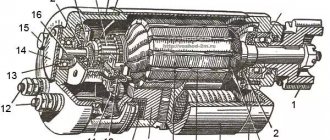
The figure below shows a diagram of the generator assembled (on the left) and on the right, disassembled into three parts.
Diode bridge, Stator winding (non-moving part) connected according to a star circuit and Armature (aka rotor, what rotates), brushes are just feed contacts.
Troubleshooting or testing should be divided into three parts: checking the stator winding, checking the armature winding, checking the bridge.
But first we should remind you how it all works.
Operating principle of three-phase alternator:
1. Excitation voltage is applied to the rotor winding using graphite brushes through contact rings.
2. Rotating inside the stator winding, the rotor winding through which current flows induces an EMF in the stator winding. Faraday's law. There are 3 stator windings and they are out of phase by 120 degrees.
3. The alternating voltage is removed from the stator windings and converted to constant voltage by a diode bridge. In the diagram and graph below it is clear how alternating current is rectified into direct current by diodes.
In a three-phase alternating current generator, there is no permanent magnet; instead, there is an electromagnet in the form of one winding on the armature, which, when voltage is applied to it, “excites” generation.
This is what the assembled generator looks like with a circuit diagram superimposed on it.
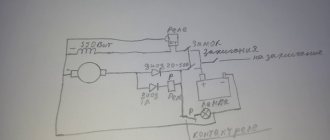
Below is a diagram of connecting the generator to the on-board network with a relay regulator of a new three-pin model and an old one.
The difference in the above diagrams is in the relay regulator. In the circuit with the VAZ regulator, it is not necessary to connect the generator control terminal. The regulator itself has status diagnostic indicators.
So:
The generator in the on-board network of a motorcycle is controlled in the same way as in a car.
A modern relay regulator is built on semiconductor elements and there is no relay in it as such; instead, an electronic key is organized, which is either open or closed. Also, the regulator relay contains a measuring element that is capable of measuring the generator output voltage and checking it with its reference voltage. At the moment when Uout. — the voltage at the generator output will be greater than Uop. - voltage support, RR will remove power from the excitation winding and generation will stop. The engine is started and the rotor rotates in the stator winding, voltage is supplied to the excitation winding through the PP and the generator is excited. As long as the voltage supplied by the generator and the PP regulator is not high, it monitors that power is supplied to the excitation winding.
By increasing the engine speed, the voltage on the generator will increase, since the dependence of the voltage on the generator speed is proportional. The PP will supply power to the field winding as long as the generator voltage meets the limit set in the PP control circuit. This limit usually ranges from 0 to 14 Volts. As soon as the voltage on the generator goes beyond the permissible limits, the PP will turn off the excitation winding.
About charging at idle:
At idle speed, there is usually no charging in Ural motorcycles. This is caused by the fact that, despite the fact that excitation power is supplied and the generator is rotating, the voltage at the generator output is < battery voltage. When the speed increases, there is charging.
Examination
1. Checking the rotor (Anchor)
It is necessary to remove the brushes and the plastic holder to access the slip rings. Set the multimeter to the “continuity” mode and connect the probes to the slip rings.
The device should show a short circuit. This is a regular two-contact coil. Next, you can check whether there are short circuits between the rotor and its core on which it is wound and, accordingly, short circuits to the housing. One probe for the contact ring, the second for the body or the armature itself. There should be no short circuits. The device should show infinite resistance.
2. Checking the stator windings.
Using the probes of the device in the “continuity” mode, check each terminal of the stator winding for a short circuit to the housing. There should be no short circuit. The device should show infinite resistance.
Next, the windings are checked among themselves. Since the windings are connected in a star configuration. The device must show the presence of a short circuit and a resistance of at least 0.4 Ohm. The resistance between the windings must be the same. If it is different, then there may be an interturn short circuit. About the inter-turn short circuit separately: This malfunction may not clearly interfere with the operation, depending on where such a short circuit occurs in the winding and there may be no charge. There are special testers for searching for turn-to-turn short circuits, which will greatly facilitate diagnostics. “Short circuit indicator” is described in detail in this article
3. Checking the diode bridge.
It is better to carry out the test with the bridge completely removed and check each diode separately for breakdown. It is highly recommended to check each diode.
4. Well, the most important part of the test. Voltage generation.
Let’s assume that the first three points have been completed and all elements of the generator are working according to the measurement results. But as practice shows, despite all this, the generator may not produce electricity during operation. energy. In principle, you can start checking the generator like this:
From the power supply or battery we apply excitation voltage to the armature winding. Plus to terminal (Ш) minus to generator ground. In this particular example, 6 volts were applied to the winding, the voltage drop across the armature was 1V. In a static state, the device detects an insignificant voltage. Next, take a screwdriver with a 10mm head and rotate the rotor by the fan bolt.
While the rotor is rotating, the device records a voltage of 2.5 Volts. We can say unequivocally that the generator is working.
G 414 generator as an engine
Messages: 4456 Registered: Nov 27, 2005, 00:00 Experience: 1998 Car: Drives :
Awards: 1
| Rating: 9 256 |
| Reputation: +9 |
Thanked: 69 times Thanked: 78 times
Generator for UAZ 90A or 120A
- Quote
Post by Zavodnoy » Apr 28, 2015, 3:04 pm
IMHO It is difficult to move up to 417. The thermostat is interfering.
The more powerful the gene, the faster you will restore the battery capacity after it is discharged by a winch. but don’t forget the corresponding wires for the gene
WITH RESPECT, DENIS.
SCALES, DISPENSERS, PACKERS. Supply, repair, modernization, rental. Label, receipt tape. https://vesopribor.ru. t. 63-79-00
Messages: 589 Registered: Oct 31, 2007, 00:00 Experience: 2004 Car: Lexus RX300 :
Awards: 1
| Rating: 1 940 |
| Reputation: +7 |
Thanked: 18 times Thanked: 12 times
Generator for UAZ 90A or 120A
- Quote
Message T-34 » Apr 28, 2015, 3:47 pm
As for the power, it’s clear, then the next question arises: if you manage to push it to 120A, then should you change the battery that is currently installed? or will it go like this?
Sent after 41 seconds: 12V 55A-h 490A
Messages: 4456 Registered: Nov 27, 2005, 00:00 Experience: 1998 Car: Drives :
Awards: 1
| Rating: 9 256 |
| Reputation: +9 |
Thanked: 69 times Thanked: 78 times
Generator for UAZ 90A or 120A
- Quote
Post by Zavodnoy » April 28, 2015, 5:27 pm
WITH RESPECT, DENIS.
SCALES, DISPENSERS, PACKERS. Supply, repair, modernization, rental. Label, receipt tape. https://vesopribor.ru. t. 63-79-00
Messages: 4253 Registered: March 28, 2012, 00:00 From: Where and all Experience: 1000000+++++km Car: YuAZIK 31514 Toyota K
| Rating: 11 562 |
| Reputation: +28 |
Thanked: 156 times Thanked: 90 times
Generator for UAZ 90A or 120A
- Quote
Post by Modelist » April 28, 2015, 6:25 pm
Messages: 1274 Registered: Jan 12, 2013, 00:00 From: we know from the forest. Experience: 1995 Car: SUV
| Rating: 5 474 |
| Reputation: +8 |
Thanked: 77 times Thanked: 68 times
Generator for UAZ 90A or 120A
- Quote
Post by Iskerhan » April 28, 2015, 7:28 pm
Messages: 489 Registered: November 17, 2012, 00:00 From: Tyumen Experience: 2008 Car: UAZ 469 :
Awards: 1
| Rating: 2 139 |
| Reputation: +1 |
Thanked: 14 times Thanked: 31 times
Generator for UAZ 90A or 120A
- Quote
Post by Senka » April 28, 2015, 8:30 pm
Messages: 1154 Registered: June 22, 2010, 00:00 From: Tyumen Experience: 2008 Car: UAZ514, Subar :
Awards: 1
| Rating: 2 107 |
| Reputation: +3 |
Thanked: 7 times Thanked: 13 times
Generator for UAZ 90A or 120A
- Quote
Post by Gray_cat » Apr 28, 2015, 11:34 pm
repair of TVs, monitors, washing machines. 89220709943 89058229728
Messages: 264 Registered: 03 Nov 2010, 00:00 Experience: 2001 Car: Mazda 6, UAZ, LUAZ :
Awards: 1
| Rating: 517 |
| Reputation: 0 |
Thanked: 3 times Thanked: 5 times
Generator for UAZ 90A or 120A
- Quote
Post by Sergo772 » April 29, 2015, 00:38
Messages: 589 Registered: Oct 31, 2007, 00:00 Experience: 2004 Car: Lexus RX300 :
Awards: 1
| Rating: 1 940 |
| Reputation: +7 |
Thanked: 18 times Thanked: 12 times
Generator for UAZ 90A or 120A
- Quote
Message T-34 » April 29, 2015, 09:36
Messages: 264 Registered: 03 Nov 2010, 00:00 Experience: 2001 Car: Mazda 6, UAZ, LUAZ :
Awards: 1
| Rating: 517 |
| Reputation: 0 |
Thanked: 3 times Thanked: 5 times
Generator for UAZ 90A or 120A
- Quote
Post by Sergo772 » Apr 29, 2015, 10:09 am
Messages: 589 Registered: Oct 31, 2007, 00:00 Experience: 2004 Car: Lexus RX300 :
Awards: 1
| Rating: 1 940 |
| Reputation: +7 |
Thanked: 18 times Thanked: 12 times
Generator for UAZ 90A or 120A
- Quote
Message T-34 » April 29, 2015, 3:18 pm
Sergo772, are you not satisfied with the height, since you want to change the mount or why?
Sent after 4 hours 17 seconds: And another question arises when transferring the genes to the top: Apparently a standard belt is not enough, but which one should I use, from which car? Who did what?
Messages: 264 Registered: 03 Nov 2010, 00:00 Experience: 2001 Car: Mazda 6, UAZ, LUAZ :
Awards: 1
| Rating: 517 |
| Reputation: 0 |
Thanked: 3 times Thanked: 5 times
Generator for UAZ 90A or 120A
- Quote
Post by Sergo772 » Apr 30, 2015, 11:30 am
Messages: 4253 Registered: March 28, 2012, 00:00 From: Where and all Experience: 1000000+++++km Car: YuAZIK 31514 Toyota K
| Rating: 11 562 |
| Reputation: +28 |
Thanked: 156 times Thanked: 90 times
Generator for UAZ 90A or 120A
- Quote
Post by Modelist » Apr 30, 2015, 11:38 am
Messages: 4456 Registered: Nov 27, 2005, 00:00 Experience: 1998 Car: Drives :
Awards: 1
| Rating: 9 256 |
| Reputation: +9 |
Thanked: 69 times Thanked: 78 times
Generator for UAZ 90A or 120A
- Quote
Post by Zavodnoy » April 30, 2015, 12:46 pm
T-34 wrote: Sergo772, are you not satisfied with the height, since you want to change the mount or why?
Sent after 4 hours 17 seconds: And another question arises when transferring the genes to the top: Apparently a standard belt is not enough, but which one should I use, from which car? Who did what?
the belt is not a problem - first install the gene, then measure the length of the belt with a string and buy a belt (for example, in Rossko) or somewhere else
WITH RESPECT, DENIS.
SCALES, DISPENSERS, PACKERS. Supply, repair, modernization, rental. Label, receipt tape. https://vesopribor.ru. t. 63-79-00
Messages: 574 Registered: Feb 18, 2013, 00:00 Experience: 1999 Car: UAZ
| Rating: 2 024 |
| Reputation: +4 |
Thanked: 13 times Thanked: 21 times
Five random motorcycles:
RUB 127,000*
Yamaha XV 535 Virago 1996
Norton Commando 961 Cafe Racer 2013
RUB 110,000*
Kawasaki ZX-400 1988
Ducati 900SL Superlight 1993
BSA B de Luxe 1927
Five random articles about motorcycles:
How Czechoslovakian mechanical engineers take into account the proposals of Java motorcycle owners from the USSR
There is only one goal - quality. At the end of 1984, YAVA-350 motorcycles of the model “638-5-00” began to arrive in our stores (see “Behind the wheel”, 1986, No. 3), which differed from its predecessor - “634.00” mainly in the engine and electrical equipment (12 instead of 6 V), as well as a front fork.
Owners of new cars positively assessed the improvements. At the same time, they expressed wishes regarding the manufacture of certain components, especially engine parts. Czechoslovak specialists - technologists, designers, having analyzed letters from consumers from the USSR, implemented a set of measures that take into account their suggestions. This work was completed last fall. And recently the scientific editor of the magazine, engineer B. SINELNY KOV, visited Czechoslovakia and got acquainted with the production of motorcycles at Czechoslovak factories. There is probably no need to talk about the great popularity of the JAVA and ChZ motorcycles, which have been attracting our motorcyclists for thirty years with their chassis... Read more >>
CZ 988 Touring motorcycle
Read more >>
Tips for modifying the Dnepr MT10-36 motorcycle. What is Dnieper missing?
Tips for modifying the Dnepr MT10-36 motorcycle It so happened that my first motorcycle was the Dnepr MT10-36.
I bought it second hand with a mileage of about 3 thousand kilometers. Probably the previous owner had had more than enough trouble with it in such a short time, but then I didn’t attach any importance to it. As does the fact that the motorcycle was released at the end of December 1979. The study of the motorcycle and the fight against its defects, both congenital and acquired, took place during the process of operation. And the deeper I delved into the device, the more surprised I was at the imperfection of the design. Gradually, I gained experience in treating typical diseases. I shared this experience with friends and acquaintances - they liked it. Now I decided that I could reach a wider audience. By the way, I made several attempts to establish a direct connection with the Kyiv motorcycle plant in the hope of getting the designers interested in my observations. The idea was exactly half a success: the connection was established, and as for the foreigners... Read more >>
How to extend the life of the engine on a Dnepr motorcycle
How to extend the service life of the engine installed on the Dnepr All motorcyclists want the main part of the machine - the engine - to always work properly and not require repairs for as long as possible.
Many, however, forget that its durability depends not only on the design and manufacturing technology, but also on the ability to properly maintain the engine in connection with operating conditions, and this is the responsibility of the motorcycle owner himself. Especially when it comes to heavy vehicles with sidecars, supplied mainly to rural workers. The service life of the engine installed on the Dnepr is mainly determined by the wear resistance of the cylinder walls, piston rings and grooves for them in the piston. These parts are most susceptible to abrasive, which enters the engine in the form of dust contained in the air, fuel and oil. Some studies show that 1 g of dust in a cylinder removes approximately 1 g of metal from the surface of rubbing parts! Therefore, we must take all possible measures... Read more >>

