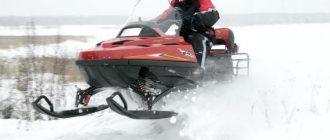
Is snow a problem? No problem if you have a snowmobile! If you live somewhere in a warm region (Sochi or Crimea, for example), your only chance to see the workings of a snowmobile is through wildlife documentaries or James Bond films. If you live closer to Siberia, snowmobiles (often called snow cars) will be as familiar to you as scooters are to people living in the south.
Considering how useful snowmobiles are, it's hardly surprising that engineers spent much of the early 20th century developing the ultimate machine for driving on frozen terrain. The small, lightweight modern snowmobile first appeared in the 1960s thanks to pioneering Canadian engineer Joseph-Armand Bombardier, who named his machine Ski-Doo. So how do these little snow machines actually work?
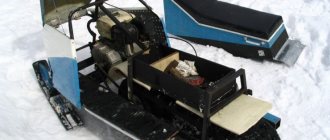
Drive system
A small diameter drive sprocket is installed on the engine output shaft. From it, torque is transmitted through a chain to the driven shaft, located under the engine seat. On the driven shaft there are:
- Large diameter driven sprocket.
- Gear wheels that drive the tracks.
- Guides for tracks.
The driven shaft is mounted on the frame using bearings. Gear wheels push the tracks, causing the tracks to move. The chain and sprockets are removed from one device. Old motorcycles and snowmobiles (Buran) are suitable donors. Gear wheels for tracks can only be removed from other tracked vehicles.
The guide rollers rotate with the shaft, are attached next to the gears and serve to tension the belt. They are made of wood or plastic and have a layer of soft rubber at the ends. Rubber prevents damage to the track. It is easy to make such rollers yourself by securing the edging with a furniture stapler.
How to make a snowmobile with your own hands: detailed instructions
Features of homemade snowmobiles
Self-propelled guns made by yourself have a number of features:
Riding a snowmobile can be quite dangerous and this must be taken into account, so although most snowmobiles cannot go faster than 15 km/h, extreme care and caution must be taken when assembling a snowmobile. When riding a snowmobile, the user will not get stuck in a snowdrift, since the device is equipped with a crawler walk-behind tractor. The snowmobile is reliable and can easily overcome many obstacles. When making a snowmobile with your own hands, the creator carefully selects the parts and assembles them into a single system, so the designer is responsible for the quality of his device. The cost of snowmobiles is quite high, but its individual elements cost little; By assembling a snowmobile yourself, the designer also saves on labor, so a homemade snowmobile costs several times less than a purchased one.
Preparation
First you need to make a drawing of the device. If you do not have such skills, then simply calculate the parameters of the machine. The design of a snowmobile is quite simple, so you can easily make a device based on a sample or video.
To make a snowmobile, you will need:
- pipe with a diameter of 40 mm. and a wall thickness of 2 mm. – needed for the frame and other frame elements;
- conveyor belt 3 mm thick. (you can use V-belts) - this is the main element of the track mechanism; lugs with a diameter of 40 mm are made from them. with a wall thickness of 5 mm;
- engine, fuel tank and carburetor from a motorcycle (for a snowmobile);
- sprockets and chain from motorcycles and snowmobiles;
- any drive shaft of suitable size;
- skis from another snowmobile;
- steering wheel with throttle and cable (from a motorcycle);
- the platform is optional because you can mount all the parts directly to the frame (most people skip this part because it's a little tricky and has little payoff); Several seats can be attached to the platform;
- seat;
- body;
- small elements (nuts, bolts, hinges, etc.).
Materials and manufacturing
When making a snowmobile on tracks with your own hands, you can follow this algorithm:
- Calculation of frame and chassis.
- Engine selection.
- Initial frame welding.
- Steering.
- Installing the engine on a temporary mount.
- Checking the design.
- If the test is successful, complete welding of the frame and installation of the engine.
- Drive system.
- Caterpillars.
- Attaching body parts.
- Final check.
You need to start work by making a frame on which the remaining elements will be attached. The frame should not be massive, otherwise the device will turn out to be heavy and lose maneuverability. It is desirable that its length be ±2 m.
Then the following are attached to the frame:
- drive shaft and receiving star;
- power plant with a transmission star and gas tank;
- front and rear wheel axles;
- front suspension with steering wheel and skis;
- seat and body.
Then tracks 40-50 cm wide are made. They can be made from conveyor belts or V-belts.
Information on how to make lugs from plastic pipes is provided above.
The rear wheel axle is secured using a movable guide element. It allows you to fix the position of the axis in a certain position. This is done so that the user can adjust the tension of the tracks.
Is it possible to make caterpillars yourself?
This is the most difficult element to make yourself. The tracks of the machine play a decisive role in what speed the unit will develop and what grip it will have on the ice surface. High-quality homemade caterpillars can last for quite a long time. Most often, car tires are used for tracks. First you need to free the tires from the beads, leaving only a flexible track. Now you need to make the lugs. To do this, use a plastic pipe with a diameter of 4 cm. It needs to be cut into pieces 50 cm long, and the resulting blanks should be sawed further along. These parts are attached to the tire with bolts. It is important to maintain the same lug mounting interval, otherwise the caterpillar will jump off the roller. It is optimal to mount them at a distance of 5 cm from each other. Caterpillars are made using a similar method. To make them, you need to use a conveyor belt, which should be cut to the optimal length for a homemade unit. It is important to connect the cut tape correctly and securely. To do this, its ends overlap each other by 5 cm and are fixed with bolts. Alternatively, you can use V-belts to make tracks. They are fastened with lugs, forming a track with ready-made recesses for the gear. When making tracks with your own hands, you need to take into account the following nuance: the larger the track area, the better the device will pass through snowdrifts, but the control will be worse. In stores, finished products are most often presented in three versions, with standard tracks, wide tracks and extra-wide. To make your task easier, instead of making it yourself, you can purchase tracks in a store. Thus, you will have the opportunity to purchase tracks suitable for the terrain and travel conditions.
Is it possible to assemble a children's snowmobile yourself?
In fact, there are many different ways to assemble a children's snowmobile with your own hands. To do this, you can use a wide variety of components. Let's look at an example of one of the possible options for such an assembly.
First of all, you need to think through the design of the unit in advance, the parts of which will be easy to purchase or make yourself. Of course, you can’t expect good cross-country ability on loose or deep snow cover, but the power of a homemade unit will be quite enough to, for example, tow a sled with riders or several “Argamaks”.
To make the unit yourself, you can take a 6 hp motor from a walk-behind tractor. For example, as a propulsion unit, you can take part of a caterpillar from an old snowmobile. On the Internet you can order a special kit for motorcycles, in which a ski is installed instead of a front wheel, as well as a small tracked mover. Using such devices, you can always make a small snowmobile with your own hands.
Several metal pipes can be used as a frame. You can make a collapsible frame with your own hands and attach a seat from an old scooter and a handlebar from a bicycle to it. If you have a choice, you can install a removable motor for ease of storage and transportation.
To make ski racks, you can assemble your own structure from forks and a bicycle frame. Individual elements can be bolted together. It only takes a few minutes to assemble and disassemble this homemade snowmobile. You don't need any tools for this at all. The engine is mounted on a removable platform. The drive to the rear propeller shaft is an ordinary chain from a motorcycle.
A homemade snowmobile should not accelerate faster than 20 km/h. To do this, it is necessary to select the appropriate gear ratio. It is best to connect the front and rear of the snowmobile with a hinge. Thus, there is no need to install shock-absorbing springs on a homemade unit.
You can install a scooter seat on the frame with your own hands. Thanks to this, a homemade snowmobile will be convenient not only for children, but also for adults. The speed of such a vehicle will not be high. In addition, such a home-made unit has practically no roll-up due to the resistance of the track and transmission. It is best to make your own brake system or a device for emergency stopping of the engine. You can install a gas handle on a homemade steering wheel. As the engine speed increases, the speed of the vehicle also increases. When you release the gas, acceleration will stop and the homemade snowmobile will stop.
You can make such a vehicle yourself using a motor from a scooter. You can order components for the propulsion system online or use old motorcycle parts that you have on hand.
If you wish, you can always make a children's snowmobile yourself. If you compare homemade vehicles with factory samples, you will be able to determine their advantage in lightness and compactness, as well as in the possibility of storage and transportation.
There may not be any difference in engine power, and if you pay attention to the technical equipment, the leading positions will almost always be occupied by branded units
A snowmobile is a unique vehicle for daily use in winter. It is used for movement across snowy terrain during scientific expeditions, excursions, hikes, hunting animals, and protecting the territory. Such a product can be purchased at a specialized store or made with your own hands. If ready-made structures have a fairly high price, and not every person is able to afford such a purchase, then homemade ones are a more affordable alternative, made from scrap materials and equipment.
What does a snowmobile consist of?
Any snowmobile consists of basic parts that will not change regardless of the modification of the device, such as:
- Frame. You can use a frame from an old motorcycle or scooter; if you don’t have one, you can weld it to order. A turner can easily cope with such a task.
- Engine. You can use a motor from a walk-behind tractor, although it is worth saying that with its power, the resulting product would be better called a children’s snowmobile; it will not be possible to accelerate it to a decent speed. There is an alternative to using a motor from a motorcycle or scooter. The choice of engine also depends on the weight of the snowmobile.
- Caterpillars. The most important and at the same time complex part of a snowmobile.
- Drive unit. Connects the engine and the track. A chain from a motorcycle is perfect for the drive.
- Steering wheel. Here you need to build on personal preferences and convenience, but most often it is also taken from a scooter or motorcycle.
- Skis. Here we use a ready-made option, if available, or you can make skis from plywood. It is better to give preference to sheets of plywood with a thickness of at least 3 mm.
- Fuel tank. For this part, you should choose a container made of plastic or metal. The capacity of 15 liters is quite sufficient to cover long distances without taking up much space.
- Seat. It is best to make it to order, since a homemade snowmobile will be used in harsh conditions, preference should be given to durable, wear-resistant materials. Don't forget about convenience, you should feel comfortable on it.
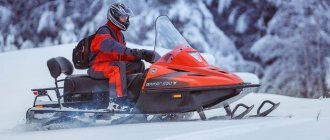
Which snowmobile is better to buy?
Snowmobiles are most in demand among residents of the northern regions, as well as among lovers of extreme pastimes. To choose the right device, you need to decide how you are going to use it.
All snowmobiles are usually divided into categories:
- Mountain bikes, the design of which is designed for extreme travel on slopes and relief terrain. These models have a long track with large hooks and are ideal for riding in loose, deep snow.
- Utilitarian models, also called working models, are used for practical purposes. Snowmobiles of this type have high cross-country ability and are often double-seater.
- Tourist models are the most comfortable models, allowing for travel on good trails covered with a light layer of snow.
- Crossovers - on these snowmobiles you can safely go on a trip over rough terrain covered with deep, loose snow.
- Sports models are chosen by fans of racing and extreme travel. Such snowmobiles are distinguished by their low weight, high speed performance and good handling.
- Children's snowmobiles are light and compact with low engine power.
It will be easier to choose a snowmobile if you have some idea of the structure and main components of this vehicle.
The snowmobile's suspension can be telescopic or lever: the first is more durable, the second provides better maneuverability and stability. Often a suspension of one design or another is used for models of a certain manufacturer, for example, the PPS suspension is used on Lynx snowmobiles, tMotion is more universal and is installed in mountain models of various brands.
The transmission used in new vehicles acts as a clutch and gearbox. On snowmobiles of the tourist and utilitarian type, as a rule, there is a separate gearbox, which includes low and reverse gears.
The most advanced versions are equipped with a RER system - when reverse gear can be engaged with a button.
The fuel supply system for snowmobiles can be carburetor (most often on domestic models) or injection - more economical and environmentally friendly.
Modern snowmobiles use one of two types of engines:
- two-stroke – light weight, manual starter, and not too demanding on fuel quality;
- four-stroke engines are more economical and durable, and also less noisy.
Depending on the type of fuel used, such engines are either gasoline or diesel. The cooling system of the snowmobile power unit can be air or water.
Recommendations: 14 best motorized dogs and motorized towing vehicles
7 Best Snowshoes
8 best children's snow scooters
Manufacturing of structural elements
Before starting to manufacture structural elements, prepare a drawing, required materials and tools. You can take ready-made drawings based on the Bullfinch or Vepr snowmobiles. Tools you will need:
- welding machine;
- pipe bender or finished frame;
- hammer;
- screwdrivers.
Since the design of the mini snowmobile is low, the seat is made of durable waterproof material. The fuel tank is made of metal. Its volume should be from 10 to 15 liters. You can use a motorcycle chain as a drive.
Who invented the snowmobile
The first snowmobile was designed by Joseph Armand Bombardier and patented in April 1944. Like modern snowmobiles, it has skis at the front for steering and a sophisticated chain tracking system at the rear. The sprockets pull the tracks around, while the intermediate wheels between them provide suspension. The main difference between this vehicle and modern snowmobiles is the large cabin, which can accommodate about 12 people.
Skis, engine, tracks and brakes - the snowmobile seems to be a fairly simple design. However, there is much more hidden under the body kit. If you examine the nearly 500 winter bike-related patents that leading manufacturer Bombardier has filed since 1944, you'll find all sorts of features you never imagined.
For example, powering through wet or deep snow, it is likely that the track will clog, significantly increasing the weight of the drive mechanism and slowing you down. That's why Bombardier developed a snow pusher mechanism in the 1960s, which consisted of spiral grooved wheels to push the snow out as the track passed them.
As you'd expect, most of Bombardier's patents relate to the track/tread mechanism, suspension, skis and basic frame design - the core features of the sled - but it's interesting to look through their other innovations, which cover everything from quick-release passenger seats and engine turbochargers to the more mundane things like electronic engine lubricants.
How safe are snowmobiles?
Snowmobiles, like motorcycles, are fast and heavy vehicles. In a typical year, 2 million people use snow machines in North America and about 200 of them are killed in accidents and 14,000 are injured (source: https://okami-sport.ru/).
200 deaths may sound like a lot, but we have to put that number in context. Every year, about 150,000 people die from accidental injuries, 33,000 die from falls, and 38,000 people die from motor vehicle accidents.
What is a snowmobile
A snowmobile has much more traction on snow than a motorcycle, using a large, wide track with deep ruts. A belt drive and clutch system transfers power from the engine (at the center of the machine) to the tracks at the rear. Compare this to Bombardier's early snowmobile design in early 1944 (pictured below) and you'll see that the basic idea hasn't changed much.
Think about a regular motorcycle: you have a heavy engine in the center, with the rider balanced on top, and two narrow wheels with rubber tires directly in front and behind. In practice, mopeds on snow and ice are incredibly dangerous and it is best to avoid such extreme riding: the steering wheel is incredibly slippery, and there is a high risk of your bike rolling right out from under you. The problem is that relatively little of your scooter actually touches the road - just two tiny patches of rubber under the front and rear tires - and that's simply not enough to give you good traction and grip.
If you had to rebuild a bike for snowy terrain, what would you change? You can place your skis at the front to distribute your weight and give you reasonable steering control. A wide track at the rear would provide you with plenty of speed and traction no matter what terrain you're riding on. What you would end up with would be something like a modern snowmobile. It's very similar to a motorcycle, with the engine in roughly the same location and power sent to the rear wheel drive via a belt.
Manufacturing options
The photo below shows a possible scheme for creating a track for a snowmobile. The length of the main section is 5.8 m. In this case, rollers measuring 0.07 m are used. The center-to-center distance is taken to be 0.9 m.
Advanced people may not limit themselves to this drawing and study another version of the kinematic diagram of the snowmobile as a whole.
Making a snowmobile track with your own hands if you have the drawings is very simple. But if you take even the best conveyor belt in its pure form, it will quickly wear out during operation. Stitching along the edges with thick fishing line helps correct the situation. There is no need to come up with anything original here - you just have to act in the same way as when sewing, you overcast the edges of the fabric.
It is the perimeter that is the most vulnerable link, and it does not matter whether the caterpillar is made 1 meter, 2 meters or some other length.
The rubber strip must be looped. Some people simply sew the ends together, but this technique is not reliable enough. It would be much better to use a hinge that is matched to a piano hinge.
Important: the thickness of the tape must be selected according to the engine power. In most cases, a thickness of 1 cm is sufficient, as on agricultural machines.
But some people note that tires removed from an old motorcycle (manufactured before 1990) are also suitable for a snowmobile track. True, such a resource is, for obvious reasons, rare. An alternative solution is to make a track propulsion system based on belts. Grousers of their own design are added to the wedge-shaped blade. Most often, rivets or a nut-bolt combination are used for clutch.
The belts are equipped with holes at the factory, which can easily be adjusted to the main sprocket of the snowmobile. You just need to leave a certain gap between the stripes. Fastening of such a structure is done using a cable of small diameters and other durable materials.
Important: do not rush. Otherwise, there is a high risk that the entire assembly will fall apart while moving.
It is useful to consider alternative solutions (of which, in fact, there are a lot). One of the schemes also involves the use of a conveyor belt. Additionally, you will need a profile pipe of rectangular cross-section. Nuts, bolts, engravers and washers are used for fastening. They begin work with a homemade propulsion unit, forming track blanks.
They are simply cut exactly to the width of the track using an angle grinder. When the rough blanks are made, they need to be given a special shape by pressing on a machine.
Recommendation: the edges of the tracks should be lubricated with used oil.
After this, limiting fangs and fittings resembling the letter Y are welded on. The resulting specimens are checked and adjusted to the place where they should fit.
Assembling the caterpillar yourself, once the tracks are made, is no longer difficult. You just need to make holes in the tape using a tube sharpened at the end. The side of the tube is also equipped with a hole, which helps remove crumb rubber and dust. The tracks are drilled with an electric drill; there should be two holes on each edge. Assembly with such blanks is not difficult.
But there are a few more subtleties that need to be taken into account in any case. If increased cross-country ability is in the foreground, then you need to make a two-track snowmobile, which is also more stable than one with one support. There is no practical difference in the work, unless you have to make one more caterpillar additionally.
The movers themselves sometimes have to be modified by tenoning with self-tapping screws. This procedure is designed to increase the vehicle’s cross-country ability to the maximum.
On a snowmobile without studs, as practice shows, it is very difficult to drive onto icy shores and slippery serpentines. If the procedure is performed correctly, you can forget about this problem for at least one season. However, it is worth considering that studded tracks turn worse, especially on asphalt. But safety in difficult conditions is worth it. It is also necessary to pay attention to the rear suspension, which must work well in conjunction with the tracks.
Linked suspensions are used in sports and cargo models. But in deep snow and when using long tracks, unlinked suspensions are better. This design enhances traction and perfectly distributes the weight load.
Important: shock absorbers must also match the tracks. In addition to the main points, it is advisable to take into account several additional nuances.
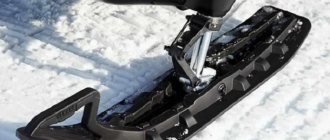
Peculiarities
There is a wide range of snowmobile skis on the market, but before you buy, you need to study their features and the suspension design of your model. Suspension mechanics and travel, strut and shock height, ski size and other components all affect the stability and handling feel of your snowmobile.
Snowmobile suspensions most often come in three types:
- lever (DSA, ADSA, RAS);
- telescopic (candle);
- spring
This is interesting: How to provide first aid for a sternum fracture and what treatment methods are used?
Most imported models are equipped with a wishbone front suspension with an A- or V-shaped link, ensuring a smooth ride and maneuverability. The disadvantages are that the dimensions of the levers have a large track width (almost equal to the body), which means that the sled can easily run into hidden obstacles in the form of stumps, sharp boulders, reinforcement, and the like. Skis run the risk of bending even from a small impact, which can be very difficult to avoid in wooded areas.
But “telescopes” are much more difficult to damage, and they are much narrower (not so wide). That is, in fact, the spark plug design travels well in a straight line, easily overcoming small obstacles and bushes - for those who like extreme sports and a lot of steering, it is not suitable.
Important: the levers, unlike the telescopic suspension, are completely repairable even with the use of non-original spare parts and can be adjusted to your own taste. Particularly pleasing is the opportunity to make the necessary part yourself using a simple tool (grinder and welding)
Its second function is to protect the plastic toe from cracks under high loads and collisions with obstacles. The skate is located under the ski and has a particularly strong pobedit soldering for moving on asphalt, ice and other hard surfaces. Its fastening is held on by bolts and is also subject to replacement.
Generally speaking, skis are designed strictly to suit their application. This is where their size and shape come from. Depending on the type of terrain in which you plan to ride, you can choose snowmobiles for sports, mountain, tourism, children's and utilitarian purposes (for sleds and cargo).
According to the type of design, they are divided into single-track with two skis (all imported manufacturers, such as Yamaha, Polaris, Arctic Cat, Ski-Doo and others) or two-track with one (domestic brands “Buran”, “Ermak”, “Eger”, "Freezing"). Thus, formally they all stand on 3 points of support, but the physics of driving has its own characteristic features.
Transport belt for caterpillar
This material is very common. Therefore, it will not be particularly difficult to find a transport tape. You can purchase it in used condition or, if possible, simply ask your friends.
Manufacturing process:
- The conveyor belt may soon deteriorate during operation, so it is necessary to stitch the sides of the material using thick fishing line. You need to do it the way seamstresses sew the edges of fabric using the overcasting method. If you do not do the work, then after some time the edges will turn into rags, therefore, the tape cannot be avoided. To give the rubber strip the appearance of a ring, stitching the ends is used, but the method is not very reliable. It is easier to use a hinge based on the type of piano hinge.
- The thickness of the conveyor belt depends on the power of the motor. A strip 1 cm thick shows excellent results. It is used in agricultural machinery. It is allowed to use tape from old Soviet motorcycles.
The advantages lie in the abundance of resources. If a homemade track breaks down, it can be restored in a short time without professional tools. Before purchasing a full-fledged track, you can use the belt version for quite a long time.
How to choose an engine
In order to create a snowmobile, it is necessary to take into account the most important and central part of the entire mechanism - the motor. The motor must have decent traction in order to move the entire mechanism in difficult snowy weather conditions. For everything to work out as it should, a powerful motor from the Neva walk-behind tractor will do.
If such an engine is available, one or two people will be able to move on a homemade snowmobile from a walk-behind tractor with their own hands. The engine power is 6-7 horsepower, which is quite enough to move on snow cover.
If you add a snowmobile stand to the walk-behind tractor, the lifting force will increase and you can easily load your walk-behind tractor for snow trips.
What is good about this engine, many ask. In fact, there are many more advantages than you might think:
- First of all, it is an affordable price.
- Also good quality is proven by Japanese production.
- The motor has an additional air cooling system.
Please also note that gasoline can be used as fuel.
Where to begin?
It is best to start assembling the device with your own hands from the drawings. To create a drawing, engineering skills will not be superfluous. However, if you are not successful in this, then you should use the Internet and print out the finished diagram. On the World Wide Web you can find drawings of snowmobiles of various modifications, from the simplest and cheapest options to complex ones, which only an experienced mechanic can construct. The drawings are publicly available, and by printing them you can easily build your dream car. When studying the drawings, pay attention to the weight of the unit; the lighter it is, the higher its maneuverability will be. The snowmobile will easily maneuver through loose and deep snow. However, not only the mass of the finished product affects cross-country ability; the supporting area of the track is no less important.
Snowmobiles from a walk-behind tractor on wheels
Let's look at how snowmobiles are made from a walk-behind tractor on wheels. The wheels for a homemade snowmobile should be chosen to be powerful, as this ensures its own safety and easy control. Cameras from the Urals or KamAZ can be used.
There are several ways to create wheels yourself, which involve a metal base with a camera built inside. The main condition when creating an all-terrain vehicle on wheels is to be equipped with 3 or 4 wheels.
When installing wheels for this snowmobile, low-pressure tires or tubes from large cars are selected. They are put on standard discs and secured with chains. The walk-behind tractor engine consumes little fuel, so the high autonomy of a self-produced snowmobile will allow you to travel long distances.
The advantage of a tracked snowmobile. In winter, crawler-mounted walk-behind tractors are much preferable. A large coverage area contributes to proper load distribution and pressure on the ground. The track attachment will never get stuck in snow or other unstable surfaces, which cannot be said about the wheels.
Let's find out how much homemade snowmobiles made from a walk-behind tractor cost. If you compare a finished snowmobile with a homemade one, the price difference will be significant. A homemade one will cost 5 times less. And if you have some parts in stock, then even less. As for the reliability of the machine, when making it yourself, the master approaches the selection of parts thoroughly, selecting the most reliable parts. The result is a powerful, go-anywhere design.
Let's consider the reviews of farmers and gardeners. People believe that it is advisable to create a snowmobile from a walk-behind tractor on their own, if only because the most primitive ready-made machine costs between 3.5 and 5 thousand dollars. The price of the best models starts from 10 thousand dollars. Even when purchasing new parts to assemble a snowmobile, the machine costs several times less. On the forums you can find many positive reviews from people talking about their unforgettable experiences of riding snowmobiles assembled with their own hands. They are happy to share their experience and knowledge with beginners who want to design a similar machine.
A snowmobile with a walk-behind tractor engine: another option
A reliable and fairly powerful snowmobile can be obtained with a monoblock engine. The Neva walk-behind tractor with a Japanese engine is perfect for assembling the structure.
In most cases, walk-behind tractors consist of 4-stroke single-cylinder air-cooled gasoline engines, but 2-stroke engines are also in demand because they have a low weight, simple design, high maintainability, manual start, etc.
Interesting! Homemade grass and twig shredder from a washing machine, here!
70 kilometers per hour - this speed can be “squeezed” out of a regular walk-behind tractor, however, only if its assembly is approached professionally.
You can make a snowmobile out of a walk-behind tractor, like a racing car overcoming snow jams.
With such a unit you can not only plow the land, but also go to the forest for firewood, hunt, fish, or just ride with the breeze. For residents of long winters, a snowmobile will be an indispensable vehicle.
Not much fuel is consumed, about 2 liters per hour.
In most cases, snowmobiles are made according to the “2 skis in front and 1 track in the back” scheme.
This design is optimally stable.
The uniqueness of the snowmobile lies in its ability to travel in places where ordinary cars only dream of doing so.
What kind of snowmobile device
A snowmobile is more than just a motor, skis and tracks. Here are some details and parts of the snow car:
- Skis - lift up to stop the car from sinking into the snow as it moves forward. They also provide efficient steering.
- Ski handles are additional metal loops on the front of the skis used to tow or pull the machine out of the snow.
- The front bumper provides some protection from damage.
- Shock absorbers are often made of lightweight but strong aluminum and absorb energy as the skis hit them due to rough terrain.
- Hood - Fiberglass or hard polycarbonate plastic front cover. Softens absorbing energy to soften impacts.
- Engine Ventilation - Remember that your snowmobile has a gasoline engine that requires air to burn fuel. There are usually vents on the front and sides of the hood.
- Dashboard Instruments - Latest sleds feature LCD instrument panels including a speedometer (showing current and average speed), rev counter, odometer, engine thermometer, and compass.
- Windshield - measures approximately 12-60 cm (5-25 inches) from top to bottom. Tall windshields like this are good for handling in difficult terrain and provide a certain amount of rollover protection. Lower windshields are better for racing.
- Side reflector for a little extra visibility.
- Leg support and protection from icy winds.
- Throttle - Expect a top speed of around 110 km/h (70 mph).
- Brake Lever - Controls the hydraulic disc brakes that stop the rear tracks. Apparently the front skis don't have brakes.
- Seating – Most snowmobiles have seating for one or two people. Some models have heated covers.
- Track Wheels - These do not provide power, but rather allow the track to spread over a larger area of ground, effectively providing a longer trajectory and better traction. Also used for braking. They have a diameter of about 14 cm (5.5 inches).
- Track - sometimes referred to as "endless tread". Typically 34-40 cm (13.5-16 inches) wide and made from durable materials such as carbon fiber or Kevlar.
- Star Wheel - The rear wheel is usually about 18 cm (7 inches) across.
- A snow flap - like a mudguard on a motorcycle, stops the snow shooting from the back onto the people following behind.
- Luggage Rack - Most snowmobiles have a fuel tank here.
- Tail and brake light.
- Back of the seat.
- Headlight - equipped with one or two powerful 60-watt bulbs with lenses to focus the beam.
- Rear bumper.
- Back plate – for protection against snowdrifts.
- Mirror.
- Fuel tank - holds about 40 liters (10.5 gallons) of gasoline and allows you to travel 300 km (200 miles) without refueling. Typical fuel consumption for snowmobiles is about 10-20 liters per 100 km (10-20 mpg).
- Wind deflectors - help protect your hands from freezing in cold air. For the same reason, handlebar snowmobiles usually have grip heaters.
- The engine is usually a 600cc two-stroke or 1200cc 4-stroke engine (similar to a mid-sized motorcycle). Power is transferred from the engine to the rear drive system by a simple V-belt.
- Rear shock absorber and suspension.
Mini snowmobiles
The most economical and convenient device for fishing and hunting. When disassembled, the mini-transport will fit into any car. The low price will keep your wallet intact. It is a means of moving from one point to another.
"Husky"
pros
- Low fuel consumption
- Small price
- Small transport dimensions
- High payload
- Simplicity
Minuses
- Low speed
- Lack of comfort
- Weak nodes
- Plywood delaminates
- The chain rubs against the casing
- Small track area
- It’s unpleasant to move along ruts
From 63,900 ₽
A good helper for hunters. Provides fast movement in the absence of roads and shallow snow. Possibility of transporting sleds up to 100 kg. Assembles without tools in 3 minutes.
"Snowstorm"
pros
- No rights needed
- Disassembles into 2 equal parts
- The equipment is stable even in deep snow
- Enviable maneuverability in the ravine
- Coupling device for sleds or drags
Minuses
- Electric lighting is missing as a class
- Started manually
- Uncomfortable fit
- No brakes
- Low speed
From 59,000 ₽
The Russian-made unit is designed for movement in frozen water areas, on trampled snow, and in light-snow forests. Can drive through serious snow, but without a load.
Advantages and features of a homemade snowmobile
The vehicle has a mechanical drive and a tracked walk-behind tractor, when driving which you will not get stuck in snowdrifts. Steering is done by the skis and the steering system is located in front so you can control it easily. The price when purchasing a particular vehicle is important. Therefore, if you do the math, the cost of making a snowmobile yourself will be five times lower than buying it from the manufacturer. And it will be even cheaper due to the available walk-behind tractor and other parts. Reliability – where a person cannot pass and a car cannot pass, the snowmobile will overcome all obstacles with ease. If a snowmobile is made by hand, then the designer is very careful in choosing parts. By doing everything yourself, you are responsible for the quality of your design
In addition, by paying great attention to the components of the mechanism, you make the snowmobile all-terrain.
Compact snowmobile manufacturing process
To reduce the manufacturing time of the snowmobile, I decided to use as many components and parts as possible from industrial samples: caterpillar, support bogies with rollers, drive shaft, springs, bearings, plastic stars - from the Buran snowmobile, steering skis - from the Taiga snowmobile, engine volume 150 cm3 and power 9 hp.
- from . This engine is quite compact, weighs only about 30 kg, is equipped with an electric starter, and a variator and a reverse gearbox are mounted in the same unit. According to estimates, the snowmobile in this configuration should weigh about 120 kg, so if it is structurally divided into three or four parts, the weight of each block will be about 30-40 kg. And this allows an adult man to lift and load the snowmobile blocks into the car.
I started making the snowmobile with a tracked block frame, which I welded from a metal profile (pipes with a cross-section of 30x30 and 20x20 mm).
The rear swingarm was made from a 30 x 30 mm profile, the bracket for the track support rollers was made from sheet steel 5 mm thick. All bushings have an internal diameter of 12 mm.
I made the rotating ski stands from ⌀ 3/4″ pipe. To give it additional rigidity, I pressed a ⌀1/2″ pipe inside. The racks were secured to the steering beam using plumbing fittings and couplings.
The ski rack was inserted into a bracket, which was screwed into a coupling welded to the cross beam of the frame (steering beam). When the nut is tightened, the strut wedges, which allows you to adjust the height, fix the ski struts and set the toe of the skis without changing the length of the steering rod.
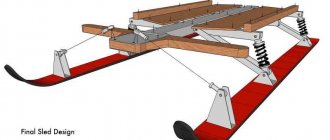
The result was a successful design (see photo)
.
To transport a snowmobile in the trunk of a car, it can be disassembled into separate blocks in just a few minutes, and without the use of special tools. 1
.
Track block frame with caterpillar and drive shaft from the Buran snowmobile. 2
.
The engine compartment was welded from a 20 x 20 mm profile and installed on a tracked block along with the front beam of the ski racks. 3
.
A caterpillar block assembled with a rear pendulum, a balance trolley with rollers from the Buran snowmobile and a removable front beam for attaching ski racks. 4
.
Ski rack made of a 3/4″ diameter pipe with a 1/2″ diameter pipe pressed in for additional rigidity and steering ski suspension parts. 5
.
Removable engine compartment without engine (frame welded from 20 x 20 mm profile), but with gas tank and steering column on a track block. 6
.
The ski suspension is made using springs from the Buran snowmobile (roller suspension) and the Zhiguli car (springs hold the rear brake pads). 7
.
This is what the snowmobile looks like when assembled, but the track has a defenseless casing. 8
. The cross beams for one and two steerable skis are welded from square pipes.
Have you decided to make a snowmobile yourself? If there was a desire... Of course, to create a decent vehicle you will also need metalworking skills, basic knowledge of physics, ingenuity, materials, spare parts and some tools. There is no doubt that you have all this, and what you don’t can be acquired along the way. The main thing is what the result is! A self-made snowmobile moving on snow, overcoming snow-covered off-road terrain - that’s cool!
Engine selection
Gasoline engines are used for walk-behind tractors or strollers. Engine speed is controlled by a throttle handle located on the steering wheel. To make a homemade tracked snowmobile with your own hands, the easiest way is to use ready-made small-volume engines for walk-behind tractors with pre-installed:
- Fuel tank.
- Ignition system.
- Reduction gearbox with a ratio of 1:2.
- Centrifugal clutch, automatically activated when the speed increases.
The power of these engines does not exceed 10 horsepower, but they are easy to install: the technician does not need to separately assemble the ignition system, connect fuel pipes, adjust the clutch, etc. There are different options on the market:
If it is not possible to purchase a ready-made engine from a walk-behind tractor, then you can use an engine from a stroller. Such engines are 10-15 horsepower more powerful, but require self-assembly. The system includes:
- Engine.
- Clutch.
- Gearbox.
- Gas tank (volume 5-10 liters).
- Muffler.
- Generator.
- Electronic ignition switch and coil.
Some of the elements will come from old motorcycles (“Minsk”, “Vostok”, “Java”, “Ural”). The gas tank is located as close as possible to the carburetor to reduce the length of the pipes.
Making caterpillars from car tires
You can make your own caterpillar using car tires. To carry out the work, you need to select tires borrowed from trucks; it is recommended to use a suitable tread pattern, and you will spend less effort when working with the tire. The manufacture of such a caterpillar must be done by cutting out the sides from the tire, while leaving space for a treadmill.
It is worth considering that this work is quite labor-intensive and requires the application of a lot of patience and effort; in this case, it is necessary to use only a well-sharpened shoe knife.
In order to spend less effort when making a caterpillar for a car with your own hands, you can wet the blade from time to time using a soap solution. As an alternative solution, you can use a device designed for cutting; it is also possible to use an electric jigsaw. On the latter you first need to attach a file with small teeth, the file must also be pre-moistened with water, during the work such manipulations must be done periodically.
Telescopic suspension
Perhaps this is one of the most common and simplest types of suspension based on the principle of operation. Most often, this suspension is used on snowmobiles of the “utilitarian” class. The design of the telescopic fork consists of a spring and shock absorber, which are located directly in the strut. Thus, the telescopic stand is able to smooth out shock-type loads. It is worth noting that the stroke of this type of suspension is limited according to the stroke of the shock absorber itself. As a rule, snowmobiles with such suspension have incredible maneuverability in dense forest conditions, since the ski base is small.
Also, one of the simplest and most common suspensions is the spring system. This engineering solution was used on the legendary domestic car "Buran". This model has one ski track, as a result of which the equipment does not have the necessary maneuverability. It is generally extremely difficult to enter the required turn at speed. But in general. The suspension performance itself is quite acceptable.
Who invented the snowmobile
The first snowmobile was designed by Joseph Armand Bombardier and patented in April 1944. Like modern snowmobiles, it has skis at the front for steering and a sophisticated chain tracking system at the rear. The sprockets pull the tracks around, while the intermediate wheels between them provide suspension. The main difference between this vehicle and modern snowmobiles is the large cabin, which can accommodate about 12 people.
Skis, engine, tracks and brakes - the snowmobile seems to be a fairly simple design. However, there is much more hidden under the body kit. If you examine the nearly 500 winter bike-related patents that leading manufacturer Bombardier has filed since 1944, you'll find all sorts of features you never imagined.
For example, powering through wet or deep snow, it is likely that the track will clog, significantly increasing the weight of the drive mechanism and slowing you down. That's why Bombardier developed a snow pusher mechanism in the 1960s, which consisted of spiral grooved wheels to push the snow out as the track passed them.
As you'd expect, most of Bombardier's patents relate to the track/tread mechanism, suspension, skis and basic frame design - the core features of the sled - but it's interesting to look through their other innovations, which cover everything from quick-release passenger seats and engine turbochargers to the more mundane things like electronic engine lubricants.
Snowmobile from a motorcycle: a guide for masters
Making a snowmobile from a motorcycle is not so easy. If the assembly of previous products did not cause any difficulties, then with this design you will have to suffer. The work will require not only tools, materials and equipment, but also skills in working with a welding machine and other equipment.
Important! Motorcycles "Ural", "Izh" and "Dnepr" are the most suitable models for making a snowmobile with your own hands.
Snowmobile design technology
- A suitable frame is made from metal pipes of different diameters and steel corners. Its base is made in the form of a rectangle (its dimensions are 150 x 43.2 cm).
- The steering beam is constructed from metal corners (its dimensions are 50 x 50 x 5 mm), its parts are sheathed with dense metal overlays. The finished structure is installed in a horizontal position on a drilling machine.
Motorcycle Izh
- The frame and the finished beam are processed at the joints, special grooves are prepared for reliable fixation of the elements.
- The front crossbar of the frame is equipped with a strong corner.
- The seat is attached to the frame of the structure.
- Make holes in the side members.
- A channel is welded between the steering and middle sections.
- Select a suitable track sprocket and rubber band for further installation (suitable dimensions - 2200 x 300 mm, thickness - no more than 10 mm).
- The caterpillar itself is carefully sheathed with nylon so that the material does not delaminate during use.
Snowmobile from motorcycle
- A transmission is installed, which consists of a front and rear axle. The front one is the drive one, it consists of a tubular shaft, a track sprocket and rollers (the sprockets themselves are fixed with through bolts). The rear axle structure consists of a track drum and a tubular shaft.
- The skis are welded to the structure of the snowmobile (sheets of steel and metal corners are used for their manufacture).
The control system of a homemade snowmobile from a motorcycle is quite complex to design. It consists of:
- longitudinal traction;
- lateral thrust.
From the information presented we can conclude: a homemade snowmobile from elements of a walk-behind tractor, chainsaw or motorcycle is a reality. Any craftsman can make it. For productive work you will only need certain skills, equipment, tools and materials.
Brakes
If you have vibration brakes (rim brakes) or disc mechanics, then everything is simple - check for rust or deposits on the cables. You can blow WD40 from a can into shirts without even taking them apart. If the cables move smoothly and the handle does not stick on the reverse stroke, then you don’t have to do anything else.
Check the condition of the brake pads; if more than two-thirds are worn out, replace them.
In the case of vibration breaks, pay attention to how well the rim is machined
With hydraulic brakes, things are a little more complicated. Air may enter the system, especially if the bike is suspended by the front wheel. Look at how the brake levers are pressed, whether the free play has increased, whether they are delayed on the reverse stroke; in these cases, bleeding helps.
In addition, if the bike was parked in a damp room all winter without moving, the brake fluid could absorb some moisture. Perhaps change the brake fluid and bleed the brakes.
Bleeding hydraulic disc brakes is not a difficult task and anyone can do it. If I get around to it, I’ll write a general guide on how to pump hydraulics.
Legality
Depending on the jurisdiction, penalties may apply for driving outside of permitted areas, without an approved helmet, without a driver's license, on an unregistered snowmobile, or while under the influence of alcohol or drugs. There may also be rules regarding noise and wildlife.
Driver's license
Some jurisdictions require a driver's license to operate a snowmobile. Special snowmobile driving licenses are required in Norway and Sweden, for example. In Finland, a snowmobile driving license is not required if the driver already has another type of relevant driving license (eg car or tractor).
Manufacturing methods and materials
When choosing material for a future caterpillar with your own hands, you should take into account the type of work for which they are intended. The product must not only be extremely durable, but also lightweight for convenient operation of the unit.
The first step is to install additional wheels on the walk-behind tractor so that there are a pair on each side. Future units will be mounted on them, the length of which will be the circumference of each wheel plus the distance between their axles, multiplied by two. All wheels must be the same diameter.
The most popular starting materials for making caterpillars with your own hands include:
- Conveyor belts and bush-roller chain.
- Unnecessary car tires.
- Chains and belts.
Each method implies its own course of action.
Conveyor belt and chain
The method of manufacturing a unit from these materials, according to most, is the simplest. It does not require a large number of tools and materials. It is recommended to consider the following tips:
- The thickness of the conveyor belt should be more than 7 mm, since it will be subject to strong physical stress that must be withstood.
- The tapes are fastened together using a bushing-roller chain.
- To increase the strength of the structure, it is recommended to sew the tape on the sides and ends using frequent stitches. The step between them should be about 1 cm.
If you follow this simple list of recommendations, you should get a durable and high-quality track for a walk-behind tractor that will serve its owner for a long time.
Tire construction
In addition to making a product from a transport belt, you can make a caterpillar from a tire with your own hands. Here you won’t have to stitch or hook anything together, since the tire already has a closed structure with a special clutch protector.
Tyres for regular passenger cars will not work. You need to find products for trucks or tractors that have a pronounced tread pattern.
The manufacturing procedure for such a unit can be divided into three main stages:
- A goose tape of the required width is cut out of the rubber. To do this, you need to use a very sharp knife dipped in soapy water.
- Using an electric jigsaw and a sharp, fine-toothed file, cut the sidewalls off the tire.
- The inside of the tire also needs to be cut with a knife or jigsaw.
- All that remains is to put the finished tire on the pre-installed wheels.
It is worth carefully studying the tread pattern. It must be clearly defined to maximize the throughput capacity of the walk-behind tractor by increasing the adhesion of the track to the surface.
Belts and chains
This method uses standard V-profile belts. They are attached to each other using rivets that are placed on them. Such a caterpillar is made from two pieces of identical chain and belts. The algorithm of actions is as follows:
- The ends of both circuits are opened and connected to each other to form a closed system. After joining, they must be compressed back and welded together for greater strength.
- Take suitable steel thickness. Small sections are cut out of it to be used as lugs.
- Using double-sided bolts, the lugs are attached to all links of both chains, and all the belts are attached to them.
Thus, you can get a durable and high-quality track made from belts and chains, made by yourself. This method is the most labor-intensive of all presented.
Design Features
A snowmobile is a highly efficient means of transportation that allows you to move through shallow snow and snowdrifts in winter. The main elements of transport design are:
- engine;
- caterpillars;
- skis;
- transmission.
Among the advantages of this technology is the ability to move through fairly deep snow at high speed. No other type of transport can compare with the efficiency of even a homemade snowmobile. Finished structures are divided into sports, work and mountain. Before moving on to creating a product, you need to decide on the necessary parameters.
Double-trackSingle-track
The best BRP snowmobiles for touring trips
The Canadian company BRP is a recognized world leader that produces the best snowmobiles in various segments. Without exaggeration, many of the brand’s models are distinguished by excellent speed characteristics, are capable of developing high power and confidently overcome winter trails of any complexity. Let's start our review with BRP touring snowmobiles, which are represented by the Ski-Doo line. The Expedition SE 1200 4-Tec model is designed for comfortable and long trips in the snow. Ski-Doo BRP Expedition is equipped with a 130-horsepower four-stroke three-cylinder Rotax 1170 cm³ engine, which develops high torque, provides excellent speed characteristics and fuel economy.
The best touring snowmobile, the Expedition SE 1200 4-Tec, consumes about 10.8 liters per hundred kilometers. Depending on the complexity of the route, the driver can change the throttle angle while driving, thereby regulating the fuel mixture consumption and power development. Simple controls and high maneuverability of the Expedition “tourist” are achieved through the following design elements:
- durable REV-XU alloy platform;
- rear suspension SC-5U (stroke length 340 mm) with Motion Control air shock absorbers;
- RAS2 A-link front suspension;
- multi-stage variator eDrive2;
- adjustable ski base Pilot DS2.
If you don't know which snowmobile is best to buy for outdoor activities and long trips, the Expedition model is a great choice. The Tourist is equipped with an ergonomic modular seat with a comfortable backrest and armrests, which can comfortably accommodate the driver and two crew members. This model will give you an unforgettable travel experience and will be able to overcome any difficulties on winter roads.