The first primitive carburetor appeared in 1895 and since then the basic principle of its operation has not changed, only the design itself has been improved. And after so many years, you can still meet people who not only do not understand how miraculously the fuel moves upward from the float chamber, but also try to adjust the carburetor according to the principle “I see a screw, I turn the screw.”
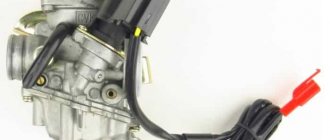
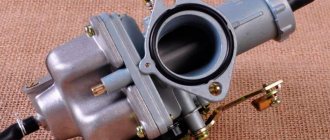
This applies, for the most part, to young novice motorcyclists who cannot afford the services of a good specialist, and the equipment they most often own is Chinese, due to its availability. Based on this, let's try to figure out how to configure the PZ30 carburetor, which is one of the most common for Chinese small-capacity motorcycles. It should be noted that much of what is written below will be true for other similar carbs, for example PZ27, which differs only in the diameter of the diffuser.
Adjusting the PZ30 carburetor float
Tuning a PZ30 carburetor is simple, but very time-consuming. Unfortunately, just as in Photoshop there is no “Make it good” button, the carburetor does not have one screw, by turning which you can achieve an ideal air-fuel mixture in all operating modes. But let's get started with the setup.
Of course, the carburetor must be cleaned, and all worn elements must be replaced. But even with a new carburetor it is necessary to carry out some manipulations. Unfortunately, many Chinese manufacturers, as well as domestic assemblers, do not always bother to adjust the carburetors on the motorcycles they sell. It is clear that this is a price to pay for being cheap, but still.
You need to start by adjusting the fuel level in the float chamber. Many instructions say that you need to connect a transparent hose to the drain, loosen the drain screw and determine by the fuel level in the hose whether the float needs to be adjusted. Let such advisers chew hauttuynia, but we are not supporters of half measures. Drain the fuel from the carburetor float chamber and remove it.
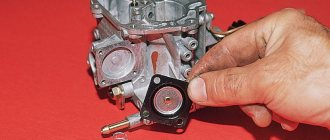
The float system consists of only two elements: a float and a locking needle, which clings to a tongue on a metal base. By bending this tongue we will set the float to the level we need.
The distance from the carburetor body to the bottom plane of the float should be exactly 14 millimeters. How to take measurements. Holding the shut-off needle in the position where the fuel flow is blocked, but without pressing on it, we put the float in the position where it just touches the spring-loaded stop on the needle. By bending the protruding tongue of the metal base of the float, we ensure that the distance from the edge of the float to the carburetor body is 14 millimeters. At this stage, accuracy is very important, so you need to be patient. Separately, you need to pay attention to the fact that both float chambers must be at the same level.
Looking ahead, it is impossible not to mention one of the adjustment methods, which dates back to Soviet times. If the mixture is lean, when the divisions on the needle have already ended, it is advised to increase the level in the float chamber. Accordingly, if the mixture is rich, reduce it. The advice is good, but it is good for that period and place where it was not possible to buy a jet of the required size, and reamers to increase the jet were a rarity. Now jets are sold both in sets and individually in any specialized store, and even if they are not in stock, they can be ordered. And this is not to mention buying online. In any case, you should only play with the level in the float chamber out of desperation.
But let’s not jump over our heads; we’ll return to the jets and needles a little later, but for now we’ll assemble the carburetor and install it in place.
Adjusting the idle speed of the PZ30 carburetor
First of all, you should warm up the engine. We poured a mug of coffee or tea, started the engine, lit a cigarette if desired and... went to the Internet to look for information about what idle speed should be set for a specific motorcycle model. If you don’t find this information, then continue searching not by motorcycle model, but by engine. By the time you find between 1000 and 1500 rpm, which is most single cylinder engines with this carburetor, the engine is just warmed up.
We look at the dashboard, understand that there are certain difficulties in the form of the absence of a tachometer, or we find a tachometer and rejoice. If there is no tachometer, then you will have to rely on your own ears, and since you are reading this article, you have no experience in setting up a carburetor, which means you need to find a reference sound that you can use as a guide.
The sound of a single cylinder engine at 1000 rpm
Single cylinder engine sound at 1500 rpm
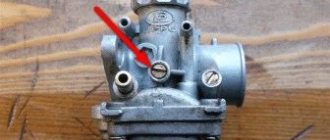
So, we have two screws at our disposal: the mixture quality screw and the idle speed screw. This is the action plan.
- We tighten the idle speed screw until the engine stops working normally, that is, there are gaps in operation, and turn it back a little. We achieve the lowest engine speed possible while maintaining stable operation.
- We tighten the quality screw until the engine stalls. It is important to do this slowly and count how much you have turned it. It is most convenient to turn the screw a quarter turn, this way you will get the exact value and will not get confused. As an example, your engine stalled at ¾ turn of the quality screw.
- Return the quality screw to its original position, in our case ¾, and start the engine
- We begin to unscrew the quality screw, again in quarters, counting how far it was unscrewed. In the process of unscrewing the quality screw, the engine speed will begin to increase, so during the process you will have to periodically tighten the idle speed screw to reduce them to the minimum with stable engine operation. At some point the engine will stall again. But he must do this by turning the quality screw, and not the idle screw. If in the process of resetting the speed with the idle speed screw you turned off the engine, then you should unscrew it, and also return the quality screw to its original position and start over. As an example, the engine stalled when the quality screw was turned 2¼ turns.
- We add 2¼ and ¾, we get the number 3, which we divide by 2. Through simple calculations we get 1½. This will be the number of revolutions by which we need to tighten the quality screw. Let's twist it.
- We are trying to start the engine. If this does not work, loosen the idle speed screw. After starting the engine, use the idle screw to set the nominal idle speed for your specific engine brand.
This completes the idle speed adjustment. But the carburetor adjustment has not been completed.
Adjusting the ignition angle
Sluggish acceleration of the car and instability of the idle speed are also often associated with incorrectly set ignition; this procedure is mainly carried out in car repair shops using special equipment. But if you wish, it’s easy to make the adjustment yourself, and without a strobe, and quite accurately:
- with the engine stopped, loosen the three nuts securing the distributor (the third fastening is located at the bottom, it is not visible from above);
- we start the car, turn the distributor-distributor clockwise (to “+”), and if the ignition was late, the idle speed will increase noticeably;
- we select the optimal position of the distributor (the operation of the internal combustion engine should be smooth, without failures), reduce the speed using the quantity screw, turn off the engine, fix the distributor-distributor with one nut for now, and check the results of the ignition adjustment on the fly.
We recommend: How to remove the secret from a car wheel without a key
If, under heavy load and sharp acceleration, your fingers begin to noticeably “knock” (engine detonation appears), you should move the distributor a little to “minus”, then check the car again while driving. This way you can set the ignition quite accurately, and sometimes even better than with a strobe light.
Tuning the PZ30 carburetor at medium speeds
When the carburetor float was adjusted, it was possible to notice that the PZ30 has two jets: the idle jet and the main jet. The maximum amount of fuel is limited by the main jet, and the amount is adjusted by a needle that rises and falls when the throttle handle moves.
From this it is not difficult to conclude that the air-fuel mixture will have to be adjusted by moving the metering needle, and not by turning any screw.
You can determine the quality of the mixture in garage conditions purely by eye, by the color of the spark plug insulator. A black insulator will tell us that the mixture is rich and the fuel supply should be limited. A white insulator indicates a lean mixture; accordingly, the amount of fuel should be increased. The insulator has a brownish tint when the air-fuel mixture is normal. You can read more about the color of the insulator and what problems it indicates in a separate article, “What does the color of a candle mean?”
There is one more very important nuance when setting the air-fuel mixture for medium engine speeds. In order for the insulator to become an indicator of the quality of the mixture, you will have to drive several kilometers, maintaining stable average engine speeds. In this case, you should not allow the engine to idle (the spark plug will immediately turn black) and you should not turn the engine to high speeds, as this will blow out the spark plug.
So, you drove several kilometers along an empty highway at medium speed, pulled over to the side of the road and immediately turned off the engine. After this, you need to wait until the engine cools down to a temperature at which you can hold your hand on it. We unscrew the spark plug and see the black insulator. Unscrew the carburetor cap and move the locking ring on the needle one notch up. That is, we lower the needle and limit the amount of fuel in the air-fuel mixture. If the insulator is white, then the stopper needs to be moved down one notch, thereby increasing the fuel supply.
We repeat the motorcycle ride and, depending on the result, move one more division in the desired direction or rejoice at the brownish tint of the spark plug insulator.
In some special cases, there is nowhere to move the locking ring on the needle, and a normal air-fuel mixture was never obtained. In such a situation, you will have to replace the main jet with a larger one if the mixture is lean, or a smaller one if the mixture is over-rich.
Well, the icing on the cake of all these manipulations is that your idle speed will most likely be lost and you will have to adjust it again.
We install autostart with our own hands
Before you begin the installation work of the autostart on the VAZ, you need to prepare everything required for this. Installing one alarm will not be enough; it will require long and painstaking work. To bring your plan into reality, you will need to prepare the following:
- alarm system with auto start, in this case you can use the simplest model from the manufacturer StarLine;
- a temperature sensor and a controller are purchased separately;
- small electric drive, can be used from a Ladovsk washer;
- a thin cable, preferably soft, made of copper or aluminum, but it is better to give preference to the copper option;
- wiring in the required quantity, it is better to prepare with a reserve;
- In addition, patience will be required, since setting up equipment and autostarting a carburetor is a long and painstaking process.
Scheme for installing autostart on a carburetor
You can start assembly by turning off the manual choke, which is installed on any VAZ carburetor engine. In this case, you don’t have to pull out the cable, but secure it securely under the hood. There is a high probability that it will be useful for something in the future. If you have an auto choke on your car, then it will have to be completely disassembled. The carburetor is completely disassembled and all sensors are removed from it. The last step before assembly is to switch the feed drive to external.
Stages of installing a do-it-yourself autostart on a carburetor
To install a start-up signal on a carburetor engine, the following series of actions must be performed sequentially:
- First of all, all the components of the structure are placed in their places. The electric drive can be installed on the engine wall. The temperature sensor is mounted on the engine. You should not use an old sensor, as there is a high probability of making a mistake. The microcontroller will need to be placed next to the electric motor, although in some situations it is better to attach it to the carburetor.
- Using a previously prepared cable, the engine is connected to the damper.
- All parts of the suction pump should be connected to a microcontroller, which in turn has a direct connection to the signaling system.
- Next comes a test test, if the system gives a response, then you can move on to the next stage, if there is no feedback in the carb, then you have to recheck the entire connection again.
- The entire system is tested and brought to perfection. The microcontroller will have to change several operating modes taking into account the temperature sensor readings. You should also adjust the length of the cable as much as possible. Once the system has been tested, the first test run can be performed.
The final stage of installing autorun
It is possible to fully start the engine using the key fob only after installing the air damper servomotor. The device, as a rule, is placed on the wall of the engine compartment, while others, on the contrary, try to mount the element directly on the carburetor. By installing this element, you can forget about the position of the air barrier. This device is produced under the Sadko brand. The model is produced in two types:
- Standard equipment, which includes a microcontroller, control unit, cable, electric drive and temperature sensor.
- The maximum configuration, which contains all the previously listed devices, as well as some additions.
Adjusting the PZ30 carburetor at high engine speeds
If at medium engine speeds the main jet and the regulating needle are responsible for the fuel supply, then at high speeds the needle is raised up and all that limits the flow of fuel is the throughput of the main jet. It was also said that at maximum speed the spark plug is blown out and will almost always have a whitish tint.
This raises two questions. How to adjust the PZ30 carburetor at maximum speed? How to determine the quality of the air-fuel mixture at maximum speed?
With the first question, the answer is obvious. You will have to regulate the quality of the mixture only by replacing the main jet and nothing else. But the second question is more interesting, but quite solvable.
Having unscrewed the throttle so that the engine speed rises to 65-70% of its maximum, you need to sharply turn the throttle to maximum and see what happens. If the motorcycle refuses to accelerate or even stalls, this will mean that the air-fuel mixture is lean and it is necessary to install a jet with a larger hole.
To check for a rich mixture, you should dial up the engine speed to maximum and sharply reduce it all to the same 65-70%. If you hear popping noises in the exhaust pipe, this will indicate a rich mixture, which means a smaller diameter jet is needed.
An important point is that in the case of a lean mixture, you can also hear popping noises, but they will come from the intake tract, that is, from the carburetor side.
It should be noted that after replacing the main jet in the PZ30 carburetor, you will have to re-adjust the idle speed and air-fuel mixture at medium speeds.
Keihin PZ 30 carburetor with accelerator pump
In general, I decided to buy two of these carburetors for my 750 cc engine.
Actually the question is, has anyone encountered this beast?
I was very interested in them, but haven’t gotten around to buying them yet. The diffuser is like the 68u or even less information (30 is the diameter of the mixing chamber) Take the throttle handle with cables (there is a splitter for 2 cables, a throttle and an accelerator pump) or You will be collectively farming these splitters yourself. About the 750, I think the engines can be a little choke at the top, but on the K750 or 650 the engines are just that. True, the question of the quality of production of these carbs still remains unclear; you will also have to select jets
P\S can you post a link to the seller whose price they are now is 1800 with cables, I only found it by
wait, so 30 is not a diffuser? I have channels that were drowning in the subway, I need a 30 diffuser, or at least 28 like the 68
I'm selling BINGs with diffuser 32, there will be a song for 750!
Hello, such a problem. When the engine is cold, it runs great, and the revs drop well. Once it warms up, the thrust decreases and the revs gradually drop to idle. And the idle floats. When it’s cold, it also drives great. Idle jet 38.
sewed in 2 weeks! super fast! A friend in the Urals is having a blast with these carburetors; the precise, tuned operation of the engine is something that can never be achieved with standard ones. The quality is generally super, I couldn’t find a single jamb, everything is smooth, it works as it should! I recommend!
__________________________ I’ll buy duckweed dropsy IMZ
__________________________ I’ll buy duckweed dropsy IMZ
Source of the article: https://oppozit.ru/post_96526.html
Let's sum it up
If you’ve read this far, it means you really want to understand how to set up your motorcycle’s carburetor, and the time spent writing above was not wasted. In fact, tuning the PZ30 carburetor, and others like it, is not the most difficult task and only looks like something incomprehensible. If configured correctly, even the famous Chinese quality will not interfere with the normal operation of the engine, although there will be nuances, such as the need to adjust the idle speed after each cleaning. But if you are patient and take one free evening, then as a reward for your time spent you will receive not only a motorcycle that responds to the throttle and consumes a minimum of fuel with maximum efficiency, but also a longer engine life. Which is, at least, nice, even though the piston engine for most Chinese motorcycles is quite inexpensive.
Having understood the nuances of tuning the PZ30 carburetor, you don’t have to be afraid of other carburetor models; the tuning algorithm, with very rare exceptions, will be absolutely the same.
Images used: china-moto.ru, alicdn.com, snegokhod-kayur.ru, jawa-store.ru, omoimot.ru
