How do you know when it's time to synchronize the carbs?
If you purchased a new bike that was well tuned from the factory, then you don’t need to do anything. It is important to simply run it through correctly and forget about any settings for many thousands of kilometers. But if you want to buy a used motorcycle, or if you have been riding your two-wheeled vehicle for quite some time, you will have to deal with the procedure for synchronizing carburetors sooner or later. The first indicators that it is time are the following:
- Gasoline consumption increases;
- It is difficult to start, the engine initially runs on one cylinder.;
- Idle speed does not hold, adjustment does not help;
- Vibration was detected that was not there before;
- The engine “troubles”, uneven operation is heard;
- Acceleration dynamics disappeared;
- The motor “shoots” into the exhaust, blue or black smoke is observed;
- The engine was overhauled.
All these symptoms may indicate other problems, primarily incorrectly adjusted or contaminated carbs. Therefore, before synchronizing, it is necessary to wash them, blow them out, replace the manifolds, and clean the air filter. And only then proceed to synchronization.
Algorithm for the procedure
You should start with proper preparation.
- Perform adjustments to the damper drives.
- Remove the fuel tank (motorcycle), dismantle the air filter and carb unit (if provided for by the modification).
- Connect diagnostic hoses through special vacuum ports. They are easy to find by looking at the stubs.
After preparation, configuration is carried out.
- Warm up the power plant by adjusting the valves of the device to reduce vibrations.
Important point. If you release the valve, the vacuum gauge will respond more strongly to the cascade of vacuums. On the contrary, tightening will lead to a decrease in vibrations.
Synchronization must be carried out in XX mode. The speed is determined by the manufacturer. You need to look in the manual. For example, on 2-cylinder engines, the procedure is performed by adjusting the main screw, which affects the position of the remote control of both cylinders. It is located in most cases between the carbs.
Synchronizer circuit
But for 4-cylinder installations, in addition to the base screw, adjusting fittings are also used. One of them controls the damper in the first/second cylinder pair, the other controls the third/fourth cylinder pair.
To carry out the synchronization process, it is necessary to set the same discharge values. This is done by rotating the screws. First, adjust the first fitting, then the screw, then the second fitting. The procedure can be considered complete if, after a rapid increase in engine speed and a decrease at idle, the indicators of all instruments point to the same vacuum readings.
Boxer engine
Incorrect carburetor adjustment results in uneven load on the cylinders. What does this mean? Yes, at least by overheating of one of them and subsequent replacement. There are several ways to synchronize carburetors on a boxer engine. The first of them is recommended by the manufacturers:
- Place the motorcycle on a special stand.
- Start the engine and engage fourth gear.
- Disconnect the first cylinder by removing the voltage wire from the spark plug.
- Increase the speed to the 50 km/h mark on the speedometer.
- After the mode has stabilized, simultaneously turn off the 1st cylinder and turn on the 2nd cylinder.
- By rotating the adjusting screws, achieve the same speedometer reading in both cases.
This adjustment method is quite complicated and requires long-term engine operation. That is why it is important to monitor the temperature during the process in order to avoid overheating of the motor.
Prices for motorcycle service
Prices are approximate. The final cost of work is determined after diagnostics or inspection
| Diagnostics | |
| Computer diagnostics, error reset (F1, Check Engine) | from 300 rub. |
| Maintenance and replacement of consumables | |
| Changing the engine oil and oil filter | from 500 rub. |
| Changing the oil in the gearbox | from 300 rub. |
| Changing the fork oil | from 1800 rub. |
| Replacing the fuel filter | from 200 rub. |
| Replacing the air filter | from 300 rub. |
| Replacing spark plugs | from 150 rub. |
| Chain lubrication | 350 rub. |
| Chain adjustment | from 300 rub. |
| Replacing brake pads | from 350 rub. |
| Replacing brake fluid (one circuit) | from 550 rub. |
| Replacing seals in fork legs | from 2000 rub. |
| Motorcycle fork repair with removal, replacement of parts, washing | 2900 rub. / 3900 rub. |
| Replacing clutch discs | from 1500 rub. |
| Coolant replacement | from 1000 rub. |
| Chain replacement | from 800 rub. |
| Replacing stars | from 700 rub. |
| Replacing wheel bearings | from 800 rub. |
| Steering column repair, bearing replacement | from 2500 rub. |
| Carburetor synchronization | from 2000 rub. |
| Cleaning, adjusting and synchronizing carburetors (1 cylinder) | from 2000 rub. |
| Cleaning, adjusting and synchronizing carburetors (2 cylinders) | from 3000 rub. |
| Cleaning, adjusting and synchronizing carburetors (4 cylinders) | from 4000 rub. |
| Engine repair | |
| Adjusting valve clearances | from 1000 rub. |
| Replacement and repair of piston group | from 2500 rub. |
| Clutch repair | from 1500 rub. |
| Removing and installing the engine | from 8000 rub. |
| Engine overhaul | from 10,000 rub. |
| Starter replacement | from 500 rub. |
| Chassis | |
| Replacing shock absorbers | from 400 rub. |
| Fork bulkhead | from 2900 rub. |
| Removing and installing the fork | from 1000 rub. |
| Removing and installing a wheel | from 600 rub. |
| Brake system | |
| Replacing brake hoses | from 800 rub. |
| Replacing brake discs | from 400 rub. |
| Electrics | |
| Troubleshooting | from 500 rub. |
| Replacing spark plug wires | from 400 rub. |
| Replacing the charge relay (regulator relay) | from 500 rub. |
| Removing and installing the generator | from 1500 rub. |
| Moto tire service | |
| Installation, Rubber dismantling | from 300 rub. |
| Balancing | 300 rub. |
| Repair of punctures, cuts | from 150 rub. |
| On-site repairs | |
| Visit of a specialist within the Moscow Ring Road | 1500 rub. |
| Departure of the master outside the Moscow Ring Road | 1500 rub.+30 rub./km |
| Welding work | |
| Semi-automatic welding MIG-MAG with carbon dioxide (steel) | from 30 rub./cm |
| Argon TIG welding (aluminum, titanium, stainless steel) | 300-1500 RUR/cm |
| Gas welding acetylene-oxygen (warming up parts) | 50 rubles/min |
Source: https://moto-one.ru/motoservis/motoservis-price.html
Signs you need to sync
Synchronizing carburetors is far from an action that should be carried out at the time you want to do it. The first rule of working with elements of the fuel system is not to touch them until they give you a reason to do so, but what reason is needed to require carburetor synchronization? There are actually several of them. In general, the list of signs indicating the need to check and adjust the synchronization of the functioning of carburetors is as follows:
- fuel consumption has increased;
- The idle ones began to “float” and cannot be adjusted;
- Excessive vibration has appeared in the operation of the motor;
- the engine operates unevenly;
- black smoke is coming from the exhaust system or the sound of gunshots is heard.
First of all, when such symptoms appear, it is enough to simply clean the carburetor. If the problems persist, you will have to synchronize the operation of individual nodes. Repair activities of this kind do not require a mandatory visit to a service station, because if desired, carburetor synchronization can easily be done with your own hands. To do this, you will need to know some of the intricacies of the procedure, which are covered in detail in the following paragraphs of the article.
When is synchronization necessary?
Manufacturers recommend adjusting the synchronous operation of carburetors at least after 6 thousand kilometers. In addition, synchronization must be performed in the following cases:
- cleaning, flushing or repairing carburetors;
- cylinder wear;
- replacement of piston group components;
- repair or replacement of the gas distribution mechanism or camshaft;
- engine replacement or repair;
- clogging of the fuel system;
- engine vibration.
Before performing synchronization, it is necessary to carry out maintenance on the carburetors.
Synchronizer ndash; what kind of animal is this?
Unfortunately, it is impossible to synchronize the carbs with the “standard” set of bikers (keys, heads, grinders). You will still have to purchase a special tool - a synchronizer. It is produced at the factory, and is calculated at the factory in accordance with the vacuum corresponding to it in the pipes when the engine is idling.
There are synchronizers with mechanical and electronic displays. The latter are much easier to use, since there is no need to monitor several arrows at the same time.
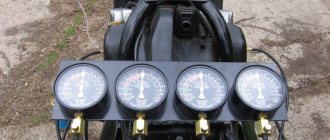
The essence of the device is to measure the air pressure in the carburetor chambers. Therefore, its main parts are pressure gauges - one for each cylinder. Under each of them there is a fitting for adjustment - it will also have to be twisted during the process in order to stabilize the arrow.
Such things are very expensive, so many craftsmen make it themselves. The simplest synchronizer from twenty-cc syringes is assembled in half an hour, and works no worse than a store-bought one.
Algorithm
- To properly synchronize the carburetors, you will need to gain access to them. To do this, you need to remove the tank, air filter, and all other components that interfere with operation;
- In this case, it is necessary to connect an analogue of a gas tank to the carbs, up to a half-liter bottle suspended from the ceiling, since the procedure is carried out with the engine running and you cannot do without fuel;
- A hose from the synchronizer is connected to special outlets designed specifically for adjusting carbs;
- The engine starts, waits for time to warm up in order to achieve maximum stability in operation;
- Idle speed is set to the minimum value at which the engine does not stall;
- Based on the readings of the electronic display or arrows on the device, it becomes clear whether there is a need for synchronization. If the indicators are the same everywhere, then there is no need to do anything. If the data differs, then you will have to adjust the location of the throttle valve on individual carbs. In the case of a homemade synchronizer from syringes, it is important to achieve the same level of liquid in them;
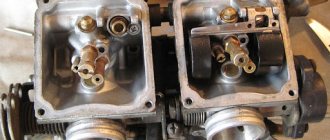
- For four-cylinder bikes, the synchronous operation of the 1st and 2nd carbs is first adjusted, then the 3rd and 4th. And after that the first and second pair are already synchronized with each other.
Remember that if you own a two-cylinder boxer motorcycle Ural or Dnepr, with separate exhausts for each cylinder, then synchronization can be done by ear.
About desynchronization and synchronizer.
The carbs must work synchronously. Symptoms of desynchronization are as follows: engine vibrations begin that were not there before, idle speed may fluctuate a little, fuel consumption increases. I have a forward flow on my Honda CB400 NC 39, and when the carbs get out of sync, the silencer starts shooting like a machine gun. I didn't notice this on the indirect muffler. On the forums they also cite the following symptom: the motorcycle “does not pull”. It is difficult to say whether the synchronized operation of the carbs affects the traction of a motorcycle. It seems to me, after all, not to the extent that it is described. That is, if the motorcycle stopped moving due to desynchronized operation of the carburetors, this means that there are generally arrows in different directions, but how to achieve this during normal operation of the motorcycle is a mystery to me.
As for the time intervals between synchronizations. Usually they say: “synchronize once every so many kilometers.” Moreover, they also add that synchronization is mandatory before the start of the season. It seems to me that this is also slightly exaggerated, because the operation of carburetors is influenced by many factors, such as: the quality of gasoline, falls, and the quality of the road surface on which you have to drive. If you only ride a motorcycle from work to work on good asphalt, refueling at a good familiar gas station, you can climb into the carbs once every couple of seasons and not have any problems. Anyway, I only sync the carbs when the above symptoms start to appear early on. And then think for yourself
In general, there is unfounded hysteria surrounding carb synchronization. In motorcycle services they tell newcomers, don’t try to do it yourself, it’s a crazy-complicated process. In fact, anyone who is able to change the oil and change the antifreeze on their motorcycle is quite capable of getting the carbs out of sync. This process is not complicated or dirty (I hate changing oil!!), you only need a special device (actually a synchronizer), beer and a little patience.
The carburetor synchronizer looks like this:
And it consists of several pressure gauges (according to the number of carbs) that measure the pressure in the intake manifold of the motorcycle. That is, between carburetors and cylinders. The pressure should be the same. Such a device at one time cost me 3,500 rubles. – the cost of one synchronization in a motorcycle service. Now such a synchronizer for 4 cylinders costs about 4 thousand rubles, that is, if you want to save money and not have to worry about servicing your motorcycle yourself, it’s definitely worth buying! There are different devices, but for your own convenience, take them for 4 cylinders, since with two pressure gauges on a 4-cylinder engine you will be tired of rearranging the hoses. Oh yes.. Let's go back to the device! There is an adjusting screw under the synchronizer pressure gauge. This screw calibrates the device before synchronization (so that the needle does not jerk). A hose leading to the fitting is connected to the pressure gauge.
This is interesting: Wiring diagram for VAZ 2114 power windows
There are a lot of fittings in the set and with different threads, so they are suitable for synchronizing the carbs of different motorcycles.
That's basically all the input data. If you have any questions, ask in the comments, that’s why this is a blog, to have simple feedback.
Symptoms of malfunction
There are characteristic signs that eloquently indicate a malfunction of the unit. These include:
- increased fuel consumption;
- drop in acceleration dynamics (the motorcycle “does not pull”);
- a decrease in speed and the presence of backfires, which, in turn, is fraught with consequences for the piston system.
Synchronizing carburetors on a motorcycle with your own hands is not such a difficult process if you approach it correctly. Anyone who can independently change the oil or add antifreeze will be able to synchronize the carburetors. The main thing is the presence of a special tool, or rather a device.
What is an econometer in the instrument panel?
On VAZ 2104, 2105, 2106, 2107 and 2108, 2109, 21099 (with a low panel) cars, an econometer is installed in the instrument panel (combination).
Let's try to understand why it is needed and how it works.
What is an econometric device in the instrument panel of VAZ cars?
— Why do you need an econometer on a car?
An econometer device is needed to visually determine fuel consumption by the driver in real time. But not exactly, but approximately - economically or uneconomically.
— How does the econometric device work?
The econometer works due to the vacuum in the intake manifold of a car engine, which occurs when the pistons move in the cylinders. This is a so-called vacuum gauge that measures the amount of vacuum. A tubular spring is installed inside it, which, when the pressure changes, either compresses or decompresses, moving the associated sector and the arrow of the device. The pressure difference is provided by a rubber tube connecting the econometric fitting and the fitting on the engine intake manifold.
Motorcycle carburetor synchronization procedure
The operation of carburetors is considered synchronous if all engine inlet pipes (EIP) have the same amount of vacuum at idle speed. In practice, this is realized by setting equal gaps between carburetor bodies and throttle valves. Do-it-yourself synchronization of carburetors can be done if you have synchronizing vacuum gauges. These devices are configured to measure the vacuum that is created in the VPD channels. Each carburetor must have a separate vacuum gauge. If the motorcycle engine is two-cylinder, there must be a block of two pressure gauges, for a four-cylinder unit, respectively, of four. All vacuum gauges are calibrated for the same readings at equal vacuum values and are equipped with mechanisms for eliminating oscillations of the needles that occur under the influence of changes in air flows inside the inlet pipes.
Interpretation of vacuum gauge readings during engine diagnostics
If you plan to repair your car engine yourself, then you need to know the following nuances::
- If the arrow drops below 450 mmHg, this means not only a problem with depressurization of the intake manifold and throttle valve. The vacuum hose may be damaged, the timing of the valves does not coincide with the timing of the pistons, delayed ignition;
- If, with such low readings, the needle also constantly twitches, then the problem may be with the injectors or the intake manifold gasket;
- If the vacuum gauge needle constantly deviates by 50-100 mm, then there may be a problem with the valves that do not close completely. To confirm this diagnosis, it is recommended to check the compression;
- If the needle oscillates significantly, the problem may be caused by a malfunctioning cylinder;
- If the needle trembles at intervals of no more than 25 mm, then this indicates a problem with the ignition. To confirm this, you need to diagnose the ignition system using a special analyzer.
Synchronization technology
- Preparation . Before performing synchronization, it is necessary to adjust the throttle valve actuators. The gas tank is removed from the motorcycle; if provided for by the design of this model, the air filter is also removed. For some modifications, you may have to remove the carburetor assembly. Connections of measuring pipelines to the high-pressure pump are made through special vacuum ports, which are easy to find by plugs.
- Setting . After connecting the pipelines, it is necessary to warm up the engine and adjust the vacuum gauge valves for minimal fluctuations. If you release the valve, the device will respond more to changes in vacuum; when tightened, on the contrary, the arrows will fluctuate less.
Carburetors must be synchronized at XX speed, the value of which is set by the manufacturer. Therefore, you should first clarify this parameter in the instruction manual. Below we will consider the typical procedure for synchronizing carburetors. However, depending on the specific engine model, there may be some nuances.
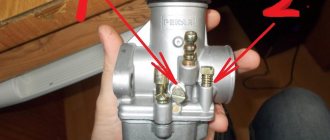
On two-cylinder engines, synchronization is performed using a base screw, which controls the position of the cylinders 1 and 2. As a rule, it is located between the carburetors.
For four-cylinder units, in addition to the base screw, two adjusting fittings are additionally used. One screw for controlling the remote control in pairs of 1-2 and 3-4 cylinders. The third fitting is designed to control the remote control in cylinders 3 and 4, respectively.
- Synchronization . To synchronize carburetors, it is necessary to set equal values of vacuum in the air pressure chamber by rotating the screws. First you need to adjust the first fitting, then the third screw, and finally the second (central).
Synchronization of carburetors is considered completed if, after a sharp increase in engine speed and reset to idling mode, the arrows of all vacuum gauges show the same amount of vacuum.
Synchronization of two carburetors
After talking a little with people on the topic of carburetors, I realized that for most motorcyclists it is a very big problem to adjust two carburetors on a boxer engine...
To be honest, I also jumped around my K-65 quite a bit while I adjusted it and developed the adjustment technology. Namely, the whole difficulty lies in synchronizing the operation of carburetors in low, medium and maximum load modes.
In other words, on incorrectly adjusted carburetors, one cylinder heats up more than the other when driving on the highway. The reason for this is the non-synchronous raising of the throttle valves; one carburetor is constantly open a little more than the other.
What we are asked to do according to the book:
- place the motorcycle on the stand;
- start the engine;
- engage 4th gear;
- turn off one of the cylinders by disconnecting the high voltage wire from the spark plug
- increase engine speed to speedometer reading 50 km/h
- wait a few seconds to make sure that the mode has stabilized, turn on the second cylinder and simultaneously turn off the first;
- raising or lowering the throttle by rotating the fittings on the carburetor caps, achieves the same speedometer readings for both cases. Since the adjustment can continue for quite a long time, it is necessary to monitor the thermal conditions of the engine and prevent overheating.
Personally, I have never used this method; it is a very complex and very low-tech method. I suggest taking it simpler. I adjusted Bing and K-65 using the method described below. After you have adjusted the idle speed, turn off the engine. Next you will need a second person, an assistant.
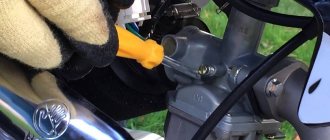
Remove the air filter pipe from the carburetors (K-65). Using your left index finger, touch the throttle valve of the left carburetor. At the same time, touch the throttle valve of the right carburetor with the index finger of your right hand. At this point, the second person should pull the throttle very slowly.
You will feel which throttle valve (left or right carburetor) will rise first. Achieve simultaneous lifting of the throttle valves by rotating the fittings on the carburetor covers. That's all the adjustment is. It seems to me that this is much simpler and more accurate than doing what is suggested in the book.
This method can be used on any carburetors
(!)Note(!)
In this way, you need to adjust the carburetors only after they work normally at idle speed! If for some reason you touched the idle speed after synchronization, you will have to synchronize the carburetors
again.
Anonymous (pedestrian)
Source: https://oppozit.ru/node/1097
How to adjust the carburetor on a motorcycle
If the synchronization of carburetors is carried out so that the amount of the combustible mixture is adjusted, then they are adjusted to improve the quality of this mixture supplied to the cylinders from the carburetors.
The Keihin carburetor for a motorcycle is adjusted in the same way for different models and brands of motorcycle. It is best to adjust carburetors at the same time as cleaning the carburetors. Because most often a poor-quality combustible mixture is formed when the jets are not clean enough.
The carburetor for the Ural motorcycle and other domestic motorcycles has been used from St. Petersburg since ancient times. It was constantly modernized and changed. And today this is a completely new device, which is called K-68. Today the Ural is the only motorcycle in the world that uses carburetors with variable vacuum.
To keep your motorcycle running properly, you need to know how to adjust the carburetor. And this needs to be done under certain weather and a specific road. Carburetors installed on motorcycles differ slightly from each other.
Attention: Motorcycle carburetors are designed specifically, and all its systems must work in parallel. The slightest mistake in this type of work will lead to other errors occurring. Care is required here.
To the question of how to properly set up a carburetor, we will answer this way, only in strict sequence.
- The float chamber contains fuel. Its level needs to be adjusted. Read the instructions carefully. The required float height is indicated there. The tongue is bent for adjustment. This adjustment is only necessary for precise adjustment.
- Idling. In this case, the carburetor operates when the throttle valve is closed. Idle speed is adjusted. To do this, you need to use the idle system jet and screws that regulate the quantity and quality of the mixture formed.
- Transitional mode. Here the throttle valve opens to a quarter. It is very important to choose the right jet and adjust the idle system.
- The throttle valve is partially open, up to seventy-five percent. Here you need to pay special attention to the gap that forms between the needle and the tunnel where the needle moves. The composition of the mixture depends on the diameter of the needle. To access this needle, on most motorcycles the carburetors will need to be removed.
- The throttle valve is fully open. The size of the fuel jet used is important here. The spark plug insulator, or rather its color, will help you find out whether you have adjusted the carburetors correctly or not. When properly adjusted, its color is dark brown.
This work is complex and small. But the reliable operation of your motorcycle engine is entirely dependent on this work. Constant practice and experience will lead you to success.
Synchronization of vacuum carburetors.
This article about synchronizing vacuum carburetors is also useful for motorcyclists who have a motorcycle with two or more cylinders. In the section “car tuning” and the article increasing engine power (read the article here), I described how a production car is given a new breath of “full breasts.” But during the operation of any vehicle with a multi-cylinder engine, engine parameters change over time. Compression changes differently in different cylinders, carbon deposits are deposited, tar deposits are deposited in the channels and jets, these channels and jets wear out, so do the needles, and everything is different. As a result, the work and power output in the engine cylinders are mismatched.
This means that all these motor parameters need to be restored periodically. This is why there is synchronization of the operation of carburetors, and therefore of the cylinders, which after this operation begin to produce the same thrust. Many workshops use a device called a vacuum gauge (or synchronizer) for this purpose.
It consists of four (depending on the number of cylinders) pressure gauges with a measurement limit of 0 to 1 kg per square centimeter (on some from 0 to 0.6 kg cm), united by a common frame for ease of operation. The device is on sale, at least in Moscow it is for sure, and costs about 3,000 rubles.
For those who cannot find it or for whom it is too expensive, you can assemble the device yourself by purchasing pressure gauges of the VP-2-U brand, with a measurement limit from zero to 1 kg per cm (I made a synchronizer for a two-cylinder engine from medical pressure gauges that used to measure pressure , see photo at the very bottom).
Only small adjustment taps will need to be installed in the hoses, which will help calm the needle, since it twitches strongly during operation and interferes with reading the readings. So, we connect the hoses from these devices to the fittings of the inlet channel adapters (throttle space).
You can buy the pressure gauges themselves, a little more expensive, but better - on the website arstools.ru (Arsenal Tool), their marking is TRISCO G-310 (V503), for 370 rubles (including hoses). The price will be two times cheaper than the factory synchronizer for 3,500 rubles, which is shown below in the photo on the left, but no worse.
All that remains is to install adjusting taps on the hoses (see photo) to calm the needle, and secure two or four pressure gauges (depending on the number of cylinders of your engine) on a board or plastic (using double-sided tape as in the photo on the left). There are screws on the carburetors that regulate the drive of the throttle valves and with these screws we achieve the same vacuum on all four pressure gauges.
After this, we adjust the throttle and if all four arrows return to the same position, then the order is correct; if not, then the adjustment needs to be repeated. In this case, the idle speed should be no more than 1000 rpm. min When we achieve this, we will get absolutely the same amount of gas-air mixture in the throttle space of each carburetor.
In some workshops, having completed this operation, the engine synchronization is considered complete. But as I already said, we achieved the same QUANTITY of fuel, but what about the QUALITY. Constantly change expensive, sooty spark plugs or ignore increased fuel consumption. I'm not even talking about harm to the environment. Few people pay attention to this, but I would like to. But the main trouble is that the engine does not fully deliver power, since strong enrichment dulls the engine just as much as depletion. In addition, these indicators are different in different cylinders, and this causes the engine to operate unevenly and vibrate.
Some cylinder shoots into the muffler from over-enrichment, and some shoots into the carburetor from over-leanness, the engine does not pull from the bottom. To eliminate all these troubles, the second stage of FULL synchronization is provided. It’s not for nothing that there are two screws on carburetors: one for quantity, and the other for quality. But for the second stage, that is, to adjust the quality of the mixture, you will need a device called a gas analyzer, which is common in services and technical inspections.
Naturally, the average car enthusiast does not have it, but almost every car service center offers a CO check service. We go there and adjust both the CO rate and the same amount of it in each cylinder. Only when setting up there is a small nuance. Usually we are used to taking an exhaust sample directly from the muffler, but if there is only one muffler, and there are four cylinders, and there are also four carbs, then the sensor must be connected to each pipe separately.
To do this, in the article “increasing engine power,” which we read here, I advised welding a threaded fitting and a plug to each exhaust pipe (next to the head). By the way, on any modern multi-cylinder imported motorcycle, these liners are welded to the exhaust pipes at the factory. We unscrew the plugs and connect the gas analyzer sensor to the exhaust pipe and use the quality screw to ensure the same CO reading in each pipe.
Naturally, if there are not one but four mufflers, then the sensor must be connected directly to each muffler and the fittings in the exhaust pipes are not needed. After all these correct settings, that is, complete synchronization of the carburetors, believe me, the engine will sing like a well-tuned musical instrument, good luck to everyone!
Synchronizer
What is a special device designed to synchronize carburetors on a motorcycle? Essentially, this is a block consisting of two or four vacuum gauges. There is no point in trying to assemble such a unit yourself, since these devices, as a rule, should be set to a vacuum that corresponds to the vacuum in the intake pipes when the engine is idling. In addition, these devices must be calibrated so that the readings are absolutely identical at the same vacuum.
By the way, branded units have special devices that reduce the oscillations of the needles when the air flow pulsates in the intake pipes. Yes, real professionals have learned to calibrate a 4-cylinder engine using 2 vacuum gauges. But an inexperienced self-taught mechanic should purchase a special 4-device synchronizer - this device has higher accuracy and will require much less time.
The device deserves special attention not with a scale and arrows, but with a liquid crystal display - this eliminates the need to monitor four arrows at the same time.
Carburetor synchronization for 1994 Honda CB400 (NC 31).
Over the weekend we got together to synchronize the carburetors on my brother’s Honda CB400 NC 31 motorcycle. In principle, his engine was already working perfectly, but he wanted to personally get into the carburetors to make sure that everything was fine and he wasn’t deceived during the purchase. Based on the results of synchronizing carburetors, I wanted to write an article “for dummies,” that is, for those who did this for the first time and don’t even know where to screw the synchronizer fittings. But it was a small bummer) The carbs on my brother’s motorcycle turned out to be perfectly synchronized, and our intervention was not required.
How to make a carburetor synchronizer with your own hands? Our option
Many motorcycle owners are interested in how to make a carburetor synchronizer with their own hands. Such a device is simply necessary in the garage of any motorcyclist, as well as owners of some carburetor cars. It can be used to configure multi-chamber carburetors. It is used to normalize the enrichment of the mixture, which allows the engine to operate as evenly as possible. Of course, you can purchase a ready-made assembly, but this is not a cheap pleasure.
Therefore, most craftsmen make the synchronizer themselves. Fortunately, it’s not difficult to do. This requires minimal skills in assembling various devices. As a result, you will get a good device for minimal money.
How to make a carburetor synchronizer with your own hands?
Before answering this question, you should first clarify when such an adaptation is necessary. Owners of vehicles with multiple carburetors know that idling is quite common. The reason usually lies in the inconsistency of the carburetors. A synchronizer is used for setup. It allows you to adjust the air supply to the cylinders as accurately as possible.
To assemble the synchronizer yourself, you will need to purchase some of its components. In general, such a device can cost from 1,500 to 3,000 rubles. But, in any case, it is still cheaper than purchasing a factory synchronizer. First of all, you will need vacuum gauges, the number of them should be equal to the number of carburetors. The simplest option would be to purchase medical IV systems. You will also need a hose to connect this entire facility.
Suitable for Zhiguli washers, the quantity depends on your unit. On average, 5 to 8 meters are required. The brake tube will be useful for making fittings. In general, this is enough. A vice, a metal file, and some other tools will also come in handy.
Making the device is half the battle. It should be used correctly. Many inexperienced mechanics make one mistake that prevents them from fully synchronizing carburetors. The fact is that tuning must be done at very specific speeds. They are indicated in the technical documentation for the carburetor or motorcycle. Motorists who have installed a multi-chamber carburetor need to find this information on the Internet. If the car has a battery of two carburetors, then you should focus on the idle speed accepted for the model.
To operate, you must connect the synchronizer to the carburetor. To do this, special holes are found, which are usually covered with rubber plugs. After connecting, start the engine and bring it to the required speed. They look at the readings of the vacuum gauges. If they differ, you should ensure that they match by turning the air supply adjustment screw. To check the correctness of the settings, you need to turn off the engine and, after restarting, look at the instrument readings; if necessary, repeat the adjustment.
Conclusion
. Synchronization services are quite expensive, and buying a special device will cost you no less. Therefore, the question of how to make a carburetor synchronizer with your own hands is quite relevant. It will cost you relatively inexpensively, and the ability to synchronize carburetors yourself will help you save a lot.
Preparing for synchronization
In order to synchronize several carburetors operating in the same fuel system, you will have to do some preparation. In particular, it is necessary to prepare the following tools:
- a device for synchronizing carburetors (otherwise called a synchronizer);
- rags;
- a set of wrenches and screwdrivers;
- gloves;
- tank substitute (a flask or other container for gasoline with a fuel line extending from it).
As a rule, finding the presented tools is not difficult for absolutely anyone.
The exception is the carburetor synchronizer, which many may have heard about for the first time. Such a device is not particularly outlandish or complex in design; it is only a collection of elements that synchronize the operation of several fuel distribution units.
Today, a carburetor synchronizer can be obtained in several ways:
- Buy in store. The device costs about 3-5 thousand rubles and is complemented by a set of fittings, allowing it to be used on carburetors of various types. Note that purchasing a device will pay for itself in 1-2 checks, if you compare its cost with the price of synchronization at a service station;
- Do it yourself. In this case, you will need to make some effort and also spend money, but 2-3 times less.
If everything is extremely simple with the purchase of a device, then questions may arise regarding its manufacture. In order to neutralize these, let's look at how to make a carburetor synchronizer with your own hands:
- First of all, you will have to purchase the following things:
- pressure gauge or vacuum gauge (their number should be equal to the number of carburetors that will have to be synchronized, often 4 pieces are required);
- fuel lines or, best of all, dropper systems (the quantity is selected in a similar way);
- block 40 by 15 cm.
- Next, you need to screw pressure measuring instruments to the bar, and then connect dropper systems or separate fuel lines to them through special fittings. At this point the synchronizer is ready.
After creating the device, it is enough to calibrate it. To do this, it is necessary to connect all hoses coming from pressure gauges or vacuum gauges to a source of rarefied air, and then check whether the readings on them agree. If not, then you will have to bend the arrow of the corresponding measuring device in the desired direction. Based on the results of these manipulations, you can proceed directly to synchronizing the carburetors on a motorcycle or other unit.
COMBUSTIBLE MIXTURES
For the combustion of gasoline in the cylinders of a motorcycle, it is necessary that the fuel meets air, the meeting point of gasoline and air is the carburetor, and a mixture of these substances is formed here. For normal combustion of air, the mixture changes its composition depending on the time of year, engine load and other factors. Even small errors can lead to deviations in carburetor operation.
negatively affect engine performance.
- A “rich” type of mixture is formed when there is not enough air entering the carburetor, but there is too much gasoline. If there is not enough air, gasoline does not have time to burn out in the cylinder, it burns out in the exhaust system, forming carbon deposits, which reduces engine power, leads to excessive fuel consumption, and overheats the cylinder.
Signs: motorcycle revs and speed decrease, spark plug is black or dark brown;
- “lean” mixtures are formed if there is too much air and not enough fuel. It is worth looking for the cause in a loose connection of carburetor parts, the presence of places for additional air intake, etc. Signs: overheating and reduction in engine power, excessive fuel consumption, popping noises in the carburetor at idle, a light brown spark plug.
In addition to these types, there are 2 more intermediate ones, in which the manifestations of symptoms are weaker than in the extremes - these are “enriched” and “depleted” mixtures. In these options the excess is insignificant.
How to adjust the carburetor?
To adjust a motorcycle carburetor , it is necessary to take into account a number of factors characterizing the terrain in which the lightweight vehicle is used: temperature, humidity, altitude, etc.
- Determine the deviation in the composition of the mixture using indirect evidence. Pay attention to the engine's performance, look at the color of the spark plugs, or do a test. Cover one-fourth of the carburetor pipe with the plate and drive at low speed. An intense decrease in revolutions and speed will mean that the mixture is “rich”, a slight deviation – “rich”, a significant increase in speed – “poor”, a slight deviation – “lean”.
- Adjust the ratio of air and gasoline, turn the screws at the bottom of the part so that the air supply is optimal, taking into account the terrain, external and internal factors.
- Proceed to adjusting the motorcycle carburetor needle at the top of the motorcycle. The position of the needle is responsible for the amount of gasoline in the combustible mixture. Usually it is set to 5, but you can change it lower or higher if necessary.
- Adjust the top. Open the float chamber where the valve is located. This valve contains a movable needle, which can be used to adjust the flow of gasoline.
Synchronizing vacuum gauge
The work of synchronizing both carbs comes down to establishing the same gap between the valves in idling mode. As a rule, this is done by setting equal vacuum in the intake valves of the internal combustion engine.
Carburetors on moto
As a rule, to independently carry out the modernization of this plan, you need a synchronizing vacuum gauge. Blocks of four (two) vacuum gauges connected to each other are also very popular today. Such a device is capable of synchronizing carburetors not only of cars, but also of motorcycles, boats, etc. The devices are connected into a compact monoblock, high-quality components are used: damping taps (reduce needle vibrations), fittings with seals, etc.
The operation of carburetors can be considered synchronous if the vacuum gauge in all intake valves of the power unit is proportionate. As mentioned above, you need to use a synchronizing vacuum gauge. In this case, you must use a separate device for each cylinder or use a monoblock with four outputs.
All vacuum gauges are equipped with mechanisms that eliminate needle vibrations. Vibrations can occur under the influence of atmospheric flows inside the valves. Modern modifications of devices equipped with LCD displays can also be used for timing. Also, instructions on how to make a carburetor synchronizer will not be superfluous.
Types of display and scale of standard vacuum gauges
Types of display and scale of standard vacuum gauges
Vacuum gauges have a display that allows the user to monitor the vacuum pressure in the system. Display types include:
- Analog. Analog meters are simple visual indicators using a dial.
- Digital counters. Digital meters are visual indicators with digital valves.
- Cathode ray tube (CRT). CLTs are commonly found in computer monitors.
- Liquid Crystal Display (LCD) - Liquid crystal displays are semiconductor light sources that use electrons that recombine with electron holes inside the device and release energy in the form of photons.
- Multi-Line Video Display - The video display allows the user to view and record live feeds of system pressure changes.
There are devices with a single scale that display pressure in only one set of units. Dual scale devices display pressure in two sets of units on a single dial surface.
Mixture quality synchronization
The above-described technique using a synchronizer allows you to achieve only a synchronized amount of mixture supplied to the carburetors. At most service stations or amateur “garage” workshops, the synchronization procedure is limited to this. What about quality? After all, a rich mixture can be fed into one carb, and a poor mixture into another. On one cylinder the spark plugs will constantly turn black and flood, on the other it will not be possible to achieve maximum power due to depletion.
For this purpose, there is a device called a gas analyzer. Full synchronization and perfect tuning of the motor operation with several pots will be possible only with it. But such a device can only be found at service stations. Ordinary car and motorcycle enthusiasts usually don’t have it. But once you feel how ideal the engine’s operation will be after full synchronization, you won’t settle for anything less!
procedure for synchronizing carburetors, synchronization is necessary, synchronization is possible
Februaryherereadoil repair
Exemplary vacuum gauges
The reference vacuum gauge is intended for carrying out verification tests of other vacuum gauges. Most often, the scale of this vacuum gauge has two zones - MO and VO.
Exemplary vacuum gauges
Main technical characteristics of the standard vacuum gauge:
- The measuring device is manufactured subject to mandatory compliance with technical specifications;
- The unit of measurement is taken to be a conventional value;
- The accuracy class ranges from 0.4 to 250 conventional units;
- The operating temperature range is from 5 to 40 degrees;
- At an average working environment temperature of +25 degrees, relative humidity does not exceed 80%;
- The weight of the device directly depends on the accuracy class. With an accuracy class of 0.4 conventional units, the mass of the device is 1.8 kilograms;
- At the customer's request, it is possible to manufacture a vacuum gauge for use in any climate zone.
Tools
To set up several carburetors operating in the same fuel system, certain preparatory work will be required. To carry out the manipulation you will need the following devices:
- Direct carburetor synchronizer.
- Set of screwdrivers and wrenches.
- Rags.
- Gloves.
- A fuel container equipped with a fuel outlet.
This simple set is available to every user. Then you can begin the main work.
