Restoring a plastic car bumper that has split into several parts, with missing fragments or broken fasteners is best left to professionals. Do-it-yourself bumper soldering repair makes sense for small cracks, chipped area up to 10 cm², provided that most of the pieces were collected. Before you solder the bumper on your car yourself, you need to find out what is it made of, select the appropriate tool and solder. In this article we will describe in detail how to solder a plastic bumper in different ways, depending on the material and the degree of damage.
How can you solder a bumper on a car?
To properly solder a bumper with your own hands, first of all you need to find out what it is made of . Markings on the inside of the part will help with this. Depending on the material, the optimal repair technology and type of solder are selected. The latter should match the composition of the part as much as possible.
You can solder a plastic bumper with your own hands, using ready-made filler rods for different types of plastic or “donor” material from pieces of another bumper, fragments of lockers (for polypropylene bumpers), etc. Using fiberglass and epoxy or polyester resin, you can seal most types of plastic.
When using incompatible materials, the defect may worsen, for example, if the melting temperature of the repair plastic exceeds the melting temperature of the bumper material!
This table will help you determine the material and select solder for bumper repair based on the markings:
| Bumper markings | Bumper material | What is the best way to solder? | Soldering Features |
| PAG6, GF15, GF30 and ABS | Hard plastics (acrylic nitrile styrene, polyamide, etc.) | A hot air gun, a torch or a powerful soldering iron that provides heating of 500 ℃. Gluing with composite material is possible. | Hard plastics have a high melting point and must cool naturally. |
| PP or PPTV | Polypropylene | An ordinary 80 W soldering iron, a hair dryer with a nozzle. | Polypropylene can be soldered well even without the use of reinforcing material (if there are no holes), and it is important to observe the temperature regime. |
| PVC | Polyvinyl chloride | A PVC bumper can be soldered with a rod, but the seam needs to be reinforced due to the not very high strength of the connection. | |
| PUR | Polyurethane | Hot air gun or soldering iron with precise temperature control, hot stapler. | When repairing a polyurethane bumper, it is important to prevent the part from overheating. Polypropylene is difficult to weld and solder, so the seam must be properly reinforced. |
| No markings | Fiberglass (fiberglass and polymer resin) | Fiberglass and resin | Fiberglass parts are glued together using glass fabric impregnated with polyester or epoxy resin, applied in several layers. |
How not to repair a cracked buffer
Not all technologies for resuscitating plastic guarantee high-quality and long-term results. We are talking about a widespread restoration technique using soldering and reinforced mesh and no less well-known technology based on epoxy resin and fiberglass. Even if we follow all the basics of videos surfing the web, we have a sad picture.
Do not solder on brass mesh
So, a buffer with a mesh sealed even on both sides lasts for at most two years. And this is provided that the driving style is within the limits of extreme accuracy and nothing stronger than the jet of a high-pressure washer will act on the repaired plastic part. And if these rules are neglected, you will have to tighten the cracked parts even earlier.
There are several explanations for this:
- The restored area has high rigidity, which is why small vibrations from overcoming potholes and holes gradually destroy the sealed joint.
- Excessive heat changes the structure of the plastic, making it more brittle.
- The fragile and hard plastic element does not withstand cold weather conditions.
- The metal mesh begins to deform over time.
Don't use fiberglass
Excessive rigidity of the repaired site is an unacceptable fact. Therefore, after improper soldering, a tandem of epoxy and fiberglass follows. The method seems to be good, but not for these purposes.
Epoxy resin and fiberglass fabric are great for creating a part from scratch. In case of repair, the effect leaves much to be desired: the crack appears again after a noticeable temperature difference.
Tips and life hacks for soldering a bumper
The tips below will help you properly repair a crack or hole in the bumper. Thanks to them, you can achieve high seam strength and durability.
- When choosing how to solder a bumper on a car with your own hands, consider the melting point of the material.
The lower it is, the more accurate the adjustment of the heating of the tool must be so as not to damage the part. For example, ABS can be soldered with almost any hair dryer, and polyurethane can only be soldered with a stable temperature of about 200 degrees. To prevent overheating, it is better to first set the temperature below the operating temperature, and then increase it gradually. Reinforcing a bumper crack with copper wire - As a reinforcing material, use mesh or brackets made of corrosion-resistant metal. The best option is stainless steel, copper or brass.
- Cracks with smooth edges that close tightly and do not reach the edge of the part can be soldered without an additive. The melted plastic will give a fairly strong seam.
- To repair polypropylene bumpers, you can use homemade filler tapes, cut from lockers (fender liners) using metal scissors. For other materials, fragments of similar bumpers that can be found at auto dismantling yards are suitable.
- If you want to do without dismantling the part, you need to carefully remove the chamfers on the crack, since it will not be possible to solder the bumper without removing it. This option is suitable for polypropylene bumpers, which are easily soldered without reinforcement.
- Focus on strength rather than beauty, and leave a raised area in the seam area, since it is possible to solder a bumper without painting only if it is originally unpainted polypropylene or polyurethane. Other materials will still have to be puttied and painted after repair, after leveling the surface.
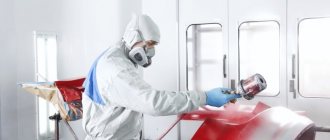
When painting the bumper yourself after soldering, be sure to consider the type of plastic and use the appropriate primer. If the technology is not followed, the bumper will quickly peel off. It is best to give the bumper to professionals for painting, since without a spray-drying chamber and a spray gun, high-quality painting of the part is impossible.
In conclusion
Almost any car enthusiast can repair a bumper using glue at home, without causing damage to the family budget. In terms of reliability, a sealed part will not be inferior to a sealed one.
There are many options available on the market and everyone can choose the right adhesive composition.
We recommend watching another method for repairing bumpers in this video:
A car bumper is not only a decorative element, it performs an important practical function. This part is used to protect the body from damage in minor accidents. It is the bumper that is the first to suffer in case of unsuccessful parking, hitting a high curb, or in a number of accidents. If a crack occurs, you can find out how to seal the bumper and carry out the repair yourself.
Content:
Answers to frequently asked questions
How to solder the fastening (ear) of a plastic bumper?
In order to reliably solder the bumper fasteners without loss of strength, the repair site must be reinforced with reinforcement. You can use wire mesh, hot staples, or regular construction staples for this.
How to solder a large crack on a car bumper?
A large crack must be sealed, ensuring that its edges are tightened and reinforced. Large holes and breaks can be repaired using composite material (fiberglass or fabric + polyester resin).
Is it possible to solder a bumper with a metal rod?
It only makes sense to use a non-melting metal rod as a heating element. You should not solder plastic parts with metal solder.
Preparatory activities
Before you glue the plastic bumper, you will need:
- Remove the cracked body element from the car.
- In the body kit that has burst, you will have to drill holes at the ends of the crack. This will prevent further damage to the part.
- Wash and dry the body kit thoroughly. Degrease the working surface of the bumper.
- Using sandpaper, remove the paint in an area from 3 to 5 cm from the edges of the crack. Apply a layer of soil to the damaged area.
- The places where the connection of the restored body element will pass must be carefully sanded. If you have a milling machine, then grooves in the form of a Latin letter V are made on the edges of the crack, which makes the gluing more reliable.
- If the body kit is cracked in many places, without removing it, you will need to fasten all the elements together (using a construction gun), and only then dismantle the element.
Recommendations for preparation
The preparatory process differs little for different methods of gluing and welding polymer parts, so it is worth considering separately. The first question is whether it is necessary to remove the bumper to make repairs. In most cases, dismantling is not possible, since the plastic must be sealed on both sides. The exception is broken body kits, cracked in many places. They must first be fastened together and then removed. Otherwise, after repair, the part may lose its shape, causing the attachment points to not meet, and the gaps with adjacent elements will increase.
The body kit cannot be removed in this state, it must first be secured
Reference. Often the bumper body comes off at the attachment points and small pieces of plastic remain on the screws. Before dismantling, such a part is securely welded to the torn fastener and only then removed.
To prepare a damaged body kit for repair, you need the following tools and materials:
- a set of keys and screwdrivers for removing the element;
- electric grinder;
- sandpaper of different grain sizes - from P180 to P320;
- degreasing liquid - organic solvent or white spirit;
- rags.
Sanding with a grinder speeds up the work significantly.
Note. Using a grinding machine, you can perform cleaning better and much faster than by hand. This and other power tools that will be needed for painting and polishing can be rented for 2-3 days.
Regardless of whether the work is carried out directly on the car or with the bumper removed, it must be thoroughly washed and dried. Then, using coarse sandpaper, you need to peel off the paint at a distance of 3-5 cm from the crack in each direction and sand the area with fine sandpaper. Whatever repair method you choose, the paint must be removed to the base, otherwise it will interfere with the adhesion of the glue or the fusion of polymers during welding. Finally, the area should be degreased.
The surface must be degreased after each cleaning.
Advice. The quality of body kit repair depends on the conditions in which it is performed. It is more convenient to repair damage in a garage equipped with an inspection ditch for easy removal of the part and soldering of the fallen fasteners in place.
12th position - Teroson PU 9225 two-component polyurethane adhesive for plastic repair
Adhesive for a plastic car bumper based on polyurethane is recommended to be used for joining areas larger than 7 cm. To obtain a stable seam, the surfaces should first be treated with Terokal-150 primer. The joint hardens under infrared radiation at 60 °C or when heated. The dried gluing area can be painted with any type of car enamels and varnishes.
Teroson PU 9225 two-component polyurethane adhesive for plastic repair
| Specifications | |
| Compound | No data |
| Color | Black + yellow (the resulting mixture is gray) |
| Processing temperature | From +15 to +25 degrees |
| Safe temperature for connection | From -40 to +80 degrees |
| Connection strength | 13 MPa |
| First setting time | 15 minutes |
| Hardening period | 15 minutes |
| Time until complete polymerization | 5 hours |
| Manufacturer | Germany |
Two-component bonding
To implement this method, you need to purchase the following bumper repair kit from the 3M brand:
- 2 FPRM components for preparing liquid polymer in 150 ml tubes (price - about 2500 rubles);
- special hard tape;
- self-adhesive reinforcing mesh made of fiberglass (otherwise known as fiberglass) 48 mm wide;
- adhesion initiator in an aerosol can;
- 2 spatulas - wide and narrow;
- stationery knife;
- gloves, safety glasses.
Two-component 3M compound for gluing plastics
Reference. Similar sets are offered by other manufacturers, but the 3M brand is the most well-known and proven in practice.
Set for gluing with liquid polymer
Bonding with liquid polymer is suitable for most plastics and can be performed both with the body kit removed and on the car. True, the second option is quite inconvenient, plus you will need good lighting in the inspection hole. To cut a crack, you will need an electric drill (not a grinder!) with a mandrel for abrasive wheels. Repair consists of the following technological operations:
- Using a drill at low speed and an abrasive wheel, chamfer the edges of the crack on both sides at an angle of about 30°. In cross section it looks something like this: “> <”.
- Degrease the area and allow time for the solvent to evaporate completely. On the front side of the bumper, where the paint has already been cleaned off at the preparatory stage, stick tape along the entire crack. It will serve as a kind of formwork when pouring a two-component solution.
- Treat the damaged area on the back side of the body kit with an adhesion initiator from a bottle, then apply a self-adhesive glass canvas over the split.
- Mix the components from the tubes in a 1:1 ratio using a spatula. Apply the liquid polymer to the mesh in several thin layers to prevent air pockets from forming. Apply the mixture until it completely covers the glass fiber.
- After laying the compound, give it 30 minutes to cure, then remove the tape from the front side and repeat the sealing operation (but without the mesh).
- After hardening, sand the area using alternately P180, P240 and P400 sandpaper. At this point, the plastic repair is complete and you can begin painting.
Uneven surfaces must be filled with putty before painting.
Important! After mixing the components, the composition must be used within 6 minutes, which is enough to apply to the damage on one side. The curing time of 30 minutes is correct for a room temperature of 21-23°C, so when working in a cold room, it is necessary to organize local heating of the bumper (for example, with an infrared heater).
The penultimate operation is painting, after which polishing is done
If unevenness is noticeable on the front side of the element, then before painting, apply a little putty intended for plastic to the differences. After drying, sand it with P1500 sandpaper, degrease it and spray paint it, after applying a layer of primer. After 1 day, polish the surface of the body kit.
Sealing with liquid polymer - photo
After cutting, manual cleaning of the crack is required. The inside of the body kit must also be sanded. Cutting the edges of the crack at an angle. Adhesive tape is glued to the front side. Glass canvas is glued to the inside. From the end you can see how the tape limits the flow of the composition outward when applying 2 components are squeezed out onto a spatula in the same amount. Mixing the components with a spatula. The composition is rubbed into the crack and the mesh with a spatula. After hardening and removing the tape, the sealed joint is cleaned. This is what a sealed crack in plastic looks like