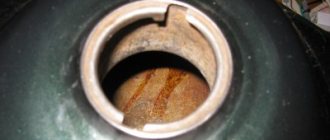
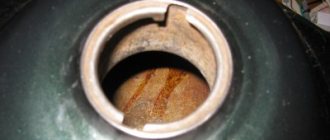
Continuing the topic of winter repairs and the fight against corrosion, I would like to remember about rust in the gas tank. This problem occurs among owners of older motorcycles. Few people are immune to corrosion. It always pops up in unexpected places and at inopportune times. Rust forms after damage to the anti-corrosion coating or after constant driving with gasoline at the bottom.
So, what should you do if you find rust in your tank?
“Motorcycle fuel system. How it works?"
Prepare the tank and work area
Since gasoline is not the healthiest liquid for humans and its vapor is also not a fresh southern wind, be sure to prepare the place of work. You need very good ventilation or even open air. The fumes from the acids that will be worked with further are similarly harmful to humans. I advise you to also think about a respirator.
The gasoline is drained from the tank and the remainder is allowed to drain. The tank is removed. Examine it from the inside with a thin flashlight to understand the scale of the disaster. This is important to know in which places the liquids should come into contact with the rust longer. The tank may have to be turned at a certain angle and left there for a while. Remember where the corrosion is most, these are the places you need to work on.
You will need thick rubber gloves to protect your hands. Acids should not come into contact with the skin, much less the eyes. Be careful.
Instructions for protecting the gas tank from corrosion
- We remove the remaining gasoline and remove the tank.
- Remove the cap and other parts from the tank.
- We blow out the inside of the tank with compressed air to remove all debris and gasoline vapors. Then we seal the outer surface. Well seal all the holes except the filler neck.
- We rinse the tank with solvent. Leave to dry.
- Preparing epoxy resin. Pour the resulting mixture into the gas tank and cover the inner surface with rotational movements. The duration of the procedure is 2-3 minutes, after which the remaining resin is poured out of the tank. Leave the tank for 2 hours to dry completely. The drying period can be a day.
- After the resin has dried, the tank is assembled. All components must be installed very carefully so as not to confuse anything.
Mechanical method for advanced cases
This method is called “grandfathered” because it is as ancient as our dreams. If corrosion has tightly gripped your gas tank, then before filling it with chemicals, you need to disturb the thick layer of rust. To do this, sand is poured into the tank. I don’t presume to recommend throwing bolts or nuts in there, simply because we don’t need damage to the “healthy” walls and scratches on them. Sand will make the work more gentle. For the sandblasting effect there is not enough pressure, but instead you will have to work with your hands - shake the tank thoroughly.
There is a recommendation to fight off rust using water pressure from a Karcher, but I will not recommend such an extravagant method. I don’t really believe that you can clearly clean everything off a Karcher, except maybe break off large pieces, and then not everywhere. The problem with cleaning a gas tank is that it is a confined space with a narrow opening, which means that not all cavities can be cleaned with equal success.
DIY tips for repairing a motorcycle gas tank
- In order not to lose the bolts and nuts, they should be screwed into place after dismantling the tank.
- To make it easier to work with the resin, it needs to be heated. It is advisable to warm up the gas tank to 35°C. After warming up, the coating of the surface will be easier and the resin will better eliminate marking errors.
If the tank has received mechanical damage due to an accident or fall, it should be taken into the hands of professionals. Often the driver cannot fix such breakdowns on his own.
This may require not only leveling the surface, but also welding.
Reagents
The modern market offers many options for rust converters. All you need to do is take a special solution and just follow the instructions. But if this is not for you, then you can turn to pure acids. Phosphoric acid is often used in rust converters. The same acid that is responsible for so many stories about washing off minor rust with soda. Therefore, users buy it in its pure form, dilute it with water and wash away the corrosion.
In addition to phosphoric acid, acetone, citric acid, phosphoric acid, formic acid and vinegar are used. The second most common after phosphoric acid is acetone.
Before pouring into the tank, acids must be prepared - diluted with water in accordance with the technical specifications. The higher the acid concentration, the greater the risk of damaging “healthy” walls or that acids will “eat up” excess in place of rust.
If we talk about vinegar, then it is left in the tank for a long period of time, 10-12 hours. The tank is turned over and shaken periodically.
Other aggressive substances such as acetone or phosphoric acid are poured out after prolonged shaking and a period of inactivity of a couple of hours. A corrosion inhibitor called “Katapin” can be added to orthophosphoric acid. It is a technical mixture of alkylbenzylpyridinium chlorides or polybenzylpyridinium chlorides. There are other inhibitors, it’s a question of being able to buy all the components and mix them correctly to the volume of the tank.
After draining the acids, their residues must be neutralized, since the effect of the substances still continues. Most often, it is enough to dilute soda with water and rinse the tank with this solution. Then they rinse again with running water to make sure nothing remains. Next, the tank is left to dry. It is allowed to rinse with an additional couple of liters of gasoline.
There are other sophisticated methods for cleaning rust from a motorcycle tank, which we all inherited from past generations, but they require a lot of time and nerves. Now, with the demand for technical fluids, finding the right acid or rust converter is not so difficult.
Motorcycle tank repair
A motorcycle tank is often a troublesome and expensive item. Buying a tank for a motorcycle is often much more difficult, longer and more expensive than repairing it!
The service team has accumulated a wealth of experience in correcting dents on motorcycle tanks. We guarantee the quality of work performed. At your request, made during the delivery of the tank for service, we are ready to prepare photo reports on the progress of the work. You will laugh, but sometimes it got to the point of sadness when conflict situations arose with motorcyclists from the series: “Did you really straighten the dent or did you just throw putty on and paint it?”
We provide a full range of repair and restoration services for motorcycle fuel tanks. With us you can:
- straighten out the dent
- brew, seal
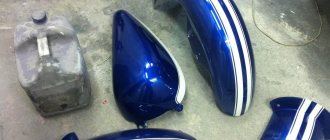
- painting a motorcycle tank
- wash the motorcycle gas tank (remove rust, cover with a new anti-corrosion layer)
- order the production of a tank for a motorcycle.
The price for straightening work can vary from 4 to 10 thousand rubles, depending on the complexity of the work.
The price for painting a tank is 5-8 thousand rubles, taking into account materials and paint selection.
We will be happy to answer by phone and mail
For an approximate estimate of repair work on a motorcycle fuel tank, you can send a request with photographs of the damage by email
In reality, the work of a motorcycle gas tank repairman is similar to that of a glass blower, and we will try to reveal this statement. Let's talk a little about the types of damage and dents on gas tanks, as well as the types of repairs and tools used in motorcycle workshop practice:
1) Slammers
This is one of the most common types of damage to motorcycle gas tanks, which is typical for Japanese and Chinese motorcycles (as the thickness of the metal is relatively small). This damage occurs when there is a sharp pressure or a soft blow. These damages can be corrected by simply blowing the flapper or pulling it out using suction cups. These methods of repairing motorcycle gas tanks allow you to straighten a dent without damaging the external paintwork and internal anti-corrosion coating
2) Dents resulting from a motorcycle fall or a hard impact.
These dents, if it is possible to get to the tank from the inside, are straightened by traditional straightening with hammers, as well as by pulling with reverse hammers (spotted method). This method leads to damage to the paintwork and internal anti-corrosion layer.
3) Slippers
These are relatively simple damage associated with contact of the tank, usually with asphalt. Several methods are used here - removing the external geometry with putty or tin
4) Cracks, damage to stiffeners, torn metal
These are the most difficult cases. They require the use of all of the above methods when repairing motorcycle gas tanks. Also, in case of torn metal damage, tin soldering is used. The stiffeners are not always stretched. In many cases it is necessary to restore the external geometry by soldering tin. When soldering, in order to avoid problems with the further application of paint and varnish coating of the motor tank, it is very important to use not standard soldering acid, but a neutral PH flux.
In our work, we have improved the spotter method. We try to avoid the use of welding to attach dent puller hooks, using a special heat-resistant compound to glue the suction cups. This avoids many problems that may arise:
- burning a hole in the motorcycle tank when welding reverse hammer hooks
- burning and damage to the internal coating of the motorcycle gas tank, which prevents rust from appearing inside the tanks
We talked about restoring the geometry of the tanks. After carrying out these activities, motorized tanks are prepared for painting using standard methods and transferred to the paint shop.
Below you can see examples of work:
Yamaha FZ tank
tank Victory Hamer S
Garage → We fix the dent on the tank ourselves.
Below the cut I post a description of the method with a photo report of the work done. The author is not me, but Ivan Potapov, I just combed the report and posted it (he doesn’t mind). You can send him an invite to BP
