Painting a motorcycle with your own hands is quite an interesting thing, but no less labor-intensive. There are a huge number of reasons to paint your bike, from the banal removal of rust or the consequences of falls, to changing the image or color of the equipment. We have prepared a description of “how to paint a motorcycle?”, which will help you navigate the process and make your work easier.
INSTALLING AUX. EQUIPMENT
| Name of works | Price, rub | Note |
| Xenon installation | from 1000 | |
| Alarm installation | from 1500 | |
| Installing a case with fastening | from 800 | |
| Slider installation | from 500 | |
| Installation of classic, chopper bars | from 800 | |
| Windshield Installation | from 500 | |
| Muffler replacement | from 500 |
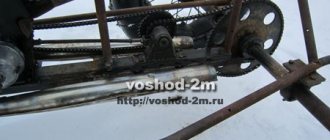
Painting a motorcycle engine. Own experience
Like any other matter, painting motorcycle internal combustion engines has its own nuances. Since modesty is practically the hallmark of our workshop, we will not claim that we are experts in this matter, but we have accumulated some experience (including mistakes, alas!) and it would be a shame not to share it.
Having carefully studied the issue, we came to the conclusion that in order not to disturb the cooling conditions of the internal combustion engine, the painting should be two-component: we paint the crankcase with powder enamel, the cylinder and cylinder head with heat-resistant silicone enamel (layer 15-45 microns).
The process of painting any part is inseparable from the surface preparation process, and this very preparation often takes much more time and effort than directly applying the enamel. The purpose of preparation is to ensure proper roughness and cleanliness from various contaminants. For a motorcycle internal combustion engine with a complex shape of surfaces, a bunch of seats and channels, of the many possible options, only sandblasting remains optimal and affordable (we do not take space technologies into account).
But here, too, there are specifics; the sandblasted internal combustion engine will also have to be prepared, in turn, because it is quite clear that corundum sand under a pressure of 8 - 12 atm, if it gets into the “wrong place”, is quite capable of causing irreparable damage to the engine.
For these reasons, when preparing an internal combustion engine for painting and sandblasting, it is necessary to simultaneously solve a whole range of problems:
- Prevent (minimize) the entry of corundum into the internal combustion engine.
- Separate the mating surfaces of the crankcase with gaskets so that when separating the crankcase halves (and dismantling the side covers), paint chips do not form.
- Protect bearing seats and threads from both sandblasting and powder coating.
- Minimize labor costs to eliminate the consequences of preparation for sandblasting during subsequent assembly of the internal combustion engine.
How we did this is presented in the photo gallery below using the example of an air-cooled internal combustion engine of the Suzuki Savage LS650. If anyone has constructive comments and suggestions for optimizing this work, we will be glad to receive your comments.
Similar articles
depoanalgin.com
SUSPENSION
| Name of works | Price, rub | Note |
| Fork bulkhead, with replacement of oil seals. (reversal) | from 3000 | including dismantling and installation |
| Fork bulkhead, with replacement of oil seals. (telescope) | from 2500 | including dismantling and installation |
| Replacing steering column bearings on a classic | from 3000 | check the price with a mechanic |
| Replacing steering column bearings on a sportbike | from 2500 | check the price with a mechanic |
| Replacing rear shock absorbers | from 800 | |
| Replacing the monoshock absorber | from 1000 | |
| Replacing front wheel bearings with wheel removal | from 1000 | |
| Replacing rear wheel bearings with wheel removal | from 1500 | |
| Editing disks | — | check the price with a mechanic |
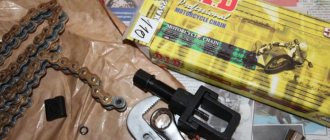
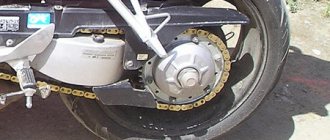
| Replacing chain and sprockets | 2500 | |
| Chain lubrication | 200 | |
| Changing the oil in the gearbox | 300 | |
| Chain tightening | 200 | |
| Removing and installing wheels | 500 | |
| Cleaning and Lubricating the Chain | 800 | |
| Replacing swingarm bearings | from 2000 |
ENGINE
| Name of works | Price, rub | Note |
| Removing and Installing the Engine from the Frame | from 5000 | |
| Engine overhaul with removal and installation | from 20000 | |
| Gearbox repair with partial engine disassembly | from 10000 | |
| Block head bulkhead | from 5000 | |
| Valve adjustment of in-line 4-cylinder engines | from 3000 | |
| Adjusting valves on single-cylinder engines | from 1000 | |
| Clutch replacement | from 2500 | |
| Cleaning and synchronizing carburetors | 4000 | |
| Changing the oil with oil filter | from 500 | |
| Replacing the air filter | from 300 | |
| Replacing antifreeze | from 500 | |
| Compression measurement | from 500 | |
| Replacing spark plugs | from 200 | |
| Replacing clutch fluid | 400 | |
| Replacing throttle cables | from 500 | |
| Replacing the clutch cable | from 300 | |
| Replacing the speedometer cable | from 200 | |
| Clutch master cylinder overhaul | from 500 |
Preparing the tank for painting
Owners of modern motorcycles often want to change the appearance of their equipment, so they turn to painting specialists. You can find good craftsmen to perform tasks of any complexity in Pm-moto.
Painting a motorcycle tank in Moscow involves careful selection of the color and type of paint itself. Thanks to this approach, our specialists will not only effectively paint the tank of your bike, but also ensure its protection from the harmful influences of the external environment.
The benefits of service in our motorcycle service include:
- thorough preparatory work, which guarantees that painting the motorcycle tank with sandblasting will provide the desired result;
- use of the highest quality paints and varnishes from leading manufacturers;
- carrying out coloristics using a computer program that ensures an exact match of shades;
- application of airbrushing, which is performed by professional artists according to individual sketches;
- variability of the materials used: painting the motorcycle gas tank and its other parts can be done with various paints, including chameleon-effect, transparent or luminescent paints;
- repairing a motorcycle tank, eliminating dents, damage, and corrosion.
After all work, the tank must be checked for leaks and a protective coating is applied to its internal surfaces.
The motorcycle tank is painted using the best materials from well-known manufacturers. We have a wide range of high-quality paints and enamels in our warehouse, so customers always have plenty to choose from in a suitable color and shade.
We have an excellent reputation, which once again proves that the best bike maintenance and impeccable motorcycle tank painting in Moscow is carried out at Pm-moto. To make an appointment to paint a motorcycle, call our managers or do it using a special online form, indicating the desired time to visit the motorcycle service center.
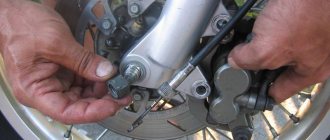
BRAKES
| Name of works | Price, rub | Note |
| Bleeding one circuit of the brake system (one caliper) | 400 | with our liquid |
| Replacing the pads of one caliper | from 150 | |
| Installation of reinforced hoses (front, rear) | from 1200 | |
| Caliper repair | from 800 | |
| Re-assembly of working brake cylinders | from 400 | |
| Replacing brake discs | from 800 |
Tool
We've sorted out the paint, now we need to buy a set of everything we need. We will need:
- degreaser (white spirit);
- removing old paint;
- sandpaper;
- paint thinner;
- putty;
- masking tape;
- air compressor with a spray gun and a set of sprayers.
The last point can cost as much as the entire painting, so you can rent the device.
When do you need to paint your motorcycle?
There are many reasons why you need to start painting work. Main list:
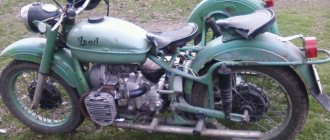
- removing traces of rust;
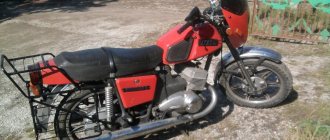
- buying an old bike and then transforming it;
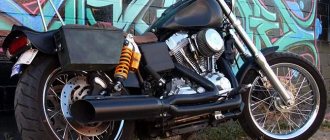
- elimination of scratches, dents, signs of falls;
- change of image, color of equipment.
Regardless of the circumstances, painting a motorcycle with your own hands is a responsible undertaking. Only targeted and step-by-step manipulations will allow you to achieve a good result.
Rust is one of the reasons for repainting
Some scratches can be painted over
Preparation
When all the materials are in hand, you can begin the preparatory work. It is worth noting that they take up most of the time, but further success will depend on preparation. How to paint a motorcycle at home? — First of all, we prepare the work site. It is best to carry out a thorough cleaning in advance - vacuum the floor, stick a film under the ceiling to get rid of falling dirt. You can spill a little water on the floor to prevent dust from rising.
- We determine the scope of work, if we repaint a part, then remove it from the motorcycle, if we tint an area, then separate it with masking tape and move on to the next steps.
- We wash the part from dirt and oil.
- We straighten the surface and, if necessary, carry out welding work.
- We remove the paint layer using sandpaper, a special attachment on a power tool, or a chemical remover.
- We degrease the cleaned surface and begin mixing the soil.
- Apply 3-4 layers of primer.
- Dry the part for 2-3 days at normal temperature or at 100 degrees (until dry).
- Apply putty to the primed surface (if necessary), trying to keep the layer as thin as possible.
- We level the putty areas with 600 sandpaper, and the entire part with 1000 sandpaper.
Color selection
Painting a motorcycle in one color or another reflects the character and preferences of its owner. Many fans of fast driving like to experiment, combine shades, and radically change color. However, if you wanted to repaint the motorcycle, for example, from red to black, then this must be recorded in the traffic police. Common shades: red, blue, black. Usually the frame is painted one color, the tank and protective elements in another, and small parts in a third. But it is possible to apply a single color preference. Professionals do not recommend using paint with a metallic effect. The recommendation is due to its high cost, difficulties of application at home and errors that will be clearly visible on the surface as a result of painting.
Please note: Paint the bumper from a spray can with high quality yourself
Coloring
The process of painting a motorcycle begins with mixing the paint. First you need to strain it several times, and then, if necessary, dilute it with a solvent.
We charge the spray gun, adjust the spray spot, and apply the first layer at a distance of 25–35 cm. It must be thin and is considered a developing film. After applying it, we look at the part to detect defects from previous work and eliminate them in time.
Working with a spray gun is a real skill. First of all, you should carefully adjust the remote control so that the applied layer is within the range of 80 - 120 microns. It should be held at right angles to the surface, with deviations of no more than 10 degrees. The paint is applied in strips, with an overlap of 4-6 cm. In this case, the hand moves at a speed of about 40 cm/s.
We are waiting for the paint to dry. Lightly sand the first layer and apply the second. Again, wait for the layer to dry, lightly sand it and apply the final third layer. This completes the painting of the motorcycle with your own hands.
SEASON PREPARATION WORK
| Name of works | Price, rub | Note |
| Maintenance complex (replacement of spark plugs, change of oil and oil filter, replacement of air filter, replacement of all pads and bleeding of the brake system, replacement of coolant) | ||
| Maintenance complex (Cleaning, adjusting and synchronizing carburetors, replacing spark plugs, replacing oil and oil filter, replacing the air filter, replacing all pads and bleeding the brake system, replacing coolant) |