Yamaha Drag Star 400 carburetor repair
Then, with the tip of a knife, we push out the float axis and remove it from the chamber - after it, the needle may fall out of the saddle, so we don’t do anything on the knee - just a table, and as clean as possible.
The next step is to unscrew the fixing screw that presses the saddle with its head, and carefully remove the saddle itself with your fingers.
A visual inspection showed the presence of darkened bronze (or brass - whatever they are made of), but no particular crime was found in the work area. However, the sealing rubber has already become quite hardened. Well, this is all lyrics - there are new valves! We put the old ones aside and take out the new ones from the bags.
I was somehow slightly confused by the fact that usually the needles are shiny and coated like a cat’s eggs, but here they have a normal surface after casting without any traces of finishing.
Well, I think God bless him - it’s no big deal. Before reassembling, I thoroughly wash everything I can reach with a carburetor cleaner in a can. I push the valves into the places intended for them, collect the carbs, throw them back into the frame, connect the gas line, turn the key in the lock and watch a cheerful trickle of gasoline from the drain pipe. After scratching behind my ear, I remove the carbs again and begin to think carefully about what the plug is all about. There are not so many parts responsible for overflow - valve seat, needle, float. So, in general there is not much to diagnose. First of all, having decided that the valves were new, that means everything was okay with them (yes, of course), I decided to check the floats - maybe they don’t float? Why did he throw them into a bath of gasoline, where they quite happily floated with their metal rods down. OK. It's not about the floats. And on the street, meanwhile, a real horror was happening with thunder and lightning.
The second thought was that, perhaps, it does not close completely due to the fact that the fuel level in the chamber has changed with the new valves. Okay, so we need to check this point. But it’s already late - we postpone it until the next evening.
The working day flew by waiting for the opportunity to continue the repair and thinking about what else to check if the last thought about the fuel level did not work. To check the level, 2 ballpoint pens with transparent bodies were purchased, and a washer tube was found in the garage, which was pulled quite well onto the fittings intended for this in the covers of the float chambers. (Sorry for the washed-out photo - poor lighting, trembling hands..)
So, Monday evening - let's get down to experimenting. We cut up a home-made stray to monitor the level, supply gasoline and see what is overflowing - okay. We disassemble, remove the floats and, following the letter of the manual, carefully bend the thrust tab, reassemble - it still flows. The whole evening goes by in such experiments, once I even bent to the point that it seemed as if the float was resting against the lid. Somewhere in the middle of the experiments, the housings from the handles broke and I had to replace them with the same washer tubes. (Sorry for the washed-out photo - bad lighting, trembling hands..)
And in the end I decided to check the carburetors one at a time: first, we remove the cover from the front carb, press the valve with our finger and supply gasoline, watching the level in the rear carburetor - everything is ok - it doesn’t overflow. Wonderful! The rear carb fills and seals normally. Now it’s the front one’s turn - we close the lid, supply gasoline - it’s overflowing, damn it, and it seemed that it began to overflow at the same time, but, most likely, it simply began to overflow through the drain from the front carb to the rear. Well, time is up - we should rest - we’ll put it off until Wednesday. By Wednesday I had already figured out the scope of work:
- Check the floats one more time: insert the axle into the float and lower it into gasoline, emulating the filling of the chamber.
- polish both the saddles and the needles, otherwise the thought of the shitty movement of the needles in the saddles still haunted me.
- Somehow check to see if the floats are catching on the covers.
And here I am again in the garage with my disassembled two-wheeled friend.
We proceed strictly in the order indicated above. Checking the floats showed that everything is fine with them - they spin easily on the axis, and when lowered into gasoline, they float up without even being half submerged. Check passed. The next point is to put the valves in order. We pick up a microdrill with a polishing felt attachment and polishing paste for metals and get started. After a couple of minutes (well, not counting the 40 minutes spent searching for a needle dropped on the floor), both valves were completely polished, thoroughly washed in gasoline to remove any paste residue, purged from a bottle of cleaner and stuffed back in. Check passed. How to check the next item? I couldn’t think of anything better than just screwing on the caps and pumping in gas - the camera will lock, which means it won’t catch. Another option is to tighten and shake the carb - you will hear the float tapping on the wall. So, I tighten the caps with 2 screws (it takes a long time for all 4, because you still have to unscrew them), connect a canister with gasoline - it doesn’t overflow! Oh, miracle! Has the problem really been resolved?! However, here I discover that my experiments with floats have knocked down the fuel level - I need to correct it. In about 3 iterations I managed to adjust the floats to the desired position and everything could be tightened completely. Then there were a couple more checks for overflow - all passed successfully, including on a motorcycle with gasoline supplied through the pump, but before installing the air box, I suddenly saw a trickle of gasoline again. T_T At this point I already wanted to cry like a girl. But my hot-tempered nature played a role and I slammed my hand on the carbs in anger, causing the overflow to suddenly stop. oO The control check showed that everything was ok again. Further reflection led to the conclusion that I was faced with a case that I had already seen on the forums of transalp enthusiasts - the needle got stuck in the saddle and did not shut off the fuel supply, it was treated by lightly tapping the body through a piece of wood. Well, the bike is quickly assembled and it’s time for synchronization. For this purpose, following a tip from friend Every_cry’s post, I purchased ROSMA vacuum gauges, model TV-510R. I found a representative in the city of Voronezh through the official website. There were some minor difficulties with the acquisition, but they were resolved fairly quickly. The fact is that they have an online store, but payment there is only possible by bank transfer for legal entities. And in principle, they pay almost exclusively by bank transfer. However, having called there, in a conversation with the manager, I found out that I could easily come to them, pick up the vacuum gauges and pay in cash, if I didn’t need all sorts of documents: invoices and other invoices. Also, based on a tip from the same post, to limit air fluctuations, I purchased ball valves and fittings for connecting hoses, although I did not find adapters for metric threads (or rather, I found them, but only plumbing ones - for M22x1.5 threads, but M20x1.5 is needed) , so, I confess, I used duct tape. I don’t remember in the manual that there was any mention of where to connect the synchronizer and what to turn to align the operation of the carbs. But the bug knows about this, having absorbed information from thousands of forums! It was on some forum that I found where to connect the synchronizer hoses, and I guessed what to turn.
Cleaning the Carburetor, adjusting the idle speed
Hello everyone, as they say, if you don’t know what to do in the off-season - CLEAN THE CARS ! This process is fascinating, requiring enormous responsibility and diligence, patience, and quite a few things called WD40 ! and what is also important is THIS MANUAL !!! Yes Yes ! so as not to sit like an old woman in a fairy tale next to a broken trough (well, carba). and so, my friend left before her mother, which means no one will be against cleaning the house))))) I bought 2 liters of gasoline at the gas station and sat comfortably at the table, light and warm, comrades, beauty and that’s all!
It’s good that my friend didn’t see it)))) otherwise I would have gotten stars! I’ll say right away that I analyzed it from the video at the end of the article, I recommend it to everyone! only that dude threw everything in different directions, for those who are going to take it apart for the first time, I advise you to put everything in 2 plates) accordingly, what you took off from the left to the left, what you took off from the right to the right! I’ll say right away if you are the first to disassemble this carb, then pour plenty of WD40 because everything has already stuck! and choose good screwdrivers according to the size, as the bolts are made of plasticine! Everything was sad for me, someone climbed before me, licked all the bolts, I barely tightened them with pliers and replaced them with new ones,
The only thing I didn’t find was one for the 6-edge, but only these, well, okay, you still can’t see the carbs. but if something happens, taking them apart on the road is not a problem!
Everything inside the carb is brass! LOOK CAREFULLY AND WITHOUT FANATISM ! everything breaks down easily! (from the life of a group member: licked the main jet costs 400 rubles on a megazip and 600 rubles for delivery and a 2-week wait)
I didn’t halve the carbs because I couldn’t unscrew them (well, there’s nothing really wrong with that, you can’t clean one small membrane) I washed everything in gasoline. and twisted it back.
After cleaning, check the gasoline level in the chamber!
very simply place the carb on a flat surface: unscrew the bolt ( 1 ) and connect the transparent hose to (2) lead it to the mark (3) and connect the hose to (4) and fill the petrol tube, the floats will work and stop the flow and you will see what They fill the level with gasoline, mine was about 1.5 cm lower, look in the manual which lever to bend to raise the level, and through trial and error achieve the level! I’ll be honest, I never met the level, I stopped at - 0.5 cm from the risk, in principle it’s not fatal! It’s not very easy to catch, I overdid it and the carb overflowed, I didn’t bend it and the carb didn’t top up !!!!
You also have the opportunity to set the quality of the mixture using this needle:
Inside it you will find a plastic bolt, unscrew it and remove the game!
there are 5 divisions on it by default in the middle one! Adjustment is carried out by candles !! unscrew the spark plugs and look at them; if they are the right color, then everything is fine, don’t worry, put it back together! if the candles are according to the picture
then move accordingly 1 division from the middle: if the mixture is lean, then to the left! if you're rich, then to the right!
IN OTHER CASES (for example, to increase the forward moment) IT IS NOT WORTH MOVING!!!
further in the manual it says to set the idle mixture quality screws
(hereinafter referred to as XX) for 2 turns: I’ll decipher it right away - 1 turn is 360 degrees ! I didn’t understand correctly at first, and took it for 180 degrees, and I haven’t been able to set it up correctly for a long time! and again there was an innovation for me, a friend said that in the English manual you need to unscrew it 2.5 turns !!! no sooner said than done! Well, that’s basically it, I went to install it!
IF YOU DO NOT HAVE A ZERO PUT A FILTER!!!! and then start the engine, since you will have too easy air access without the filter you set, and when you put on the filter everything will go wrong! I HAVE NULEVIK so in the first video I can launch and configure without it.
Attached videos:
Reasons for adjustment
They say there is no smoke without fire. This folk wisdom also applies to our case. There is no need to get into the carburetor unless there is a reason to do so. What reasons could there be? Here are the main ones:
- the spark plug always floods;
- The engine runs intermittently and stalls.
Also, carburetor adjustment is necessary when using low quality gasoline for a long time or the air element is dirty. Let's move directly to adjusting the Yamaha Jog carburetor.
First, thoroughly rinse the carburetor. We pay special attention to all channels where gasoline is supplied. If you have already gotten around to repairing the carburetor, then at the same time you can change the spark plug. In addition, we reproduce the replacement of the air element. After the above steps, we proceed to adjustment. Pay attention to the old spark plug, it can “say” a lot. White candle – a mixture of white, black and rich. This leads to excessive fuel consumption and channel contamination.
JavaScript is disabled in your browser
When buying a Japanese scooter, the question of cleaning and adjusting the carburetor may arise, this is not at all surprising because there are almost no new mopeds in Russia or Ukraine, all copies come to us in a worn condition and are already “shamanized” here by skilled craftsmen and brought into the appropriate form . You may wonder, why take the Japanese if you can take the new Chinese? Yes, but even used Japanese equipment can be better than new Chinese equipment.
And so, first you need to remove the scooter carburetor itself (the example is given taking into account that the plastic has already been removed), to do this you need to unhook the air filter pipe on one side, and the inlet pipe to the engine itself on the other. You should also check these pipes, if there are cracks or holes in them, replace them. Possible problems with carburetion, leanness or enrichment of the mixture may be related to this. It is necessary to disconnect the wiring (it goes to the solenoid valve), fuel pipes, and vacuum pipes. Then unscrew the screws that secure the top cover of the carburetor, to which the spool throttle with a needle is attached. Unscrew the lower part - the float chamber. Next, use a pneumatic gun, or simply use your mouth to blow out all the air and fuel jets. If there is debris or film on the surface of the float chamber, remove excess; the walls can also be cleaned or washed with kerosene, AWD-40.
I talked about the illness of my conic in this post, and now I’ll tell you the story of the repair.
Finally, the free weekend has arrived - galloping to the garage, fixing the bike (well, as free, first - go to the gym - lift iron, and only then you can go to the garage). I arrived, with the movements that have already become habitual, I remove the seats, tidy, tank, unscrew the air box and get to the carbs. Initially, I assumed that the rubber bands in the needle valves had died and that’s why the inlet holes wouldn’t close, so I decided to order new valve assemblies (it was already suggested to me in that post in the comments that it would be possible to get by only by replacing the needle, but then I had information from repairmen about tired saddles), who arrived a couple of days ago. We remove the carbs, begin to unscrew the covers of the float chambers - everything is strictly in order, so as not to confuse the covers and the insides of the carburetors (well, it is difficult to confuse the covers - they have a unique pattern of oxides and indelible deposits that can only be cleaned off by sandblasting.)
Then, with the tip of a knife, we push out the float axis and remove it from the chamber - after it, the needle may fall out of the saddle, so we don’t do anything on the knee - just a table, and as clean as possible.
The next step is to unscrew the fixing screw that presses the saddle with its head, and carefully remove the saddle itself with your fingers.
A visual inspection showed the presence of darkened bronze (or brass - whatever they are made of), but no particular crime was found in the work area. However, the sealing rubber has already become quite hardened. Well, this is all lyrics - there are new valves! We put the old ones aside and take out the new ones from the bags.
This is exactly how they arrive.
I was somehow slightly confused by the fact that usually the needles are shiny and coated like a cat’s eggs, but here they have a normal surface after casting without any traces of finishing.
On the left is a new needle, on the right is an old one.
Well, I think God bless him - it’s no big deal. Before reassembling, I thoroughly wash everything I can reach with a carburetor cleaner in a can. I push the valves into the places intended for them, collect the carbs, throw them back into the frame, connect the gas line, turn the key in the lock and watch a cheerful trickle of gasoline from the drain pipe. After scratching behind my ear, I remove the carbs again and begin to think carefully about what the plug is all about. There are not so many parts responsible for overflow - valve seat, needle, float. So, in general there is not much to diagnose. First of all, having decided that the valves were new, that means everything was okay with them (yes, of course), I decided to check the floats - maybe they don’t float? Why did he throw them into a bath of gasoline, where they quite happily floated with their metal rods down. OK. It's not about the floats. And on the street, meanwhile, a real horror was happening with thunder and lightning.
The second thought was that, perhaps, it does not close completely due to the fact that the fuel level in the chamber has changed with the new valves. Okay, so we need to check this point. But it’s already late - we postpone it until the next evening.
The working day flew by waiting for the opportunity to continue the repair and thinking about what else to check if the last thought about the fuel level did not work. To check the level, 2 ballpoint pens with transparent bodies were purchased, and a washer tube was found in the garage, which was pulled quite well onto the fittings intended for this in the covers of the float chambers. (Sorry for the washed-out photo - poor lighting, trembling hands..)
So, Monday evening - let's get down to experimenting. We cut up a home-made stray to monitor the level, supply gasoline and see what is overflowing - okay. We disassemble, remove the floats and, following the letter of the manual, carefully bend the thrust tab, reassemble - it still flows. The whole evening goes by in such experiments, once I even bent to the point that it seemed as if the float was resting against the lid. Somewhere in the middle of the experiments, the housings from the handles broke and I had to replace them with the same washer tubes. (Sorry for the washed-out photo - bad lighting, trembling hands..)
And in the end I decided to check the carburetors one at a time: first, we remove the cover from the front carb, press the valve with our finger and supply gasoline, watching the level in the rear carburetor - everything is ok - it doesn’t overflow. Wonderful! The rear carb fills and seals normally. Now it’s the front one’s turn - we close the lid, supply gasoline - it’s overflowing, damn it, and it seemed that it began to overflow at the same time, but, most likely, it simply began to overflow through the drain from the front carb to the rear. Well, time is up - we should rest - we’ll put it off until Wednesday. By Wednesday I had already figured out the scope of work:
- Check the floats one more time: insert the axle into the float and lower it into gasoline, emulating the filling of the chamber.
- polish both the saddles and the needles, otherwise the thought of the shitty movement of the needles in the saddles still haunted me.
- Somehow check to see if the floats are catching on the covers.
And here I am again in the garage with my disassembled two-wheeled friend.
We proceed strictly in the order indicated above. Checking the floats showed that everything is fine with them - they spin easily on the axis, and when lowered into gasoline, they float up without even being half submerged. Check passed. The next point is to put the valves in order. We pick up a microdrill with a polishing felt attachment and polishing paste for metals and get started. After a couple of minutes (well, not counting the 40 minutes spent searching for a needle dropped on the floor), both valves were completely polished, thoroughly washed in gasoline to remove any paste residue, purged from a bottle of cleaner and stuffed back in. Check passed. How to check the next item? I couldn’t think of anything better than just screwing on the caps and pumping in gas - the camera will lock, which means it won’t catch. Another option is to tighten and shake the carb - you will hear the float tapping on the wall. So, I tighten the caps with 2 screws (it takes a long time for all 4, because you still have to unscrew them), connect a canister with gasoline - it doesn’t overflow! Oh, miracle! Has the problem really been resolved?! However, here I discover that my experiments with floats have knocked down the fuel level - I need to correct it. In about 3 iterations I managed to adjust the floats to the desired position and everything could be tightened completely. Then there were a couple more checks for overflow - all passed successfully, including on a motorcycle with gasoline supplied through the pump, but before installing the air box, I suddenly saw a trickle of gasoline again. T_T At this point I already wanted to cry like a girl. But my hot-tempered nature played a role and I slammed my hand on the carbs in anger, causing the overflow to suddenly stop. oO The control check showed that everything was ok again. Further reflection led to the conclusion that I was faced with a case that I had already seen on the forums of transalp enthusiasts - the needle got stuck in the saddle and did not shut off the fuel supply, it was treated by lightly tapping the body through a piece of wood. Well, the bike is quickly assembled and it’s time for synchronization. For this purpose, following a tip from friend Every_cry’s post, I purchased ROSMA vacuum gauges, model TV-510R. I found a representative in the city of Voronezh through the official website. There were some minor difficulties with the acquisition, but they were resolved fairly quickly. The fact is that they have an online store, but payment there is only possible by bank transfer for legal entities. And in principle, they pay almost exclusively by bank transfer. However, having called there, in a conversation with the manager, I found out that I could easily come to them, pick up the vacuum gauges and pay in cash, if I didn’t need all sorts of documents: invoices and other invoices. Also, based on a tip from the same post, to limit air fluctuations, I purchased ball valves and fittings for connecting hoses, although I did not find adapters for metric threads (or rather, I found them, but only plumbing ones - for M22x1.5 threads, but M20x1.5 is needed) , so, I confess, I used duct tape. I don’t remember in the manual that there was any mention of where to connect the synchronizer and what to turn to align the operation of the carbs. But the bug knows about this, having absorbed information from thousands of forums! It was on some forum that I found where to connect the synchronizer hoses, and I guessed what to turn.
This is what it looked like at the beginning of work:
It turned out blurry, but you can see that they are working a little differently.
The most difficult thing was to ensure that the arrows trembled just a little and did not freeze - after all, ball valves are not a very good choice of constipation in this case, but gently tapping the handle of a screwdriver on the valve saves the day.
The process is underway
When the screw is rotated counterclockwise, the pressure shifts towards the front carburetor, and clockwise - towards the rear. By the way, you don’t need to turn the nuts - the rotation is carried out by a few degrees. When you turn the screw, leading to equalization of the carburetors, you can clearly hear an increase in speed.
And this is what happened at the end:
When twisting the gas handle, the arrows deflected absolutely synchronously. The motorcycle is running normally so far - no more anomalies appear. Now, if such an opportunity arises again, then I more or less know what to do, including in the field.
Adjusting the fuel level in the float chamber.
You can check the fuel level in the float chamber using a transparent tube located at the very bottom of the carburetor. Unscrew the butter screw,
lift the tube up opposite the carburetor and check the fuel level. Please note that the fuel level must be checked with the scooter engine running, and the tube should always be located above the carburetor. The fuel level should be just below the cap curb.
If there is little, or usually a lot, remove the cover and adjust the moment of operation of the locking needle by bending the needle holder in very small ranges.
It should be noted if the carburetor has not been washed for a long time and there are signs of contamination of its channels and jets, if gasoline has been or is being filled with an octane rating lower than that recommended by the manufacturer (for example, A-80), if the installed jets and other parts do not correspond to those recommended by the factory parameters, then before adjusting the carburetor you need to eliminate all this, since further adjustment will only be temporary and you will not achieve the desired result.
You can also read other articles on the topic:
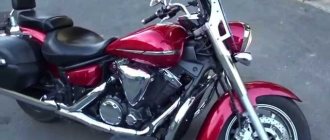
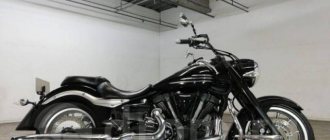
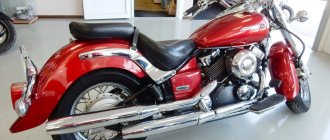
Review of the Yamaha Drag Star 400 motorcycle
In 1996, a motorcycle from Yamaha appeared on the market - Drag Star 400 or XVS 400. As you can guess from the designation, it has an engine with a displacement of 400 cm³. The predecessor of the Drag Star 400 is considered to be the Yamaha Virago 400. And this is not without reason, since the basis for the XVS 400 was a slightly redesigned engine from the Virago 400, although in some respects these are two different motorcycles, but more on that below. The motorcycle was produced only for the Japanese domestic market, which did not prevent it from crossing borders and becoming widespread in the post-Soviet space.
Tuning the carburetor of a two-stroke engine
One of the main components in the fuel mixture supply mechanism in a vehicle such as a scooter is the carburetor. Before moving directly to the description of the adjustment process, let's talk about why it is needed at all.
Carburetor - a device that ensures the formation and supply of a fuel mixture (consisting of air, gasoline and oil) directly to the engine
What exactly is the purpose of a carburetor? In a nutshell, this is a device that ensures the formation and supply of a fuel mixture (consisting of air, gasoline and oil) directly to the engine. That is, the quality of this mixture and, accordingly, the power that the power unit produces depends on it.
Scooters typically use carburetors of a type called “float” carburetors. The main element is a Venturi tube, which houses a damper that regulates the amount of air supplied to the mixture, as well as a needle that supplies gasoline. By unscrewing the throttle, we thereby open the throttle and raise the needle, increasing the amount of air-fuel mixture entering the engine.
Naturally, the movements of the valve and the needle must be clearly synchronized to ensure its (mixture) homogeneity. The float chamber is designed to ensure the constant presence of gasoline in the tube. The principle of its operation is based on the fact that when the fuel level drops, the float lowers and opens a channel for supplying gasoline to the tube. When it is full, the float rises and closes the valve, thereby stopping the flow of fuel.
If the scooter's engine power drops, it is impossible to start the engine or the engine stalls - these are signs of a carburetor failure
Signs that the carburetor is faulty may include:
- Engine power drop
- Inability to start the engine
- The engine stalls.
Another way to assess the quality of the carburetor (more precisely, the correctness of its operation) is as follows - unscrew the spark plug and look at its color. If it is white, it means the fuel mixture is lean, that is, there is too much air in it, and if the spark plugs have a black tint, it means the carburetor is “pouring” too much fuel. With any of these options, one thing is clear - it needs adjustment.
It should be noted that, globally, this process does not depend on the engine stroke, therefore the answer to the question of how to correctly adjust the carburetor on a Chinese 4t scooter and how to correctly adjust the carburetor on a 2t scooter will be the same. Let's now move on to describing the sequence of actions.
Development of Yamaha Drag Star 400
As noted above, the XVS 400 appeared on the market in 1996 and has remained virtually unchanged. The only exceptions are 1998, 2000 and 2010.
In 1998, the Yamaha Drag Star 400 Classic version appeared. From a technical point of view, it was still the same motorcycle and all the differences were cosmetic. The model received wider fenders, a different seat, steering wheel and optics, in addition, the front wheel was changed. This was done to make it more similar to American classic motorcycles. “Draga” was offered in these two variations, right up to its discontinuation.
In 2000, the motorcycle received an updated engine that complied with new environmental standards without losing any of its performance. In addition to the engine, the dashboard was replaced - an odometer and a fuel level indicator appeared.
In 2009, the designers decided to abandon carburetors, switching the engine power to an injector. The updated motorcycle appeared on the market in 2010. This decision seems more than strange, since the Drag Star 400 was valued by consumers, first of all, for its simplicity and maximum similarity of design with old “iron” motorcycles, but arguing with environmentalists is too expensive. With the switch to injection power, the engine lost its power insignificantly: 30 horsepower versus 33 at 7500 rpm, and the torque also decreased from 32 to 31 Newton per meter. It should be noted that in the carburetor version, 32 Nm was achieved at 6000 rpm, while in the updated version, the maximum torque of 31 Nm is achieved at 6250 rpm. The already considerable mass increased slightly.
It is impossible not to mention that the Yamaha Drag Star 400 has become an excellent platform for tuning, both “garage” and quite professional. This is especially noticeable in those motorcycles that end up outside Japan at auctions. You can often find changes in the design of the steering unit and frame, sometimes for greater similarity with old American models, and with a “dry” frame. In other words, the Japanese, despite the small volume, do not hesitate to turn the “Drag” into choppers and bobbers. There are frequent modifications to the engine to improve its performance. All this sometimes leads to minor confusion in maintenance and repair for new owners.
The last year of production was 2022. The reason for discontinuation of production was the same environmental standards.
on “Adjusting and tuning the scooter carburetor”
How to clean the injector on a Suzuki V50g? I started eating 1 liter per 25 km. Against 70 km half a year ago. Where do they clean them? Or can I do it manually?
The administrator replied: March 25th, 2012 at 12:17
In your case, it is better to contact a service center, since the work is quite delicate.
Roman replied: May 23rd, 2022 at 11:38 am
Good afternoon, there is a problem with the carburetor on stroke 16, air leakage through the carburetor overflow fitting
Sergey replied: March 12th, 2022 at 08:31
Good afternoon. I have a Honda 34 at medium speeds that loses speed until it stops at high speeds and it works fine, what’s the reason?
How to adjust the carburetor on a scooter
Nowadays almost every teenager has a scooter, because it is easy to ride and is small in size. But with a scooter, like with all equipment, some parts may become unusable. The carburetor is one of the main parts of any vehicle. How to adjust the carburetor on a scooter so that it continues to work? In order to get down to business, it is best to familiarize yourself with the principle of operation of the carburetor so that it will be easier for you to cope. The operation of the carburetor is also affected by: fuel quality, atmospheric pressure, air temperature.
Source


