Additional equipment for a snowmobile
Controlling engine temperature is extremely important for air-cooled engines.
Especially for two-stroke engines, piston cooling is significantly worse compared to four-stroke engines.
Which, if overheated from a lean mixture, can lead to burnout of the bottom of the piston.
And if a two-cylinder snowmobile is still able to continue moving for some time after this, then a single-cylinder one will have to be towed or abandoned while going for help.
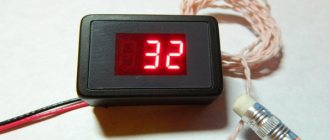
To detect signs of overheating in time, engine temperature indicators are used. Most of them provide not only a bright digital temperature display, but also indicate overheating both visually and audibly.
The temperature can be taken from either one or two cylinders.
Additional options may include an indication of engine speed and ambient temperature.
Even the latest turbocharged sleds have tuning solutions like the KOSO X-2 Boost Gauge, which shows boost pressure, mixture ratio, and more.
Recommendations for installing temperature sensors
When mounting the device body into the snowmobile's instrument panel, keep in mind: the installation location should always be in front of your eyes, without obstructing your view, with little exposure to air turbulence - when moving, the snowmobile raises snow dust, which settles differently in different parts of the snowmobile. When cutting out a space for the body in a snowmobile panel, remember the proverb “measure 7 times, cut once.” The laying of wires is carried out using frequent fixing laying or the wires should be placed in additional protection such as a cambric. The insulation of the wires is negligible; vibration frays, which leads to a short circuit. When extending the sensor wires (if necessary), take into account that the temperature sensor is polar and make the connection in accordance with the polarity. The connections should be soldered and insulated; wires should not be mounted on twisted wires. It is possible to do without soldering by using electric wires to connect them. automotive type connectors. In the future, such a connection is more convenient for repair work, as it allows the components of the device to be easily removable. Note! The sensor wires are heat-resistant - they can withstand the operating temperature of the engine, but not the exhaust manifold. They can be extended using any wire, without exceeding the resistance of each wire of 5 Ohms. Regardless of the sensor installation method, it is useful to isolate the protruding parts of the sensor shell (brass sleeve) from the incoming air flow. For example, by using a piece of cambric that will reduce heat loss, the same method can be used when installing the sensor under the spark plug. Power supply - connect temperature sensors in accordance with the device installation manual. The power connection via the ignition switch is most often used. How? On the ignition switches, there is a terminal on which there is no voltage at the moments when the key is turned off, the key is turned to the electric operating position. starter, but is present when the ignition is on or the engine is running. Thus, the ignition switch functions as a switch. The power supply circuit is quite simple: power is supplied through separate wires from the battery terminals - the ignition switch - the circuit that you soldered - the device. If there is no ignition switch, it is possible to use a separate toggle switch. If there is no battery, it is permissible to connect to the step-down terminals of a standard voltage stabilizer. Please clearly remember that the device is not designed to be connected to an alternating current network, or directly to the engine magneto, bypassing the standard voltage stabilizer. Also, it should not be connected to the old type of rectifier devices of Russian technology such as VU.
The average operating temperature of a serviceable two-cylinder engine, under light and medium operating conditions, is 140 - 150 degrees Celsius. With any of the considered methods of installing sensors, the temperature difference between the left and right cylinders should not exceed 20C. A fully operational, new engine has a temperature difference between the left and right cylinders of 5 - 10 degrees. Up to 20 C is considered acceptable. In this case, the temperature spread between the cylinders may vary depending on the speed of movement.
Installing sensors under the spark plug has undoubted advantages, which include: if the engine is under warranty, such installation will not lead to its loss (requires clarification from the dealer); installation method is less time-consuming; certain accuracy of readings - the sensor is located in close proximity to the epicenter of combustion, it is not affected by heat dissipation in various parts of the engine - with such an installation, when taking readings, it is possible to rely on the generally accepted pattern of 180 - 200 degrees (in accordance with the operating instructions for a particular technical means). The disadvantages of this installation include the high probability of damaging the sensor when installing spark plugs.
Characteristic
The principle of operation of the sensor is the same as in many devices that were found on Soviet-made snowmobiles. The device is located under the glow plug and is a ring, the design of which includes a thermocouple.
The element, detecting the temperature, sends a signal to the device that monitors this indicator.
Using a digital temperature sensor, you can measure not only the temperature of a running engine, but also determine:
- broken belt of the ventilation device;
- presence of snow in the air intake;
- Fuel supply system malfunction.
The latter can be determined by analyzing the temperature difference between the cylinders. The sensor can also indicate engine overload and air leaks into the system. It is noteworthy that it is high temperature that causes many malfunctions.
Therefore, the snowmobile owner should take this point into account
Temperature sensor characteristics:
- operating range – from +50 to +250 degrees Celsius;
- error - 2 degrees in either direction;
- Possibility of use - on snowmobiles with and without batteries;
- body dimensions - on average 45x90 cm.
Some models contain additional elements that ensure more reliable operation of the device.
During operation, the sensor lights up in the standard color declared by the manufacturer. If there is a sudden change in color, the owner of the equipment should take action, as the sensor reports that a critical temperature is approaching.
Installing temperature sensors in the engine head
Installing temperature sensors in engine heads is not difficult. The time required for such an installation is about two hours of leisurely work. To install sensors without removing the cylinder heads from the engine, it is necessary to determine in advance the locations for drilling the recesses. For example, by examining an analogue head in a store. When drilling a recess for the sensor, the hole should not be through, be careful! The minimum is considered to be a recess in which the sensor is placed at a height of 7 mm. The advantage of such an installation is its reliable performance, since the sensor is installed according to the principle - install it once and forget it! There is no need to dismantle the sensors in the future, for example when replacing spark plugs, which means there is no risk of damage. The disadvantage of installing temperature sensors in the body of the engine head is the inability to follow the generally accepted critical temperature template of 180 - 200C (for different engines, the temperature may differ, you should study the instructions for the technical equipment), since such a template is acceptable for measuring the temperature under the spark plug. Different parts of the engine heat up differently due to heat dissipation. The user needs to independently determine in everyday use, through analytical observations, which temperature should be considered normal and which should not be exceeded. For people with technical experience, this is not difficult. Regardless of the method of installing the sensor, it is useful to isolate the protruding parts of the sensor shell (brass sleeve) from the incoming air flow - using a piece of cambric, which will reduce heat losses, the same method can be used when installing the sensor under the spark plug.
Installing a temperature sensor in the head of a Buran snowmobile
In our opinion, this is not the best place for installation, although it is acceptable. With this installation of the sensor (from the exhaust side), the readings will be higher. It is clear that exhaust gases have significant temperatures. Installation was possible in other places of the head, see the example of the Taiga snowmobile. About how the kit works Moto thermometer on the Buran snowmobile
Installing sensors in the engine head of a Taiga snowmobile
The sensor installation location is selected in the stiffening rib of the engine head, running crosswise, from stud to stud. The thickness of the metal in this place is about 26 mm
Installing a temperature sensor on the Lynx snowmobile, similar to the installation on the Taiga snowmobile
Attention! Temperature sensors should not be installed on 2-cylinder engines. let's say only at the right studs (as in the photo below). This will lead to significant differences in readings, up to 30 degrees Celsius. The reason is quite simple - the installation location of one sensor is close to the fan and is very cool, while the second sensor is installed almost at the epicenter of the heat. To avoid this effect, the sensors should have been positioned differently - the sensor of the left cylinder should be installed at the right stud, the sensor of the right cylinder - at the left
Installation of temperature sensors in the Lynx snowmobile engine head is also possible in the technological holes available on the engine cylinders. As a rule, the holes need to be deepened
Operation in wet environments*
It is noted that when operating devices on equipment that is frequently exposed to moisture, oxidation of printed circuit boards may occur, followed by failure of electronic parts. This situation is faced by users who daily operate equipment in the cold - warm garage mode, or on the water (powerboats). It is quite easy to protect the device from moisture. It is necessary to cover the printed circuit boards with a protective compound that prevents exposure to moisture. Radio stores have a wide range of such products. Before applying the protective layer, wiping with pure alcohol is useful. We do not impose such a procedure; most users simply drive for seasons without experiencing problems. We are talking about private operating conditions! The sensor itself does not have sufficient tightness, and immersion in electrically conductive liquids disables it. However, it is successfully used to control engine temperature by oil t, immersed in the engine crankcase. Also, if necessary, use a specially made adapter to remove the coolant temperature on 4T engines. And they are used outside the engine, to measure the ambient temperature - using it as an outdoor thermometer.
Don't forget to thank the author by clicking the rating button at the top of the page, or by posting a link to the article on the Internet. Thank you
OEM snowmobile parts
The Megazip online store offers to buy spare parts for Japanese and American special equipment. All spare parts for snowmobiles are original! They are absolutely identical to the units used during factory assembly. Delivery is carried out directly from the countries where the snowmobile was manufactured.
In order for any vehicle to work properly and fully cope with its purpose, it is very important to select high-quality equipment for it. If you need original spare parts for snowmobiles, we have everything you need.
The Megazip online store invites you to look into the catalog and get acquainted with a colossal number of these products. Here you can buy spare parts for snowmobiles from Japan to order. Their price will please any buyer.
Excellent range and impeccable quality
The snowmobile spare parts that you will find in the catalog are produced at the manufacturer's factories and are of excellent quality. Original products from the USA, Japan and many other countries are manufactured using proven and innovative technologies and modern equipment. Users can be absolutely confident in the safe and long-term operation of the goods they purchased to order.
Buying spare parts for a snowmobile in the Megazip online store means getting first-class Japanese products designed for comfortable and trouble-free operation. All models contained in the catalog are highly reliable and will not disappoint their owners. You can order them at a very competitive price.
Have a nice shopping
Customers looking for snowmobile parts from Japan will be able to order them online. At M egazip you can leisurely get acquainted with all models thanks to a convenient website. Before purchasing any item to order, you can view clear photographs of each model, read their detailed characteristics, and learn about the features of their work. If you have any additional questions, you can always consult one of the online store managers. Our prices for spare parts for snowmobiles are reasonable, so everyone can afford to order them.
Why you should place an order in our online store:
- the sale of spare parts for famous Japanese and American snowmobiles will be of interest to everyone who loves products of decent quality and wants to receive them with maximum efficiency;
- prices in M egazip are quite affordable, so you can buy any model to order without large financial costs;
- an extensive assortment in the catalog is a guarantee that any client will find here what he is looking for;
- the ability to order products online will be a significant advantage for people who value their time and do not have the opportunity to visit stores in their city. This is also a real salvation for residents of small towns where there is nowhere to purchase such goods.
Equip your vehicle with high-quality and reliable parts.
CITD-3 (with spark plug sensors)
Ts ITD 3 is a digital temperature indicator for a snowmobile that displays the operating temperature of the engine using two ring temperature sensors under the spark plugs. The kit of CITD 3 includes everything necessary for its installation. Differences between TsITD 3 and its predecessor TsITD 2-1: cylindrical body shape with reduced dimensions L 65 mm, D 54 mm and improved design; increased tightness; The internal electrical part of CITD 3 is made more reliable. CITD 3 is a third generation device - a new product on the market. You can get acquainted with the CITD-3 device in the article “Improved Engine Temperature Indicator “CITD-3” - review.” Read the article on how to install CITD 3 on a snowmobile
CITD 3 characteristics
- Operating temperature from - 50 to + 50 C.
- Power supply - constant or alternating 12 Volts.
- Temperature measurement error is no more than 2 C.
- Temperature measurement range from - 50 to 199 C.
- The overheat warning threshold is 196 C + - 2 degrees.
- Passport/installation manual - 1 pc.
- Measuring unit - 1 pc.
- Wiring - 1 pc.
- Wiring fastening clamp - 2 pcs.
- Outdoor temperature sensor - 1 pc.
- Engine temperature sensor - 2 pcs (for spark plugs).
- Button for switching air temperature readings to engine temperature.
Photo gallery
Before purchasing any type of sensor, you need to familiarize yourself with its characteristics, material of manufacture and the possibility of installing it on your snowmobile. We invite you to familiarize yourself with more popular models.
Pros and cons of the Irbis Dingo T-125 snowmobile.
After selling the karakat, I was faced with the question of purchasing equipment that was more modern, reliable and easy to manage and operate. Initially, I planned to buy a motorized dog with a capacity of 12-15 hp. s., but eventually acquired the Irbis Dingo T-125. The decisive factor in the choice for me, I confess, was not the amount of hp. or cross-country ability, but the appearance and illusion of a “real” snowmobile.
Now, after four seasons of operation, we can talk about the pros and cons of this snowmobile. For some reason, most of the advertising articles for this snowmobile begin with the possibility of its quick assembly/disassembly and transportation in a passenger car. So, the pleasure of disassembling and loading a snowmobile into a car is not a pleasant procedure, and for one person it is almost unrealistic. Indeed, the snowmobile can be disassembled, the fastest option is to unfasten the skis and the track, thereby disassembling the snowball into three parts, but the part with the engine is quite heavy and bulky, so I struggled with assembly/disassembly a couple of times, and then began to transport the snowmobile in a trailer, without understanding. But still, having the ability to assemble/disassemble a snowmobile is a definite plus.
My Irbis has a 7 hp engine, quite a bit, but on light snow or on a well-trodden road it goes quite well, I reached speeds of up to 38 km/h. He doesn’t like to carry large loads, the passengers in the sleds feel quite seriously, the speed and maneuverability drop significantly, but at the same time I carried three people in the sled and about forty kilograms of luggage, of course they didn’t fly, but they rode quite confidently along the trail at a speed of 15 km/h . If there is no trace, and the depth of the snow exceeds 30 cm, then it is better not to take a passenger, otherwise you will be pushing the snowmobile every now and then, and you will suffer quite a lot. When there is no “trail”, I break through it without a passenger, and then return for it; it follows my trail just fine even with passengers.
The snowflake really doesn’t like snow-water porridge, the snow begins to stick in the goose and if the area with water is long enough, the snowball simply “chokes”, you have to tilt it and hollow out the snow between the rollers, an unpleasant task, I tell you.
The weakest element of the snowflake is the standard battery. At temperatures below -10 degrees, starting a Dinga is quite difficult. At the dacha, if you have the opportunity to use an electric hair dryer to heat the carburetor, this is not a particular problem, but in my practice there was a case when a snowball started up in the morning without problems, but on the lake, after five hours of fishing, the battery died and a whole special operation had to be carried out to evacuate us together with the snowflake, but this story requires a separate description. Now I always take the battery into the house so as not to have to worry about warming it up.
Briefly about the advantages:
- It’s high-torque, develops a good speed along the “trail”, without any problems drags 1 person in a sleigh or a load (for example, firewood), I noticed that it drags up to 0.35 cubic meters of firewood confidently and with almost no loss of speed.
— Availability of headlights, on-board computer, heated grips.
— A fairly economical and unpretentious engine (the gas tank is 5 liters, enough for a long time, I take one and a half gallons of gasoline in reserve, just in case, and I feel calm).
— Possibility to assemble/disassemble the device and transport it in a passenger car.
— Price (I bought mine for 64 thousand).
Now about the cons:
— Carburetor (does not like frosts).
— Sticking of skating rinks and tracks with snow, if there is water on the lake under the snow.
— Cheap materials used by the manufacturer (cheap iron, especially evident in the quality of the muffler, the weld burst, welded, enough trips for 5, burst again in the same place, apparently due to vibration, had to be replaced with a reinforced one). Poor quality track material, after three years of operation it had to be changed at a mileage of 1450 km.
In general, I am pleased with the technology, since we usually travel together, sometimes I take children, but they don’t weigh much, and the speed and cross-country ability are at a fairly high level. You need to understand that the equipment is budgetary and in no case can it be compared with a Yamaha for 700 thousand rubles, for example, but it does its job honestly (and not 10 times worse than the same Yamaha), it delivers without problems, especially if there are “trace”, quite economical and unpretentious. The Irbis Dingo-T150 model has already been modified taking into account the disadvantages in the T-125, but it also costs almost twice as much. In the summer I want to make a modification, install the so-called “third ski” - engine protection. They say that this upgrade greatly increases the cross-country ability and traction qualities of the snowflake; I will definitely tell you about the corresponding experience in the following articles.
Thank you for reading, subscribe to the channel, press the thumbs up, good luck to everyone!
Source
CITD and other options for cylinder temperature control
Ratnik.
Active participant
I took two options, first I’ll put it under a candle, after the guarantee I’ll probably drill it, on the Thermiko website there are installation instructions and insertion points.
Installation of an engine temperature monitoring device on snowmobiles such as “Buran” and “Taiga”.
Fig.1 Fig. 2 Rice
3 Attention: The thickness of the cylinder heads is limited to 22-24mm. To avoid through drilling of cylinder heads, drilling must be done carefully
Installation of the TSITD 2-1 engine temperature monitoring device on a snowmobile.
To install a digital engine temperature indicator TSITD-2-1, it is necessary to prepare a cutout measuring 42.5x92mm in the dashboard or hood of the snowmobile Fig. 1Photo1. Install CITD 2-1 into the prepared hole, using the side holders to fix the device in the panel. Lay the measuring cable in the standard electrical wiring fasteners. Connect the connector of the measuring cable to TsITD-2-1. Connect the power output of the measuring cable to the on-board network of the snowmobile, for example: to the headlight size or to the wires on which 12V appears when the ignition is turned on. Note: The device can be powered from both alternating and direct voltage 12V. When connecting the device to a constant voltage (+), the red (-) black wire of the device. Installation of temperature sensors TPT3-6 for snowmobiles “Buran and Taiga”: Drill a hole (not through) 19 mm deep in the cylinder head. in any of the four head mounting stiffeners, at a distance of approximately 12mm. from the stud, so that the sensor is completely recessed in the body of the head, and the pressure washer of the stud does not touch the sensor cable photo2-3. For drilling, use a drill with a diameter of 3.2–3.3 mm. Next, fill the prepared hole with heat-conducting paste (KPT8) and install the sensor in the cylinder head. A core is used to fix the sensor. Photo3. Install the second sensor in the other cylinder head in the same way. Mount the third (air) sensor on the inside of the front bumper (photo 4). Install the cooling casing. Using connectors, connect the sensors to the measuring cable. TPT 3-6R For the Lynx snowmobile: When installing temperature sensors (we recommend), use standard holes in the cylinder heads with a depth of 20 mm. and M6 thread. These holes must be refinished by deepening the hole by 6mm using a drill with a diameter of 3.5mm. Fig.2 The right cylinder head (for older snowmobiles) must be modified so that the left head temperature sensor nut does not interfere with the installation of the right head. To do this, you need to select a vertical axial groove 5 mm deep in the head. and 15mm wide. (Fig. 3 - photo 6). Install the right cylinder head, fill the standard hole with heat-conducting paste (KPT-8) and install a temperature sensor into it. Install the left cylinder head in the same way with a pre-installed temperature sensor. Mount the third (air) sensor on the inside of the front bumper (photo 4). Route the lead of the temperature sensor of the right cylinder so that it goes into the technological hole of the cooling casing on the variator side (photo 7). Secure the air cooling casing. Using connectors, connect the temperature sensors to the measuring cable. Installation of temperature sensors TPT3-6U (under a spark plug): 1) To install temperature sensors, it is necessary to remove the standard sealing rings from the spark plugs. 2) Place the temperature sensors on the spark plugs so that the brown plane is at the bottom, install the spark plugs in the standard places of the heads. When tightening the spark plugs, do not allow the temperature sensor washer to rotate, since the cooling lamellas on some snowmobile models are located very close to the spark plug, and can lead to a break in the temperature sensor cable.
Operating order of the device. Start the snowmobile, the indicator will display the current engine temperature, the upper indicator R (right cylinder) - the lower indicator L (left cylinder). When you press the button, the upper indicator displays the ambient temperature.
*Critical engine temperature: If the instrument display begins to flicker while the snowmobile is moving, then the engine temperature has reached critical (195ºC - 200ºC). It is necessary to immediately stop driving and let the engine idle for about 3 minutes to prevent burnout or jamming of the piston.
Source
How to improve snowmobile cooling and reduce cylinder temperatures
Many users will answer without thinking, citing well-known requirements: oil proportions, carburetor and ignition adjustments, engine cleanliness and correct driving style. These facts are undeniable. But what if following these basics does not provide the necessary parameters? The answer, as always, is simple - modify the engine cooling system yourself. What steps can be taken in this direction will become clear as you read the article. The simplest step is to insulate the exhaust system with thermal insulation materials. The idea behind this modernization is to ensure that the air sucked in by the forced cooling system is not warmed up due to heating by the exhaust manifold. Additionally, this method reduces operating noise. Imported snowmobile mufflers, initially in their design, have internal packing made of high-temperature materials with a high degree of sound absorption
Such modernization should be approached carefully, since the exhaust system loses the ability to transfer heat to the external environment and its internal parts begin to experience temperature loads that they were not designed for. As a result, segments inside the muffler begin to burn out, which subsequently move freely and create metallic sounds that are not typical for the operation of a snowmobile. However, in each individual case, the duration of destruction of the muffler is individual and can last for years.
A more correct solution should be considered a separate air supply to the air intake or the use of a heat shield from the influence of the muffler. There is no need to talk about this; all the photographs presented below give a clear idea of how this can be accomplished. There are snowmobiles that normally have air intake through a special channel - a casing - from the external environment. It is undeniable that the possibility of direct air intake from the street helps improve engine cooling and reduce cylinder temperatures
The next effective step to improve engine cooling and reduce cylinder temperatures in general is to install a screen between the exhaust manifold and the engine cylinders. This idea has been used on imported snowmobiles almost since the founding of snowmobile construction in Russia
The purpose of such a screen is to cut off the air flow passing through the cylinders and prevent it from heating up further by coming into contact with the hot exhaust manifold. On the assembled engine it looks something like this. Moreover, as can be seen from the photograph, the cooling casing is practically absent at the exit point of the exhaust pipe
Since about 2001, a similar solution began to be used on Buran snowmobile engines, installing an air flow divider on the inside of the cooling casing
If you do not have such a solution on your snowmobile, we strongly recommend that you adopt this method, make a plate and install it, regardless of the brand of the snowmobile. Moreover, recently a similar design began to be used at the plant when assembling Taiga snowmobile engines. The effect of the design is very noticeable even without the use of electronic engine temperature sensors. The thermal stress of the left cylinder is especially greatly reduced, and the temperature difference between the left and right cylinders is also minimized. An example of using this method yourself is the photo below, where the part of the cooling shroud highlighted in yellow has been removed
There are craftsmen who install two fan impellers on a snowmobile. The method is very controversial, since in theory, the operation of two impellers of unidirectional rotation will be accompanied by excessive air turbulence and interfere with each other. In practice, no one has conducted research and it is impossible to say whether the air flow increases or decreases
The last significant modification to the cooling system is an increase in fan impeller speed. This is achieved by changing the size of the pulleys with the simultaneous use of a non-standard fan belt size. For such modernization, as a rule, it is necessary to contact a turner and be able to select fan belts
Where to start on your journey to lowering engine operating temperature is up to you to decide. The main thing we tried to clearly convey is that there is a vast field for activity. And only you can decide whether to leave everything as is or by improving the cooling of your snowmobile to increase its operational properties, and therefore traffic safety
Don't forget to thank the author by clicking the rating button at the top of the page, or by posting a link to the article on the Internet. Thank you
Source
