Today, “budget” means of transportation, in particular scooters, are more popular than ever. The most common models on the market are those equipped with small-sized motors, which can be purchased in almost any store.
The popularity of such solutions is explained by their “budget” cost, good build quality and all components. Regardless of the scooter model, all its components, especially the motor, require constant maintenance, which is the key to its long service life.
Among the adjustments that need to be carried out regularly, the process of adjusting the valves causes particular difficulties. Often, many scooter owners do not dare to carry out this operation themselves, fearing due to their incompetence of damaging engine components. However, adjusting valves on bikes with engines up to 150cc is a completely solvable problem for any owner of this “iron horse” who has patience, desire, and also has the necessary keys and tools. Further in the article, the process of adjusting valves on mopeds will be described in detail, where models with 139qmb and 157 qmj engines will be considered as an example.
Why valves require regular adjustment
Many happy owners of absolutely any equipment, be it a bicycle or a car, after making its purchase, completely ignore its needs and requirements, which is fraught with the rapid deterioration of most components, in particular the motor. The main function of the valves is to supply the air-fuel mixture into the combustion tank, as well as to ensure the removal of processed gases.
The valves operate under conditions of constant high temperatures, which leads to expansion of the metal parts of the assembly and their gradual deformation. Frequent expansion of metals during heating, combined with deviation from backlash, can lead to inadequate operation of the valves - the pusher may jam and the valves will stop closing, or significant backlash will arise at the junction of these elements.
When an unacceptable amount of play forms in the intake valve, this prevents the air-fuel mixture from filling the reservoir, since its area becomes much smaller, and then a pusher malfunction is inevitable. When play occurs between the exhaust valve and the pusher, the ventilation process of the cylinder is disrupted. In both situations, the driver will experience a significant reduction in engine power and a number of other characteristics.
If we are talking about a large backlash for this unit, then its main signs will be characteristic clicks, and the consumption will increase significantly. To summarize, we can highlight a list of various signs indicating the need to check valves and their further maintenance:
- The motorcycle or scooter has become harder to start;
- The bike stopped starting altogether;
- During the trip, cases of engine failure occur;
- The scooter stalls when trying to start;
- A drop in engine power, leading to a significant decrease in maximum speeds;
- Characteristic clicks or clattering sounds are heard from the gas distribution mechanism;
- The mileage after replacing the elements of the cylinder-piston group exceeded 500 kilometers.
Preparation
From the above, you probably realized that the thermal gap exists in order to compensate for the thermal expansion of timing parts. The most important rule follows from this: the thermal gap can only be adjusted on a cold engine. If you start adjusting the heat when it’s hot, you’ll simply increase it since the initial gap will go to expansion. And when the engine cools down, the gap adjusted in this way will double. I hope this is clear.
When to adjust valves
Advice!
Experts recommend carrying out the first adjustment of the unit and diagnosing backlashes after the first 500 km of motor vehicle mileage, and 5-7 thousand km thereafter.
Service work will also be required when troubleshooting engine problems, characteristic sounds, loss of power during acceleration, or when the bike stalls and it is impossible to start it.
To carry out repair work you will need a minimum set of keys and tools:
- Pliers;
- Crosshead screwdriver;
- A pair of horns for 8 and 9;
- Socket wrench 10;
- Probes 0.05 and 0.1 mm.
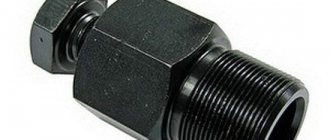
Probes
Attention!
The clearances on the scooter valves must be strictly 0.05 for the upper and 0.1 for the lower, so the feeler gauges must be exclusively of the same thickness.
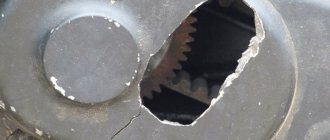
Gaps
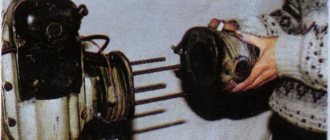
Here is the combustion chamber of an ordinary Chinese scooter engine.
During engine operation, the valves heat up to significant levels. And in order to compensate for the expansion coefficient of the valve and the entire timing belt as a whole, there is a small gap between the valve and its opening mechanism. Called thermal.
In our case, the gap that we will adjust is between the valve and the rocker arm adjusting bolt. By tightening the adjusting bolt within the required limits, we can adjust the thermal gap as much as we need.
But do not forget that the gap should not be very large - otherwise the mechanism will work with a shock load and quickly fail. And very small: the valve will heat up, hit the rocker arm and burn out.
Preliminary work
Before repair work, the most initial, necessary diagnostics of engine components, inspection of repair accessories, assessment of weather conditions, etc. are carried out. To summarize, the list of preliminary work is as follows:
- The motor of the bike must be cold; it is advisable not to ride it before repairing;
- It is necessary to clean the engine elements from soot and dirt in advance, since dirt can get inside the valves;
- The temperature in the garage (or other place where repair work is carried out) must be above zero;
- The bike is rigidly fixed on the stand or in other convenient ways;
- The necessary set of keys and containers are prepared and are at hand.
Communities › Daewoo Matiz Club › Blog › Intake and exhaust valves are jammed! Because of which ?
Hello everyone, please give me some advice! The first time I got into the engine to adjust the valves was at 70,000 miles, they did everything well, but I didn’t notice much of a difference! At a mileage of 83 thousand, problems arose with cold starting, everything is described in detail in my blog, so after starting the engine doubled and ran very unstable, I rushed to change it from the simplest: spark plugs, high voltage wires, both gasoline filters, washed the injectors, distributor cap, nothing did not help ! I went to the service station where they immediately told me that the valves needed to be adjusted, they did it, it turned out that the valves were clamped, the gaps were set to 0.20 and 0.30, but after 3250 km the engine started working unstably again when cold, under warranty they did the adjustment again, again all the valves were clamped! The question is why, is it really the problem with the seats or the valves themselves? As a result, they told me to come and check the gaps after 2000 km! Thank you in advance !
How to adjust valves on a 4t 50cc scooter with a 139qmb motor
After making sure that all preliminary notes have been taken into account, you can proceed to the setup process:
- The seat is disassembled, its upper part is dismantled, and then the whole thing is twisted. Next, you need to remove four nuts in the niche itself, two nuts on different sides of the lock, and a few more nuts that hold and secure the bottom. There are two bolts under the carpet that should also be removed. Once these ten bolts are removed, access to the engine will be available.
- Adjusting the valves involves setting the piston to the TDC (top dead center) position, and therefore the cooler grille will need to be removed. To do this, you need to tighten the nuts on the grille body, after which the cooler opens.
Rotor (cooler)
- The next step is to dismantle the cover that covers all valve elements. The cover itself is usually held on by four bolts, after twisting them you will need to unscrew a couple more nuts securing the pipe.
- Now the gas distribution mechanism will open in front of us. There will be several arrows visible on the body indicating the exhaust (lower) and inlet (upper) valves.
- Next, you will need to find such a position of the elements when the piston is located as close as possible to the valves. All calculations are carried out based on the positions of the marks on the generator rotor. Before tuning, you should look at the positions of the holes on the camshaft sprocket - it is necessary that they are aligned similar to those shown in the image below.
- From the camshaft we switch to the rotor, where you will need to find a small mark in the form of the “T” symbol. Having found the desired arrow, install a protrusion parallel to it, as in the photo below.
- This position corresponds to the TDC of the piston, but care should be taken - if there is more than one TDC, for example, as on four-stroke engines, it is necessary that all valves are closed and the holes of the timing sprocket are in the same position as in the photo above. To set the mark to the desired position, use a suitable wrench to turn the handwheel clockwise until the mark and the protrusion coincide. Moreover, if the valves move when the rotor moves, you need to rotate the rotor again to the “T” mark, until the valves stop moving.
- The next step is to actually adjust the bike's valves. You should have a set of feeler gauges at hand, among which you will immediately need the 0.05th one, which is inserted into the backlash, as shown below. You can loosen the lock nut if the dipstick passes too easily, or, conversely, does not get into position. Now, holding the dipstick with your left hand, you need to rotate the adjustment bolt with your right. It is better for the probe to go into the backlash with some effort. When fixing the feeler gauge in the play, one hand firmly holds the adjusting screw, and the other hand tightens the lock nut. Afterwards, all that remains is to check the play one last time. There are cases when the clearances are immediately lost, to prevent this from happening, you will need to repeat the entire process again until the play is exactly under the feeler gauge 0.05. The same steps are performed to adjust the exhaust valve, but here a 0.1 mm feeler gauge is already used.
Valve adjustment
- Once all valves have been adjusted and tightened, their operation should be tested. The test begins with the cooler rotating. After making a few revolutions, you need to again set the mark parallel to TDC, after which the two valves should be in the closed position. Finally, a final measurement of the backlash is made with the same feeler gauge at 0.05.
- After checking, the assembly of all elements begins in the reverse order. It is recommended to tighten all bolts, in particular those securing the valve cover. This is the final step in the valve tuning process on this bike.
To see how to adjust the valves on a four-stroke scooter, see the useful videos:
Size of gaps
What I don't like about Chinese scooters is that they don't have any adjustment data. There is information about this on the Internet, but it is not always reliable.
It’s your right to believe me or not, but for my clients I adjust the gaps within the following limits:
- On engines of the 139QMB series (regular Chinese eighties), I set the gap to 0.05 mm - on both the intake and exhaust valves - the same.
- On engines of the 157 QMJ series (ordinary Chinese hundred and fifty) I set the intake to 0.05 mm and the exhaust to 0.07 mm
How to adjust valves on a 4t 50cc scooter with a 157 qmj engine
The process of adjusting the valves on this bike begins with gaining access to the cylinder head. The first step is to remove the container under the bike's saddle, which is secured with several screws. Having figured out how to gain access to the cylinder head, we twist the four bolts and remove the cylinder head from the engine. Next, we get access to the cooler body. On the one hand, if you don’t have time or circumstances interfere, you don’t have to completely dismantle the fan, limiting yourself to only removing the cover. However, it is better to completely dismantle it, since this will provide full and free access to the nodes and marks needed in the future. If you opted for the partial dismantling option, then to remove the plug, which the arrow points to, a regular screwdriver will be enough. The removed plug will provide a minimal overview, allowing you to see all the necessary rotor marks.
After gaining access to the rotor, take a 14mm socket wrench (you can try to do this with your hands, if possible), which is inserted into the generator casing, and, with some effort, rotate the rotor clockwise, while carefully looking into the hole on the casing. It is necessary to set the rotor to a position where the “T” mark is clearly visible in the hole, indicating the position of the piston at the TDC point.
Now we smoothly move on to the gas distribution unit. Please note that at this point all valves should be closed and the holes on the camshaft sprocket should be in the same position as in the case of the previous engine at this stage of tuning, shown in the photo above. If everything matches, you can move on to the next step. If the mark on the rotor does not match the one shown in the photo, then you will need to continue rotating the rotor until the mark is parallel to the protrusion. During the rotation process, we must not forget to carefully monitor the condition of the valves and holes on the star.
At this stage, some motorists may experience certain difficulties - for example, if the same holes on the sprocket do not match. Typically, this situation occurs due to chain stretching. If the discrepancy is small, then this is not a particular problem, and you don’t have to deal with this issue. However, a large discrepancy between the marks in the future is fraught with motor malfunction, and means that it is time to replace the chain:
- The locknut securing the top valve is loosened.
- A 0.05 feeler gauge is inserted under the valve, and the adjustment bolt is tightened with a wrench.
To check the tension, the probe should take its original place with a little effort and be removed almost freely. If any problems arise, the entire procedure is repeated until the desired result is obtained.
- Having finished with the intake valve, we move on to the exhaust valve. To adjust this valve, a 0.1 mm feeler gauge is used. The procedure itself is exactly the same:
- The screw is loosened.
- The dipstick is installed.
- All fastening screws are tightened and the backlash is measured one last time.
- This concludes the tuning of the valves on this bike. All that remains is to reassemble in the reverse order and test the new settings configuration in action.
For more detailed and visual information about adjusting the valves on a similar scooter, watch the video:
It may be noted that after adjusting the backlash, you can also diagnose the carburetor.
Periodicity
It is advisable to make the first adjustment immediately after purchasing a scooter, both new and used. The remaining adjustments should be made after 3000 - 4000 km.
Many scooter owners periodically complain about an unpleasant sound coming from the cylinder head, reminiscent of a clattering or clicking sound. Or they feel that their scooter is slowly picking up speed when starting up. This is a sure sign that the scooter engine is living its last weeks, and maybe even days.
It is advisable to adjust the valves on a scooter immediately after purchase or after the first run of 500 km
Normally, this phenomenon occurs after a run of 2500-3000 km, and in order not to worsen the situation of the scooter, it is necessary to promptly adjust the valve clearances in the engine. This procedure must be performed immediately after purchase (if the scooter is Chinese), then after the first run of 500 km and then in accordance with the table of professional work, which is located in the instruction manual.
Toha 5, 4 measures. (Views: 4)
That's it! I was expecting an addition of at least 5-6 hp, but nothing here! Abidna-yes!
In fact, what I mean is that in the thread there were concerns about the very small exposed gaps with all the consequences!
Max96
- 22.09.2014
- #4 923
max24
- 23.09.2014
- #4 924
max24
- 23.09.2014
- #4 925
Usually it all starts after purchasing a boat motor with the same characteristics, but different power ratings. A less powerful one is chosen, simply because it was cheaper, or to get acquainted with the world of botting. With a more detailed acquaintance with outboard motors and some experience, the problem in the characteristics comes to light. Absolutely identical indicators in terms of cubic displacement and gear ratios, engine weight, etc., with powers close to each other, begin to be alarming. Or simply one or two horses are not enough to confidently enter the planing mode
.
And here the search for truth begins. Although the subsequent purchase of a boat/motor kit has a significant progression in size/power, you want to finally squeeze everything possible out of the currently available boat motor. For a boatmaster who has decided to exchange his watercraft for a new one according to the standard scheme, increasing the size and power several times over, only purchasing a new powerful motor will help. You can't drive thirty horses out of a tag team. And even if it could work out, it would be for no more than an hour of work. But there are lines of 4-5-6-8 hp engines. , in which, for almost all manufacturers, the previous model will be a compressed version of the next one, with the exception of the opposite effect - boosting one basic model. The same story with the lines 9.9-15-20, 25-35, 35-40. Here we can already do something, but there will still be costs for components, so this is justified if we are not going to change the outboard motor in the near future. . For four-stroke outboard engines, discrepancies are present in changes in timing valve settings and carburetors. In powerful injection engines, you will still have to re-flash the electronic unit. The work of returning the engine to its horses is not difficult, but it is imperative to learn how to control the quality of the mixture, adjust the carburetor and prevent leanness. A good detector in this regard are spark plugs. Also, on engines from 9.9 hp. you will have to adjust the ignition for all speed ranges, moving it to an earlier one. But under no circumstances deviate from the spark plug markings and their gaps recommended by the manufacturer for your engine, or for the one you now have. You can only play with spark plugs if the serviceman has extensive experience, thereby changing some of the characteristics of the engine. » https://goodboating.ru/v-pogone-za-ryiboy-kak-uvelichit-moshhnos/
“Pancakes”, which we in distant and not so childhood, floated pebbles across the water surface - nothing more than
planing mode
.
Of course, you remember that the pebble must have a flat surface, preferably on both sides. A flat surface that is in contact with the water surface is a “low deadrise” - a prerequisite for planing. Obviously, an absolutely flat bottom of the boat, with zero deadrise, has less drag and the highest coefficient for planing mode .
Another thing is that traveling on a punt, even with slight excitement, will shake your brain quite well, and in addition, it is fraught with destruction of the ship’s hull due to strong shock loads.
It is also better not to consider the seaworthiness of such a hull. But the power of the boat motor to switch to planing mode will be minimal. Consequently, for small bodies of water, with eternal calm, you can choose a flat-bottomed boat with a less powerful, and therefore cheaper, outboard motor. As soon as a small wave appears on larger lakes and bays, for a planing boat there is, at the moment, the most compromise option (not counting, of course, multihulls, exotic hull models and, of course, semi-planing boats and yachts) - a hull with variable deadrise. The so-called “deep “V” at the bow, which smoothly transitions into a flatter surface closer to the transom of the boat. This twisted hull increases seaworthiness and reduces shock loads when passing through waves. Sharp cheekbones on the hull, in the bow, work to cut off the waves. The aft part of the bottom also cannot be made completely flat, as this will greatly increase the yaw rate of the boat and increase the radius of circulation. This means that a sharp reversal can be downright dangerous. I absolutely don’t want to load the article with complex formulas and long calculations from nautical universities. We just need to understand the essence of the process. Planing
is a mode of movement when the hull of the boat stops “floating”.
During “swimming”, the Archimedean buoyancy force acts on the body. If the design (low deadrise) and the center of gravity (correct weight distribution) allow it, then, upon reaching the required speed, the hull of the vessel begins to support the oncoming flow of water. This means that the boat is already moving, including due to hydrodynamic forces. And the value of Archimedes' force, in this case, is significantly reduced. The generally accepted value is no more than 50%. Remember a pebble or a water skier - the Archimedes force in the case of planing is extremely small. Both a pebble and a water skier without a life jacket usually drown. In a static state. The deadrise at the transom
has, of course, its limit, after which the boat hull ceases to be planing.
A boat with displacement lines has a much greater deadrise throughout the entire hull, and the chines in the bow have smoother lines. After all, the lack of planes in the aft part, which play the role of a wing, no longer allows it to enter the planing mode. Therefore, such a boat has to push the water mass in front of it, and not “fly” over it. The displacement hull has a speed limit limited by the Froude Number, the founder of the ship theory. Of course, we won’t write any formulas. The speed limit directly depends on the length of the boat's hull. Indeed, in addition to the resistance exerted by friction, the lion's share of energy is spent on the formation of waves. It is not surprising, but an ocean liner and a fishing boat, when moving at the same speed, produce the same wavelength. As the speed increases, the wavelength also increases. Considering the length of the liner's hull, one can imagine how many such waves will pass along it. But the size of a fishing boat may turn out to be, at this speed, less than the wavelength that it itself creates. Wave formation begins, of course, from the bow of the boat. Therefore, at some point, it turns out that the boat is between two waves, right at their soles. At the same time, she tries to climb the bow wave. Increasing the speed will not help in this case. This will only lead to a sharp increase in engine fuel consumption and stern trim. Due to the increase in wave height. The boat is three times longer, will already be positioned on three such waves, which means it will be able to go much faster until their number is reduced to two. Hence the expression “the length runs.” Froude's law is irrefutable and fundamental in hydrodynamics. We considered options with displacement hulls. If the boat had planing contours and sufficient power from the outboard motor, it would be able to cross the crest of this bow wave. This would begin the planing mode. The process of rolling over the bow wave formed by the boat is called the transition mode. To overcome it, more power from the boat engine is required than to maintain it. Therefore, moving in transitional mode consumes much more fuel in this case too. And after overcoming it, excess gas should be released and go into cruising mode. If you are planning to buy an inflatable PVC boat for fishing with an electric boat motor as the main engine, then choose models without a glued transom. The plane of the glued transom, which goes under the water, is the planing geometry of the boat. Such a transom will create a strong vacuum behind the stern of the boat, which will literally pull it in the opposite direction. For fishing in displacement mode, it is better to buy an inflatable boat with a hinged transom. Well-known calculations for reaching planing are 1 hp. engine for 25 kg displacement (total weight of the boat with motor, skipper, spinning rod, beer and dog) (. )
. With an increase in the deadrise of the boat, the weight on the horse will have to be reduced to 22 - 20 kg. This is a rough estimate. Much depends on the design of the boat, the density of the water, the settings of the boat motor, the correct weight distribution and competent designers. For example, on a PVC inflatable boat, you should install a boat motor of obviously higher power than on a plastic hull. Among other things, planing hulls have longitudinal and transverse steps - ledges on the bottom of the boat, to reduce the wetted surface and cut off excess water, transom plates - to stabilize the boat and reduce excessive trim, and other tricks. A well-designed planing hull, not just the hull, but the entire boat, has very high seaworthiness, speed and safety. In addition, the efficiency of the outboard motor depends on this, which is quite important on powerful large boats.
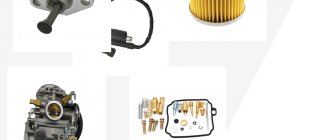
How does a scooter carburetor solenoid valve work?
The starting enrichment on a 2t scooter and on a four-stroke moped works according to a fairly simple algorithm. On a cold power unit, the spool needle occupies the upper position. It is responsible for opening the fuel channel, and the position of the damper affects the volume of supplied air. The first revolutions when starting the engine cause a vacuum inside the emulsion channel, and gasoline is sucked into the engine.
The result is a highly enriched mixture, making it easier to start a cold engine. Before reaching operating temperature, the power unit needs to be fed with an enriched mixture.
The enricher in this mode performs the function of a parallel carburetor - fuel entering through the nozzle is mixed with air and directed to the engine.
The current generated by the generator of the running engine is supplied to the contacts of the heater that controls the thermoelectric valve of the intake system. Due to heating, the temperature of the powder drive increases, which causes the rod to gradually extend up to 4 mm. The force is transmitted to the pusher, which ensures the movement of the damper.
The starter enricher on a scooter works according to a fairly simple algorithm.
As the engine warms up, the spool with the needle lowers, followed by the air-fuel channel closing. After five minutes, the damper closes completely and the mixture becomes lean. Now the gasoline enrichment system on a warm engine is regulated by the carburetor.
After stopping the engine, the valve stops heating, and as a result of powder compression, the damper drive using a pusher and rod returns it to its original position. The system is ready for subsequent startup. The cooling and return process takes no more than two minutes. The enricher has a drawback - it works separately from the motor.
As a result, in the warm season, on a hot engine that does not need a rich mixture, the engine, when the thermoelement has cooled, is powered by a rich mixture.