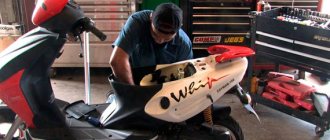
Any scooter, be it Japanese or Chinese, has the ability to start from an electric starter or a kick starter. If the first one doesn’t work for you, which is a very common problem, kickstarter comes to the rescue. Let's look at the reasons for its breakdowns.
Probably 80 percent of scooter owners use kickstarter. Kick means foot, that is, you start the scooter using your foot, which you need to press on the foot located on the variator. And if you often start the scooter this way, the kickstarter may break. The reason may be either poor quality design (most often in Chinese models), or incorrect and rude attitude. Using my own example, I will say that having a Japanese scooter with a kick starter failure there were no problems, while a Chinese two-seater scooter received two kick starter failures in 1 year. If you simply compare the material of both scooters, then even by touch you can see that on Chinese scooters the variator cover or the kick starter itself has very cheap material.
Why does the kick starter break?
There may be several reasons for the breakdown, because they are the ones that most often happen to most scooter riders.
Kickstarter build . If you decide to change the kick starter or another part, be sure to do it correctly. You will need to assemble the spring, retaining rings and other elements according to the instructions. If you miss something, the kick starter leg simply will not return to the right place (see photo).
Worn teeth . Another common failure. If you press the kick starter foot sharply and often, the teeth connecting the foot and the variator will simply wear off, which threatens the same slippage of the foot. The result will be the inability to start the scooter, so keep an eye on the condition of the teeth.
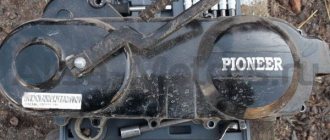
Broken variator cover . Most often it happens with Chinese scooters, which I myself have witnessed more than once. If you press the leg with great force or sharply, the cheap and low-quality material of the variator cover will simply crack around the leg. Here, repairing a variator on a scooter is unlikely to help, as well as welding. The Chinese variator cover is difficult to weld, the weak material does not allow this, so the only option is to buy a variator cover.
We looked at several reasons why the kick starter breaks down; repairing this rather problematic element may take you a little time, but when you have a similar breakdown on the road, you will have to roll the scooter. There may also be three repair options. In the case of cracked teeth, the only possible solution is either replacement or welding. In the case of replacing a kick starter, you simply need to correctly assemble the entire structure, which will be discussed in another article. And if the variator cover is cracked, all you have to do is replace the cover itself. You can try to weld it, but I’ll tell you right away that there is little chance of fixing it this way.
How to tell if replacement is needed
It is clear that the circuit must be changed when there is obvious dysfunction. When the chain wears out a lot, it makes a loud noise. Well, or jumped over the tooth of a star. Or it fell off, which indicates its stretching and wear.
Standard chain lifespans should be close to the lifespan of the scooter engine itself. It's logical. Each owner operates the vehicle differently, but the average chain lifespan is somewhere between 15,000-18,000 km. In a situation where the engine was halved to eliminate other faults, and the chain was immediately replaced after using it for, for example, 9000 km, everything is clear.
Photo report: Servicing the kickstarter of the Chinese scooter 139QMB (50-80CC)
While the scooter is still new and the factory lubricant remains on the kickstarter parts, the kickstarter works properly: it cranks the engine easily and without slipping, does not creak, and most importantly, after starting it always returns to its place, and does not hang snot.
And as soon as the factory lubricant runs out, the kickstarter parts stick to each other and then problems begin: it creaks, then slips, then does not return to place. I think this situation is familiar to many owners of Chinese scooters, especially scooters equipped with 139QMB series engines.
To avoid this situation, disassemble the kickstarter at least once a season and lubricate its parts. Disassembling and lubricating does not take much time, nothing is particularly difficult there either, so don’t be lazy and service your scooter on time and all technical problems will bypass you.
To disassemble and lubricate the mechanism, you must first remove the variator cover
Then unscrew the bolt on the winding lever, pull it out of the lever and then just remove the lever itself
The shaft that we need is fixed with a retaining ring. We remove the ring with a special puller for retaining rings or we suffer and remove it with the help of a couple of nails and such and such a mother...
There is a thrust washer under the ring - this is a very important device! When disassembling, do not lose it!
Remove the “fungus” from the lid
We take out the shaft with the spring
Before reassembling, carefully wash and lubricate the places where the parts came into contact with the variator cover. You can use any lubricant, but it is better to use copper paste. If you don’t have one, apply regular lithol.
This is interesting: How can insurance companies get a legal discount for accident-free driving?
Apply lubricant to the shaft first
Insert the shaft into the cover, wind the spring
Turn the cover over, place a thrust washer on the shaft and secure the shaft with a locking ring.
Lubricate the “fungus” axis
We move the gear sector of the shaft so that the welded tooth goes behind the “fungus”
We insert the “mushroom” into the lid, making sure that its spring bracket fits between the two ledges
This is where our service ends. All that remains is to put the cover back on and put the winding lever on the shaft.
Backlight
An excellent option for adding individuality to your scooter is to install additional lighting. The most common type of implementation of such an event is the installation of LEDs. The main positive point in this process is the minimum energy consumption that is necessary for the operation of the diodes. They can also be mounted on wheels. And on the dashboard, and even on the headlights. The LEDs under the bottom of the scooter look no less original. At night, they can be used to additionally illuminate the road. And it will be easier for other road users to see the scooter rider.
A good option for external tuning is to replace the front headlight with a more advanced and brighter one, which together with the installed LEDs will look very impressive. Many scooter owners immediately after purchasing a vehicle try to replace the factory mirrors with darkened or tinted counterparts.
To summarize, I would like to note that the option of making changes to the appearance of the scooter depends on the financial component and imagination of the owner of the scooter. In any case, this process can be turned around, since tuning a scooter is a field for implementing the most sparkling ideas and plans, which very often become the founders of new trends in styling.
There is no need to be afraid of experiments, especially now, when you can find any structural element or part on store shelves. But you shouldn’t forget about a sense of proportion.
Source
Kickstarter repair on a Chinese scooter with a 157QMJ engine
Typical situation: The winding claw of the Racer Taurus scooter, when pressed, hangs in the pressed position and does not crank the engine. It turns over as if at idle, while some strange sounds are heard from under the variator cover.
The cause of this malfunction lies in the incorrect assembly of the kickstarter mechanism located under the variator cover. Or rather, even in incorrect assembly, and in ignorance of the fact that the variator cover needs to be removed only with the crank removed in advance, leaving the kickstarter shaft in its place.
Beginners usually don’t know this and remove the variator cover along with the crank and shaft, thereby bending the return spring bracket and preventing the correct installation of the shafts. And then they can’t properly assemble the mechanism into a “heap”, so they drive around with the winding claw always not working.
We remove the variator cover, unscrew the bolt on the winding claw and remove it from the shaft.
We remove the starter primary shaft from the cover body.
Do not lose the thrust washer of the kickstarter shaft.
We remove the front variator. The work of removing a scooter's variator is described in detail in the article: How to remove a scooter's variator using available tools
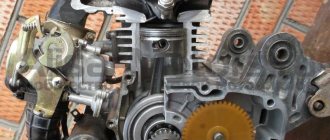
We take out the intermediate shaft, as you can see there are completely no traces of lubricant, which is not good. It is imperative to lubricate all rubbing parts.
In order to lubricate the intermediate shaft, it must be disassembled; to do this, remove the pin.
Remove the thrust washer and intermediate shaft gear.
Lubricate the shaft with grease (Litol-24).
We assemble the intermediate shaft in the reverse order. Lubricate the intermediate shaft mounting bracket.
Lubricate the working surface of the shaft.
After completely lubricating the intermediate shaft, set it aside; we won’t need it for now.
And now, pay attention to the fixing bracket of the return spring, it is unbent, and they unbent it unknowingly when they tried to remove the variator cover along with the kickstarter shaft (we do not take our case into account, since it was unbent a long time ago before my intervention).
We remove it and level it.
We install the intermediate shaft into the hole, making sure that the pin on the shaft fits into a special groove.
We make sure that the installation bracket also goes into place.
We look for marks on the intermediate shaft - in our case, these are “arrow” and the letters FT.
We rotate the intermediate shaft gear so that the “arrow” is directed to the crankshaft journal, and the letters FT are directed to the kickstarter shaft (do not get confused).
We also lubricate the bushing.
We are looking for a “brewed tooth” in the kickstarter sector.
With one hand, hold the intermediate shaft gear from mixing, with the other hand insert the kickstarter shaft so that the “welded tooth” comes close to the tooth of the intermediate shaft helical gear, that is, the kickstarter shaft should not rotate clockwise; the “welded tooth” should secure it from turning .
It should turn out like this.
After installing the kickstarter shaft, we put the return spring into place; this is easiest to do with pliers.
After installing the return spring, screw in the pre-aligned fixing bracket.
Before installing the variator cover, do not forget to place the thrust washer on the kickstarter shaft.
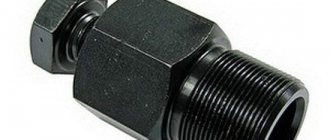
Homemade puller
Unfortunately, homemade, just like factory-made, is not without its drawbacks. It is moderately reliable, versatile, and cheap, but it is not so convenient to use, and if you do not know how to use it, you can easily break the threads under the bolts of the cooling impeller.
Which puller you will use is up to you to decide. I have described all the pros and cons of both options for you.
For myself, I chose the option with a homemade puller. And the price has nothing to do with it. It's all about experience. Over the years of work, I tried a lot of things and eventually came to the conclusion that there is nothing better than a homemade tool puller.
I screwed a bolt from a regular car puller into the nut, attached the washer to the cooling impeller, marked points with a pencil through the holes for the bolts, marked and drilled the holes.
If you don’t want to make a puller, buy a factory one at the store or ask your friends. Just before purchasing, just in case, remove the cooling impeller and look at the condition of the thread.
Repairing a kickstarter on a Chinese scooter using improvised means
Mar 14, 2015
It is shown how you can eliminate some kickstarter breakdowns using simple means. more info on the page - valeraprivalov.ru/problemyi-s-kikstarterom-na-skutere-super-sport-acar/
Comments
This is a ratchet from a Suzuki Lets
How did you drill the gear? I tried it manually but there was steel in there
At the end of the season, my kickstarter failed again. The teeth of the crescent were immediately a little scratched and in the end a couple of teeth broke off. then I solved the problem with starting the scooter this way - https://www.youtube.com/watch?v=USmTDyuNiWI
I already had it with a hole. I bought this scooter as a non-running scooter. Kickstarter didn't work. This gear was simply given away and there was no shaft on which it was put on. Perhaps it was pressed onto the shaft, but not much. And of course, drilling is a problem - you need to use a drill with a pobedit tip in a lathe. In order for the gear to spin smoothly on the shaft, everything must be accurate.
I have a problem with the leg, when I start the scooter everything is fine, but after I start it, it’s as if something is rubbing there and there’s a very loud and nasty grinding sound, and it wobbles just like in the video, if you press it to the variator, the noise disappears, but as soon as you let go it's starting, help me, I'm sorry, I'm already for it. I'm scratching my head about the fact that it could be a 4t 50cc engine
This is interesting: The need to remove the minus terminal when the car is not used for a long time
Dude, exactly the same problem. Have you solved it? Also, I put my foot against the variator when I’m driving, the sound disappears.
It’s so difficult for me to say what the problem is with your scooter. you need to remove the cover and where it rubs should be visible. perhaps your version of ". It seems like a crescent moon is rubbing against the ratchet due to a bad washer or bushing. - is correct. Perhaps the crescent axle bushings need to be replaced or there may be some other reason. you have to look visually - after all, I only repair my scooter, but mine didn’t have such a problem.
It’s like a crescent moon is rubbing against the ratchet due to a bad washer or bushing, but I’m not sure whether this is due to this or not
Ignition advance
How to set the ignition on a 4t scooter with advance? There is an opinion that if you do this, the speed and power of the motor will increase. In theory, this is true. If the spark at the moment of compression occurs slightly before the moment the cylinder passes the dead center, this should give the desired effect. But the technical implementation of such an ignition setting on a scooter is associated with the transfer of its protrusion on the generator rotor housing. There is a method that is simpler and safer, which gives a certain effect. You can make a step on the ignition ledge. To do this, you need to remove a layer of 0.5 mm from half the surface of the protrusion. The step should start from the side that first contacts the ignition sensor. The resulting dual spark will provide more predictable engine starting and will also increase the likelihood of ignition when exposed to adverse weather conditions and improper fuel and air settings.
The ignition system plays an important role: without it, not a single vehicle with a gasoline or diesel engine will move. The quality of engine operation, whether it will start in cold weather, and whether it will work correctly depends on how it is configured. Depending on how the ignition is set and what spark plugs are selected on the scooter, it depends on whether it will go or not. From this material you will learn how to set the ignition on a scooter yourself, what you will need for this, and how to set up a contactless system.
Scooter kickstarter repair
Any scooter, be it Japanese or Chinese, has the ability to start from an electric starter or a kick starter. If the first one doesn’t work for you, which is a very common problem, kickstarter comes to the rescue. Let's look at the reasons for its breakdowns.
Probably 80 percent of scooter owners use kickstarter. Kick means foot, that is, you start the scooter using your foot, which you need to press on the foot located on the variator. And if you often start the scooter this way, the kickstarter may break. The reason may be either poor quality design (most often in Chinese models), or incorrect and rude attitude. Using my own example, I will say that having a Japanese scooter with a kick starter failure there were no problems, while a Chinese two-seater scooter received two kick starter failures in 1 year. If you simply compare the material of both scooters, then even by touch you can see that on Chinese scooters the variator cover or the kick starter itself has very cheap material.
Tuning options
It's no secret that changes to the appearance of a scooter are made in order to give individuality to the exterior, as well as to make traveling on a scooter more comfortable. As already mentioned, tuning can be divided into several types: external and internal. Using the first option, changes are made to the characteristics of the vehicle, thereby improving its driving properties; in the second case, they give the appearance additional elegance and uniqueness.
One of the easiest options for updating the exterior of a scooter is painting the frame. For example, the color of a scooter has long lost its original shine and charm and needs updating. The painting process will allow you to both update the color and replace it with something more suitable to your style. It is recommended to use an aerosol can during the painting process. If you couldn’t find the right color in a spray can, then you can do the job using a regular brush. If the scooter is painted in several layers of paint, there should be a break of at least a quarter of an hour between applying each layer.
At the end of the work, you should think about coating the frame with a special varnish, as well as polishing the finished surface. In addition, at the very end of the work on tuning the appearance of the scooter, you should think about pasting the frame with a variety of stickers, which can also add individuality.
Factory puller
The rotor can be removed using either a factory puller or a homemade one. The option with a factory and homemade puller has its pros and cons. I'll start with the disadvantages of the factory puller.
The main disadvantage of a factory puller is its price. A factory puller is very, very expensive. About 500-600 rubles. But price is essentially not a very important criterion for me. Versatility, reliability, ease of use and durability are much more important to me. Unfortunately, the factory puller does not have all these advantages, except perhaps ease of use.
The versatility of the factory puller is zero and, unfortunately, it is only suitable for a certain series of engines. And if you need to repair a scooter that is not widely used in our country, then you will also have to buy a new puller for it. And this will be very, very difficult to do, since tools for rare models of scooters are as rare on sale as spare parts.
The reliability of the factory puller is extremely low. I won’t say that the problem is in the design itself, rather the opposite: the design is more than perfect. Where else could it be more perfect?.. Nut + bolt - that’s its entire design.
But the quality... There is something to discuss here. The quality of factory pullers leaves much to be desired. They are enough for literally several times, and I’m talking about expensive pullers for 500-600 rubles.
Cheap ones at 220-250 rubles in terms of quality are completely out of the question. Not only are they made of some kind of plasticine, but even this seems not enough for the manufacturer of this shit. He still manages to make them thinner or even thicker than necessary.
This is what the cheapest puller looks like, or rather, what’s left of it: a bolt from it is lost somewhere. It was used only once - the thread was immediately torn off, both on the puller itself and on the rotor, although before using this guan it was good there.
And even if you imagine the situation. that I will be able to buy a good branded puller, even if it costs 1,500 rubles, but it costs about that much. So where do I put the tusks (or rather, where can I get away from them???), who kill the threads under the puller and then, with an innocent look, roll their garbage dumps to me for repairs?
This is what a high-quality factory puller looks like. Their prices are real - from 500 rubles and above.
Cons are minuses, but the factory puller also has its advantages. One of which is ease of use. And it is really convenient and easy to use. What's inconvenient about that?.. Screw it into the rotor, tighten the bolt and the rotor itself jumps into your hand.
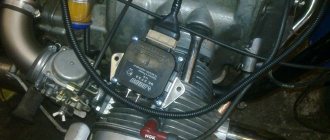
Principle of operation
Inside the body there is a movable cylindrical element called a rotor (in collective farm language - an anchor). An insulated copper wire is wound on the rotor in a strictly defined order, forming several independent coils, circuits, windings, poles, circuits - which, in fact, is the same thing. The ends of each of the coils have their own independent outputs in the form of lamellas (contacts) on the collector.
Inside the main body, two permanent magnets are glued exactly around the rotor. Each of the magnets has a different pole N (north) S (south) in relation to each other. Anyone who went to school will understand...
After you press the start button, the electric current from the battery will begin to pass through the power terminal, the brush and then, passing through the lamellas of one and the rotor windings - it forms a constant magnetic field along the axis of the armature.
I think there is no need to explain that the magnetic field that forms a constant electric current has different polarities? So, what am I talking about?.. Oh yes, the magnetic field of the rotor will begin to interact with the magnetic field of the permanent magnets and the armature will deviate by a certain degree. The commutator will turn, the next pair of lamellas will approach the brushes and the rotor will deviate again. Thus, it will rotate exactly until you lower the start button.
Malfunctions
There is nothing special to break in the starter and all its malfunctions consist of wear, sticking of the brushes and contamination of the commutator, which often happens due to engine oil getting into the housing from the engine crankcase. It is worth noting that faults associated with commutator contamination and brush wear are typical for DC electric motors.
Worn brushes, as well as a dirty commutator, prevent the passage of electric current through the brushes to the lamellas of the rotor windings and therefore the starter stops working. In this case, to restore the functionality of the starter, we just need to clean and wash the commutator and replace the brushes with new ones or make them ourselves (more on that later).
In addition to purely mechanical faults associated with wear and contamination of current-carrying elements, there are also a number of faults associated with a short or interturn circuit of the rotor windings, as well as with a violation of the contact of the winding output with the commutator lamella and burnt wire insulation.
All these malfunctions are characterized by increased noise and heating of the starter during operation and a drop in its speed. If, after cleaning the commutator and replacing the brushes with new ones, the starter turns poorly, gets hot, and hums, then most likely not everything is in order with the rotor windings. Either they shorted out, went to ground, or simply burned out. And nothing can be done about it.
Removing the rotor
Insert the bolts into the required holes. We take the bolts from the cooling impeller - they fit there perfectly. In order not to touch the windings, we screw restrictive nuts onto the bolts - they will not allow the bolts to go deep inside the generator.
We apply the puller to the rotor and screw the bolts into the holes. In order not to break the thread, slightly tighten the central bolt and see if all the bolts are tight. If any bolt is loose, tighten it.
This way we will evenly distribute the load between the bolts. If you neglect this moment, the entire load, unnoticed by you, can rest on only one bolt or two, and then they will break out of the rotor along with the thread. We don't need this, of course.
Now the main thing: what is there, you cannot tighten the central bolt by force. In this case, excessive force will not achieve anything. Everything must be done slowly and competently. Otherwise, you will tear the puller out of the rotor along with the roots, and then your budget will become completely financially insolvent.
You only need to remove the rotor this way: Lightly tighten the central bolt of the puller with a wrench, lightly hit the end of the central bolt with a small hammer - the rotor, usually, after the first blow, flies off the cone without talking, if it doesn’t fly off, pull the bolt again and hit again.
I learned this technique back in 1996, when I had the opportunity to remove the reel drive pulley of the Kolos combine harvester from the shaft. If it weren’t for one smart person who promptly told me how to work with a puller correctly, then I would have smashed both the pulley and the puller and the sledgehammer along with the combine...
The rotor sits on a key. If you do not plan to further disassemble the engine, leave it as is. And if you plan, you better get it, otherwise you’ll lose it.
A broken key can be easily removed with small pliers; if the key fits very tightly, leave it, it won’t get away from you.
So that you don’t have to guess later how your stator was positioned, we put marks with a core or take a photo, remember it, or do something else. This is necessary in order to protect yourself from problems with a lost outline.
Can you push?
If, after pressing the starter button, you hear a short-term unusual grinding noise and the engine does not start, then, most likely, the problem is not in the starter - the battery has simply “died”. The symptoms of a starter malfunction are different: when you press the start button, a single metallic click is heard from the contacts of the starter relay, but this is not followed by engine noise. What to do?
Engage first gear and, with the clutch depressed, pushing the motorcycle back and forth, press the starter button. If the motor starts working, we can conclude: there is poor contact between the carbon current-collecting brushes and the commutator. Dust got between the rubbing parts (commutator brushes), causing sparking and forming a kind of dielectric. When the motorcycle was pushed back and forth, while sliding, the brushes found contact - and the starter started working.
This method of starting a motorcycle will help if the “disease” is at an early stage. However, a moment will inevitably come when the motor cannot be excited.