Tuning the carburetor and air filter.
The basic principle of driving fast is to burn more gasoline per unit of time, it is suitable for tuning Chinese 4t scooters, Japanese 2t scooters and any other models and types of engines, and the carburetor helps in this, first of all. You can modify the standard unit by installing more efficient jets, but in practice it is better to install more efficient models. Scooter tuning is made easier due to productive models of carburetors produced by DellOrto, a set of pipes and other accessories for them.
A high-performance carburetor will deliver more fuel to the cylinder, and more fuel requires more air. Therefore, the standard filter should be reviewed; it is best to replace the filter element with a new one, while making sure that the entire system is tight. If you are preparing a high-power device, it makes sense to install a minimum resistance filter, but do not forget that it requires constant care, otherwise the filter element will dry out and sand will begin to get into the engine.
Analogues - engine 1P39QMB
Chinese developers have created an analogue of the Japanese 139QMB engine - a motor labeled 1P39QMB, which in appearance completely replicates the original. Despite all the similarities, you can still find differences: the valve clearances on the 1P39QMB are not adjustable. The situation is similar with the carburetor: before direct operation it requires thorough cleaning and correct adjustment. Chinese copies of 139QMB engines, of course, cope with their task, but their main purpose was to reduce the final cost of motor vehicles. Budget versions of scooters are equipped with exactly the same versions of engines that are good only for short trips at low speeds.
Before starting operation, be sure to carry out a full run-in of the 1P39QMB engine. The optimal operating mode of the engine begins only after 2 thousand kilometers, but after 10 thousand kilometers all its technical characteristics drop, and it loses dynamics and power.
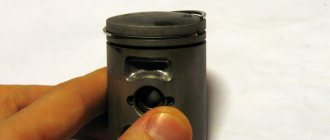
Installing piston rings
Remove the set of piston rings from the box. A piston ring set for a Chinese four-stroke scooter usually consists of five items. Three of which are a single assembled oil scraper ring, the other two: upper and lower compression.
A typical set of piston rings looks something like this
Or so
Carefully unpack the kit with perfectly clean hands.
In the kit you will find two of the thinnest rings and one thick corrugated ring (expander) - this will be an assembled oil scraper ring that needs to be installed on the piston first.
We place an expander in the lowest groove of the piston
We place thin oil scraper rings in the same groove - one under the expander, the second on top of the expander
We find the lower and upper compression rings in the kit and install them, respectively, in the middle and upper grooves of the piston - with marks on the side surface to the cylinder head (cylinder head). The lower compression ring differs from the upper one in color (not always) and the shape of the working edge (always). In most kits, the lower compression ring is painted black, and its working edge has a slight bevel.
Tags
The top compression ring in the vast majority of piston ring sets is a uniform light color. But this is in most cases, but in practice it happens that the kit comes with upper compression rings that are black or even red
By and large, the color is not particularly important to us, something else is important to us: the working edge of the upper compression ring has small roundings (chamfers) on the sides, and the working surface of the edge of the upper compression ring is covered with a shiny protective coating
For example, in this kit both compression rings are black. But the working surface of the upper compression ring is covered with a layer of protective coating, and small chamfers are removed on the edges of the working surface.
The lower compression ring has a matte working surface, and the working edge is beveled at a slight angle. All these moments are clearly visible in the photo.
The compression rings in this kit are red and black. As in the first case, the upper compression ring has chamfers on the working edge and a protective coating, and the lower one has a matte working edge beveled at an angle.
On classic piston ring sets, the upper compression ring has a light color and a rounded working edge. The bottom is dark in color and the working edge is beveled at a slight angle.
When installing the piston rings, do not forget about the marks. The marks on the rings after installation on the piston should be oriented towards the cylinder head (cylinder head).
We remove 50 and put 72. Replacing the piston on a scooter.
Scooter tuning, how to properly tune a scooter Scooter tuning using the example of Honda Dio AF-18 Remove 50 - put 72. Replacing the piston on a scooter CVT tuning. Adjusting the weight of the variator weights using available materials
Let's start the analysis.
1.
First, let’s free up access to the engine by dismantling the “toilet bowl” and the plastic underneath it. Now it’s the carburetor’s turn - let’s free it from all the tubes and disconnect the pipe coming from the filter. Next, we unscrew the fastening bolts of the inlet pipe (just be careful that no debris or dirt settled at the junction gets into the cylinder through the opened inlet hole), and now the carburetor is in a free state. Also, the scooter engine itself may have a plastic casing, which also needs to be removed. And finally, the muffler also needs to be removed; the mounting bolts are located near the oil filler neck and on the exhaust pipe.
Next you need to clean the dirt at the junction of the cylinder head and its cover. Disconnect the tubes from the cover.
Disconnect the spark plug wire and unscrew the spark plug.
2.
Using a 8-mm socket, carefully loosen and unscrew the cylinder head cover mounting bolts. We remove the cover and here is the timing belt - the gas distribution mechanism of the scooter. Now, in order to be able to carefully remove the mechanism with the rocker arms, you need to set the TDC of the piston (top dead center). How this is done is described in the article Adjusting scooter valve clearances. Next, use a 10mm head to unscrew the timing belt mounting nuts, gradually loosening them crosswise (the nuts are marked with an arrow). After this, carefully remove the bracket with the valve rocker arms, holding the camshaft and sprocket (there is no need to remember the position of this bracket relative to the valves, since you can’t put it upside down anyway).
3.
Now attention. Before removing the chain from the sprocket and the camshaft, you can mark some chain link so that during the assembly process you can hook it onto the same sprocket tooth on which it was before disassembly - although you may have to move the chain later, this will help immediately put it on more accurately. To do this, it is convenient to use the tooth located above the large hole of the star (it is marked in the figure with a red arrow, and the tooth with a line). In addition, the chain needs to be tied with something so that the insidious piece of iron does not fly into the crankcase. In my case, this “something” turned out to be tin wire that came to hand. The other end of the wire was tied to the frame.
4.
You can mark a link using a thin wire, as in the figure. From now on, there is no need to rotate the crankshaft unnecessarily - there will be no unnecessary hassle during assembly.
5.
Next, unscrew the two cylinder mounting bolts, and you can remove the cylinder head. This is done carefully, gradually loosening it to the sides. We also keep an eye on our chain; the wire will have to be untied from the frame (namely the wire from the frame, not the chain from the wire).
6.
And here it is, the holy of holies of the scooter. The soot-covered piston saw the light of God. But it’s too early to rejoice. We need to get even further. To do this, remove the cylinder block itself.
7.
This is what the cylinder head looks like from the inside. If desired, you can clean the carbon deposits with a solvent, but it is advisable not to touch the valves and the area around them, this can lead to “depressurization” of the valves. The fact is that during running-in and general work, the valves are rubbed against the surface of the cylinder head so that the closed state of the valve ensures complete tightness. And if you start cleaning the carbon deposits around, there is a danger of damaging this seal. In this case, the valves will have to be ground in manually. There are special liquids for removing carbon deposits from internal combustion engines. But sometimes mechanics use household liquids designed for cleaning ovens and gas stoves - they are much more effective. But this efficiency may be excessive. Such products, having “eaten” carbon deposits, are capable of “biting” the aluminum of engine parts. There is such a method: heat the part with a hairdryer to ~ 60°C, spray the contaminated surface with a household spray bottle and after two or three minutes, as soon as the carbon deposits soften (check the hardness with a wooden stick), immediately clean it off and rinse the part with water. Polished parts after such cleaning become matte gray or matte brown.
8.
We check whether the gasket is caught on anything, and very carefully (!!!), holding the connecting rod (when a sufficient gap appears), pull out the cylinder block. And we follow the chain. It is necessary to hold the connecting rod so that the piston, when it slips out of the cylinder, does not hit the edge of the crankcase and is not deformed. Although some here advise to first set the piston to BDC, we didn’t bother pulling the crankshaft with the chain again.
9.
Here is the piston, free from the sleeve, on the connecting rod. The naked eye can see what a considerable layer of carbon deposits is on the surface of the piston. After removing the piston, this deposit can also be very carefully removed with a solvent.
Now we will remove the piston itself from the connecting rod. It is held in place with a finger secured on the sides with fastening rings. When removing and installing them, you should be very careful, as the ring can spring and fly into the crankcase. You can’t leave it inside, you know. Of course you can get it, but it will take a lot of time - you will have to drain the oil, try to hook this ring with a magnet, or you will even have to disassemble the engine. To prevent all this from happening, plug the crankcase neck with a rag. To remove the pin, it is usually sufficient to remove one retaining ring. But not with a screwdriver, as is often done, but with narrow pliers. It happens that the rings on some engines have very small antennae, and sometimes there are no antennae at all - then only an awl will help. When installing, the ends of the ring must be located in the same plane - check it by placing it on the table, straighten it if necessary - straighten it with pliers. The rings are removed, you need to squeeze out your finger. It may be easy, or you may have to work hard. Some strongmen manage to bend the crankshaft when they squeeze out their finger, and the bend may not be noticeable by eye.
10.
Here it is, a handsome piston removed from the connecting rod. Carefully clean it of carbon deposits, then wipe it with a rag soaked in gasoline. Also, with a soft cloth soaked in gasoline or carburetor cleaner, we wipe the sooty area inside the liner, which the piston rings do not reach.
11.
Once you get to the crankshaft, you can check it for play. The verification process is described in the article Repairing a scooter - checking the condition of the scooter's crankshaft.
What's in our tuning kit? It includes: a piston with rings (piston and retaining rings), a cylinder and a set of gaskets. When assembling, lubricate all parts with engine oil. Do not skimp on oil: the first minutes of engine operation after assembly are the most critical, and parts should not run dry!
The compression rings of a 4-stroke engine should not be pushed into the grooves at random. Due to their shape, they, like scrapers, scrape oil from the cylinder walls into the crankcase - they help the oil scraper ring. There is a designation on the top surface of the rings, usually the letter A, but it happens that something else is stamped into the marking. Make it a rule: any inscription on the ring should be directed towards the cylinder head.
Feel the difference!
Be sure to separate the joints of the rings by 120° from each other. Moreover, if the oil scraper ring is assembled, the upper and lower of its constituent rings must be moved apart relative to the place where the gap should be by 20 mm in each direction. Exactly how the gaps are located relative to, for example, the plane of rotation of the crankshaft is not important.
Install the retaining ring so as not to deform it. Otherwise, it will not fix the finger and may jump out, damaging the cylinder wall. You can check whether the rings fit well in the grooves like this: take them by the tendril with narrow pliers and try to turn them. In the direction towards its gap, the ring should move with little resistance, and in the opposite direction - not move at all.
Remove the centering bushings from the old cylinder and install them into the new one. Find the cylinder gasket in the tuning kit and place it on the crankcase studs. In any case, when assembling the motor, use only new gaskets. As a last resort, thoroughly clean the joint between the mating parts and lubricate with silicone sealant. It can be painlessly used (in accordance with the instructions on the tube) in almost all components, except for the joint under the cylinder head and in the carburetor. When the cylinder is put on the piston, you need to compress the piston rings using, for example, a simple crimp made from a beer can. It happens that without such a device the piston cannot be inserted into the cylinder at all. Don’t forget to lubricate the cylinder bore with engine oil first. It’s good to work together: while one, squeezing the rings with his fingers, pushes the piston into the cylinder, the other pulls the timing chain.
12.
Well, then the order is reversed. It is not necessary to change the cylinder head for a 72 piston or smaller. If we are talking about a larger cubic capacity, then replacing the head is necessary. There should be no difficulties during reassembly in reverse order. Let's dwell on just a few points. Before installing the cylinder head, we “pull” the piston to the very top, at TDC. But only so that our mark on the chain does not dive into the crankcase, but remains on top.
When installing the cylinder head, you need to monitor the “skis”—chain vibration dampers—so that they lie flat, without distortions or snags.
In paragraph 3, it was noted that, to simplify, you can mark a certain chain link so that during assembly you can throw it on the same sprocket tooth on which it sat before. Here we had to tinker a little during assembly - it was difficult to immediately put on this necessary link, the chain kept slipping. By the way, it turned out that it was not necessary to first remove the yellow wire-tag from the chain - the chain went on with it, and the wire was easily removed afterwards. And one more thing - the chain was put on only in one “initial position”, that is, first it must be thrown over the camshaft axis, inserting the shaft into the loop of the chain (unfortunately, I did not take a photo). In other words, you need to not just place the shaft, resting the bearings in the grooves, but first insert it from right to left through the chain. The same effect will occur if you throw the chain on the sprocket to the left (relative to the observer) side.
13.
Finally the chain is on. However, it is still too early to dance about this. Now it is necessary to check the correctness of what was done, that is, to make sure that the valves will actually open and close on time, and not rest against the piston every 2 strokes. To do this, we turn the camshaft as in the figure in point 3, that is, so that the large hole on the sprocket is located “on the 3rd stroke” (see the figure in the article Adjusting the valve clearances of a scooter).
Now is the time to look at the generator flywheel - the “T” mark on it should coincide with a special protrusion in the housing. This means that the piston is now really at the very “top”, at TDC, and there will be no conflicts with the valves. If suddenly there is no such correspondence, then you need to manually set it by rotating the flywheel clockwise. However, let me remind you that the desired piston TDC position is achieved only with every SECOND such mark match, and not with every first one - a four-stroke engine has two TDCs, at the beginning of the 1st and 3rd strokes. So, we screwed the flywheel to the mark. It’s clear that the holes in the camshaft star are no longer in place, and now our task is to align them correctly without disrupting the alignment of the marks on the flywheel.
14.
In general, you can not mark the chain link, but when installing the sprocket, calculate the “middle” link (that is, pull the chain evenly with a finger or a nail, then this link will be at the top), and throw it on the tooth above the large hole of the sprocket. Let me remind you first by pulling the piston up. And then, double-check as described in paragraph 13.
After all this, you can dance.
15.
We carefully place the bracket with the rocker arms, making sure that these rocker arms lie on top, and do not rest against the valves with their cams on the side. We tighten the fastenings conscientiously. There are various recommendations for tightening the head nuts, but the simplest and most reliable is to tighten them crosswise (in general, the same as unscrewing them).
16.
I don’t know whether it is necessary to explain why it is now necessary to check and adjust the thermal clearances of the valves. By the way, if after the adjustment there is a desire to tighten the timing belt mounts again, then the desire should be eliminated, but there is no need to tighten them, otherwise why did we just adjust the gaps? Close the lid and screw it on.
We change the oil and filter. That's all, further assembly is a matter of technique. If the scooter does not start the first time after assembly, carefully check that everything is connected correctly. Is the spark plug connected, for example, or is fuel flowing? If the engine is clearly not working correctly, then, most likely, the timing belt is set incorrectly - return to step 13. That’s it, you can start it! The new “voice” of our horse is immediately noticeable. Already during the running-in, the engine made it clear that it now has more torque. And after running-in, the maximum speed increased by 15 km/h.
See also Scooter tuning
Material used from www.moto.zr.ru - MOTO Magazine
Scooter tuning, how to properly tune a scooter Scooter tuning using the example of Honda Dio AF-18 Remove 50 - put 72. Replacing the piston on a scooter CVT tuning. Adjusting the weight of the variator weights using available materials
Tweet
#1 maxim
25 February 2010 16:26
and the cylinder head needs to be placed tighter or at 72
#2 Igor
25 February 2010 20:24
not necessary. By the way, I forgot to write about this right away in the article
#3 Romario
26 February 2010 10:48
you can find out the diameter of the tuning piston
#4 Vasil-Samara.
05 March 2010 18:36
how to position the rings on the new 72nd cylinder. And please tell me what is the distance of the rings between the two ends.—
#5 Boris Citi gx
06 March 2010 13:03
And if I forgot to mark this position on the chain, what should I do, please tell me
#6 earring
14 March 2010 20:30
Who put the picture from Most Wanted??????????????????? It turned out great. RESPECT:)
#7 Igor
14 March 2010 22:40
Seryoga, you are the first to appreciate it))
#8 Igor...
20 March 2010 22:20
but it doesn’t work out so, we change the piston, the crankshaft goes to hell?
#9 Igor
20 March 2010 23:56
How could this happen? This only describes the process of replacing the piston. But everyone decides for himself whether to do such things for him or not, based on the condition of the scooter as a whole, including the crankshaft
#10 Igor
March 21, 2010 00:01
Vasil-Samara seems to be written here in the article... find it. Between the ends there can be up to 2 mm.
#11 Igor
21 March 2010 00:02
oris Citi gx point 13
#12 Active
21 March 2010 10:41
Igor I have a Chinese scooter (looks like a 125cc rocket, only I have a 50cc scooter from Zongshen) 2007. running 5k is worth changing the piston at all, I’m just saying that the crankshaft will immediately have a cover...
#13 Igor
21 March 2010 19:48
Active, well, you can check the crankshaft first (if you install up to 70 cc piston) https://www.scooter-tronix.ru/problems_koleno.php but in general it’s better to replace it with a reinforced one
#14 NIKITA
24 March 2010 04:46
HOW CAN YOU ORDER A PISTON 72C
#15 Igor
24 March 2010 14:21
NIKITA, nothing is ordered on this site (at least not yet). You can advertise in the Motor Market section
#16 Ilmir (Chet)
25 March 2010 09:19
Thanks a lot. Very accurately and clearly written...
#17 @lex
26 March 2010 19:54
Yes, thank you very much for everything that was said and described, but I decided to do it myself, thanks to you, once in my childhood I revived the Carpathians and deltas, I hope that we can do this too.
#18 Forum 163
31 March 2010 08:01
People, help with the “WIND” scooter, write something about it, please... you’re a pro =) at least tell me
#19 Seryoga April 1, 2010. 20-45
01 April 2010 20:48
I need to know how much rings cost for a two-stroke scooter
#20 Linar
04 April 2010 08:12
I have a Chinese 4-stroke scooter that doesn’t go more than 40 km/h, what could be the problem? and at high speeds the scooter literally shakes very much, is this normal?
Home Scooter tuning We remove 50, - put 72. Replacing the piston on a scooter
Cylinder-piston group.
Finally, the most effective improvement for any engine is replacing the CPG. But not just a replacement, but the installation of a new, larger piston. Fortunately, there are now many ready-made kits on the market; you don’t have to sharpen or adjust anything, as with Soviet equipment. Moreover, there is even a lot to choose from. For example, for various models with a volume of 50 cubic meters, they offer kits to increase to 63, 72, 82 and even 90+ cubic cm. In some cases, this is an almost double increase in power.
The situation is similar with larger engines, for example, for 125 cubic meters, sets of 150 or 170 cubic meters are sold. Some, in the process of tuning a scooter, manage to increase 150 cubic meters with their own hands to 225 cubic meters. Choosing the right part is not the most difficult thing, the most difficult thing is installing it. After all, this process involves almost complete disassembly of the engine. You will be faced with the need to have several special removable keys in your arsenal; you can ask them from friends or borrow them for the evening at auto repair shops. We strongly recommend studying the technical component in order to properly disassemble, replace the necessary elements and assemble the motor.
Alas, for some, increased power does not promise anything other than breakdowns or inadequate performance. This is because by significantly increasing power, you inevitably entail work on all other nodes. Let's imagine that we installed a new 92 cc CPG on an old 50 cc engine. The first thing to check is the condition of the connecting rod, crankshaft and bearings. Otherwise, they will fly first, followed by our new system of both cylinder and piston.
Great, we added new bearings to the CPG, an elbow with a connecting rod, now we can be sure of reliability. But the engine does not go faster, and we decide to purchase a new carburetor. Now the mixture is too rich, and we understand that the exhaust needs to be changed. After such modifications, the engine sounds loud, accelerates perfectly, but the maximum speed is slightly higher than before and the variator sounds strange. After installing a high-speed CVT, for example from the Italian manufacturer Polini, the engine will be able to fully realize its new power. The last stage is an inspection of the brake system; you don’t want to find out at a speed of 60 km/h that the brakes are now comparable to bicycle ones.
As a result, after replacing almost all the components, we got a very fast “flea” that can surprise your friends and experts in this technology. Over time, you can make changes to the chassis system, replace shock absorbers, and install more attractive wheels. Often, the modernization process does not stop there, and after tuning a scooter 50, 150 with your own hands, impressive improvements in appearance are made. The moped is repainted, panels are changed, new devices, lighting, and so on appear.
How to install a piston on a scooter?
One of the most serious breakdowns of a scooter is the failure of the cylinder-piston group, which immediately makes the scooter inoperative. It is the scooter’s CPG that is responsible for its movement; the slightest breakdown will lead to the impossibility of further movement. That is why if you are faced with a non-working piston, immediately start repairing it.
In general, any CPG has a certain lifespan; with a certain mileage, its wear increases and the buyer will have to replace the part. Often replacing the piston is enough, but sometimes more serious problems occur. Where you have to change the piston, rings and cylinder. Depending on the scooter model and manufacturer, the installation may vary slightly, but we will cover the basic steps. Also, piston scooters may differ in power, but this does not affect the replacement process in any way.
Removing the CPG
If you don't know how to properly install a piston on a 2t or 4t scooter, the first step is to remove the old part. Getting to the piston group is not easy; you will have to disassemble the scooter and sometimes remove the plastic. In general, the steps to replace the CPG are as follows:
- Removing the engine, disconnecting the wires;
- Removing the old piston;
- Installation of a new part according to requirements;
- Similar engine assembly and electrical and hose connections.
After you have disconnected all wiring and made sure that the -oil and -gasoline hose are closed, remove the engine. Removing the engine may be different in different scooter models, so act according to the situation. Having received the finished engine, begin to remove the plastic cylinder casing; it protects the CPG from external dirt, dust, etc. The next step is removing the cylinder head. Depending on the type of scooter (2t or 4t) the head may be more complex, 4t scooters also have valves that will then have to be adjusted. But the procedure for removing the head is to unscrew 4 nuts.
Important: the nuts must be unscrewed gradually, using the criss-cross method. That is, as shown in the picture below
Otherwise, you will break the thread and damage the piston. This also applies to the installation of the piston; the nuts are also tightened.
Next you will have to remove the cylinder, in some cases this is problematic due to large carbon deposits or a defect in the piston. If the cylinder is intact, but the piston is faulty, proceed to replacing the piston. How to properly install a piston on a scooter
Replacing a piston involves a number of difficulties, because the piston will come with several other basic parts. In the kit you will find locking rings, a pin and several rings (depending on the scooter - 2t or 4t). In 2-stroke scooters, only two rings are usually installed; they are compression rings; the third thin ring is practically not needed, but we recommend placing it under the lower ring for springing. In the case of 4-stroke mopeds, there are three main rings, two of them are compression rings, the third is an oil scraper ring.
The ring assembly is based on a 2t scooter; it has a simpler design. So, put two rings on the piston, then take your finger and insert it into the crankshaft hole so that the piston is held securely. Be sure to secure the finger with locking rings on both sides, this is necessary so that the finger does not come out during operation. Also, the retaining rings should not stick out, they should fit snugly into the special hole
Important: the piston must be installed with the arrow (or the inscription EX) facing the exhaust pipe, otherwise the whole procedure will be useless. The next step is installing the cylinder on the piston
Cylinder installation
This procedure is quite complicated, because you need to fit the cylinder onto the piston perfectly. First of all, don’t forget to put gaskets on both sides; they are included with the CPG or can be purchased separately. There are usually two gaskets, one is placed down between the cylinder and the engine, the second is installed between the cylinder and the head. After installing the bottom gasket, try to put the cylinder on so that the rings meet in the groove. To do this, when installing the cylinder, it is enough to press the rings, having previously lubricated the cylinder and piston with oil.
Next, put on the gasket and secure the head with nuts. The nuts must be tightened in a cross pattern. Then check the operation of the piston with a kickstarter; if the installation was successful, the piston should move evenly along the cylinder and have noticeable compression.
That's all, reassemble the scooter in reverse order, connect all the wires and hoses.
Engines 157QMJ
In addition to the very popular model - the 139QMB engines - Hongling Corporation produces other versions of power units, one of which is the 157QMJ. It is installed on expensive scooter models of famous brands. In terms of its technical parameters and indicators of functionality and reliability, this version is a complete analogue of 139QMB. In addition, the design features of the model are strongly reminiscent of other mass-produced Japanese engines.
The advantage of the 157QMJ is its increased service life - about 25 thousand kilometers. The engine boasts powerful dynamics and a high top speed. However, it also has its downside - the price is too high compared to previous versions of the engines.
Setting the valve timing ch2 (in collective farm style - ignition)
Without knocking the piston off from TDC, we orient the camshaft so that the large hole and marks on its sprocket become as shown in the photo and, while putting on the chain, install the camshaft in bed.
Ideally, the marks on the sprocket should be strictly parallel to the plane of the valve cover connector. In practice, unfortunately, such accuracy is difficult to achieve. And this is mainly due to the stretching of the timing chain. And there’s nothing you can do about it - either change the timing chain to a new one or catch the phase by switching the teeth, but this method of setting the valve timing is not acceptable to me personally.
Air filter
It is not recommended to completely remove the filter element or replace it with a zero-resistance filter - this can lead to contamination of the carburetor. Experts usually recommend removing the plug that is installed at the inlet of the air filter.
Many reviews that affected the assembly of the 139QMB engine after tuning talk about installing a zero-resistance air filter. Despite the fact that this solution is one of the most popular, it is not always appropriate and justified.
The reason lies in the fact that installing such a filter leads to rapid contamination of the carburetor. The main reason for using a zero resistance filter is the need for a richer fuel mixture after installing a larger piston. However, this can be avoided by installing a new camshaft and replacing the jets in the carburetor.
Separately, it is worth noting that a standard carburetor equipped with a 16 mm diffuser is installed together with a 62–72cc piston system, while the 82cc piston system is equipped with a carburetor with an 18 mm diffuser.
For replacement, it is advisable to purchase a set of jets, since several different options may be needed to adjust the carburetor.
Photo report: Adjusting valves on a Chinese scooter (139QMB, 157QMJ)
During operation of a four-stroke air-cooled engine (such engines are found on most Chinese scooters and motorcycles), the cylinder head (hereinafter referred to as the cylinder head) can heat up to 260 degrees. This is, of course, not the operating temperature, but this is often the peak temperature.
The valves that are located directly in the cylinder head itself heat up in the same way as the head, with the only difference that the intake valve heats up a little less since it is cooled by the working mixture, and it is ordinary atmospheric air saturated with gasoline vapors, and the exhaust valve heats up much more. Since a flow of exhaust gases passes through the exhaust valve, the temperature can reach 600 degrees.
The problem is that metal parts expand when heated. Valves are no exception: during operation, the valve heats up and becomes a little longer. And when the valve becomes longer, it simply rests against the gas distribution mechanism and opens a little, or rather does not close completely (squeezed), due to which gases under high pressure seeping through leaks melt the working edges of the valve and its seats.
The edges of burnt valves look something like this.
By the way, not only the valves burn out, but also the sockets in which they sit
And this is what the working edges of valves and seats look like after repair.
As you can see, there is little point in regulating something that has already gone bankrupt for a long time. A burnt-out valve will no longer hold compression. And if you find that one of the valves has been jammed, then feel free to remove the head and grind the valves, otherwise there will be no point.
Running in the engine
Incorrectly carried out running-in of the 139QMB engine in most cases leads to failure of the piston system. Friction occurs between the parts of the new CPG, which leads to an increase in engine temperature.
Running in the scooter motor is carried out as follows:
- The scooter is placed on the center stand.
- Within 5 minutes the engine starts at idle speed, the field of which cools down during the same time.
- Over the next 10 minutes, the engine also runs, after which it cools down for 15 minutes.
- The engine is restarted for 15 minutes, then turned off and left to cool for 15 minutes.
- The scooter is started again for 30 minutes, after which it is turned off and left for 20 minutes.
After carrying out such manipulations, you can run in the scooter itself. In the first 100 kilometers of the journey, you should not turn the throttle handle more than 1/3 of its full stroke. The maximum speed should not exceed 30 km/h. The speed can be increased by 15–20 km/h for the next 300 kilometers - during this time the engine should more or less reveal its potential.
After this break-in process, the oil must be changed.
Engine valves are adjusted every 500 kilometers.
How to extend the life cycle of CPG
It is not recommended to drive the scooter at maximum speed for long periods of time (especially in hot weather). This can lead to thermal seizure, which leads to deformation of individual parts of the CPG. As a result, the highest speed of the vehicle will be unattainable due to the loss of pressure inside. When disassembling the structure, the sticking is easily determined by the presence of burnt parts in the form of tongues. Carburetor adjustments will be required to prevent deposits from forming in the muffler and combustion chamber and overall loss of power.
It is necessary to fill in high-quality motor oil that gives a positive effect:
- no noise from the engine;
- no overheating of the motor during prolonged operation;
- relatively clean exhaust and a pipe for the exit of gases.
The best option is synthetic oil, which has the advantage of efficiency, the absence of carbon deposits in bearings, deposits on the piston crown and other unpleasant consequences. Similarly, it is necessary to take a responsible approach to choosing fuel for a scooter. It is worth buying gasoline of the 95 type, which does not lead to detonation inside the combustion chamber, increasing the engine temperature.
After replacing the piston on the scooter, you can begin other types of work such as painting or changing other internals. Be sure to drive several hundred meters to ensure the reliability of the work done.
Downloading a book
After successfully completing the payment (by any method) and returning to the KrutilVertel store from the payment system website, you will be taken to the successful payment page:
The book you purchased will be in your personal account, from where you can always download it.
Please note that after making the payment, you need to return back from the payment system website to the KrutilVertel website. If for some reason you did not return back to the site and closed the payment system tab with a message about the successful completion of the payment, please let us know - we will send you a letter indicating access to download the book
If for some reason you did not return back to the site and closed the payment system tab with a message about the successful completion of the payment, please let us know - we will send you a letter indicating access to download the book.
Installing the timing chain tensioner
If you have a 157QMJ series engine, do the following: unscrew the plug on the tensioner body; We insert a thin flat screwdriver into it and begin to tighten the bolt until the tensioner rod goes inside the body.
Without releasing the screwdriver while simultaneously holding the tensioner body, with your free fingers, insert the tensioner into the cylinder, screw it in with bolts, and only then release the screwdriver and screw the plug into place.
If you have a 139QMB series engine, then do this: unscrew the plug from the tensioner housing and remove the spring; push the rod inside the body; install the tensioner in the cylinder; insert the spring into the housing and screw in the plug.
After installing the piston, do not forget to adjust the thermal clearances of the valves and break in the engine.
Our production
It is worth noting that durable and trouble-free operation of the piston largely depends on the correct installation of the rings. There is absolutely no need for haste and dirt in this matter. Do everything carefully (for yourself, after all), slowly and most importantly: keep it clean!
First, let's take a little look at what a standard set of piston rings for a four-stroke scooter engine is. The standard kit consists of: two compression rings (upper and lower) and one oil scraper ring, which in our case has a collapsible design.
A set of piston rings for a two-stroke scooter engine differs from the previous one in the absence of an oil scraper ring; also, a set of rings for a two-stroke engine may include an expander (marked with an arrow).
So, we have more or less figured out the kits - it’s time to get down to business. We prepare in advance small strips of tin or thin plastic, with their help we will put the rings on the piston.
We thoroughly wash the rings and piston; when installing new rings on a used piston, do not forget to clean its grooves from carbon deposits, otherwise the new rings will not fit into the cylinder. We prepare a clean workplace and perform the installation.
We take the oil scraper ring expander from the kit and place it in the lowest groove of the piston.
In the same way, we install the expander from the kit for a two-stroke engine (if any), with the only difference being that the expander lock should be located in the area of the locking pin (marked with an arrow) of the piston groove.
We look for marks on the rings, apply pre-prepared strips to the piston, very carefully and slowly pull the rings along our strips onto the piston, in this order: first we put on the oil scraper ring, then we put on the second oil scraper ring, then we put on the lower compression ring (dark) and only then put on the upper compression ring (light). The marks on the rings after installation should be located upward towards the cylinder head.
We straighten the rings so that they stand exactly opposite their grooves and slowly pull out our strips from under them. Now the main thing: after you have pulled out the strips and the rings are in their grooves without fail, check each ring for mobility. The rings in the piston grooves should rotate freely in different directions.
The oil scraper ring should look something like this after installation:
After installation, the marks must be directed strictly towards the cylinder head.
Immediately before installing the piston into the cylinder, the piston ring locks must be moved apart in the correct order. This is done like this:
We unfold the upper compression ring so that its lock moves relative to the piston pin axis by approximately 45 degrees, and unfold the lower compression ring so that its lock moves approximately 180 degrees relative to the lock of the upper compression ring.
We rotate the upper oil scraper ring lock 90 degrees relative to the lower compression ring lock, and rotate the lower oil scraper ring lock 180 degrees relative to the upper oil scraper ring.
The photo shows approximately how the piston ring locks of a four-stroke engine should be positioned:
Red marks indicate compression ring locks. Blue marks indicate oil scraper ring locks.
Before final installation of the piston, the piston ring locks of a two-stroke engine must be positioned strictly in the center of the locking pins.
If you charge the engine of the same 139QMB to the maximum, then such tuning before the “increase” cost the client about 35,000 rubles and this does not include work.
It is clear that not everyone can afford such amounts. Yes, even if it’s affordable, what’s the point? It’s easier to buy an old branded scooter and ride it than to charge the “Chinese” and then throw it in the trash after a season. But that's what I think.
Tightening torques for threaded connections
| Tightening torques, Nm | |
| Generator rotor nut | 30-38 |
| Camshaft sprocket bolts | 7-11 |
| Clutch housing fastening nut | 38-45 |
| Footrest attachment | 20-25 |
| Rear shock absorber upper nut | 20-30 |
| Rear shock absorber lower nut | 25-30 |
| Engine, mounting nut M10 | 25-30 |
| Engine, mounting nut M8 | 20-25 |
| Rear footrest attachment | 35-50 |
| Muffler mounting nut | 20-25 |
| Left and right crankcase cover, screws | 5-10 |
| Front fork fastening nut | 18-23 |
| Connection of front fork and shock absorber | 15-20 |
| Seat nut | 6-10 |
| Attaching control handles | 6-10 |
| Steering wheel mount | 5-10 |
| Brake handle | 3-5 |
| Trunk mount | 5-10 |
| Wheel axle nuts: front rear | 50-60 110-120 |
| Crankshaft pulley nut | 80 |
| CVT rear pulley nut | 100 |
| Spark plug | 18-20 |
| Drain and fill plugs | 10 |
| Cylinder head nuts (bolts) | 10-15 |
| Other threaded connections | |
| M6 | 6-8 |
| M8 | 14-18 |
| M10 | 30-35 |
| M12 | 55-60 |
| M14 | 80-100 |
| M16 | 110-140 |
Note
:
These tightening torque values do not apply to fastening plastic parts.
Replacing the piston
Note
:
The need to replace the CPG, as a rule, arises after it wears out due to long-term use or the use of low-quality fuels and lubricants, as well as due to the operation of a moped with an air filter that is not impregnated with special oil, or without it at all. Therefore, when replacing the CPG, it is imperative to diagnose the condition of the crankshaft and main bearings, since they may also need to be replaced. It is recommended to change the CPG as a whole, i.e. Along with the piston group, change the cylinder as well. During operation, the rings and cylinder wear out not evenly in a circle, but in an ellipse, due to the fact that the rings are pressed against the walls of the cylinder with unequal force. Therefore, it is not recommended to replace only the piston and rings if the need to replace them is due to wear, since an elliptical cylinder will not allow for normal compression with new (round) rings.
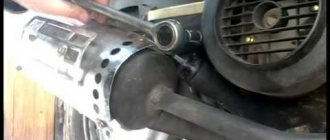
1. Remove the motor. Disconnect the battery ground wire. Remove the necessary body parts. Disconnect the power cable connecting the motor to the scooter's electrical system. Disconnect the high voltage wire and high voltage coil. Disconnect the automatic enrichment connector. Disconnect the generator wiring connector. Disconnect the fuel hose and vacuum hoses. Disconnect the accelerator cable. Remove the air filter housing. Remove the rear brake cable. Remove the rear shock absorber. After unscrewing the bolt securing the engine, remove it, see Figure 10. Carefully lift the scooter by the frame, see Figure 11.
Attention:
Check the condition of the silent blocks on the engine mounting brackets.
Rice. 10 Fig 11
2. Remove the air filter, muffler, generator and cylinder casings. Using a brush and a compressor, remove all dust from the cylinder; if necessary, wash the cylinder. Everything must be perfectly clean.
3. Unscrew the spark plug and unscrew the nuts (bolts) securing the cylinder head, see photo 12.
Photo 12
4. Remove the head and cylinder (if it doesn’t fit, you can carefully pick it up with a pry bar), see photo 13.
Photo 13
5. Be sure to place a clean cloth between the connecting rod and the crankcase walls to prevent foreign objects from getting into the crankcase, which can lead to damage to the crankshaft and piston group, see photo 14.
Photo 14
6.Remove the piston pin stopper and squeeze out the pin. It is not pressed in, it is simply installed a little “pull”, see photo 15
Cleaning the cylinder, boring windows.
Improvement suitable for scooters with two-stroke engines. Their peculiarity is that very often the casting inside the drain and exhaust channels is defective, that is, it has roughness. These shortcomings lead to the fact that the piston is not blown through properly and, accordingly, loses power. Having removed the cylinder and armed with a rolling cutter, you can polish the channels, and then round off the sharp edges on the inside. When tuning scooters, in the photo you can see the differences between the motor before and after polishing. This action will help make the engine work easier at high speeds and potentially add a couple of kilometers to the top speed.
You can go further and increase the diameter of the inlet/outlet windows. For each 2T engine, this parameter is calculated individually. For example, it is enough to bore some 50 cc engines by 1 mm to obtain optimal intake/exhaust parameters. Do-it-yourself tuning of a 150cc scooter and other engine sizes is done in the same way.
Piston installation
Insert a retaining ring into any boss of the piston pin. It is most convenient to insert the ring with small round nose pliers. After installation, check how well and tightly the retaining ring fits.
- If the retaining ring does not cover the entire surface, but only a small part of it, replace it with a new one.
- If the retaining ring does not lie tightly in the groove and dangles, straighten it a little
Lubricate the bearings of the lower and upper connecting rod heads and the piston pin bosses with clean engine oil. We put the piston on the connecting rod, orienting it with the “IN” mark to the inlet port; if there is an “arrow” on the piston instead of the “IN” mark, orient the arrow to the exhaust port. We insert the piston pin into the boss - orient the piston on the connecting rod so that the pin hits the connecting rod - install the pin all the way into the locking ring and secure it from falling out with the second locking ring.
We install the cylinder guide bushings on the studs and put on the gasket. It is advisable to place the gasket on the sealant, but without fanaticism.
How to properly install rings on a two-stroke scooter piston
There is nothing complicated about installing rings on the piston of a two-stroke scooter, as well as a four-stroke scooter, and many people know this. But most scooter riders who have only recently acquired such equipment have no idea how to replace the piston on a scooter, how to correctly install the rings on the piston, where the arrow on the piston should point, and much more.
In this lesson, I will tell you how to properly put the rings on the piston and assemble the piston in place. Since we have already talked about four-stroke engines before, here we will talk only about two-stroke engines. So, our piston is worn out and requires replacement.
The rings and piston wear out first, and usually only those need to be replaced. If the piston is severely worn, it is necessary to bore the cylinder. It is also bored when the piston jams in the cylinder, forming deep scratches on the walls of the latter. There's nothing wrong with that, and if your new cylinder has been properly bored (for which you'll only need to shell out about $10), it will need a ring repair kit with a new piston. Such rings are marked 0.25. The second boring is 0.5, respectively, etc. to one.
After purchasing a piston, it needs to be assembled. In the kit, as a rule, you will find the piston itself, two compression rings, a third thin corrugated ring (more on its purpose later), a piston pin and two piston pin retaining rings.
Now about the third ring in the set. Its purpose is to spring the lower compression ring. It installs it directly under it, and usually does not provide any benefit during operation. You can throw this ring away or you can put it in, it makes no difference. Many piston manufacturers do not include it at all.
It's time to put everything back in place. Depending on the scooter model, compression rings may be the same or vary in thickness and cross-section. Most pistons for Honda scooters, for example, have different rings, where the upper one is thinner than the lower one and has a different cross-section.
You should definitely pay attention to this when installing; the top one is thinner and ground at an angle. Also pay attention to the inscription on the ring (usually the letter T or repair size), the inscription should always be on top, that is, opposite to the finger
First you need to put on the bottom, then the top. There is no need to stretch or bend them. These manipulations must be carried out carefully
Also pay attention to the inscription on the ring (usually the letter T or repair size); the inscription should always be on top, that is, opposite to the finger. First you need to put on the bottom, then the top
There is no need to stretch or bend them. These manipulations must be carried out carefully.
There are locks in the grooves for the rings that prevent the rings from turning during operation, so the ring gap must be in these locks, otherwise you will not stick the piston into the cylinder.
And the last important point is the arrow (1) on the bottom of the piston or the inscription EX. Both the arrow and the inscription must be directed towards the exhaust (2). In this case, the ring locks will be located on the side of the reed valve. If the locks are placed towards the exhaust, the piston will not last long, the rings will be pulled into the exhaust port and gradually grind it down.
During all manipulations with the piston, it is imperative to put a rag in the crankcase window so that nothing inadvertently gets in there; we still need a crankshaft with bearings.
When installing the piston pin, pay attention to the condition of the separator (bearing); it may need to be replaced. Before installing the piston pin, install the snap ring on one side before installing the piston (usually on the side where you will not be able to fit the pin and the second snap ring in)
Then place the pin with the bearing and the second retaining ring; when fixed in the groove, it will make a certain click.
That's all, now put on the cylinder, not the piston (remembering to check the condition of the gaskets and lubricate the piston and cylinder walls with engine oil), the cylinder head and tighten the bolts one by one in a cross pattern.
You can also read other articles on the topic:
Problems when paying with bank cards
Sometimes difficulties may arise when paying with Visa/MasterCard bank cards. The most common of them:
- There is a restriction on the card for paying for online purchases
- A plastic card is not intended for making payments online.
- The plastic card is not activated for making payments online.
- There are not enough funds on the plastic card.
In order to solve these problems, you need to call or write to the technical support of the bank where you are served. Bank specialists will help you resolve them and make payments.
That's basically it. The entire process of paying for a book in PDF format on car repair on our website takes 1-2 minutes.
If you still have any questions, you can ask them using the feedback form, or write us an email at [email protected]