How to properly connect the fuel pump on a scooter after repair or replacement, we will consider further. read more "
A common problem is that a scooter or moped starts with a kickstarter, but refuses to start with an electric starter. Let's consider all possible causes and methods for eliminating them. read more "
Of the trio of Japanese manufacturers, Suzuki scooter carburetors are perhaps the most capricious. Let's look in detail at how to properly connect carburetors to the engines of the following scooters read more "
Causes of heat seizure: read more »
For the average scooter user, the easiest way to test the voltage regulator is with the scooter engine running and can be done within one minute. Let's look at how to do this correctly using a regular multimeter. read more "
The scooter clutch assembly is equipped with bearings, ball, needle, and their combinations, which are the most common. Let's take a closer look at how to replace clutch bearings on a scooter. read more "
If, when you press the brake lever of the hydraulic brake system of the scooter, the brake caliper cylinder does not receive the necessary force to adequately press the brake pads to the disc and stop the scooter at lightning speed while moving, it is obvious that air has entered the system read more »
Safety while driving is ensured, among other things, by informative and precise steering. Only correct adjustment of the steering column can ensure smooth turning of the steering wheel without jamming or vibration. read more "
This material will be useful to all owners of a wonderful scooter - Honda Lead 90 with an HF-05 engine. The material contains all the data, technical characteristics, nominal and limiting parameters for the engine read more "
Replacing the drum brake pads of a scooter is necessary if the linings on the pads are worn out, the pads themselves are defective, and also in some cases when the operation of the scooter with the current pads is unsatisfactory due to the poor quality of the pads. So, let's look at the process of replacing the brake pads of a scooter drum brake. read more "
In the design of a scooter you can find a large number of oil seals of various sizes, designs and densities, but they all have the same task - to maintain the tightness of the connections read more "
Let's look at a simple example of how to use available tools to check the performance of the clutch within a few minutes and, if necessary, replace it. read more "
This material is intended for beginners. Here you will learn how to inspect the variator and rollers of the Honda Lead AF-20 scooter at home, using ordinary improvised tools that every scooterist has. read more "
To check the condition of the rings and piston, it is necessary to disassemble the engine, namely, remove the cylinder head and the cylinder itself. Only direct measurements and inspection can definitely determine the degree of wear and most effectively help take the necessary repair measures. read more "
It is very easy to check the cylinder of a four-stroke scooter yourself for the need for further repair. This includes only two operations - checking the plane of the cylinder surface that is in contact with the head and checking the geometry of the working surface of the cylinder. read more "
Source: https://scooter-remont.com/?cat=8
Kick Starter scooter device
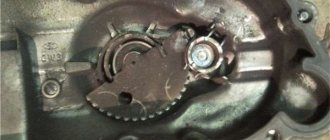
Any scooter, be it Japanese or Chinese, has the ability to start from an electric starter or a kick starter. If the first one doesn’t work for you, which is a very common problem, kickstarter comes to the rescue. Let's look at the reasons for its breakdowns.
Probably 80 percent of scooter owners use kickstarter. Kick means foot, that is, you start the scooter using your foot, which you need to press on the foot located on the variator. And if you often start the scooter this way, the kickstarter may break.
note
The reason may be either poor quality design (most often in Chinese models), or incorrect and rude attitude. Using my own example, I will say that having a Japanese scooter with a kick starter failure there were no problems, while a Chinese two-seater scooter received two kick starter failures in 1 year.
If you simply compare the material of both scooters, then even by touch you can see that on Chinese scooters the variator cover or the kick starter itself has very cheap material.
Why does the kick starter break?
There may be several reasons for the breakdown, because they are the ones that most often happen to most scooter riders.
Kickstarter build . If you decide to change the kick starter or another part, be sure to do it correctly. You will need to assemble the spring, retaining rings and other elements according to the instructions. If you miss something, the kick starter leg simply will not return to the right place (see photo).
Worn teeth . Another common failure. If you press the kick starter foot sharply and often, the teeth connecting the foot and the variator will simply wear off, which threatens the same slippage of the foot. The result will be the inability to start the scooter, so keep an eye on the condition of the teeth.
Broken variator cover . Most often it happens with Chinese scooters, which I myself have witnessed more than once.
If you press the leg with great force or sharply, the cheap and low-quality material of the variator cover will simply crack around the leg. Here, repairing a variator on a scooter is unlikely to help, as well as welding.
The Chinese variator cover is difficult to weld, the weak material does not allow this, so the only option is to buy a variator cover.
We looked at several reasons why the kick starter breaks down; repairing this rather problematic element may take you a little time, but when you have a similar breakdown on the road, you will have to roll the scooter. There may also be three repair options.
In the case of cracked teeth, the only possible solution is either replacement or welding. In the case of replacing a kick starter, you simply need to correctly assemble the entire structure, which will be discussed in another article. And if the variator cover is cracked, all you have to do is replace the cover itself.
You can try to weld it, but I’ll tell you right away that there is little chance of fixing it this way.
Video: How to assemble a kickstarter on a scooter
Photo report: Servicing the kickstarter of the Chinese scooter 139QMB (50-80CC)
While the scooter is still new and the factory lubricant remains on the kickstarter parts, the kickstarter works properly: it cranks the engine easily and without slipping, does not creak, and most importantly, after starting it always returns to its place, and does not hang snot.
And as soon as the factory lubricant runs out, the kickstarter parts stick to each other and then problems begin: it creaks, then slips, then does not return to place. I think this situation is familiar to many owners of Chinese scooters, especially scooters equipped with 139QMB series engines.
To avoid this situation, disassemble the kickstarter at least once a season and lubricate its parts. Disassembling and lubricating does not take much time, nothing is particularly difficult there either, so don’t be lazy and service your scooter on time and all technical problems will bypass you.
To disassemble and lubricate the mechanism, you must first remove the variator cover
Then unscrew the bolt on the winding lever, pull it out of the lever and then just remove the lever itself
The shaft that we need is fixed with a retaining ring. We remove the ring with a special puller for retaining rings or we suffer and remove it with the help of a couple of nails and such and such a mother...
There is a thrust washer under the ring - this is a very important device! When disassembling, do not lose it!
Remove the “fungus” from the lid
We take out the shaft with the spring
Before reassembling, carefully wash and lubricate the places where the parts came into contact with the variator cover. You can use any lubricant, but it is better to use copper paste. If you don’t have one, apply regular lithol.
Kickstarter repair on a Chinese scooter with a 157QMJ engine
Typical situation: The winding claw of the Racer Taurus scooter, when pressed, hangs in the pressed position and does not crank the engine.
It turns over as if at idle, while some strange sounds are heard from under the variator cover. The cause of this malfunction lies in the incorrect assembly of the kickstarter mechanism located under the variator cover. Or rather, even in incorrect assembly, and in ignorance of the fact that the variator cover needs to be removed only with the crank removed in advance, leaving the kickstarter shaft in its place.
Beginners usually don’t know this and remove the variator cover along with the crank and shaft, thereby bending the return spring bracket and preventing the correct installation of the shafts. And then they can’t properly assemble the mechanism into a “heap”, so they drive around with the winding claw always not working.
We remove the variator cover, unscrew the bolt on the winding claw and remove it from the shaft.
We remove the starter primary shaft from the cover body.
Do not lose the thrust washer of the kickstarter shaft.
We remove the front variator. The work of removing a scooter's variator is described in detail in the article: How to remove a scooter's variator using available tools
We take out the intermediate shaft, as you can see there are completely no traces of lubricant, which is not good. It is imperative to lubricate all rubbing parts.
In order to lubricate the intermediate shaft, it must be disassembled; to do this, remove the pin.
Remove the thrust washer and intermediate shaft gear.
Lubricate the shaft with grease (Litol-24).
We assemble the intermediate shaft in the reverse order. Lubricate the intermediate shaft mounting bracket.
Lubricate the working surface of the shaft.
After completely lubricating the intermediate shaft, set it aside; we won’t need it for now.
And now, pay attention to the fixing bracket of the return spring, it is unbent, and they unbent it unknowingly when they tried to remove the variator cover along with the kickstarter shaft (we do not take our case into account, since it was unbent a long time ago before my intervention).
We remove it and level it.
We install the intermediate shaft into the hole, making sure that the pin on the shaft fits into a special groove.
We make sure that the installation bracket also goes into place.
We look for marks on the intermediate shaft - in our case, these are “arrow” and the letters FT.
We rotate the intermediate shaft gear so that the “arrow” is directed to the crankshaft journal, and the letters FT are directed to the kickstarter shaft (do not get confused).
We also lubricate the bushing.
We are looking for a “brewed tooth” in the kickstarter sector.
With one hand, hold the intermediate shaft gear from mixing, with the other hand insert the kickstarter shaft so that the “welded tooth” comes close to the tooth of the intermediate shaft helical gear, that is, the kickstarter shaft should not rotate clockwise; the “welded tooth” should secure it from turning .
It should turn out like this.
After installing the kickstarter shaft, we put the return spring into place; this is easiest to do with pliers.
After installing the return spring, screw in the pre-aligned fixing bracket.
Before installing the variator cover, do not forget to place the thrust washer on the kickstarter shaft.
Scooter kickstarter repair | Moto blog
The kickstarter is used to start the engine. If your electric starter does not work, this device will come to the rescue. But during operation, the kickstarter may break. This happens due to many factors, for example, most often it breaks due to improper handling. If you hit or sharply press the kickstarter leg, you risk that it will soon break, unable to withstand such a load. Also, the kickstarter breaks due to weak metal. Let's say that the Japanese variator body is much stronger and is made of high-quality metal. Chinese CVTs are much worse, because even by eye you can determine its poor condition. Let's look at the main breakdowns that occur when the kickstarter is handled incorrectly.
General structure of the scooter
Any scooter owner should know how his vehicle works, because without such knowledge it is not only impossible to find out the cause of the malfunction, but also to eliminate it.
Almost all equipment, no matter in which country or in which factory it was produced, has the same design for a scooter, so after examining and repairing one moped, you can easily troubleshoot any other.
Scooters are rightfully considered one of the most economical and unpretentious means of transportation. Ease of operation, low engine power and amazing maneuverability have made scooters one of the most popular types of equipment.
If we consider the general structure of a scooter, then we can say that this vehicle contains an engine, transmission, suspension, chassis, plastic parts and systems responsible for control . The functions of the main components of mopeds should be considered in detail.
- In a scooter engine (the device is often an internal combustion engine - an internal combustion engine), the energy obtained from fuel combustion is converted into mechanical energy, which sets the vehicle in motion.
- The main function of the transmission is to transfer torque from the engine to the drive wheel (in the case of scooters, this is the rear wheel). The transmission of most mopeds that were produced from the beginning of 2000 to the present day consists of an automatic variator, clutch, gearbox, and a foot start system.
- The chassis of the moped includes both wheels, the brake system and the suspension. It is thanks to the suspension, which ensures the connection of the wheels to the frame, that vibrations during driving are dampened, and braking or speeding up are carried out smoothly and softly.
- The photo shows the structure of the moped, or rather, the “engine and transmission” unit: 1 – the place where the engine is attached to the frame; 2 – engine cylinder; 3 – the transmission itself, which includes the scooter’s variator device, as well as the clutch; 4 – place to which the shock absorber is attached; 5 – wheel.
- Basically, all mopeds have either a two-stroke or four-stroke gasoline engine and, depending on such features, the moped or scooter can be supplemented with various components - for example, an oil pump.
- It should be noted that the design of the scooter’s carburetor also refers to the “engine-transmission” unit, although it is not indicated in the photo.
- The scooter's control devices include a steering wheel, a series of ignition buttons, turn signals, headlight switches, brake levers and a speed controller.
- Plastic cladding refers to all mudguards, fairings, as well as tuning such as spoilers or panels that perform an aesthetic function.
The diagram shows the general structure of the moped: 1 – front fairing; 2 – steering control panel; 3 – protective steering fairing; 4 – seats for the passenger and driver; 5 – trunk located under the seat; 6 – wing; 7 – side fairing; 8 – rear wheel; 9 – power transmission; 10 – driver’s floor; 11 – suspension; 12 – brake system.
Side mirrors, trunk, saddlebags and other parts that are not included in the basic structure of the scooter are called additional components or equipment.
Despite the fact that many motorcyclists are accustomed to scooters with an automatic centrifugal clutch, on the market you can also find two-wheeled vehicles with a mechanical gear shift system (for example, with a four-speed manual gearbox with an engine capacity of 49.3 cc). Such scooters are considered rare and require great driving skills from drivers.
We recommend reading:
Source: https://MotoHolder.ru/poleznoe/ustroystvo-skutera
Scooter Kickstarter. Major breakdowns and their elimination| Information, operation, maintenance
- home
- →
- Information
- →
- Scooter Kickstarter. Major breakdowns and their elimination
Information
29.08.2014
Scooter Kickstarter. Major breakdowns and their elimination
Despite the fact that most modern scooters and motorcycles are equipped with an easy-to-use electric starter, scooters equipped with a kickstarter have a number of undeniable advantages.
First of all, a kickstarter, which is often also simply called a “crank”, allows you to start the scooter even with a completely discharged battery, without resorting to the “push” method.
Also, the kickstarter will insure you in case of problems with the electric starter, allowing you to get to the lady or to the nearest repair shop under your own power.
But, unfortunately, the kickstarter itself can also break during operation. Most often this happens due to the carelessness of the scooterists themselves, who, instead of pressing the kickstarter leg, hit it with all their might.
As a result, under such a load, the leg simply breaks and has to be replaced. Sometimes a kickstarter fails due to poor quality metal. This is especially true for Chinese scooters.
As a rule, either the leg itself or the variator housing near the kickstarter leg breaks.
Important
The latter happens quite often with Chinese scooters. Since their variator cover is usually made of low-quality material. As a result, cracks form around the kickstarter, especially often for those who like to pull the kickstarter leg too hard.
Of course, the variator housing can simply be welded in a problematic place, but usually such repairs do not last long, and soon the crack manifests itself again. Therefore, I recommend not to suffer and just buy a new variator cover. You should buy only high-quality, expensive lids to avoid similar problems in the future.
If you nevertheless bought an original Chinese variator cover, then in order not to break it again, try to press the kickstarter leg more calmly.
Also, on forums, scooter riders often complain that the kickstarter leg does not return to its original position after starting the engine. And therefore you have to manually raise the leg to the proper position each time.
It is important to understand that with prolonged use, the kickstarter rusts and the starting mechanism parts wear out, especially for Chinese engines. Of course, in this case it is best to purchase a new kickstarter, but quite often an old kickstarter can also be brought back to life.
To do this, the kickstarter needs to be disassembled, all parts thoroughly washed in clean gasoline, and then lubricated generously. Regular lithol is best suited for this. If the kickstarter runs dry, the lever may simply hang due to friction. Usually, this procedure is quite enough for the leg to begin to return to its original position.
139QMB CVT cover and kick starter repair
This video describes the repair
kick starter
for a scooter
with a 139qmb engine.
3. Cracked teeth. This is also a common problem for many scooter riders. It happens that the kickstarter simply wear out and the leg begins to slip. In my experience, something similar happened, which led to the fact that I didn’t start the scooter at all and had to walk home. How to assemble a kickstarter on a scooter How to quickly and easily assemble a kickstarter on a Yamaha How to tension the kickstarter spring on a Ural motorcycle. Ural motorcycle gearbox. (6) Kickstarter repair. Soon, in order not to buy a new one, I simply welded the stem and teeth (photo below). Now the leg stands confidently, and I am not afraid that it will fall off.
Well, that’s basically all the main breakdowns. Scooter kickstarter repair
sometimes it can be heavy, so don't rush to buy new parts. You can always limit yourself to welding or other methods.
