Motoclass: how to adjust the clutch on Izh-Jupiter 5 on your own?
Not all motorcycle enthusiasts can afford a BMW 1200, and some simply ignore all the technological innovations of the “West,” preferring Soviet classics.
The only thing is that the owners of such motorcycles experience not only a lack of spare parts, but also a hunger for information.
This fully concerns the adjustment of the gear control mechanism, on which the efficiency of using the vehicle depends.
Functional purpose of the gearshift clutch
Before you adjust the clutch on the Izh-Jupiter 5 motorcycle, it’s a good idea to understand its purpose and principle of operation. The essence of the transmission clutch:
- Ensuring the transmission of torque from the large gear of the motor transmission to the gearbox input shaft.
- Short-term separation and smooth connection of transmission elements to each other.
Izh motorcycles were equipped with a mechanical clutch, the operation of which is based on the friction force between the driven and driving disks.
It is a multi-disc design operating in an oil bath - a classic arrangement that the Izhevsk Machine Plant used until 2008.
Working in tandem, the main chain drive and four-speed gearbox are reliable and proven by many generations of motorcyclists.
When is it necessary to repair and adjust the gear clutch on an Izh motorcycle?
Regardless of the amount of experience the motorcyclist has, the feelings regarding gearbox malfunctions are almost the same:
- At first it seems that the clutch is slipping slightly. After two or three days, confidence appears - yes, it is slipping, because as soon as you add speed, the acceleration rate lags behind the engine speed level. The breakdown is especially obvious when moving uphill.
- The clutch “leads” or the clutch is incompletely disengaged when the control lever is depressed. In such a situation, the disks of the assembly remain pressed against each other and do not stop transmitting torque to the gearbox. You can finally verify such a breakdown after lifting the rear wheel - it continues to rotate in this situation.
If you want to know how to adjust the clutch on an Izh-Jupiter 5 motorcycle, then information about the reasons causing the listed factors would be useful:
- Use thicker oil in winter.
- Weakening of pressure springs.
- Worn clutch discs.
- Wear of clutch control mechanism elements.
In most cases, if signs of slipping or incomplete disengagement of the clutch are detected, a simple adjustment of the mechanism is required. To do this, it is enough to have a “13” key and a slotted screwdriver.
Life hack: how to adjust the clutch on an Izh-Jupiter 5 motorcycle yourself?
The adjustment procedure depends on the design features of Izhevsk motorcycles. The fifth generation is equipped with a shutdown mechanism, which is combined with a gear shift device. Adjusting the clutch control should begin by centering the machine's cam relative to the roller with the lever, which are mounted on the body of the right crankcase cover.
Adjusting the alignment of the motor transmission teeth
We put an adjusting washer on the input shaft of the gearbox, then we put the spacer sleeve of the outer clutch drum there. We put a spring washer on the crankshaft journal. We install the outer drum and the drive sprocket of the motor transmission on the engine, tighten the bolt on the sprocket. We apply a ruler to the sprockets and look at the alignment of the teeth under the motor transmission.
- If the teeth do not converge, we adjust their convergence by placing or removing adjusting washers under the clutch basket
In my case, the teeth of the basket and drive sprocket are aligned.
After adjusting the alignment of the teeth, remove the drum and sprocket from the engine and leave the adjusting washers and spacer sleeve.
We put the thrust washer of the kickstarter return spring on the gearshift shaft.
We put the kickstarter shaft on the shaft of the gear shift mechanism and insert the return spring hook into a special groove.
To avoid injury to your hand, tension the kickstarter spring only with the crank!
We put the claw on the shaft, tighten the bolt and, depending on personal preference, tension the spring. Personally, I tensioned the spring two turns. It turned out a little tight, but the paw didn’t dangle like snot and always returned to its place.
We install a basket with a sprocket and a motor chain on the shafts. We place a tin rod or stick under the chain and tighten the bolt on the sprocket with the maximum possible force.
We install the inner clutch drum on the shaft, put a special lock washer on it, screw on the nut, fix the drum with a puller and tighten the nut with the maximum possible force (left-hand thread, pull counterclockwise).
We look for the thickest one in the set of metal clutch discs - this is the thrust disc, it still has a groove on the inside - you can’t go wrong. We place the thrust disc with the groove towards the engine on the inner drum of the clutch basket, then we put a plastic disc and alternating the discs with each other we assemble the basket.
There can be 7 pieces of plastic disks on the “Jupiter” baskets. There are only 6 at Planetovskie.
We install the clutch rod into the input shaft of the gearbox: on “Jupiters” the rod is normal, on “Planets” it has a fungus. We put the pressure disk on the basket, insert the cups under the pressure springs into the holes of the pressure disk, then insert the springs into them and clamp the springs with special nuts.
Before installing the nuts, they need to be hammered: lay the nut on its side and hammer it into the flange with a chisel. Where to put it at risk, you will see: there are factory ones. There is no need to tighten the nuts tightly - screw them so that their ends are 5-6 mm higher than the bolts, this will be quite enough.
After final assembly of the clutch, we carefully adjust it.
Not all motorcycle enthusiasts can afford a BMW 1200 , and some simply ignore all the technological innovations of the “West,” preferring Soviet classics. The only thing is that the owners of such motorcycles experience not only a lack of spare parts, but also a hunger for information. This fully concerns the adjustment of the gear control mechanism, on which the efficiency of using the vehicle depends.
Adjusting the electronic ignition system on Izh Planet 5. How to set the ignition on the Planet?
If you are the owner of an IL, the ignition of Planet 5 electronic type can be adjusted in the following way:
- set the advance angle (3.5 mm to the top dead center mark, in this case the sensor will show a pulse only when the modulator leaves the gap);
- start the engine.
As a rule, this option for setting up the ignition on Izh Planet 5 works without problems. Moreover, as a reserve for installing the ignition on Izh Planet 5, you can use a contact system for starting the power unit.
So, we figured out how to set the ignition on the Planet. With proper adjustment of the engine starting system, your motorcycle will start normally, and you will be able to experience all the delights of driving such a two-wheeled vehicle.
Clutch device of the IZH Planet 5 motorcycle
For those who are not good at technology, it is worth recalling that the clutch acts as a connecting element between the crankshaft and the gearbox. The large clutch gear is connected to the small crankshaft sprocket by a chain transmission, which is how torque is transmitted. In the normal state, the system ensures constant communication between the gearbox and the crankshaft and only when the clutch lever is pressed, the drive mechanisms increase the gaps between the elements in the multi-disc clutch system, thereby disconnecting the box from the crankshaft.
Owners of the IZH Planet 5 motorcycle are lucky; their clutch release system is simpler in comparison with the similar 5th Jupiter, which means it is unpretentious and easier to set up with your own hands. It looks like this:
- Shaped nuts;
- Springs;
- Cups;
- Pressure disk;
- Driven (steel) disk;
- Drive (plastic) disk;
- Driven drum;
- Large drum with large gear motor transmission;
- Clutch release pusher;
- Kernel;
- Ball;
- Spring;
- Worm;
- Cable;
- Washer;
- Screw;
- Screw.
Adjusting the clutch on a motorcycle
The clutch is regulated by changing the force of pressing the discs against each other, which, in turn, is regulated by preloading the springs. To do this, special “fungi” are put on the springs, which can be accessed after removing the cover on the left engine cover (oil hole). It is worth saying that in this way you can not get close to all the “fungi”, but only to some of them. All “mushrooms” can be adjusted by rotating the crankshaft using the starter
It is worth noting that absolutely all springs must be equally tensioned, i.e. each “mushroom” is twisted the same number of half turns
Thus, if the clutch is slipping, there are only two steps to follow:
- Make sure there is free movement of the handle. If it is not there, the clutch will be constantly depressed.
- Open the left cover, without draining any liquids, and tighten all the “fungi” evenly. After this, you should check the operation of the clutch. If slippage continues, it is worth repeating the procedure.
During adjustment, you should be careful and pay attention to various details, for example, the oil level in the engine, the condition of the teeth on the discs, etc. If after adjusting it there is no improvement, then you can begin the process of replacing the clutch
If after adjusting it there is no improvement, then you can begin the process of replacing the clutch.
It is worth noting that the malfunction of this element of the motorcycle should not be neglected, because if at the beginning of the day the clutch begins to slip, then after just a few hours of intensive motorcycle riding, it can completely die, thereby causing harm to the vehicle as a whole. After all, small particles of burnt clutch discs get into the oil, along with which they are sent to the precision joints of the liners, connecting rods and pistons, thereby damaging the engine
Therefore, if the time has come to replace the clutch, it should be done immediately.
With constant use of the motorcycle and long mileage, the basket itself wears out along with the clutch - wear appears on the edges of its longitudinal slots. Its appearance in these places makes it very difficult for the clutch discs to move. A shallow hole can be corrected using a regular file, however, this is a completely extreme case; still, if it appears, it is better to install a new basket.
So, there are different types of motorcycle clutch, however, the most common type is the multi-plate clutch in an oil bath. This is what is most often installed on motorcycles. Therefore, we will consider replacing the clutch using the example of a multi-disc clutch.
IZH, come out - we’ll go for a ride, or the easiest way to fix the clutch (part 3)
Continuation of the story about the restoration of IZH Planet 3-01.
Last time it all ended with the desire to ride and this time this desire needs to be realized, in fact, what else do you need a motorcycle for?))) And so the motorcycle starts up well, sometimes it kicks, here you need to develop a reflex to raise your leg sharply up after the kickstarter kicks, It runs well, smoothly, holds idle. Next, we try to squeeze the clutch, the clutch is squeezed, we feel an effort, which means the cable is not broken, I try to engage the first one - it doesn’t work - good, or rather bad. We are silent. I try to change gear - everything clearly turns on 1-neutral-2-3-4. At the same time, even the neutral warning light is on, which I didn’t notice before. So it's still the clutch. There are two options: the cable has stretched or the release mechanism needs to be adjusted. First we check the cable - there is almost no free play. So we try to adjust the clutch release mechanism, loosen the outer nut of the right cover and tighten the screw in the center with a slotted screwdriver; for this I used a spanner wrench and a ratchet with an attachment for a slotted screwdriver.
We start, remembering that the leg must be pulled up very sharply, in order not to get hit))) We squeeze the clutch, it became a little tighter to squeeze out, I try to engage the gear - it doesn’t work... we turn off the engine, we think... The cable is intact, the release mechanism works, I began to think that there was something wrong with the clutch discs themselves... And I don’t know how, but I remembered an article, apparently from an old magazine Moto or Young Technician, that the reason that the clutch does not disengage may be that there is no oil, or it not enough, or it's old. It’s all simple here - drain it, fill it up. I didn’t have a transmission, so I temporarily filled in the engine, and I decided to “wash” the box, i.e. I drained the system, filled in a new one, spun the wheel several times in gear, drained it and filled in a new one again. The moment of truth. We start it, sit down, depress the clutch, move the shift paw up with the toe of our left foot and... with a quiet click, the gear is engaged! My joy knew no bounds, I immediately remembered how in my school years we were just as happy when we managed to start a Riga moped))) Slowly, as if in a driving school, I release the clutch and add gas - hurray, it goes. I took a victory lap around the garage cooperative)) When I stopped I noticed that the whole time I was driving I had a smile on my face)))
When I was driving, I also noticed that on potholes and bumps the fork knocks and breaks a lot, while the bumps are very small. I decided to follow the already proven path - replace or fill the oil)) I unscrewed the plugs and poured 50-70 grams of motor oil into each pen. I drove for more knocks and breakdowns went away, but I began to notice a lot of play in the fork legs - this can’t be cured by changing the oil, it needs to be disassembled))) As a result: the IL starts up confidently, the gears are engaged, and it drives. The fork legs need major repairs, you can't ride with this one.
Next, we disassemble everything, paint it, bring the technical part to mind and rejoice)))
To be continued))) Thank you for reading to the end. Good luck to all!
Malfunctions and clutch adjustment of Izh motorcycles
There are two possible types of clutch malfunction: incomplete disengagement of the discs and slipping. If the motorcycle is slipping, it will not develop speed as the crankshaft speed increases. The reasons for this malfunction may include: wear of the discs, insufficient spring pressure due to loss of elasticity or loose adjusting nuts, incorrect adjustment of the clutch mechanism. When the clutch is not fully disengaged, the motorcycle wheel continues to rotate while the control lever is fully pressed. This may also be due to incorrect adjustment, or this malfunction may occur when thick oil is used, especially in cold weather. First of all, if you discover one of the clutch malfunctions, try to eliminate it by correct adjustment. First, you need to adjust the gap in the shutdown mechanism; this is done using the adjusting screw located on the right engine cover. To do this you will need a screwdriver and a 13 mm wrench. Using a wrench, loosen the locknut and use a screwdriver to tighten the screw until it stops, and then turn it in the opposite direction half a turn - one turn. Tighten the locknut with a wrench. Secondly, after this, adjust the free play of the lever using the cable adjusting screw on the left handlebar handle. It should be within 5-10 millimeters. The correct clutch adjustment can be checked in this way: place the motorcycle on a stand, engage first gear and try to manually turn the rear wheel with force. If the adjustment is correct, you will not be able to do this. Now you need to perform one more check: to completely disengage the clutch. To do this, in the same position (motorcycle on a stand, rear wheel not touching the ground), start the engine and engage first gear. Then fully depress the clutch control lever and apply the rear brake, the wheel should stop. Release the brake, the clutch is depressed, and the wheel should remain stationary if adjusted correctly. If it starts to rotate when the lever is pressed, you need to loosen the adjusting bolt on the right side of the engine.
To check the ease of movement of the clutch cable in the sheath, press the lever and release sharply. The lever should spring back to its original position. It may be worth lubricating the cable with a few drops of liquid oil, such as Autol.
Clutch adjustment IZH Planet 5:
- Remove the gearshift foot and kickstarter. Next, unscrew all the bolts on the left crankcase cover and carefully remove it.
- We temporarily put on the gear shift leg and engage first, or better yet, 4th gear. We rotate the rear wheel in the direction of travel, observing the alignment of the pressure disk (4).
- With chalk we mark the bolts (1) that correspond to the side that protrudes the most during rotation. We tighten the bolt that is closest to the protrusion, and then check the tension of those located nearby. (If the disk is not distorted, then immediately proceed to the next step)
- Now you need to check how much the bolts (1) protrude. The operating manual indicates the optimal protrusion length is 4.5 - 5 mm. However, this data corresponds to a new disk package. The package will obviously require replacement when the protrusion of the bolts is 2 mm or less.
- We have dealt with the disk package, now we need to configure the shutdown mechanism, or rather its free movement. To do this, go to the right cover. There is an adjusting nut (16) and a screw (17) on it.
- We tighten the nut until it stops, so that the clutch does not disengage. Then we unscrew it a quarter or half a turn, securing it with a screw.
- All that remains is to set the free play of the lever on the steering wheel. To do this, use the adjusting screw and set the gap to 5 mm.
This completes the adjustment of the IZH Planet 5 clutch. All that remains is to assemble the left cover and pour oil into the mechanism.
Advice. To avoid oil leaks, replace the gasket and also check the tightness of the screw connections on the crankcase cover.
Generator
The motorcycle is equipped with a 3-phase alternator, which has an electromagnetic excitation circuit. The principle of its operation is based on some features. So, the electrical circuit of “IZH Planet-4” looks like this: the current is supplied to the rectifier, which, in turn, converts it into direct current, then supplies it to consumers. The factory instructions for the generator contain the following elements:
Voltage regulator with rectifier “BPV-14-10”;
The head light circuit consists of the rear brake light, parking light and color control light. The motorcycle is equipped with a speedometer with mileage indicators (daily and total), a tachometer, indicator lamps for turn signals and head lights, a voltmeter and an engine temperature sensor. Very often during operation it is necessary to adjust the gap between the contacts of the breaker. To do this, it is best to use a diagram and special tools to know which elements need to be dismantled.
While easily fixing mechanical failures, motorcyclists experience difficulties if the electrics fail. It’s completely in vain, the wiring diagram of the planet Izh 5 is not complicated, it’s easy to figure out.
There is no need to have special stands and equipment for repairs. A minimum knowledge of electrical engineering and a simple avometer (tester) is enough; even often you can get by with just a test lamp.
We will tell you in more detail about the main electrical wiring components and possible malfunctions. The Izh Planet wiring diagram makes it easy to find a broken wire or damaged insulation (for example, a bad contact always gets hot).
In this case, we look to see if there is a spark at the coil output and at the output at the spark plug contact. Let's take a closer look at the main wiring components of the Izh Planet.
IZH Planet clutch malfunction
Possible malfunctions that may occur during operation of the IZH motorcycle. Let's start with clutch slippage. This error indicates that the drives are slightly pressed together.
There may be several reasons:
- Incorrect setting
- The springs have lost their former elasticity
- The discs are worn out and become thinner
- Wear of drive parts
Clutch wires. This is when the lever is pushed all the way and the clutch is not completely disengaged. The discs are not evenly weakened in places that are in close contact with each other.
The main reason is the springs that compress the discs.
I mounted the clutch and installed cork discs.
I decided to experiment, if I don’t like it, I’ll return the standard ones. To adjust, I used an electronic caliper, 4mm from the nut head to the bolt.
There are now fewer metal disks. I was still thinking about the chain guide, but I didn’t bother yet and assembled it without it. I think next year. Well, the visibility of the clutch has become many times easier. Previously, more effort had to be made, but now it’s almost like foreign cars.
I like I like 2
Other entries in this logbook
Again a rarity. Ignition switch, tray in the glove compartment.
Time passes, and I still slowly continue to equip the motorcycle with original spare parts. This time they were found in the vastness of Avito. Read more
Air filter mount.
As always, I am a hunter for rare parts) While going to the market, I accidentally noticed a motor from Izh Jupiter 2, and that’s what I saw on it. Read more
I assembled the motor.
After finishing the bolt and minor modifications, the assembly of the motor began. The gaskets were cut out independently. Armor is stuffed under the cylinder. Read more
Comments
Only authorized users can leave comments
won't it slip?
- Answer
- November 16, 2022 at 05:36
__vorbik__
IZH Jupiter 5 “MRAZOTA”
My parents bought this motorcycle with wedding money in 1988. and in 1994 they put it in the garage because the family got a car. In 2007 I got it, and our relationship began. There’s no other way to call it) he and I are like cats and dogs, we love to test our nerves to the limit. 2007 Pulled it out of the barn next to the chicken coop. I washed it off the shit, started it, and drove around with minor repairs. 2009 The engine died and there were no funds for repairs. 2010 Complete disassembly, painting, engine overhaul with replacement of shafts, bearings, seals, gaskets, piston. A month later, the piston burned out (because at that time I was not yet a nanomechanic and had not heard anything about the thermal gap). As a result, I bought a piston kit with new cylinders assembled in short. 2011 April. 13 km from the house, the chain lock opened and gutted the rear casing of the star (in common parlance, a guitar) and that was the last straw. After that, the motorcycle was kicked into the barn with the words: GET OUT OF THE SOVIET MOTOR INDUSTRY! And a new YBR125 was purchased. 2015 My soul yearned for my friend, old grievances were forgotten, and my friend was transported from my grandmother to my garage. 2016 Attempts to revive this barn were ongoing. The day of dancing with a tambourine at the contact ignition was exhausting. We bought an optical ignition and it STARTED! and it didn’t just start, it FLYED. 2022 I decided to modify the engine and not touch the frame. But then, as always, I decided to go all out. Again a complete disassembly and then Ostap suffered!
Clutch faults
Possible malfunctions that may appear during operation of IZ motorcycles.
The clutch of IZH Jupiter IZH Planet is slipping reasons
The malfunction is noticeable during sudden acceleration. We increase the speed, but the motorcycle does not accelerate. The same thing happens when driving on a steep hill as the load increases. The motorcycle cannot overcome the obstacle and stops, although the crankshaft speed does not drop. The discs get very hot and wear out quickly. It is impossible to operate the equipment in this condition; the cause must be found and eliminated.
This malfunction indicates that the disks are poorly pressed against each other.
There may be several reasons:
- The adjustment was not carried out correctly
- The springs have lost their former elasticity
- The discs have worn out and become thinner.
- Wear of drive parts
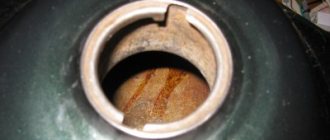
A serious problem could be a jammed control cable. The reason is damage to the shell and the resulting rust underneath. Gentle cleaning and lubrication, better replacement.
Check and wash the adjustment mechanism itself located in the right engine cover. Small particles of road sand that get into the mechanism with water can slow down the operation. After squeezing the lever, the parts do not return to their original position.
Drives clutch IZ Planet IZ Jupiter reasons
The clutch is driving - this is when the lever is squeezed all the way, and when the speed is turned on, the motorcycle immediately starts moving and cannot be stopped. You press the brake, the engine stalls. This indicates that the clutch is not completely disengaged.
The main reason is the springs that compress the discs. The discs are not evenly weakened and in some places are in strong contact with each other. The springs need to be adjusted correctly.
There is too much free play in the control lever on the steering wheel. If adjustment is not possible, replace worn control parts.
You need to check the pusher, which is located inside the input shaft of the gearbox. Perhaps the rod has become shorter.
Be sure to check the presence of the ball. Often during disassembly it rolls out and gets lost.
The ball is located inside the input shaft of a two-cylinder engine between the pusher and the thrust rod.
For a single-cylinder unit, the ball is located in the right cover between the screw with a control nut and the thrust rod in the input shaft of the box.
Clutch Spring Adjustment
Adjusting the springs is not difficult, that's the main thing. understand correctly. Let's start by mounting the motorcycle on the center step. Then remove the cap before draining the oil. The clutch lever is compressed to the limit and will definitely lock. Next comes speed, preferably first. Take the wheel and start spinning. We are trying to determine how much effort we are making. We look at the clutch as it rotates and determine which springs are loose. We mark them with chalk and then tighten them. We start turning the wheel again, and if you feel that the wheel is turning easier, that means everything is done correctly. The process must be repeated to achieve the best result. After that, we check the result while moving. If the load starts to clip when the load increases. All springs must be tightened using nuts. In this case, all nuts must have the same number of turns.
Adjusting the IZH Jupiter clutch
On IZH-Yu and IZH-YUK motorcycles, adjusting the clutch release mechanism begins with adjusting the machine, for which the adjusting screw is screwed in all the way and released 1/4.1/2 turn, then tighten the lock nut. Correct adjustment is checked by pressing the switch pedal in any direction. Moving the front end of the shift pedal 5-5.5 mm from the neutral position should not lead to movement of the pressure plate. Then adjust by manually pressing the adjustment screw located in the left column of the clutch lever
on the steering wheel (free play 5-10 mm)
Purpose of the clutch IZ Planet and IZ Jupiter
Clutch - the name speaks volumes about the job it does. In our case, the crankshaft engages the gearbox of the IZH Planet and IZH Jupiter engines. The connection should occur smoothly without jerking, this is necessary to start moving and smoothly change gears. In case of heavy loads, it protects engine parts from damage. The clutch is located in the left half of the crankcase, under the left engine cover.
To get to the clutch, you need to drain the oil and remove the cover with the gasket, first remove the levers and unscrew the mounting bolts.
The basket is constantly in working condition, the discs are tightly compressed by springs.
The motor transmission consists of two sprockets. The small drive is located on the crankshaft. A large star driven on a drum. The connection is made by a motor chain.
The engine gear ratio is 2.17 for all single-cylinder IZh models. For IZ Jupiter, the gear ratio is 2.57.
When assembling the motor transmission, the planar arrangement of the stars is controlled. No more than 0.4 millimeters are allowed.
Switching off occurs using a special device. The shutdown mechanism is installed in the right engine cover. This mechanism is used to make adjustments.
Functional purpose of the gearshift clutch
Before you adjust the clutch on the Izh-Jupiter 5 motorcycle, it’s a good idea to understand its purpose and principle of operation. The essence of the transmission clutch:
- Ensuring the transmission of torque from the large gear of the motor transmission to the gearbox input shaft.
- Short-term separation and smooth connection of transmission elements to each other.
Izh motorcycles were equipped with a mechanical clutch, the operation of which is based on the friction force between the driven and driving disks. It is a multi-disc design operating in an oil bath - a classic arrangement that the Izhevsk Machine Plant used until 2008. Working in tandem, the main chain drive and four-speed gearbox are reliable and proven by many generations of motorcyclists.
Clutch setting
Adjusting the springs usually does not take much time and is not considered a complicated procedure. To carry out these actions, the motorcycle is placed on the stand, the oil is drained, and then the installed cover can be removed. After this, the special lever will need to be squeezed to the maximum and securely fixed. Then it is recommended to turn on the first or second speed, take the wheel and start rotating. Based on the load, we determine which springs are more tense and which are looser.
Then, when we have figured out which springs need to be tightened, we rotate the wheel to check the result
It is necessary to pay special attention to such a fairly important point that when the load increases, the clutch will not slip. After all of the above steps are completed, the IZ Jupiter 5 clutch basket is assembled
Adjusting the IZ Jupiter 5 clutch is important for stable and safe riding on this popular motor vehicle. Therefore, when you feel that it is necessary to carry out these actions, then you should not delay this
How to properly adjust the clutch on the Izh-Jupiter motorcycle?
Adjusting the clutch on motorcycles of the “Jupiter” series is complicated by the fact that here the clutch release must be synchronized in a certain way with the gear shift.
This is not at all difficult to achieve if you follow the established procedure and do not perform these actions thoughtlessly. First of all, you need to remove the left engine cover (after draining the oil, of course!) and, pressing the lever on the steering wheel, watch how the disks move in the grooves of the drive drum. In itself, this movement is insignificant, about 2 mm, so any, even the smallest, misalignment of the disks will lead to incomplete shutdown of the mechanism. By tightening or loosening the corresponding clutch spring nuts, achieve uniform movement of the entire disc pack.
After this, tighten the clutch adjustment screw on the steering wheel until it stops so that it does not interfere with the free movement of the lever. And begin to carefully screw the clutch adjustment screw (Fig. 26) into the pressure plate until a noticeable stop appears. This is where you need to show special sensitivity with your fingers: not just turn the screw, but screw it in until it comes into contact with the pusher passing through the input shaft. (Try turning the screw in and out several times - and you will learn to determine this moment!) After contact, unscrew the screw 1/4. 1/3 turn and secure with lock nut.
Rice. 26. Adjusting the clutch of the Izh-Yu motorcycle
It remains to unscrew the screw on the steering wheel so that the free play of the lever, measured at its end, is 5.8 mm, and the adjustment is complete.
AutoNews / Reviews / Tests
How to Adjust the Clutch on Izh Planet 5
Adjust the grip of the IZH Planeta motorcycle
Tips for increasing the life of the Izh motorcycle clutch
The clutch is not intended for long-term operation in the disengaged position, as in this case increased wear of the mechanisms occurs. The control lever must not be released abruptly or very slowly. When turned on abruptly, the power transmission receives maximum load; when turned off slowly, the parts wear out even more than when turned off completely, due to slipping of the disks. If you have a habit of keeping your fingers on the lever, make sure that there is not even the slightest pressure on it. Even with a slight pressure that does not cause the discs to slip, the clutch mechanisms experience significant load. Do not use the clutch to disconnect the engine from the gear when stopping or coasting for a long time. In all these cases, use the gearbox, putting it in neutral. Also, never try to make the engine work easier on climbs and in other difficult situations, causing the discs to slip and, as a result, increase engine speed. In such cases, it is better to switch to a lower gear in advance.
Motorcycle care
Motorcycle braking system
Storing a motorcycle in winter
An important detail - the cable
Owners of used motorcycles do not always take into account the essential role of the cable in the clutch control system. The cable itself is practically not subject to stretching, but the sheath loses its qualities. Its frame is a spiral under a layer of PVC.
After prolonged use, the frame becomes pliable and excessively springy, which affects the useful stroke of the lever. If the cable sheath is worn out, the clutch will not operate normally, so it is important not to miss the moment and replace the cable in a timely manner.
Switch P-200
Light switch with horn button (located on the left side of the steering wheel). To switch the low and high beam circuit, a P-200 type switch is used with a built-in push-button horn switch for three operating positions: neutral - the headlight lamp is off; far right – low beam is on; far left – high beam is on.
The horn button has a movable contact connected to ground and a fixed contact connected to one of the wires coming from the horn terminal. When you press the button, the contacts close and the signal circuit is completed.
Caring for a sunrise motorcycle generator - how to remove, what to check and install correctly
Generator maintenance mainly comes down to tightening the threaded fasteners of the generator stator and rotor, as well as the wire terminals.
In order to remove the generator, you must:
- disconnect the wires of the ignition circuit, sensor, brake light and direction indicators from the generator terminals;
- unscrew the three screws securing the stator to the crankcase and remove the stator;
- Unscrew the bolt securing the generator rotor and, with light, careful blows of a wooden hammer on opposite sides of the rotor, remove it from the trunnion and remove the key.
Checking the removed parts
After removing the generator stator and rotor, wash the parts with clean gasoline and carefully inspect them. Disassemble the wire fastening terminals on the stator. Wipe dry all insulating parts of the terminals.
Generator installation
Installation is carried out in the reverse order, in this case it is necessary:
- check the runout of the generator rotor, which should be no more than 0.1 mm with the bolt secured;
- tighten the generator stator without distortions, ensuring a tight fit to all three supports;
- install the ignition correctly;
- The generator wires must be securely fastened and well insulated from each other.
Checking the clutch drum
The first step is to check the foot start ratchet mechanism. This is where the main load falls. Turn the clutch basket over with the ratchet facing you, remove the retaining ring and disassemble the ratchet.
We inspect the teeth of the ratchet: they should be sharp without chips or other damage. If the teeth are wrinkled or broken, the winding foot will slip 100%. Many suffer from this problem due to thick oil or a weak spring - in fact, the reason for the foot slipping lies in the ratchet.
If the teeth on the basket are not worn out, it is advisable to rivet the ratchet: buy a new one in the store or remove it from another basket and rivet it. I riveted several baskets and they went without any problems until the “victory”...
An example of ideal ratchet teeth.
Often and thickly, the rivets on the ratchet weaken and if you don’t notice this in time, they are cut off. To prevent this trouble from happening to you, move the ratchet with your fingers. If it wobbles, drill out the old rivets and rivet them again. Pulling old rivets usually does nothing.
If you are making a clutch “for yourself” and for a long time, be sure to check the condition of the teeth for the motor chain.
If the teeth have already begun to turn back, then such a basket should be immediately thrown into the trash. It will no longer be of any use: the operating noise will increase, it will 100% eat up the motor chain, and there’s never an hour when one “fine” day it will lick your teeth and you will then be forced to push your jalopy for a long time and tediously...
An example of worn teeth.
It is not uncommon for the basket body to burst. Unfortunately, the body is made of cast iron and welding it will be problematic. If you find cracks on the body, try to find a welder who welds non-ferrous metals, the so-called “argon welder”; they usually take on welding cast iron.
An example of cracks in the basket body. By and large, this basket can still be saved: chamfer the cracks, weld and turn the seams on a lathe. But the teeth under the motor chain were worn out and I threw it away.
Checking clutch discs
The main clutch problems occur due to the fault of the discs. If the discs are crooked or worn out, then no amount of even a super couture adjustment will correct the poor performance of the clutch.
Wear is determined visually and only on plastic discs: we inspect the disc and if we find a crack or a broken hook on it, with which it enters the outer drum, or we see that the round protrusions on the working surface have long been worn out, we throw such a disc in the trash.
The curvature of the disks is determined as follows: place all the disks on the glass one by one and try to swing them
- If the disk wobbles, it means it is 100% crooked and should be in the trash.
- If the disk lies flat, leave it.