Operating principle of the electronic ignition system
The latest generation of Minsk generators significantly increases the power of the electricity source.
This ensures uninterrupted functioning of all elements of the system. In all speed modes, electricity consumers have reliable supply. New generators differ not only in their functionality, but also in their structure. Different motorcycle models have different types of alternators. But they are similar in appearance, which allows you to attach them without matching the model.
The only thing to remember is that when changing the generator to another type, it is necessary to regulate all other elements.
Electronic ignition is non-contact. The design features of Minsk do not provide for the presence of a battery. The ignition system operates on the basis of GPT. The work uses a switch unit - stabilizer and an induction sensor.
A voltage stabilizer is used to regulate the amount of current supplied to lighting and sound signals. The switch and the stabilizer are not interconnected in their functions.
The Minsk ignition system works through the connection of such elements as:
- candle,
- voltage transformer;
- induction sensor;
- resistance;
- indicator lamps;
- wires
A properly configured ignition system is the key to ensuring that the motorcycle will start even in winter. The absence of a battery makes life easier for a motorcycle owner to some extent. There is no need to think about periodically recharging the battery. The Minsk motorcycle wiring diagram shows the relationship between individual elements.
Switch P-200
Light switch with horn button (located on the left side of the steering wheel). To switch the low and high beam circuit, a P-200 type switch is used with a built-in push-button horn switch for three operating positions: neutral - the headlight lamp is off; far right – low beam is on; far left – high beam is on.
The horn button has a movable contact connected to ground and a fixed contact connected to one of the wires coming from the horn terminal. When you press the button, the contacts close and the signal circuit is completed.
Motorcycle Minsk, operation and repair.
>> ELECTRICAL EQUIPMENT, IGNITION SYSTEM Next >>
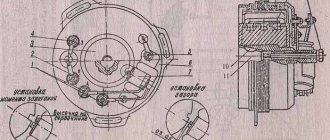
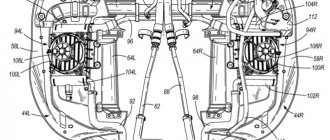
Rice. 3.12. Ignition system.
On motorcycles M103-M106 and 3.111 a contact (mechanical) ignition system was used.
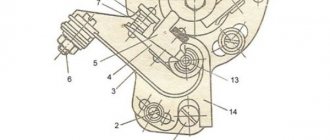
The ignition system consists of a generator ignition winding, a breaker, a capacitor, an induction coil, a high voltage wire, an anti-interference device, a spark plug, a central switch and low voltage wires (Fig. 3.12).
When the breaker contacts are closed, the ignition winding is short-circuited to ground and the current flows through circuit 1: ground - generator winding - breaker - ground. When the contacts open, the current flows through circuit 2: ground - generator winding - terminal A - red wire - terminal H - primary winding of the induction coil - ground. If the ignition is turned off, then terminal 4 in the central switch is connected to terminal 3 and the current, bypassing the primary winding of the coil, which has resistance, goes to ground through terminals 4 and 3 of the switch.
Ignition system devices. The B-300 induction coil consists of a core, primary and secondary windings, a housing, a cover, coupling screws and terminals.
The coil is installed in a metal bracket, which is attached with two bolts to the frame bracket. The ground terminal is connected to one of these bolts, so the frame bracket must be well cleared of paint where it connects to the coil bracket. The high voltage wire is secured to the coil output terminal using a rubber sealing sleeve and nut.
A faulty coil cannot be repaired and must be replaced. The only exception is a wire break from the low voltage terminal inside the coil, which can be eliminated by soldering. Do not allow water to come into contact with the reel, as this may cause interruptions or failure of its operation. If water does get in, the coil should be dried in the sun or in a warm room for several hours.
Failures of high voltage wires include damage to the insulation and destruction of the core, especially at the ends. If the end of the wire is damaged, it should be carefully cut off with a knife.
Rice. 3.13. Spark plugs: a - hot; b - cold; c - with a protruding thermal cone (skirt); 1 - length of the threaded part; 1 - protruding part of the skirt; 2 - sealant; 3 - side electrode; 4 - central electrode; 5 - skirt; 6 — body; 7 — insulating heat sink washer; 8 - glass sealant; 9 — mesh knurling on the contact rod; 10 - insulator; 11 — contact rod.
The spark plug (Fig. 3.13) consists of a housing, an insulator and electrodes.
For uninterrupted operation of the spark plug, the temperature of the lower part of the insulator (skirt) must be within 500 - 600 ° C. In this case, carbon deposits burn on the insulator (self-cleaning), and the color of the insulator changes from light gray to light brown. If the temperature of the skirt is below 500 °C, then carbon deposits are deposited on it, causing current leakage to ground (carbon deposits - conductor) and interruptions in operation. If the temperature exceeds 700 °C, then premature ignition of the mixture from the hot insulator occurs - glow ignition.
The correct selection of spark plugs improves engine performance, makes it easier to start and increases power. A well-chosen spark plug, removed from an engine running under load (at least 2 km of driving at a speed of 80 - 85 km/h), should be dry and have a skirt color from light gray to light brown. Since an engine in operation necessarily has deviations from the norm (even if insignificant), at the moment it may be better suited not to a factory-installed spark plug, but to another one that is close to it in thermal characteristics.
Malfunctions of the spark plug include heavy deposits of soot and soot on the skirt, shorting of the electrodes with soot or melted metal (bridge), an increase in the gap due to burnout of the electrode, pitching or cracking of the insulator. When eliminating a bridge or soot on an insulator, the causes of the malfunction must also be eliminated. If there are cracks or movement of the insulator, the spark plug is replaced with a new one. Sometimes cracks in the insulator may be invisible and without a load (when checking for ground), such a spark plug can produce a normal spark, but under load (in the cylinder) it will work intermittently. If there is any doubt about the serviceability of the spark plug, it is necessary to install a rubber plate between its electrodes and check for a spark. For a working spark plug, the spark will jump between the central electrode and the body, and for a faulty spark plug, through the insulator outside or inside the spark plug.
Radio interference protection device SE-12 or A-14 is used to reduce radio and television interference created in a high voltage circuit.
It is based on a resistance of 12,000 - 14,000 Ohms, mounted in the body of the spark plug tip. Shielding the tip with a metal casing (A-14) additionally reduces the level of radio interference. The device improves the performance of the spark plug and its installation on a motorcycle is mandatory.
The central switch VK-863 (Fig. 3.14) is installed together with an audio signal on the bracket of the upper bridge. Has three working positions:
0 - the motorcycle and the entire electrical system do not work;
1 - the ignition circuit is turned on, the braking signal and the direction indicator circuit are on (when switch P201 is turned on);
2 - the side light lamp turns on when driving on illuminated streets, the speedometer and rear light are illuminated (through the throttle) and the high/low beam lamp turns on when the P200 switch lever is moved to the right/left.
To remove the central switch, disconnect the cover, remove the plastic cover and unscrew the round nut. To remove the cylinder, you need to insert the key and turn it all the way to the left (counterclockwise). Insert a needle into a small groove on the perimeter of the cylinder and press the end of the lock washer down 2 - 2.5 mm, turn the cylinder all the way to the left and remove it along with the key. To remove the rotor, unscrew the screws securing the arms and, carefully, so as not to lose the balls and the retainer spring, remove it from the housing.
During assembly, the rotor must be rotated so that its leads connect terminals 1 - 2 and 5 - 6 (Fig. 3.12). The cylinder is installed together with the key. First, place the lock washer and align the groove in the bottom of the cylinder with the protrusion in the body, and then insert the cylinder and, lightly pressing it down, turn the key all the way to the right, and then to the left.
Rice. 3.14. Central switch VK-863: 1 — locking ball; 2 - rotor; 3 — clamp spring; 4 — rotor driver; 5 — contact plates; 6 — cover; 7 — bracket; 8 - wire; 9 - terminal; 10 - panel; 11 — protective cover; 12 — locking plates; 13 - groove in the body; 14 - cylinder; 15 — lock washer; 16 - nut; 17 — body; 18 — fixing protrusion in the body
Maintenance of the switch consists of tightening the threaded connections and periodically (once a season) lubricating the cylinder and retainer balls with lithol or consalin. After 2000 km, you can, without disassembling the switch, pour a few drops of autol into it through the key hole.
The following switch malfunctions are possible:
1. Stiff cylinder rotation caused by lack of lubrication or sand. The malfunction can be eliminated by flushing the switch and lubricating it.
2. Weak fixation due to weakening of the clamp spring or1 development of grooves in the housing. The spring should be stretched or the groove in the housing should be filed.
3. Sticking of the cylinder as a result of wear of the lock plates or 1 key. It is necessary to remove the cylinder along with the key and carefully file away all protruding plates. If the locking plate breaks, it should be removed. Jamming can be caused by the rotor arms being loosened or the contact plates being bent, causing the arm to rest against the end of the plate. The driver screws should be tightened or the contact plates should be straightened.
4. Fuzzy switching - the ignition does not turn on, the lights do not turn off, etc. - may be caused by loosening of the leash or contact plates that need to be riveted. The panel may break (usually with the terminal, which can be fixed with glue).
If you lose the ignition key, you can get to the garage by disconnecting the red wire from terminal 4 (Fig. 3.6) and insulating it.
Instructions
1
If you're choosing a base engine, go for the M-125. Compared to the previous models M-105 and M-106, it has improved cooling, which increases the possibility of boosting it for sports purposes. If for models M-105 and M-106 the power is 9 hp. is almost the maximum, then for the M-125 model you can achieve 10.3-10.8 hp. in the conditions of an average mechanical workshop. The engine must be well run-in and have serviceable parts and mechanisms.
2
Completely disassemble the engine. Insert and securely fasten rings into both halves of the crankcase, which will reduce the diameter of the crank chamber to 121 mm. Replace your crank chamber seals with specially designed sport models. They must withstand pressure of at least 0.8 kg/sq.cm. Change the valve timing: exhaust phase should be 164 degrees, scavenging phase should be 108 degrees, exhaust phase should be 128 degrees.
3
Instead of the standard one, install a K-36I carburetor with a diffuser diameter of 27 mm. Its main fuel jet must have a flow rate of at least 0.25 l/min. Cut the purge windows in the piston to 25 mm so that they coincide with the purge windows on the motor cylinder.
4
Extend the intake manifold to 300 mm. In this case, the length of the intake pipe from the cylinder mirror to the carburetor should be 100 mm, the internal diameter of the intake manifold should be 40 mm, the length of the manifold from the carburetor to the air filter should be 150 mm. Install an M-24G magneto in the ignition system. Set the ignition timing to 2.2-2.5 mm before TDC. Screw in a spark plug type PAL-14-8 or BOSCH-260-280.
5
Replace the bronze separator of the lower head of the crankshaft connecting rod with an alloy type D-16T or V-95. A homemade one made from cyanidated steel or grade 45 steel without heat treatment with mandatory silvering of the surface is also suitable.
6
Carry out additional polishing of the cylinder channels, check and correct, if necessary, the cross-section of these channels, as well as the angles of the purge outlet. The factory level of processing of these surfaces is insufficient for sports purposes.
7
Replace the air filter with a larger one, with a reservoir volume of at least 3 liters and paper filter elements. After running in the engine boosted in this way, install a carburetor with a 28 mm diffuser, increase the length of the pipe from the cylinder mirror to the center of the nozzle to 135 mm, increase the length of the manifold from the carburetor to the air filter to 170 mm.
8
In an engine boosted in this way, use B-95, B-100 or A-98 gasoline. Motor oil - MS-20 in a ratio of 1:20. To further increase power, you will need to install a sports crankshaft, piston and piston rings, switch to higher valve timing, as well as use a racing muffler and carburetor.
How to set the outline for the best ignition
Initially, the outline is installed at the factory, when the finished motorcycle is in a state of assembly, and is tightly adjusted with special screws. In most cases, this avoids problems, but sometimes they become loose, disrupting the course of the ignition spark and reducing its intensity.
Setting an outline on a Minsk motorcycle is not easy. This procedure takes a lot of time and effort, and also requires utmost attention from even the most experienced drivers. Therefore, you need to start it only if you are absolutely sure that the problem lies in the outline. You can check this by measuring the intensity of the spark when adjusting the contacts. Changing it indicates a problem, but if it remains stable, no adjustment is required.
Loosen the outline screws and check how the spark changes. If it increases with increasing distance between the contacts, then the plate should be gradually rotated clockwise, and vice versa if it decreases. The steps must be repeated until you get a strong ignition spark that will remain stable when the distance between the contacts changes.
Installing a Minsk motorcycle ignition will be much easier with the assistance of experienced drivers or mechanics if you are new to this matter. However, you can easily do it yourself, paying maximum attention and effort to it, saving a lot on the price of repairing a motorcycle at a service center.
- https://motoking.ru/sovety/kak_otregulirovat_zazhiganie_na_motocikle_ural
- https://avtorep.ru/nastrojka-zazhiganiya-na-motocikle-ural/
- https://real-biker.ru/articles/zazhiganie-minsk-principy-regulirovki-iskroobrazovaniya-dlya-dannoy-modeli-motocikla-28/
Painting a motorcycle at the car service center "Painting Auto Minsk"
Painting a motorcycle is not a simple and lengthy technological process. Sometimes car enthusiasts, trying to reduce the cost of repairs, paint the motorcycle themselves. But often this leads to a sad result. The motorcycle part is damaged, and correcting the errors increases the cost of painting the motorcycle. Also, if there is minor damage, it is not always necessary to completely paint the motorcycle; partial painting can be done using computer-assisted enamel selection, which will ensure the correct shade of paint.
Motorcycle frames are painted in specialized painting booths. Where the temperature regime is maintained and the surface is protected from dust and debris. All these conditions provide excellent results in painting a motorcycle.
As the revs increase, the headlights become brighter... is this namano?
Re: volt generator Power the headlight from a 12 V battery, and put an amp diode in the circuit between the battery and the generator on Stanislaff View profile Forum posts Created topics. Re: volt generator I wish I could write what kind of motorcycle it is. Re: Volt Izh Planet 5 generator with Mins generator.
Re: Volt generator Is the switch-stabilizer unit alive? Re: volt generator switch live. Re: the volt generator may have a circuit that will constantly show 12 volts even at low speeds. Re: a volt generator is what they suggested to you, insert a battery and a chocolate bar from a car generator, it will regulate the voltage. Alex View Profile Forum Posts Home Page Created Topics. Re: Volt generator Message from dear Karlson. Last edited by Zhenya1; Re: volt generator Is writing correctly in Russian also “not an option”?
Smilies On HTML Code Off Current time: All rights reserved.
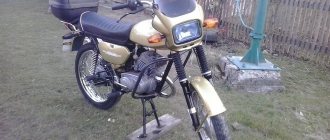
Dimensions
Regarding the overall characteristics, we note the following indicators. The motorcycle wheelbase is 1230 millimeters. The length is 2100 millimeters, width – 800 millimeters, height – 770 millimeters. The tank capacity is 11 liters. Fuel consumption shows the following figures: consumption is 3.5 liters at a distance of 100 kilometers.
So, when considering whether to buy such a motorcycle, first of all, decide for what purpose you need it. If you are going to the store to buy bread, then you can do without it. But if you want a bike powerful enough for off-road and city riding, then this is what you're looking for.
Ignition Minsk - principles of spark regulation for this motorcycle model
The article talks about how to set up the ignition of a Minsk motorcycle with your own hands, as well as the basic principles of self-adjustment of spark formation.
There are quite a few models and varieties of Minsk motorcycles, but they are all equipped with similar generators that operate on the same principle and also provide an automatic ignition system. Therefore, most often, if the engine does not start, the problem lies there. Setting up the ignition of a Minsk motorcycle is not particularly difficult for an experienced driver or mechanic, but those motorcyclists who are encountering this problem for the first time will need some advice. With their help, you can easily adjust the ignition of your Minsk motorcycle and put it in order, so that your iron horse can again carry you along the road with the breeze.
The main thing in working with ignition in Minsk is to determine what the problem is and whether you can help the motorcycle with your own hands. Most often, the problem occurs in the breaker or due to an insufficiently strong spark of the outline. We will look at these points in more detail.
How to set the ignition on Jupiter | Do it yourself
Many motorcycle owners have had the opportunity to set the ignition on them themselves. It's not difficult to do this. However, you need to have an idea about the structure of the system itself. You will also need a special tool for the job.
Instructions
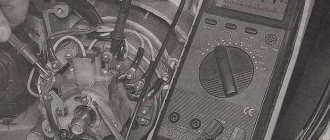
1. You need to get a 12 V lamp with two wires. You will also need a tester. You can use a caliper as a depth gauge. It is easier for everyone to measure the gap with the support of a feeler gauge.
2. First, unscrew the generator cover. You can also remove the entire right crankcase cover. This will make it much more comfortable to work further. Turn the crankshaft clockwise. Rotate using the generator bolt. It is your responsibility to achieve maximum opening of the breaker contacts. After this, loosen the screw and turn the eccentric. There should be a gap of 0.4 - 0.6 mm between the contacts. Tighten the screw thoroughly.
3. After this, rotate the crankshaft clockwise. The piston must be set to top dead center. After this, rotate the crankshaft counterclockwise. The piston should not reach TDC approximately 3.0 - 3.5 mm. Loosen the screws and install the contact opening preface. Tighten the screws carefully. It is easier for everyone to determine the opening of contacts using a probe. Connect one of its wires to ground, and the second to the breaker hammer terminal. Turn on the ignition. The lamp should light up when the contacts are opened.
4. If you have BS3, then you need to exclude the item for setting the gap. You will need to determine the moment using a tester. Set it to measure voltage. Connect it to the second and third contacts of the DC. The tester should show a voltage of about 7 volts when the modulator is not in the DC. When the modulator is in the DC, the voltage should change from 7 V to 0. At this moment, sparking occurs.
5. Set the ignition separately for each cylinder. It is recommended to start by adjusting the gap on the left breaker. After installing the ignition on it, you can move on to the right breaker.
Tip 2: How to set the ignition on a motorcycle
If your motorcycle does not start or operates abnormally, then the possible reason is that the ignition is set incorrectly
Special attention should be paid to this problem
Instructions
1. It’s worth noting right away that the generators “G-401”, “G-411”, “G-421” have a mechanical ignition system. To set the ignition, you need to positively adjust the gap between the ignition contacts. Please note that you will also have to adjust the outline at the same time.
2
Special attention should be paid to adjusting the gaps in the breaker. For this purpose, turn the rotor with a ten key to an arrangement in which the gap will be larger than each
After this, loosen the screw that secures the contact post to the cover. Using a screwdriver, turn the eccentric in such a position that the gap between the contacts is about 0.4 mm. For the job, it’s best to first buy a special probe. Its thickness is 0.45 mm. It should be slightly clamped by the contacts.
3. If you are an experienced driver, you can adjust the gap directly with the engine running. To do this, slowly turn the eccentric with a screwdriver. Determine the gap at which the engine cycles will be the largest when the throttle is stationary. After this, you need to firmly tighten the screw of the contact stand. The clearance should not change on its own during subsequent driving.
4. After setting the gap in the breaker, you need to set the piston to top dead center, and then turn it back by 3 mm. For comfort, you can insert a screwdriver into the hole in the cylinder head. Turning can be done with the same key of ten. Please note that the piston must stop at a position of 3 mm before the top dead center along the movement from the top dead center.
5. Instead of a screwdriver, you can use a micrometer, the one with a clock head. A caliper with a specific depth gauge is also great for this purpose. Loosen the stator bolts and start turning it in such a way that the contacts in the breaker begin to move away from each other, that is, to open.
Adjusting the gap in the breaker
Adjusting the gap between the contacts is a simple procedure with which you should begin diagnosing problems. First of all, prepare a key for 10 - you will need it more than once when setting up the ignition in Minsk.
To adjust the gap you will need to do the following:
- rotate the rotor as much as possible, placing it in a position in which the gap will be as wide as possible;
- then it is necessary to loosen the fastening screw, which ensures the connection of the contact post with the cover;
- Having access to the eccentric, begin to tighten it until the gap is about 0.4 mm. You can measure this distance using a special probe - if adjusted correctly, it will be slightly clamped by the contacts.
Next comes setting the ignition timing. It must be performed only after the above steps.
You can set the ignition timing as follows:
- first you need to set the piston to top dead center and turn it 3 millimeters in the opposite direction;
- then pay attention to the starter bolts - lower them and start turning it so that an open circuit is formed between the contacts. You can determine this moment using an ordinary piece of paper - at the moment of rupture it will pass between the contacts without any problems
- Having determined the gap, tighten the bolts and tighten them tightly, then check the breaker and its clearance.
If after this the problem with the ignition on the Minsk motorcycle has not been corrected, then you need to proceed to the next, not the easiest step - installing the outline.
Some tips for setting up the ignition on a Minsk motorcycle
- Before you move on to setting up the ignition, you should make sure that this is the problem. It is better to start repairs by checking the elements, the setup of which is much easier, and which more often fail. Even experienced specialists will not immediately determine whether the problem is in the ignition or the carburetor is clogged.
- Study the ignition mechanism thoroughly.
- Check the condition of the spark plug. Perhaps that is where the problem lies.
- When adjusting the ignition, it should be remembered that when the crankshaft rotates clockwise, the ignition interval increases, and counterclockwise, it decreases accordingly. Before adjusting the outline, the ignition timing is set.
Using these instructions and recommendations, ignition control will no longer be a problem. You can see the setup procedure in more detail in the video.
Source
Malfunctions in electrical equipment
- Burning of contacts - occurs due to a broken connection of the terminals or breakdown of the capacitor. It is necessary to replace the capacitor and clean the contacts.
- Weak spark. Eliminated by replacing the spark plug. If it doesn’t help, you should look deeper for reasons.
- The rotor clings to the stator. Eliminated by replacing the bearing.
- Damage to winding insulation. The result will be no spark. If this problem occurs on the road, you can try to swap the terminals and get to the garage that way. In this case, the motorcycle will have to be started while running.
All of the above malfunctions can be prevented if you constantly monitor the condition of these elements. As you know, prevention is cheaper than repair.
Scooter ignition
Ignition from a scooter on the Izh Jupiter can work without a battery. Before setting it up, we need three details:
- Scooter switch;
- Ignition coil;
- Inductive original sensor (must have a single wire output).
The DC switch is powered from a 12 W network, also the on-board network of the motorcycle is 12 W, the switch has 4 wires, the first of which is plus, the second is minus, the third is to the coil, the fourth is to the inductive sensor. We reliably connect the negative wire from the switch to the negative wire from the motorcycle (ground), and connect the positive wire that goes to the standard coil to the positive wire of the switch.
Ignition coil connection:
- We connect the negative wire to the ground of the motorcycle;
- we stretch the second wire to the switch and connect it to the output under the coil
In order not to pull an additional wire to the inductive sensor through the entire engine, you can use the wire that connected the contact group and the standard ignition coil.
To do this, you need to take the wire from the switch that goes to the inductive sensor and connect it to the wire that went to the standard coil. Next, remove the capacitor and connect the inductive sensor
Particular attention must be paid to positioning the generator cover. It needs to be installed properly and not touch anything when rotating.
To do this, you need to shorten the cam a little and also make notches on it that prevent the modulator itself from turning. It is also worth observing the parameters of the gap between the modulator and the inductive sensor, which should be within 1-1.5 mm. When installing the ignition, you need to know that the spark strikes when the modulator leaves the sensor, and not at the input.
Once electronic ignition from a scooter is installed on a motorcycle, its performance will improve significantly. In particular, it will start much better (this will be especially noticeable when the battery charge level is low). Speed gain will also improve noticeably. The motorcycle will idle smoothly, which indicates proper engine operation.
Ignition system with alternator
The gap between the contacts when the piston is at TDC and at the moment of spark formation is adjusted and measured as in a system with battery ignition. Determine the beginning of the contact break using tissue paper or a probe.
The required ignition timing is adjusted by turning the generator.
Contactless ignition on Izh Jupiter 5.
If you are the owner of a more modern and beloved BSZ motorcycle on Izh Jupiter 5, then in addition to all its well-known advantages, ease of customization will also be added. To begin with, we need to unscrew the spark plugs and, without removing them from the spark plug caps, lean them against the ribs of the cylinder, then catch the T.M.T. one of the pistons and rotating the crankshaft back lower the piston by 2.6 mm. When the advance is set, we move on to the modulator.
This element must rotate freely, due to which we must “catch” the moment of spark formation (on the spark plug) with the ignition on. Next, you need to very accurately fix the resulting position by pulling the modulator. Now let's move on to the next cylinder. We also place its piston in the top position, and then unscrew it, lowering it by 2.6 mm. Now, turning the crankshaft by the generator nut, we look at the ignition. If it matches, then everything is set, if there are deviations, then we proceed as follows: for early spark formation, loosen the lock nut of the modulator and set the ignition in the manner described above, then move on to the option when the ignition is later.
With late ignition, the edge of the modulator grinds down until, with the advance set, a spark is formed at the right moment. Finally, leaving the spark plugs on the cylinders, we crank the engine using the kickstarter, determining the evenness of the spark plug formation “by eye.” You can more accurately monitor the accuracy of the settings only by running the engine.
On your own. Adjusting the ignition
It is known that correctly selected ignition timing ensures the best power and economic performance of the engine, maintains optimal thermal conditions and helps increase the durability of its main parts.
The most advantageous ignition timing is determined on benches during factory tests and the instructions indicate the amount of advance that should be followed during adjustment.
The influence of ignition timing on engine characteristics is presented on the tab in the form of curves of the dependence of pressure in the cylinder on the position of the piston at various advance values - “normal”, “early” and “late” (Fig. 1). It is easy to notice that with optimal advance, the rapidly growing pressure of the resulting gases reaches a maximum immediately after the piston passes the top dead center. As a result, the most efficient operation of the engine is ensured - in our graphs it is characterized by the area limited by the curve. At the first stage, this area (that is, the useful work of one cycle) is maximum, which provides the greatest power and, under given conditions, efficiency.
The second graph shows a case of too much ignition timing, called early. What happens in the cylinder? As we can see, the pressure in it begins to increase rapidly at the moment when the piston is still far from the top dead center, reaches its maximum and... by the time the piston reaches the top point it begins to fall! The top of the curve forms a "loop" (shaded area) which represents harmful, negative cycle work that prevents the crankshaft from rotating. As a result, the load on all the main parts of the engine increases, it works “hard”, with metallic knocks. The maximum pressure in the cylinder often significantly exceeds the normal design value, which almost inevitably results in detonation, that is, abnormal combustion of an explosive nature. This, in turn, further increases the negative work of the cycle, reduces power, leads to overload and overheating of the engine, and wasteful fuel consumption.
The third graph shows the opposite extreme, when the mixture in the cylinder ignites too late, for example when the piston is at or even past top dead center. Under such conditions, the pressure in the cylinder increases slowly, as if following the descending piston, its maximum possible value is much lower than the calculated one. With late ignition, combustion may be delayed until the exhaust ports (exhaust valves) open and continue in the exhaust pipe. The result is a decrease in engine power (the useful area limited by the curve is small), increased fuel consumption. Prolonged combustion increases heat loss, which is determined by the general overheating of the engine, especially the lower zone of the cylinder and adjacent parts of the crankcase (for a two-stroke engine) or the upper zone at the smut with a valve mechanism (for a four-stroke engine), as well as overheating of exhaust system parts, such as the exhaust valve and pipe .
Magneto installation in Minsk
- Motorcycles
- Jawa Reviews/Tests
- IZH
- Minsk
- Ural/Dnepr
- Sunrise
- Scooters
- Jawa
- Jawa
- VAZ
- VAZ
- VAZ
- Motorcycles
friends of site
Motorcycle engine boost Minsk
First you need to disassemble the engine. Then the engine crankcase needs:
1 )
insert and securely fasten the rings into both halves of the crankcase, reducing the diameter of the crank chamber to
121 mm
,
2)
change the seals so that they can withstand a pressure in the crank chamber of at least
0.8 kg/cm2
.
In the engine cylinder, set the phases: exhaust - 164°
, purge -
108°
and intake -
128°
(Fig. 66).
Increase compression ratio to e = 9.5
.
Install a K-36
I carburetor with a diffuser diameter of
27 mm
, the main jet must have a flow rate of at least
250 cm3/min
.
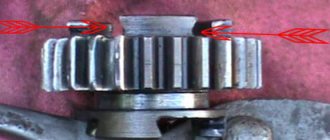
The purge windows in the piston should be cut to 25 mm
(Fig. 67) so that they coincide with the purge windows in the engine cylinder.
To increase the boost effect, the total length of the intake pipe should be 300 mm (the length of the intake pipe from the cylinder mirror to the carburetor is 100 mm
;
the length of the pipe with an internal diameter of 40 mm
, between the carburetor and the air cleaner is
150 mm
(Fig. 68).
Ignition from the G-416
does not work well due to interruptions at high speeds.
For normal engine operation, it is recommended to install an M-24G
.
Ignition timing is 2.2-2.5 mm
to top dead center.
Candle PAL-14-8
or
BOSCH-260-280
.
In the crankshaft, the bronze separator of the lower head of the connecting rod should be replaced with another one, for example, duralumin ( D-16T, V-95
) or made of cyanidated steel (can also be made of steel
45
without heat treatment) with subsequent silver-plated surface.
After running-in and final adjustment, the engine develops a power of 12 hp
. and has excellent pickup.
Uprated engines for motocross M-105
,
M-106
and
M2-125
.
Piston with two L-shaped rings and piston pin bosses shifted upward by 7 mm
(compared to the standard size).
The diameter of the crankshaft cheeks is 120 mm
.
Length of connecting rod on centers 125 mm
.
The length of the piston skirt is 62.5 mm
, on the intake side the piston skirt is cut by
1 mm
and is equal to
61.5 mm
.
Compression ratio e = 15
.
Particular attention should be paid to the processing of the cylinder channels, their throughput and the correct angles of the purge outlet (Fig. 69)
Head with an offset “jockey cap” sphere. Magneto ignition. Recommended ignition timing is 2.2-2.3 mm to top dead center. Candle PAL 14-15. Gasoline B-95, B-100. A-98.
MS-20
oil in a ratio of 1:20.
The engine is equipped with one carburetor with a diffuser diameter of 28 mm
.
The length of the pipe from the cylinder mirror to the center of the nozzle is 135 mm
.
The total length of the intake tract is 170 mm
.
Be sure to install a large air filter (tank volume 2.5-3 l
) with paper filter elements.
After all the work on boosting, running in and fine-tuning the engine, the maximum power is 14-15 hp.
With. at
n = 6600—6800 rpm
.
An engine like this can be increased to 20 hp.
With. , increasing the speed to
9000 rpm.
But this will require a special crankshaft, piston, rings and higher valve timing, a new muffler and carburetor.
Flaws
First, let's figure out what shortcomings the motorcycle has, this will allow us to decide what needs to be improved first. In general, many problems are typical for domestic motorcycles, and when tuning sunrise 3m they are faced with the same problems.
The main disadvantages of the motorcycle are as follows:
- Low-power engine. The most powerful engine is only 13 hp;
- On the earliest models, the placement of the crankshaft bearings was unsuccessful;
- Poorly designed clutch;
- Weak brakes.
These are the main disadvantages of Minsk. In general, it is worth noting that all of the above can be eliminated with your own hands, significantly improving the performance of the motorcycle.
Appearance tuning Minsk
Every Minsk 125 owner has at least once thought about the appearance of his motorcycle. Perhaps we should start by repainting the frame and other parts of the motorcycle. The first thing to do is remove the handlebars, seat, tank, engine, wheels, fork and other parts to leave a bare frame. Sandblast the parts to be repainted or remove the old paint layer using special attachments for an angle grinder/drill. An attachment on a drill for an emery wheel with Velcro is also very effective for this. Be sure to get rid of pockets of corrosion. The next stage is puttying. This is necessary to get rid of deep scratches and level the surface. Parts with a leveled surface are degreased to prepare for priming. Apply primer in 2 layers. The dried soil should be sanded with 400 grit sandpaper. Then we paint it in the color we like in 2-3 layers, followed by a layer of varnish in 3 layers. The metallic color on your Minsk 125 motorcycle will look very impressive.
The next method of tuning Minsk is polishing the engine crankcase to a mirror finish. This procedure can also be done with your own hands using a set of sandpaper with grit from 120-180 to 2500. By sanding the surface of the engine in steps from coarse to finer, you will achieve an ideal matte surface. At the end of this work, use GOI paste, a felt circle and a drill to achieve the final mirror surface. The Minsk motorcycle engine will immediately be transformed!
This procedure applies to the rims, spokes and muffler - this will help them shine in a new way.
New road tires would be a good investment. The new tread pattern is not only effective when driving on wet asphalt, but also looks attractive. Replacing lighting equipment will also appeal to everyone. For example, LED turn signals and brake lights will not only give a modern appearance, but will also reduce the load on the generator, and will also increase road safety when driving at night. Separately, it is worth noting the efficiency of xenon installation. The recommended heat of light is 4300k as it is the most neutral white light, does not cause eye fatigue and provides the best illumination. A useful tuning in Minsk will be the installation of new chrome mirrors, which will also significantly increase riding safety and complement the transformation of the motorcycle. In conclusion, I would like to note that these tuning actions can be carried out selectively at will and combined according to your taste and financial capabilities.
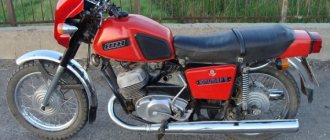
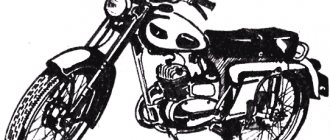
Minsk was perhaps the most widespread and accessible of the motorcycles of the Soviet Union. Produced at the Minsk plant, it enjoyed deserved popularity among motorsports enthusiasts and ordinary citizens for its low price, ease of operation and good maintainability. This unpretentious motorcycle could serve as both the first vehicle for a novice motorcyclist and a workhorse for many residents of cities and rural areas.
The ancestor of the Minsk motorcycle was the motorcycle of the German DKW center, the equipment for the production of which was exported from Germany as reparations in 1945. The production of the first models was established in Moscow, but then by 1951 production facilities were transferred to Minsk. The first motorcycle rolled off the assembly line of the Minsk Motorcycle and Bicycle Plant back in 1951. For more than 60 years of production of motorcycles of this brand, more than 6.5 million Minsk motorcycles have been sold worldwide.
Tuned motorcycle Minsk 125
But this mass-produced motorcycle, like any other equipment, of course, has its certain drawbacks. The main ones include:
- The rather weak engine is the most powerful available in the basic version, only 13 hp.
- A poorly designed clutch that can slip even after the motorcycle has been driven for a long time.
- On early models, the arrangement of the crankshaft bearings was poorly thought out.
- Weak braking system.
But this amazing motorcycle provides its enthusiastic owners with ample opportunities to implement tuning ideas. And, although in the basic version, even with the most powerful engine, the Minsk motorcycle could hardly accelerate to 100 km/h, as a result of competently and responsibly carried out tuning from this beloved, but still not very technically advanced product of the Minsk plant, it is possible to make a truly nimble, responsive and fast motorcycle, not much inferior to its expensive foreign counterparts.
Motorcycle styling Minsk 125
Caring for a sunrise motorcycle generator - how to remove, what to check and install correctly
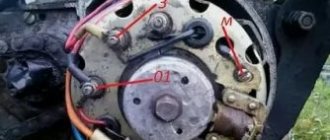
Generator maintenance mainly comes down to tightening the threaded fasteners of the generator stator and rotor, as well as the wire terminals.
In order to remove the generator, you must:
- disconnect the wires of the ignition circuit, sensor, brake light and direction indicators from the generator terminals;
- unscrew the three screws securing the stator to the crankcase and remove the stator;
- Unscrew the bolt securing the generator rotor and, with light, careful blows of a wooden hammer on opposite sides of the rotor, remove it from the trunnion and remove the key.
Checking the removed parts
After removing the generator stator and rotor, wash the parts with clean gasoline and carefully inspect them. Disassemble the wire fastening terminals on the stator. Wipe dry all insulating parts of the terminals.
Generator installation
Installation is carried out in the reverse order, in this case it is necessary:
- check the runout of the generator rotor, which should be no more than 0.1 mm with the bolt secured;
- tighten the generator stator without distortions, ensuring a tight fit to all three supports;
- install the ignition correctly;
- The generator wires must be securely fastened and well insulated from each other.
Generator care
When maintaining the generator, it is necessary to periodically tighten the threaded connections. It is necessary to periodically check the gap between the rotor and the induction sensor. This is done in this way: a maximum gap is created when the rotor is turned, then using an eccentric, the gap is set within 0.35-0.40 mm and the screw is tightened into place.
At the end of these actions, the gap is measured again. The performance of the generator is greatly influenced by the storage conditions of the motorcycle. Do not expect electrical equipment to perform well if left in a damp area for a long period of time. This is especially true for storage in winter.
Let's start tuning a Minsk motorcycle with our own hands
To increase power we will tune the engine, clutch, ignition system, cooling and exhaust.
Engine tuning in Minsk - adding a few horses
The most powerful engine in the base, as mentioned above, is a maximum of 13 horses. Of course, this is completely insufficient for modern dynamic riding, motocross, and stunt riding (depending on what the motorcycle tuning is for). Modifying the Minsk engine is not very difficult. To increase power, you will have to work on the cylinder and piston of the motorcycle engine. We reduce the combustion chamber by grinding. This increases the compression ratio and engine power. The engine is now suitable for using high-octane gasoline and this will have a positive effect on increasing power.
Read more: Voltage on a new car battery
Motorcycle engine Minsk
So let's get started:
- It is necessary to change the overall dimensions of the inlet, bypass and exhaust holes in the cylinder to improve the filling of the gas-air mixture and more dynamic release of burnt gases.
- You can replace your original pistons with Japanese ones with improved performance.
- A reed valve must be installed at the inlet of the cylinder itself.
Tuning Minsk for sports
Such tuning of the engine of this motorcycle will allow you to add several horsepower to the power, which will immediately noticeably affect the dynamics and acceleration speed. The increased power as a result of engine modification will require replacing the standard crankshaft bearings with more durable ones. For this, it is best to use imported bearings produced by the Japanese company NTM.
Photos of tuning the Minsk 125 motorcycleReworking the ignition system
The standard ignition system with a very powerful and reliable generator, a contactless ignition system and an electronic switch require modification in terms of additional installation of a device to change the degree of ignition angle advance depending on the engine speed. With the help of such tuning, the Minsk motorcycle engine will run more smoothly and quietly, and its service life will increase significantly.
Motorcycle tuning Minsk
Exhaust tuning for a Minsk motorcycle
How to make a Minsk motorcycle quieter? To improve the power performance of this engine, it is very important to install a resonator in the exhaust system. A resonator is an oscillatory system where vibration energy is accumulated due to resonance with the driving force
A properly selected resonator allows you to ensure that some of the lost working mixture is returned to the cylinder by the time the exhaust window is closed. It is very difficult to find such a device for free sale, because... it was produced in limited quantities and only for cross-country versions of the Minsk motorcycle. But you can make it yourself using drawings available on the Internet.
Tuning the exhaust system on a motorcycle Minsk
Motorcycle tuning Minsk
Cooling system tuning
Increased power as a result of engine tuning will require a more efficient cooling system. It is necessary to purchase and install a more serious radiator.
Clutch modification in Minsk
Now, after engine tuning, the standard clutch will not be able to cope with the increased power in all operating modes of the motorcycle engine. It needs to be improved by replacing springs and discs. It is necessary to cut off a few millimeters of steel from the standard clutch discs and insert three more selected discs into the free space. As a result of this replacement, the clutch will become slightly stiffer in first gear, but overall the motorcycle will gain more dynamics and drive.
Now we can replace the rear wheel sprocket with a similar one, but with fewer teeth, which will add dynamics to the acceleration of the motorcycle. We replace the standard brakes with good disc brakes - do not forget about driving safety. All these measures, if carried out correctly and responsibly, will allow you to increase the power of a 125 cc motorcycle engine from the standard 13 to 20-23 horsepower, which of course will make your iron horse much faster and more interesting. A technically savvy owner can do the tuning of a Minsk motorcycle engine on his own, or you can contact a motorcycle center, where all the necessary work will be carried out not only quickly and efficiently, but also where you can quickly purchase all the parts and elements necessary for tuning a motorcycle.
Carburetor problems
So, you are the owner of a Minsk motorcycle, the carburetor of which regularly receives gasoline, and the spark plug provides a spark sufficient for stable operation of the engine.
But this is not enough for the motorcycle to start. An unscrewed dry spark plug showed that the problem was in the carburetor, namely, the incoming fuel could not reach the combustion chamber of the cylinder. In this case, it is necessary to remove and clean the carburetor.
To clean the carburetor, it must be removed by disconnecting it from the cylinder and air filter. You also need to disconnect the throttle cable and gasoline hose. To prevent dirt from getting inside the carburetor, before further disassembly you must not be lazy and completely clean it.
It is necessary to disassemble and reassemble the carburetor cleanly, since dust or dirt particles getting inside will lead to unsatisfactory operation of the motorcycle engine even after washing it.
Upon completion of disassembling the carburetor, it is necessary to clean all its parts from accumulated dirt, and also blow out all channels and the jet with a compressor. It will not be superfluous if you additionally blow out the air filter and gas tap.
After completing all the manipulations, you need to install the carburetor in place. During assembly, as well as during disassembly, it is necessary that no dirt gets inside the carburetor.
After installation, make sure that the carburetor fits tightly to the cylinder. If you did everything correctly, you can be sure that after some effort your Minsk motorcycle will be able to start.