Many people very often think about how great it would be to at least try to create their own motorcycle with their own hands, without resorting to the services of salons, craftsmen, etc. However, often such a desire remains unfulfilled due to the motorcycle enthusiast’s uncertainty about the success of his planned project. That’s why it’s worth figuring out how to make a motorcycle without anyone’s help.
Preparing to assemble the motorcycle
First, you need, of course, to decide what configuration the future “steel horse” will have, and also to resolve the issue of all the parts and tools necessary for the work. If you have some experience, some elements can be made independently, for example, on milling and lathe machines or by welding.
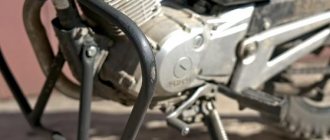
If during the assembly process the base is an old motorcycle, then you should not start work with the installation of small parts, universal joints, brake rods, etc. The best solution would be to start puttingty and painting the tanks and fenders. To avoid problems with the motor or parts of the gearbox bridge, they need to be placed in kerosene for a while. A homemade motorcycle will look much more expressive and impressive if its engine crankcases, covers, gearboxes and ignitions are well polished.
The engine of the old device needs to be completely rebuilt, and only then begin installing accessories, which, as a rule, include two main materials: leather and chrome.
Advantages of an assembled bike over a purchased one
Bicycle models in stores are not made for a specific user, but taking into account average needs. They also have rigidly fixed equipment - types of rims, tires, fork, brakes, saddle, etc. That is, everything is already spelled out for the model, and although changes are made, they are infrequent. What should a buyer do who likes the model in general, but is not satisfied with the type of fork or the quality of the braking system?
There are three ways you can go here:
- buy a bike, then tune it at your discretion;
- order a bike assembly from scratch;
- assemble it yourself from spare parts.
If you go the first route, you will have to allocate a tidy sum: buying a new bike + the cost of new spare parts. You can buy a cheap bike secondhand and then improve it. True, this will not reduce costs; on the contrary, only the frame may remain usable from a used bike. The rest will have to be bought again, consider assembling a bicycle, only expensive.
A custom bike is great. The difficulties lie in the price of all spare parts and assembly work. In short, it will cost even more than upgrading a bike purchased in a store. In addition, you need to have an exact plan of what exactly you want to get as a result. And he may not be there.
Creating a new model from scratch is a more promising direction compared to the two previous options. Here you have the opportunity to select the necessary parts, combine new parts with used ones, and also get balanced characteristics.
Many people know firsthand how on purchased bikes, durable and high-quality parts coexist with cheap fakes. The cost of all this will be significantly lower, since:
- no need to buy a new bike;
- you don’t have to pay yourself for the work;
- many good parts can be bought inexpensively in online stores;
- It is possible to use used spare parts.
This is all great, now it’s time to decide which components you can buy second-hand and which ones you can only buy new. A bicycle is a complex system, so you need to approach its assembly responsibly.
Bicycle as a basis for a motorcycle
It's no secret that often the basis for a motorcycle is just a bicycle, which is equipped with all the necessary equipment. When thinking about how to make a motorcycle out of a bicycle, it is important to understand exactly what materials should be used, as well as to know their technical characteristics.
Quite often you can find this option when the engine of a motorcycle-bicycle is a motor from a chainsaw. In this case, it is also worth studying its power, weight and size in detail.
Tips for those who decide to build a bike from scratch
A few tips from those who assembled their bike themselves will definitely not be superfluous - they will help you avoid common mistakes and outline a clear plan of action:
- “Settle” in bike sales and forums where avid cyclists live, constantly monitor the arrivals in the nearest bike shops - this will allow you to save on the purchase of spare parts.
- When purchasing a used part, pay attention to the seller. If it’s a girl or a skinny nerd guy, you can take it. If you are a brutal racer, weighing under 100 kg, it is better to refuse the deal.
The most suitable candidate for donating bicycle parts is a major fetishist who wipes his bike with ear sticks. As a rule, these people constantly need an upgrade, and they are in a hurry to get rid of the “old junk” at half the price.
- Some spare parts can be safely purchased even after intensive use. For example, the front derailleur shows virtually no wear. Shifters, by the way, too - they often outlive other “neighbors” in the transmission.
But you should be more careful with forks and shock absorbers - an expert opinion will come in handy here. You should also pay attention to the wheels - the rims must be intact, without cracks or dents. If your self-assembly project involves non-standard knitting needles, think in advance where you will look for the necessary elements.
- You can't skimp on the frame. The custom should be assembled based on desire and common sense, and not on possibilities. Therefore, this part should be purchased in a store, and not from hand.
- If you decide to assemble the bike yourself, then select components that will be in harmony with each other. This applies to color, shape, size, design, etc. The same can be said about brands - don’t mix Shimano and SRAM. It is also undesirable to install parts from mountain bikes on a road bike.
- Try to periodically take a break from your project. When the desire to assemble your bike takes up most of your time, “side effects” may appear: apathy and reluctance to continue what you started.
Possible list of materials for creating a motorcycle from a bicycle
So, turning a bicycle into a homemade motorcycle, the most common option for a set of parts is the following:
- engine;
- pulleys;
- drive belt and tension roller;
- fasteners.
One way or another, making a motorcycle from a bicycle is far from a cheap pleasure, so sometimes it’s better to think about whether it would be advisable to do this or whether it’s better to buy a new moped or at least a ready-made bicycle motor.
Required materials and tools
The material for the main elements is selected individually. For example, pipes (steel or aluminum) are usually used for the frame. Less often - plastic or wood. For the steering wheel - steel, carbon or titanium.
Before you figure out step by step how to make a bicycle with your own hands, you need to take care of special tools. You will need:
- welding machine;
- a machine for bending pipes (so as not to cut them at an angle, but to bend them);
- jigsaw;
- thread locker.
In addition to the basic elements listed, you will need additional ones:
- durable pipes to create a fork and extend the frame;
- sheet steel for hopper plates (thickness 1.4 mm);
- bolts for screwing fittings onto the frame. In particular, you need to consider a holder for a flask and brackets for the cable jacket;
- cranks and carriage - will be needed to screw in the pedals.
Materials are also selected taking into account what kind of homemade bicycles you plan to make. For example, you can build a seat from boards, foam and leather. You will need to drill two holes and connect the two boards with bolts. The upholstery material is secured using a construction stapler.
Welding machine
Pipe bending machine
Jigsaw
Thread locker
Pipes for creating a frame
Connecting rods and carriage
DIY motocross motorcycle
Despite the highest technical indicators of this type of motorcycle, such as a cross-country motorcycle, it is quite possible to assemble it yourself. Of course, nothing prevents you from simply buying a ready-made model, but not always factory samples are able to satisfy all the desires of a particular motorbike enthusiast, besides, such a purchase will certainly not be cheap, and a homemade motorcycle will save a significant amount of financial resources. However, here it is necessary to strictly comply with all installation requirements, otherwise the end result may be very disappointing.
How to properly combine new and used parts
First, you will have to list the main components of the future bicycle. Let's say we are assembling an ordinary high-speed bike. For this you need:
- Frame.
- Finished wheels.
- Tubes and tires.
- Fork.
- Steering wheel and stem.
- Saddle and seatpost.
- Carriage and crank-pedal pair.
- Transmission: shifters, cables, switches, cassettes, chain.
- Brake system.
- Additional canopies: fenders, trunk, etc.
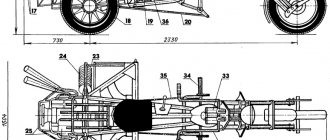
Detailed diagram of bicycle components
So, which of them should be new, and which ones can be bought through message boards and at a flea market?
At the stage of choosing a supporting structure, the question of what kind of bicycle it will be is immediately decided: a touring bike, a road bike, a hybrid or a mountain bike. The frame can be purchased secondhand provided it is 100% quality. We remember that the frame determines what kind of bike we will get - good or bad in the classical sense. If there are no used options nearby or they are not trustworthy, we buy a new frame, it’s more reliable. Most likely you will have to go shopping. There they may even encourage you to buy a ready-made model. Is the idea of building a bike still there? Then we definitely find the frame and continue further.
How to install a bicycle steering column?
Wheels. The same two-fold option, although it is advisable to buy them from the factory and not used. Why? Rolled wheels may already have defects in the rims or spokes. We only buy used wheels if they actually meet all safety requirements. When buying new ones, you shouldn’t choose cheap, low-quality options; it’s better to overpay. But tires can be bought secondhand. Again, we look at the quality of the rubber and the tread pattern.
You can buy used forks, handlebars, a saddle with a post and additional body kits. You should pay close attention to the suspension forks. They may be of poor quality. A saddle pin is, in fact, an ordinary metal pipe, and if it successfully served another bicycle for a long time, then why won’t it serve again? Everything is clear with additional canopies, the main thing is that they fit the bike being assembled.
You can look for good gear shifters, shifters and metal cables at the bargain shop. When purchasing, you need to carefully examine their condition; in case of any suspicion, it is better to refuse in favor of new ones.
But under no circumstances should you buy other parts secondhand! Technically important components remain here, and the maximum requirements must be placed on these spare parts.
Now a little about the consequences of buying them secondhand:
- A worn bottom bracket will have a negative impact on the bike's speed and torque transmission.
- Run-in connecting rods may not hold well, broken ones will not hold at all.
- There is no need to talk about the dangers of accidentally faulty brakes.
- A worn chain and sprockets mean poor gear shifting, slipping, and overall poor driving.
So, let’s summarize what you can buy second-hand, and what components are needed only in a new form:
| Spare part | Boo |
| Frame | +/- |
| Wheels | — |
| Tires | +/- |
| Fork | +/- |
| Steering wheel | + |
| Saddle and pin | + |
| Carriage | — |
| Connecting rods | — |
| Shifters | +/- |
| Cables | +/- |
| Switches | +/- |
| Stars | — |
| Chain | — |
| Brakes | — |
| Additional body kits | + |
The procedure for self-assembly of a motocross motorcycle
It would be best to start assembly with wheels, which can be freely purchased at any motorcycle parts store. There are two most common options for attaching these elements: purchase a rim and replace the spokes, or simply install cast sports wheels on the device.
A fork for a motocross motorcycle should be classic and have a full range of adjustments. The optimal size for it would be 43 mm.
In order to increase the reliability of the brake system, it is necessary to increase their power. Alternatively, sometimes the diameter of the brake disc is simply increased.
Particular attention should be paid to the suspension, which is mounted on a homemade motocross motorcycle. The most suitable for it will be stock shock absorbers, which can be ordered directly from the manufacturer, but it is important to indicate the possible weight of the device so that the suspension elements are equipped with the appropriate springs.
If we talk about the engine, it is definitely worth mentioning that its thrust can be increased by reducing intake losses. To ensure this, the standard paper filter in the old engine is replaced with a foam one, after which the updated motor is installed in the system of the future motocross motorcycle. In addition, the carburetor is also subject to changes, which should ensure good engine operation at maximum speed.
Pros and cons of an assembled bike
On the one hand, a finished bike is a finished bike. The manufacturer has already taken care of the appearance and technical components of the bike for you - all that remains is to buy it and enjoy the coordinated operation of all mechanisms.
On the other hand, you can go to bicycle flea markets, look into workshops, connect to social networks to search for the necessary components and assemble your own custom, which will turn out to be a little cheaper than a store-bought analogue, but closer to your heart, because it is assembled by hand and with love.
Pros of an assembled bike:
- Almost every detail is adjusted to each other, taking into account the wishes of the owner and the advice of experienced cyclists.
- The total cost of self-assembly can “catch up” with the cost of the finished bike, but the build quality is usually higher, so a self-assembled bike often turns out to be a much more profitable investment
- Assembling a bicycle from scratch is a fascinating process that allows you to become intimate with the bike, feel every joint and get even more pleasure from riding.
As for the minuses, only one point can be noted here - this is the time spent searching for suitable parts and mechanisms, assembling and configuring all components. But time spent with pleasure can hardly be called a negative factor.
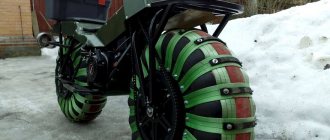
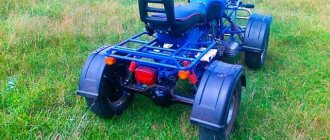
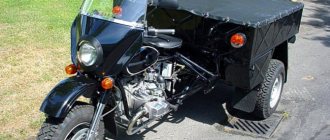
How to make an all-terrain vehicle from a motorcycle?
Recently, all-terrain vehicle designs that are made from ordinary motorcycles have become widely popular. In addition to the entertainment functions that such a device carries, it is also a very reliable means of transportation.
So, homemade all-terrain vehicles made from motorcycles can be divided into several categories, the main of which are, naturally, ATVs. These transport models amazingly combine the mobility of a motorcycle and the stability inherent in cars. Due to the fact that each of the ATV wheels has its own suspension, the device is able to overcome almost any, even the steepest, road irregularities.
Manufacturing stages
It will take approximately 6-10 hours to assemble a bicycle with four hands. You will need a stand to make it more convenient to assemble the structure. The stand can be replaced with improvised things - for example, this role can be performed by a stepladder with shovel handles attached.
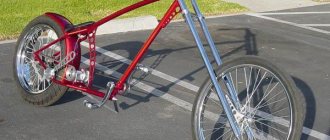
Creating a bicycle at home with your own hands completely from scratch is a very difficult task. It is important to choose the pipe material, take care of the welding machine and a set of other tools. Next, you need to choose the correct ratio of the carriage, steering, symmetry, and calculate the angles. If you make a bicycle from scratch, then the best option would be a chopper - a bicycle for leisurely riding over short distances. If you need a tourist or sports model, you should select all the necessary components and assemble it.
The first step is choosing or creating a frame. The wheels are fitted to the main structure and the fork and handlebars are attached. Further steps include seat placement and securing the wheels securely. Immediately before use, the fork must be lubricated.
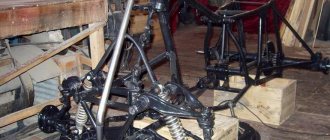
Frame assembly
The easiest way is to pick up a ready-made part. But it should be remembered that the shape and material of the element will affect further design. Options include: steel, titanium, aluminum, carbon fiber frame. For example, the main material for mountain two-wheeled vehicles is aluminum alloy. Instead of the previously popular alloys 6061 or 7005, improved versions with impurities (magnesite or scandium) began to be used.
A homemade bicycle frame can be created from profiles, pipes or plates. First you need to work out the sketch, displaying all the main nodes (preferably in a 3D editor). The main task is to see the actual dimensions of the parts, evaluate the geometry of the structure and eliminate errors. For example, placing the top tube too high can cause operational problems.
Making the frame is more challenging. The bicycle drawing will tell you how to combine the frame elements. When assembling the structure, follow approximately the following sequence:
- prepare seven pipes (two short and four medium);
- the lower main one is welded to the carriage shell. It should be attached to the lower edge of the head tube;
- the seat tube is welded to the bottom one, selecting the required angle of inclination;
- the seat and front ones are connected to the main upper one;
- the lower stays are welded to the carriage glass;
- fasten the upper end of the seat profile to the edge of the lower stays.
There are several ways to combine the main elements, but the optimal one is welding. The weld seam is highly durable. Additional parts are attached using bolt holes, such as the trunk or rear fender. The material for the rear wheel brackets is the same as for the frame itself.
Pressing in the fork and making dropouts
The fork is selected taking into account the future use of the vehicle. For mountainous terrain, a soft part is suitable, which involves the presence of shock absorbers. If you want to create a road model or a bike for city walking, forks are not used due to excessive weight.
for a soft design you need to consider the following points:
- move;
- method of fastening brake pads;
- supported wheel diameter.
Pressing the fork is done in a horizontal position:
- installation of bearings;
- cones are fixed;
- the washer is placed on the shock absorber rod;
- the locknuts are carefully tightened;
- The steering wheel is located at the base of the fork.
An important point that will increase the reliability of the future bicycle is the fastening of hand-made parts. There should be no defects, even minor ones. Otherwise, the safety of the structure will decrease, resulting in an increased risk of injury.
Then you need to weld the dropouts under the rear wheels. Using a metal plate, several parts are cut out. Using a jigsaw, create recesses (according to the diameter of the wheel axle and fixing nuts). The element is connected to the frame (welded). The landing recesses must be located at the same level, otherwise the wheel will not fit on the dropouts.
Installation of other elements
Transmission components are selected ready-made, because it is difficult to make a speed switch or chain yourself, not to mention building components at the level of well-known brands. Therefore, for a homemade bicycle, a classic transmission or one with a planetary mechanism is selected.
Next steps:
- Installation of the carriage and debugging of connecting rods and pedals.
- The steering wheel is secured with a bolt.
- Before using the vehicle, the fork must be lubricated.
- The seatpost is installed vertically into the tube and secured with a clamp and nut. The carriage is placed in a glass. When the chain is mounted, install the wheels.
- The seat is attached using welding technology. But if you need to expand the functionality, you can create a removable structure.
- An important condition is that the wheels are securely fastened. Fixation is ensured using nuts and locknuts.
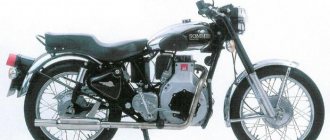
Homemade motorcycles in Russia
Self-made bikes are popular all over the world, but they are especially common in countries where the market offers a relatively meager range of motorcycles. Russia can be called one of such countries - for many years the choice of the domestic bike fan was limited to 5-6 options.
This factor, superimposed on historical ingenuity and ingenuity, led to the emergence of a huge number of homemade motorcycles created by oneself. Almost all Soviet-Russian bikes, both light small-cubic and heavy multi-cubic ones, still fall under the radical upgrade of motor-kulibin bikes.
From lightweight ones, due to their high availability, amateur engineers prefer to create homemade motorcycles from Minsk. The bike is a kind of construction kit for a novice inventor. Of the more serious ones, homemade products based on the IZH Jupiter motorcycle and especially Planet Sport 5 are popular, famous for their high-revving engines with high wear resistance, for which, in fact, they have earned the respect of motorcycle mechanics.
But the most shocking and original are homemade products based on Ural motorcycles. From bulky Soviet laborers, Russian amateur motorcycle makers create presentable, imposing choppers that can easily compete with expensive American Harley Davidsons.