We are increasingly noticing the presence of plastic on motorcycles. This material has a number of advantages over some materials such as glass or ceramics. It is really very shock resistant. However, plastic scratches very quickly. It is very sensitive to scratches, which makes motorcycles less aesthetically pleasing.
How to get rid of unsightly scratches? The easiest way to give your motorcycle a new look is to polish the plastic. What is it about ? In this article, we provide you with more information about polishing plastic.
Motorcycle plastic repair
Motorcycles sometimes fall.
Just imagine, it lies on its side, with fragments of the cladding scattered around. Your actions? Usually a biker goes to a spare parts store, finds out the price of a new plastic, the delivery time - and in horror goes to the used sellers. Some people are lucky, and the “walk through torment” ends there. But more often, after visiting shops and “showdowns”, having found out the prices and tariffs, the biker decides to glue the fragments together himself (if, of course, he thought of collecting them at the scene of the accident). Alas, in most cases nothing meaningful comes of these attempts at handicrafts. After all, what is sold in the nearest auto store with the advertisement: “Glues everything!”, as a rule, only glues well fingers stained with this composition. “Professional” adhesives require a professional attitude, and they are not cheap. When the next sticky mass demonstrates its failure and the lining falls apart again, the biker falls into despair. The remaining plastic is thrown away, and the motorcycle turns into Naked - naked.
It's a pity? And how! But the plastic could have been saved. Typically, the lining is made of thermoplastic plastic. This means that it can be melted, and when it hardens, all its strength properties will return to it. Moreover, it can be melted many times.
Plastic welding machine
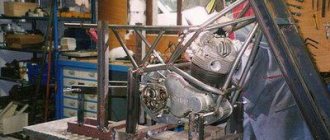
The machine for welding plastic is the same as a hair dryer (in the photo above), designed for long-term operation. The air temperature is regulated within the range of 20-600'C. Air flow -1-4 l/s. The rotation of the drill spindle (pictured below) can be varied from 3 to 10 thousand rpm. Plastic solder rods are sold at hardware stores.
Motorcycle linings are made from different types of plastic, the solder must be from the same material. The most common ones are PP (polypropylene), ABS and RA (polyamide). On the Yamaha R1, KB, Honda Fireblade, for example, the “faces” are made of ABS, and the sides and bottom, which are subject to strong heating, are made of RA. Critical parts that are exposed to high temperatures are not made from PP. Solid and heat-resistant RA is also used to make cooling system radiator tanks and various linings, for example, under a chain shoe.
Determining the type of material to be welded is important not only for the correct choice of solder. The melting points of different plastics are different, and the maximum temperatures to which they can be heated are also different (see table). When overheated, they begin to boil or decompose, and the weld becomes porous, interspersed with decomposition products. You can’t even dream about the strength of such a seam. If, on the contrary, it is underheated, the material will not be welded, but rather stuck together, and the strength of the seam will again be “not the same.”
Due to the strict temperature limits, it is impossible to reliably weld plastic with a conventional soldering iron: the temperature of its tip, as a rule, is much higher than necessary, and because of this, plastic decomposition products accumulate on the tip. They will inevitably get into the seam and reduce its strength. Then use a special hairdryer that warms up the parts with a stream of hot air.
Welding happens like this. First of all, warm up the hairdryer for 10-15 minutes so that the temperature of the hot air stabilizes. In the meantime, you put together the whole “picture” from the wreckage. The easiest way to secure them in the desired position is with special clamps-clothespins (as shown in the photo). Along the future seam, parts need to be cleared of paint - otherwise it will penetrate into the seam and impair its strength. When welding, it is important to heat the thin plastic and thick solder rod evenly. If the fairing parts heat up faster, the weld will sag and the resulting hole will be difficult to fix.
Polishing deep scratches
Polishing deep scratches requires special attention. A simple soft cloth will not work. You will need sandpaper . It is really a paper made up of a hard material that allows for effective polishing. To start cleaning the plastic, use 400 grit paper. Then use 800 grit paper and finish sanding with 1200 grit paper.
Take care to ensure that the surface to be polished crosses the sanding direction every time you change paper . This will remove all traces of old sanding.
Welding plastic
Before welding, the pieces of plastic must be secured so that they do not move relative to each other. The most convenient way to do this is with spring-loaded clamps, similar to large and powerful clothespins. When welding, you need to tilt the rod at an angle of 45° and press it towards the seam with a force of about two kilograms. Direct the flow of hot air more towards the solder rod.
To facilitate the initial stage of welding, you need to sharpen the end of the rod. The heating speed can be adjusted by the air flow rate. When welding, you need to tilt the rod at an angle of 45° and press it towards the seam with a force of about two kilograms.
When the welding is completed and the part has cooled, the seam is cleaned. It is easiest to file flat and convex areas with a regular metal file. It is better to take a new one - one that has never been used to process the metal. Cutting slippery plastic is much easier with fresh cutting edges. To clean the seam in the recesses, you will need a drill with metal cutters. Files and cutters clog quickly and need to be cleaned periodically with a wire brush. If seam defects are revealed during filing, they need to be cut out with a thin bur and the area should be welded again.
It is better to clean the welding seam on one side - then it will be stronger. For finishing work, the drill should only be used by those who have already acquired the appropriate skills. For beginners, it is better to use a file.
Before painting, the part must have a smooth and clean surface, otherwise the painter will have to level it with putty, and this is no longer great: what if it bounces off due to vibration? It is better to clean the seam only from the outside. A seam that is cleaned on only one side will be stronger. I know a biker who managed to break the same part of the cladding five (!) times during the season. And not once did it burst along a weld.
The upper and lower halves of the “muzzle” are ready. All that remains is to cook them.
And now - what will it cost? There are many different hair dryers on sale starting at $30 and up. The cheapest ones have no more than two fixed adjustments of the supply air temperature - they are heavy and bulky. Professional hair dryers have smooth adjustments to the temperature and speed of the air supplied; they are slightly larger in size than the palm of your hand and weigh very little. True, they cost decently - $450-600. Professional drill - $120. Plus various burs and cutters from 60 to 200 rubles apiece and solder rods. It makes sense to buy such a kit if you are going to repair plastics professionally or if you and your friends have accumulated enough broken fairings. Only then will the tool pay for itself. If you are making plans to make a fairing of your own, unique design, you will have a hard time without such a “gentleman’s kit”. Do you think it's too expensive? Please note that such work in a workshop is also not cheap: welding is $1.5-2 per 1 cm of seam, plus painting with surface preparation is $70 per part. The total cost of repairs averages about $100. True, repairs happen quickly, in the simplest cases - within a day, but parts take months to order.
What can you do if the plastic on your bike is damaged?
It happens that by dropping a motorcycle or accidentally catching it somewhere, we can damage the plastic on it (lining or something like that). So what should we do? Buying a new one nowadays is quite expensive, especially if the motorcycle is quite serious and popular, unless of course you are a tycoon!)))) You can’t always draw a used one either, or they will slip you some kind of garbage (this happens too)! Then the only option left is the folk method, if the damage is minor - glue it together!
Now, of course, there are enough workshops that do this, but what to do if it’s a little expensive or there’s no suitable garage with smart guys nearby!? Glue it yourself!
But this process is painstaking and you need to be well prepared so as not to create a whitebird! Because in most cases, nothing meaningful comes of these attempts at handicrafts. After all, what is sold in the nearest auto store with advertising; “Glues everything”, as a rule, only glues well fingers stained with this composition. “Professional” adhesives require a professional attitude, and they are not cheap. When the next sticky mass has demonstrated its failure, and the lining has fallen apart again, you can give up and wipe it off. The remaining plastic is thrown away, and the motorcycle turns into Naked - naked, or is waiting for new plastic (that is, when the grannies get ready for it))))))
Preparatory stage
Before making a body kit, you need to dismantle the old one. Depending on the car, body kits can be attached differently. For example, the “Japanese” have them glued to them with double-sided tape and self-tapping screws. After unscrewing all the bolts, you need to remove the remaining tape. There is an option when the pistons are used as fastenings.
With a used car it may be a little more difficult, since perhaps the previous owner was also a fan of experimenting and secured the body kit with sealant. In order to get rid of its traces, you will have to use professional body polishing.
Regardless of the fastening technology, it is recommended to use a garage with a pit or a jack to carry out such work. After disconnecting the parts, corrosion may appear in the place where the body kit was located. Remove it using a sanding device.
Motorcycle plastic repair and restoration
We will tell you and show you several available options for how to restore plastic on a motorcycle with your own hands.
Many modern motorcycles are replete with plastic panels; they are needed to create a complete appearance of the bike, improve aerodynamics and protect important components. In order to protect these parts from damage, modern polymers are made flexible and shock-resistant, but even this does not save the motorcycle from falls and accidents. In such cases, the manufacturer offers to replace the part with a new one, which costs a lot of money. We have prepared several affordable options for making plastic for a motorcycle with your own hands.
How to make a body kit with your own hands
Every person wants to express their individuality. Someone buys clothes, jewelry or collects stamps, and car enthusiasts modernize their cars in every possible way. In this case, tuning is the most common way to transform a car. Few people may notice the new engine, but the updated body catches the eye immediately.
Ordering a bumper or other part in a store is quite expensive, so it makes sense to make a body kit for your car yourself. With a minimum set of knowledge you can get a lot of advantages, including:
- Significant cost savings compared to a custom body kit
- Opportunity to create a unique body kit for your car
- The work is done independently, which means that with due effort it will be done conscientiously
- Gaining Real Useful Skills
We tell you how to do interior tuning in this article. About 3D virtual tuning - here.
When is it worth repairing plastic?
First of all, it is worth determining the extent of the damage. With the right approach, you can restore a completely broken part, but sometimes the cost will be the same as buying a new one. If the damage is relatively minor and relates to a non-load-bearing structure, such as part of a motorcycle body (maxi scooters), then cosmetic repair methods are suitable.
Cracks, chips and gluing of several pieces of plastic can be done using soldering with a hot air stream or a soldering iron. Critical, load-bearing structures, as well as parts with a high degree of damage, are best repaired using methods that involve restoring the mass of the plastic part and its characteristics (rigidity, elasticity, etc.). In cases where the plastic can no longer be repaired with a patch or gluing, there is an option to manufacture part from scratch. To do this, you will need to carefully study the entire modeling process and have a lot of combined time and nerves. Often, in such cases, it is easier to purchase a used spare part and repair it, or even buy new plastic.
Hot air soldering
To repair the plastic of a motorcycle with heated air, you will need a hair dryer, but not just any hair dryer, but one with a temperature regulator. You can use the cheapest device, but then there is a risk of overheating the plastic, which will lead to the loss of its basic properties. Overheated material will be brittle and may break due to vibrations from driving on normal roads. You will also need a special nozzle with a thin nozzle, approximately 5-8 mm.
In addition to the hair dryer, you will need a large piece of plastic identical to the one being welded. To do this, you should pay attention to the markings of the part; most likely, you will see a product of the PP, RA or ABS brands. Polypropylene PP, for example, melts at 300 degrees and begins to burn at 350, so it should be welded at a temperature of 300 - 340 degrees. Polyamide or RA should be welded at 410 - 460 degrees, ABS at 360 - 400. Soldering process:
- For greater convenience, remove the part from the motorcycle and wash it from dirt and oils.
- We clean the edges of the parts with medium-sized sandpaper, level the edges, and try to make a hollow in areas close to the surface.
- If we weld broken parts, then we lean the pieces against the base and use a heated hairdryer to grab them in several places (from the inside). Otherwise, if you weld the parts one by one, some areas may twist and it will be impossible to achieve a flat surface without leveling with additional materials.
Advice. If the plastic initially twists a lot, then to make it easier to work with, you can fasten it with staples.
- From a piece of plastic with a suitable composition, cut out a strip 0.8 - 1.5 cm thick; this will be our solder.
- From the edge of the crack (it’s better to start from the inside), we begin to heat the seam; as soon as it starts to melt, we lean against the solder and then direct the jet partly to the seam and partly to the solder. As the plastic melts, it will fill the seam; you can help this process by lightly pressing on the plate at the moment when the material has become sufficiently liquid.
- If the fracture shape has many turns, make solder plates with a margin of up to 5 mm, and connect several sections only by complete melting. When the seam is ready, you can begin work on the front part. If you did everything correctly, the internal seam will give the piece of plastic sufficient rigidity, so the external repair will be more of a cosmetic nature. The process itself looks identical, with the exception of the solder strip, which should be made thinner. After welding of the front part is completed, the plastic should be cleaned and, if necessary, a paint coat should be applied to it or the error should be hidden with a sticker that suits the style.
Making a fairing
Before you make a homemade moped fairing, you need to think about the design of the future accessory. After this, you need to measure the headlights and, taking into account the dimensions of the future product, prepare a pattern (for this it is best to use cardboard).
Blank
The next step will require a blank. It is best to use penoplex for this (of course, you can also purchase cheaper foam, but this material quickly crumbles, so it will be very difficult to give it the desired shape). The fairing pattern is applied to the material (it is better to leave a margin of 5 cm on the sides), after which we perform the following steps:
- We give the workpiece a streamlined shape (you can use a jigsaw and any available cutting materials).
Soldering with a soldering iron
This DIY motorcycle plastic repair is practically no different from the previous one. The main difference will be the tool used. You'll need a high-power soldering iron that you don't mind getting dirty. Here, too, the type of material being welded and the appropriate solder are important. The latter can be found in the form of special tapes in stores. Welding process:
- We dismantle the part, wash it from dirt, clean the edges with sandpaper and degrease it.
- We assemble a puzzle from broken pieces, spot welding them from the inside using a soldering iron. (further work is carried out exclusively on the inside of the product).
- Starting from the edges, we lean the soldering iron against the seam and, melting it almost right through, we form a deep hollow.
- Now the parts are holding, but not yet strong enough. The next step is the direction of the new layer; for this we melt the solder with a soldering iron near the hollow. While the plastic is still liquid, level it with a sting to get an even layer.
Advice. With proper skill, you can simultaneously make a hollow and fill it with solder.
This way the process will take much longer and require greater concentration, but the layers of plastic will stick better, which means the connection will be stronger. If you did everything correctly, then in the end you will get a strong seam, which looks rough on the inside, but with the outside turns out to be almost perfectly smooth. This can be achieved through deep melting of the mass when forming a recess.
Note! Some advise using reinforced metal mesh for strengthening. This option only makes sense if you are working with fragile, low-quality material that is not capable of bending.
Scooter tuning, making a plastic body kit online instructions
Payment for goods and downloading of the book in electronic form (PDF format) is made on the website.
To do this, you need to find the book you are interested in and click on the “Buy” button. The price of the book is indicated on the button.
For convenience, the price on the website for residents of Russia, Belarus and Kazakhstan is presented in rubles.
For residents of Ukraine in hryvnias, and for all other countries - dollars.
After clicking on the “BUY” button, a payment window will open where you can select a payment system with which you can pay for the selected book using any bank card (Visa, MasterCard, MIR, etc.)
When you click on the “Pay by bank card” button, the Portmone payment system will open, which is the easiest way to make a payment.
In addition, the website offers four payment systems for payment:
- Yandex (payment from any bank cards, Yandex Money account, QIWI Wallet, terminals, etc.);
- Portmone (payment from any bank cards, Portmone account);
- PayPal (payment from any bank cards, PayPal account);
- WebMoney (payment from any bank cards, payment from WebMoney wallets).
Payment via Yandex Cashier
After selecting payment via Yandex, the Yandex Cashier payment system will launch, where you need to select a convenient payment method (bank card, QIWI, Yandex Money account, etc.)
After specifying payment details and confirming payment, payment for the goods will occur.
[/su_box]
If you have a bank card in a currency other than the ruble, then the money will be debited from the card at the rate of the Central Bank of Russia at the time of the purchase.
This payment method is optimal for residents of Russia, Kazakhstan and Belarus.
Official website of the Yandex Kassa payment system https://kassa.yandex.ru
Payment via Portmone
After selecting payment through Portmone, the payment system will launch, where you need to select the payment method: bank card or Portmone account.
The price in the Portmone payment system is converted into dollars at the exchange rate of the Central Bank of the country where you are located.
If you have a bank card in a currency other than the dollar, then the money will be debited from the card at the rate of the Central Bank of your country at the time of the purchase.
After specifying payment details and confirming payment, payment for the goods will occur.
[/su_box]
Official website of the Portmone payment system https://www.portmone.com
Payment via PayPal
After selecting payment via PayPal, the PayPal payment system will launch, where you need to select the payment method: bank card or PayPal account.
If you already have a PayPal account, then you need to log into it and make a payment.
If you do not have a PayPal account and you want to pay using a bank card via PayPal, you need to click on the “Create an Account” button - shown with an arrow in the picture.
PayPal will then prompt you to select your country and provide your credit card information.
After specifying the information required to make the payment, you must click on the “Pay Now” button.
Official website of the PayPal payment system https://www.paypal.com
Payment via WebMoney
After selecting payment via WebMoney, the payment system will launch, where you need to select the payment method: bank card or WebMoney wallet.
If you already have a WebMoney wallet, then you need to log into it and make a payment.
If you do not have a WebMoney wallet and you want to pay in another way, you need to select any of the methods that WebMoney offers and make the payment
After specifying payment details and confirming payment, payment for the goods will occur.
[/su_box]
Official website of the WebMoney payment system https://www.webmoney.ru/
Downloading a book
After successfully completing the payment (by any method) and returning to the KrutilVertel store from the payment system website, you will be taken to the successful payment page:
On this page you need to indicate your e-mail, where access to download the book will be sent.
If you are already registered on our website, then simply follow the link to your personal account.
The book you purchased will be in your personal account, from where you can always download it.
Please note that after making the payment, you need to return back from the payment system website to the KrutilVertel website.
If for some reason you did not return back to the site and closed the payment system tab with a message about the successful completion of the payment, please let us know - we will send you a letter indicating access to download the book.
Problems when paying with bank cards
Sometimes difficulties may arise when paying with Visa/MasterCard bank cards. The most common of them:
- There is a restriction on the card for paying for online purchases
- A plastic card is not intended for making payments online.
- The plastic card is not activated for making payments online.
- There are not enough funds on the plastic card.
In order to solve these problems, you need to call or write to the technical support of the bank where you are served. Bank specialists will help you resolve them and make payments.
That's basically it. The entire process of paying for a book in PDF format on car repair on our website takes 1-2 minutes.
If you still have any questions, you can ask them using the feedback form, or write us an email at
Source: https://krutilvertel.com/tjuning-skuterov-glava3-izgotovlenie-plastikovogo-obvesa-svoimi-silami
Gluing plastic
Repairing the plastic of a motorcycle can be done by gluing parts together. For this we need:
The gluing process: First of all, we remove the defective part, wash it thoroughly with hot water, then we clean the areas around the cracks and the ends of the chips, and finally we degrease the parts being processed. Next, we dilute the resin with the hardener; keep in mind that the material will remain in a plastic state for 2-4 hours, so it is better to prepare it in small parts. If you add a little castor oil to the mixture, it will become more flexible, which is especially important for flexible plastics. Apply the finished resin on the inside of the part with a brush in one layer. Next, we place a layer of fiberglass no more than 5 cm wide and cover it with another layer of glue. In total you should get 3-5 layers of mesh, and the final layer is glue. Remember! All work with epoxy resin should be carried out with gloves and safety glasses. Upon completion of the work, leave the part to dry for a day at room temperature. A sign of hardening of the material is the lack of adhesion and structural strength. You can apply light pressure to the seam to test its strength and make sure the material is curing. If everything is satisfactory, the repair is completed, otherwise we completely remove the layer and apply a new one. There is still an outer part left, but it should be treated with putty to prevent damage and then painted over. Gluing is needed to create a strong base, and final work is best done with materials that are more amenable to processing.
Manufacturing a replacement part
When talking about restoring motorcycle plastic, don’t forget about completely replacing missing or damaged parts. Here we divide the process into making the panel from scratch and making the missing piece. The hardest part is making the part yourself. The factory forms can only be completely replicated using fiberglass. The process is very long, not the cheapest and is only suitable for enthusiasts. Initially, you should make a matrix that repeats the shape of the future part. A layer of fiberglass and resin is gradually applied to the matrix, thereby forming the part. Then the product is sanded, primed and painted. Such a part will last until the next incident, because fiberglass is very fragile, and its repair does not make sense due to the loss of rigidity of the entire structure. Finally, plastic repair can be done using a piece of plastic of suitable composition and size. A shape should be cut from the workpiece that replicates the missing part. The method is suitable for straight sections and with a slight spherical bend. A bend can be obtained by heating the part, shaping it and fixing it until it cools.
Coating
Coat the resulting body kit with a single layer of epoxy resin with fiberglass, which must be cut into small pieces. Apply the resin first, followed by the fiberglass. Glue the entire body kit. In some places, dripping drops of resin form. It is recommended to remove them after the resin has hardened. At this stage, it would be a good idea to follow a few tips:
- Stock up on pieces of fiberglass
- To obtain normal density, overlap the fiberglass
- Small pieces of fiberglass are easier to glue
A durable layer is achieved by pressing down the fiberglass with a brush soaked in resin. Swipe it from the middle to the edges until the material is completely saturated with resin. Avoid the formation of air bubbles.
Once dry, begin applying a layer of coarse putty. The main problem at this stage will be applying an even layer. This process is necessary to remove all irregularities and flaws. After this, go through the sandpaper to remove problem areas. To get the best result, you will have to repeat the procedure several times. We remove small indentations with putty.
When everything is dry, carefully look at the design. Make sure that symmetry is maintained and feel free to move on to the next step of how to make a body kit with your own hands. Now you are required to:
- Remove the resulting element from the bumper
- Unfasten the original skirts and wipe them well
- Make a template for the outline of the skirt on the side, touching the fiberglass bumper. Apply several layers of fiberglass to ensure the template is durable
- Carefully remove the workpiece from the bumper
- Clean the resulting part from polystyrene foam. Do this gradually, as the model loses its rigidity, so treat it with fiberglass, and then apply a layer of resin
- Detach the side skirt templates to provide a mounting base
- Make several cuts on the fastening strip to later connect it to the skirt. Similar cuts are made on the skirt.
