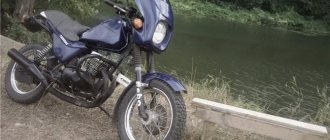
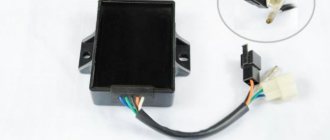
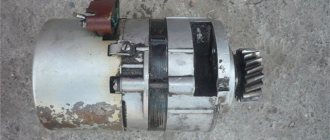
Replacing the right crankshaft oil seal sunrise 3m
Craftsmen always keep some tricks in stock with which they can use an unconventional method to repair or replace a part in a matter of minutes.
Let's say, many people know how much trouble replacing the right crankshaft main bearing will require. If you follow all the points in the operating instructions, then you will spend at least half a day on this operation: for now, remove the engine from the motorcycle, while you halve it... Then, again, installing the engine in the frame is a nightmare! Everything happens much easier if you know... that you don’t need to do any of this - neither remove, nor install, nor half. And we’ll teach you how. Take a regular tool and, in addition to it, a narrow chisel, a sharpened pin or a powerful screwdriver.
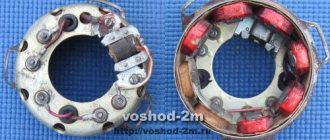
1. Remove the right engine cover, unscrew the generator stator mounting screws, remove the generator itself and hang it on the driver’s footrest.
2. Unscrew the bolt securing the generator rotor from the crankshaft journal. We will also compress the rotor in a special way. So, in one hand you have a mallet (however, a copper hammer will do), and the other hand, pulling the rotor, turns it along with the crankshaft. Two or three blows of the mallet are enough (if it is a copper hammer, then not backhanded), and the rotor will be compressed.
3. Usually the right crankshaft bearing fails due to the fact that air is sucked through the oil seal, so always replace the oil seal along with the bearing. And don’t stand on ceremony when dismantling the old one: punch it with the sharp end of the pin as close to the outer diameter as possible and simply uproot it from the crankcase.
4. Remove the shaped washer and slightly push the bearing deep into the crankcase. Use special “duckbills” or a regular bit to pry and remove the bearing retaining ring.
5. Now it’s time to use a thin chisel for the first time. Use it to cut off the bearing cage on each ball, and then, striking between the balls, push the cage deep into the crankcase.
6. Now that the balls are mixed, group them into two groups of equal size. And into the spaces between the groups of balls, insert two screws with sanded heads. Turn the screw heads 90° and they will fit into the spacer on the raceway between the bearing races.
7. An improvised puller can be any metal plate, say, an eyelet for a padlock unscrewed from a barn gate (your own, not your neighbor’s). There should be two holes in it at a distance from each other, close to the diameter of the circle described by the balls when the bearing rotates. Press the plate against the end of the crankshaft, passing the threaded part of the bolts into the holes, and screw the nuts onto them.
8. Tighten the nuts one at a time until the bearing is completely pressed out of the crankcase.
9. Press the new bearing into the crankcase, striking the races alternately. Use a spark plug wrench to hit the inner race, and use a pipe with a diameter slightly smaller than the outer race to hit the outer race.
10. Install the retaining ring and washer. Take a new oil seal and lubricate its side surface with grease - this will make it easier to press it in.
11. Without distortion, aim the oil seal into the mounting hole and press it in until it stops. To do this, you can use an old bearing and a spark plug.
This is how you can cleverly replace the crankshaft main bearing in a matter of minutes. Now this method is not a secret for you.
Source
Step-by-step instructions for replacing the rear crankshaft oil seal
Just when the rear crankshaft oil seal leaks, then all the troubles begin: the engine begins to get dirty in oil at a rapid pace, and all the dust from the road then very actively sticks to it. One has only to look at such a motor and already there is a desire to pull it out and throw it away. Moreover, the oil will also corrode rubber parts and drip onto the clutch disc, after which it risks losing its frictional properties. Everything starts to creak, slip, rub against each other... In general, because of the small seal, the whole car seems to have gone crazy.
All the oil, of course, most likely will not leak out (however, do not be sure of this), but such a nuisance can add serious problems to you. If there is a leak from the rear oil seal, it must be replaced. There is no other solution to the problems and there simply cannot be.
As we have already noted, this oil seal was invented to neutralize lubricant leaks from the engine through the hole from which the crankshaft emerges. The rear crankshaft oil seal for most car models measures approximately 99 millimeters.
After dismantling the oil seal
Manufacturers apply special marks and inscriptions on the outside of the oil seal. They can be used to determine which direction the crankshaft rotates. Using this information, errors are eliminated during the process of replacing the rear crankshaft oil seals.
This sealing element is installed in the area of the cylinder block where the crankshaft comes out. In ordinary cars, where the engine is located longitudinally and the gas distribution process is carried out using a chain drive, the oil seal is installed in front of the support bearing in the crankshaft shield. In the case of front-wheel drive cars, where the engine is located transversely and a belt is used in the gas distribution mechanism, the element is located in the cylinder block, since there is no shield in the engine design.
Inside the engine crankcase, the lubricant is under a certain pressure. Due to this pressure, the seal is constantly pressed against the parts that it is supposed to seal. This way the engine is reliably protected from oil leaks.
Even with the slightest, slightest displacement of the part, the lubricant will flow. But how can you determine when it’s time to install a new seal? The first sign is oil leaks in the place where the power unit crankcase connects to the gearbox.
If lubricant leaks, it can get into the clutch housing, settle in a thick layer on the walls and stain the clutch disc. All this will lead to clutch slipping. Oil consumption will also increase significantly.
The most surprising thing is that even new oil seals can leak and the reason will not be due to poor installation. In stores you can buy a fake rear crankshaft oil seal for a VAZ. Its cost is low, and car enthusiasts do not notice that they are buying a fake. Poor quality of a part will definitely affect how it performs in the future.
An example of an incorrect oil seal installation
Another reason is a violation of installation rules. Often the seal is placed in a convenient position and carefully hammered into place with a hammer. But manufacturers do not recommend using a hammer or applying significant force when installing the part.
Leakage of poor-quality oil seal
If certain changes occur in the operation, as a result of which the gas pressure in the crankcase increases, then these gases are undoubtedly capable of squeezing out the oil seal. As a result, the contact with the crankshaft will not be tight enough, and the lubricant will leak out through the resulting gap.
Is it possible to confuse the oil seal with something else? Yes, you can. Very often, many experienced motorists confuse an oil filter leak with an oil seal leak. Sometimes a completely normal part is replaced with a new one, and it was just necessary to replace the oil filter.
You should not purchase these sealing parts in dubious stores or markets. There is no need to buy cheap products from unknown brands. This way, you can not only purchase an oil seal, the replacement of which will cause certain problems, but also get more serious malfunctions. Imagine that after buying a cheap oil seal and saving $5, oil will get on the timing belt and damage the entire cylinder block at a cost of $1000, if not more! Saving on oil seals is a real absurdity.
The most popular are the following manufacturers:
- Viuctor Reinz;
- Elring;
- Goetze.
They make quality products. Products of these brands are found not only in car stores, but also at numerous showdowns.
Removal and installation of crankshaft, bearings and oil seals Voskhod
It is not clear why Voskhods have gained fame as unreliable and capricious motorcycles. You might think that Jupiter or Ant is much better than Sunrise. However, this opinion still exists in the motorcycle community. Well, okay, if there is such an opinion, then so be it.
Someone had already “overhauled” the engine before us, then we drove it a little, removed the cylinder for boring and rolled it into the garage for the winter. While the motorcycle was standing in the barn, water began to flow into the engine... And when spring came to the yard, the owner wanted some drive... Well, let's give him some drive.
Checking the seals after replacement
It is almost impossible to assess the effectiveness of changing crankshaft elements due to their limited visibility during visual examination.
Its implementation is advisable only when there is a significant consumption of oil fluid in the absence of obvious leaks.
Technical characteristics sunrise 3m.
| Name | Index |
| General indicators | |
| Load limit, kg | 165 |
| Dry weight, kg | 125 |
| Number of gears | 4 |
| Dimensions | |
| Distance between wheels/width/height from ground to seat, mm | 2000/ 761/ 1090 |
| Ground clearance, m | 1,25 |
| Turning radius, m | 2,5 |
| Performance indicators | |
| Maximum acceleration, km/year | 105 |
| Gasoline consumption per 100 km | 4.4 l |
| Engine | |
| Type | Two-stroke, single-cylinder, carburetor |
| Volume | 173,7 |
| Power at 5500 - 5800 rpm | 4 l. s./ 10 kW |
| Clutch | Multi-disc in oil bath |
| Cooling system | Air |
| Electronics | |
| Voltage | 12 V |
| Ignition system | Electronic, contactless |
| Alternator | 65 W |
| Chassis | |
| Frame | Tubular, welded, single |
| Wheels | Spoked, tube tires, 3.25 - 16 inches |
| Brake mechanism | Drum with mechanical drive |
| Suspension | |
| Front | Telescopic, wheel travel 160 mm |
| Rear | Pendulum, wheel travel 80 mm |
Motorcycle bearings "Voskhod" 3, 3M, 3M-1, 3M-2
Brief information. Voskhod-3 (1979) - differs from its predecessor in a different gas tank (holds 2 liters more fuel), intake system, rear shock absorbers with increased energy capacity (located at an angle of 12° to the vertical, providing a wheel travel of 105 mm). Modernized brakes were used (the diameter of the brake drums was increased from 125 to 160 mm), wheels, a G-427 generator (rated voltage 7V), and an improved saddle. Maximum speed 105 km/h, dry weight 125 kg.
Motorcycle engine assembly Voskhod
Voskhod-3M (1983-1993) The cylinder fins have an increased cooling surface. Some engines were equipped with Czechoslovak-made carburetors. 12-volt electrical equipment was installed, an FG-137B headlight with a “European beam” diffuser, and a new rear light with side reflectors. Above the headlight there is a block of control devices made of plastic: ignition switch, speedometer, indicator lamps for direction indicators, low and high beams. In addition, an anti-theft lock was installed. The front shock absorbers received corrugated rubber covers. "Voskhod-ZM" was equipped with a wear indicator for the brake linings of both wheels. The motorcycle received a new profiled front wheel guard, a kickstarter lever with a folding pedal instead of a solid one, folding driver's footrests, and two rear-view mirrors. Maximum speed 105 km/h, dry weight 122 kg. On the basis of this model, the production of the Voskhod-3M Krokha tricycle was organized; the body had a load capacity of 200 kg. Speed 80 km/h, rear gearbox borrowed from the Ant scooter
Voskhod-3M-tourist (1985) - The motorcycle received a new sports-type steering wheel with a jumper, roll bars, two rear-view mirrors, tourist equipment (rear trunk with side sections, side bags made of artificial leather, a tablet bag on the fuel tank). The motorcycle has new inscriptions on the tank and tool box lids, stickers are made of lavsan film. Maximum speed 105 km/h, dry weight 125 kg.
Voskhod-3M-01 (1989) A new engine with a reed valve was installed on the old chassis. The modernized engine featured a cylinder with a five-channel scavenging and one exhaust port (the Voskhod-ZM model has two channels). An intake reed valve reduced fuel consumption to 4.2 l/100 km. Power increased to 15 hp. at 6000 rpm, maximum torque up to 1.7 kgf m at 5500 rpm. The engine has one muffler. The motorcycle's handlebars became wider and received a crossbar. The piston skirt is enlarged.
Bearing table
| Installation location | Number | Bearing type | Size | Qty |
| Engine, crankshaft | 204 | Ball radial single row | 20x47x14 | 2 |
| Rear wheel sprocket | 60304 | Ball radial single row | 20x52x15 | 1 |
| Rear wheel | 60204 | Ball radial single row | 20x47x14 | 2 |
| Front wheel | 60204 | Ball radial single row | 20x47x14 | 2 |
| Gearbox, primary shaft | 203 | Ball radial single row | 17x40x12 | 1 |
| Gearbox, intermediate shaft | 202 | Ball radial single row | 15x30x11 | 2 |
gdepodshipnik.ru
Photo report: Motorcycle engine repair "Voskhod-3m"
Before any repair or assembly of the engine, we carefully inspect all parts for wear or damage, paying special attention to the condition of the engine crankcase and threaded connections. You will find all the answers on crankcase repair in the article: Photo report: Repairing the crankcase of a scooter engine
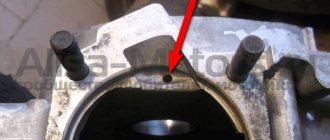
Next, we carefully wash the engine parts, clean all the oil channels (marked with an arrow in the first photo, the second channel is located there only in the other half of the crankcase), buy a new set of gaskets and oil seals (a prerequisite for a quality repair), lay the engine on planks so that the shafts hang in the air and do not interfere with work.
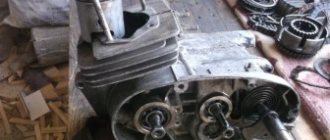
The engine that we will be repairing today was initially in good condition, only the crankshaft bearings were badly worn and the return spring of the gear shift shaft was broken. Therefore, the entire repair will consist of installing new bearings, seals and gaskets with subsequent engine assembly. You will find all the details on disassembling this engine in the article: Photo report: Disassembling the engine of the Voskhod-3M motorcycle
We begin repairing the Voskhod-3M motorcycle engine by installing the crankshaft main bearings into the crankcase.
We install retaining rings in both halves of the crankcase, then install the main bearings there using a mandrel.
So that the crankshaft “stands” exactly in the center of the crank chamber, that is, the distance between the cheek and the wall of the crank chamber is the same on both sides. We need to take some measurements with a caliper before installing it in the engine.
So, we take a caliper and, using a bore gauge, measure the depth of the crank chamber one by one.
We look at what happened and write down the value in a notebook.
We measure the second chamber in exactly the same way and write down the value in a notebook, after all the measurements taken, we add up both values and add to it the thickness of the gasket, my gasket will be homemade from paronite with a thickness of 0.6 mm, therefore, to the sum of the depth values of the crank chambers we add another value equal to: 0 ,6mm.
The result is this: 26mm + 26.5mm+0.6mm = 53.1mm, feel free to round the sum of the values to: 53mm.
Now we measure the thickness of the crankshaft itself, as you can see in the photo, the thickness of this crankshaft is exactly 50mm.
We make the last calculation: from the first value we subtract the second 53mm-50mm = 3mm, now having received the difference between these two values, divide it by two and get the exact distance between the crankshaft cheek and the wall of the crank chamber: 3mm/2 = 1.5mm, which, as they say, is what was required prove. The quality of Soviet motorcycles always left much to be desired, therefore, your digital values may differ significantly from those given in the article.
It should be noted: the crankshaft fits into the new bearings with great force, which naturally creates an unusual axial load on the ball bearings (if installed according to the collective farm), but they really don’t “like” this and after such “bullying” they quickly fail. Plus, if you install the crankshaft in the “classic collective farm way”, hammering it into half of the crankcase, there is a high risk of misalignment of the crankshaft journals, and this is not good.
Engine disassembly
We unscrew the bolts holding the crankcase together. There should be 14 bolts
We heat the crankcase connector with a hairdryer, apply gentle blows to the protruding shafts through a wooden spacer until the engine is halved
The third jamb
The crankcase gasket was installed crookedly, so much so that it did not even cover the crank chamber connector
Jamb four
The main bearing was closed. He died quickly
Disassembling the clutch
Checking the motor circuit
We put pressure on the motor chain and see how much it has sagged: if the chain sag by more than 15 mm, we immediately throw it in the trash.
In our case, the motor chain is ideal: there is practically no sagging
Removing the clutch basket springs
Remove all discs from the basket. After removal, check the discs for wear and warping.
We weld a rod or piece of tire to the old unnecessary clutch disc, unbend the lock washer under the nut of the inner drum of the clutch basket, fix the inner drum with a puller and unscrew the nut (left-hand thread)
First joint
Someone put a washer under the inner drum
Place a tin block or stick under the chain and unscrew the nut (right-hand thread)
The sprocket sits on a cone and can only be removed with a puller
Remove the adjusting washers from the shaft and pick out the second key
The process of replacing the oil seal on a VAZ
To replace it you will have to work hard, since the required part is hidden behind the clutch mechanism. And it is in such a famous vehicle as the VAZ 2107 that this nuance is most clearly observed. To carry out this event, it is better to ask someone to help. Seriously, you can do it alone, but you will waste more nerves than you can imagine. It is better if the assistant has experience in such work.
We begin to unscrew the flywheel
First of all, unscrew the engine flywheel and remove the clutch. The rear oil seal is located in a bolted housing. There are eight of them. Unscrew the bolts and the body will be in your hands. The oil seal can be removed and a new part pressed into the body instead.
The size of the rear crankshaft oil seal is quite large, and the shape is simple, so there should be no problems when pressing in and out.
Replacement using the example of Renault Logan
Using the Renault Logan car as an example, let's see how to change the rear oil seal. The first step is to remove the transmission or gearbox mechanism. The car is hung on a lift. Next, you should remove the battery. Then unscrew the bolt holding the gearbox rocker. After this, remove the bolt holding the clutch cylinder. Then remove all the bolts holding the gearbox.
Next, remove the wheels, unscrew the CV joint nuts, disconnect the ball joints from the steering knuckles, drain the oil from the gearbox and dismantle the axle shafts. A support is placed under the engine pan and the upper transmission mounts are removed, and then the entire gearbox housing.
Yes, to replace the oil seal you need to disassemble the floor of the car. But, alas, there is no other way to cope.
Flywheel removed
Remove the flywheel, basket and driven disk. In this case, it is necessary to remember the position of the flywheel relative to the crankshaft. After this, unscrew the flywheel bolts and remove the Renault Logan crankshaft rear oil seal. The oil seal is replaced with a new one in the reverse order. This completes the procedure. After a successful replacement, you can put everything back together.
Rear drive
All of the above instructions are relevant for front-wheel drive car models. As for rear-wheel drive vehicles, not only the gearbox is removed here. The first step is to remove the driveshaft, then the clutch slave cylinder. Next, unscrew the bolts holding the gearbox. They also unscrew the drawstring. After this, you can safely remove the box and change the rear crankshaft oil seal of a Ford or other rear-wheel drive vehicles.
Attention! Oil seals are made from materials of varying degrees of density. This is done so that they are selected according to the type of oil. If you install oil seals for mineral oils, and the engine is filled with synthetic oil, the seals may dissolve.
Installation of the oil seal (try it on the crankshaft)
Before installation, the oil seal is tried on the crankshaft. The surfaces of the seal housing and the crankshaft are lubricated with oil. After installation, check the status. If no leaks are observed, then everything turned out well. Experts also advise changing both engine seals at once - both the rear and the front.
Here's how to replace crankshaft seals. On front-wheel drive cars, this task can be accomplished even by beginners. As for rear-wheel drive with a longitudinal engine, the procedure requires enormous costs and time. The price for replacing crankshaft oil seals at a service station is affordable (from two thousand rubles), so you can entrust the car to specialists.
Engine tuning
The Voskhod 3m tuning engine which we will consider is a simple, 2-stroke engine with one cylinder. This engine is considered its own development, but has many similarities with motorcycles of Japanese origin. Experienced tuners assure that with the right approach, you can extract almost twice as much power from this engine as it comes from the factory. But you can’t do it with just one stroke; you need a careful approach and studying mountains of specialized literature. Let's look at what we can change to ride the Sunrise motorcycle faster:
You might be interested in tuning the Ural motorcycle engine - all the details and videos from professional mechanics.
- Cylinder-piston group. There is no point in starting other improvements without making changes to the CPG. To begin with, it is worth noting the fact that the factory safety margin of the parts is quite small, so all subsequent modifications will shorten the life of the engine. Let's start with the piston; you can leave it as a native one or select a foreign analogue in size. Next, you need to lighten its weight; for this, you need to grind off with a mill those parts that do not participate in the formation of the strength and operation of the piston. The connecting rod is also subject to lightening. At the cylinder itself, we change the geometry and size of the inlet, outlet and purge channels. This is necessary so that when the amount of air-fuel mixture increases, the engine can effectively burn it and remove gases.
- Carburetor. Alas, in order for the engine to go faster, you need to burn more gasoline, and in order to put more mixture into the cylinder, you need to purchase a more efficient carburetor. If we are talking about a significant increase in power, then the original carburetor is clearly not enough.
- Air filter. More gasoline requires more air for combustion. In order for the engine to “breathe” easily, it is better to replace the original filter element with a filter with minimal resistance.
- Reed valve. The design of a two-stroke engine is designed in such a way that during the compression stroke, part of the air-fuel mixture is emitted into the exhaust; to avoid this, a reed valve is installed. In addition to saving fuel, it also significantly increases traction at low speeds, which means the acceleration of the motorcycle improves.
Resuscitation of main bearings on the left axle of Java-250 (353 and 559)
The case was very simple and common - the outer main bearing of the left crankshaft journal of my Chekhushka © began to sit by hand when pressed in, and when installing the crankshaft, it simply fell out. The reason is also simple - the crankcase is weak here, and is reinforced with only a few stiffening ribs. Tapping with a core didn't help, and thread sealant didn't help either. It seems that the problem was solved quite simply - I gave the crankcase and bearing to a person who had access to metal spraying and a jig boring machine. The idea was simple - spray aluminum onto the inner surface of the seat, and then use the above-mentioned machine to restore the original geometry. The man decided that I was not worth his efforts, and therefore sprayed metal onto the bearing, after which he sealed it into the crankcase using liquid nitrogen. The bearing stood tightly by itself, and was the cause of all my glitches with equipment throughout the entire season, because I had to replace two oil seals that were facing each other (© gazzz) with a badly worn original labyrinth seal.
After a season of torment, I disassembled the engine, with difficulty knocked out this bearing, after which the seat began to resemble a Copernicus crater, and the bearing flew all the way to the retaining ring without stopping. After scratching my back, I came up with the following idea...
Need to:
1. One double-row bearing 3205C from a Java-638 crankshaft. It has the same internal diameter as the original 6305, but its external diameter is smaller.
2. Crankshaft oil seal from IZH-Yu (has exactly the same parameters as the above-mentioned bearing).
3. Find a good turner.
4. A little brain.
So, the idea: we sharpen the bushing into the crankcase, into which we place the double-row bearing from the outside, and the oil seal from IZH into the same bushing between it and the inner bearing. Between the outer double-row bearing and the oil seal there is a technological step of about 1 mm, so that the oil seal does not touch the bearing. On the other hand, the same role is played by a locking ring, which limits the fit of the sleeve.
The Izhevsk oil seal very conveniently has two edges, so there is no need to install two Java oil seals. By the way, by the season I will try to replace the right axle seal with it by turning a simple clip.
The idea was a success, at least technically. A bushing, machined with a tightness of about 0.01-0.02, plus a few microns removed under the cone with emery, set “hot”, T ~ 150-180 °C - fits like a glove and looks incomparable. The resource of the left axle will thus hopefully become almost transcendental.
 Besides, now I’m not afraid for the crankcase. Unfortunately, I can’t post the dimensions - everything was done locally exclusively for my crankcase.
I’ll definitely tell you about the changes in the nature of the engine’s operation.
08/17/05 After a run of about 2 thousand km, no jambs were identified. There is no play either in the bushing or in the crankcase. The bearing works as it should. A small extraneous sound was added - a slight howl at mid-speed. If you don’t know about him, you won’t even listen. There are no changes in dynamics or maximum speed. The Izhevsk oil seal causes slight skepticism, but pah-pah-pah works so far.
(click on the picture to enlarge)
Source: https://www.jawaold.su
izh-motor.ru
Parts of the cylinder-piston group
Tuning sunrise 3m begins with improving performance characteristics. The maximum speed of the Voskhod 3M motorcycle can be increased by lightening the CPG parts. To do this, we use a milling machine to bore those places that do not affect the strength.
We lighten the connecting rod in the same way. To play it safe, you can find foreign analogues. Next, you need to bore the purge, inlet and outlet channels. This is done in order to better mix and ignite the air-fuel mixture.
What functions do crankshaft oil seals perform?
For best engine performance, constant lubrication is necessary. To solve this issue, the developers installed a lubrication mechanism in the internal combustion engine, where the oil fluid circulates under pressure.
Lubrication goes to various components and elements inside the engine. The oil literally splashes out under the pressure. It happens that the lubrication comes on its own. In most internal combustion engines, a mixed mechanism operates: some dissipate under pressure, some spontaneously.
The main goal is to reduce contact as much as possible, remove recycled waste, and protect the internal combustion engine from breakdowns and overheating. At the same time, it is necessary to separate the crankshaft. It goes from the engine frame to the outer surface, and to prevent oil leakage, the hole where the crankshaft rotates must be closed.
A crankshaft oil seal device is used for sealing. Use 2 of these parts:
- Front: Located near the crankshaft gear;
- Rear: Next to the gear.
