Normal engine operation and comfortable movement on Ural motorcycles require constant care of the vehicle. From time to time and depending on travel conditions, individual spare parts and consumables wear out. Oil seals belong to the second group. If at the moment there is a need to repair a motorcycle and the ability to do it yourself, without resorting to the help of car services, you should use simple instructions, which include not only a list of actions, but also a detailed description of the reasons why you can immediately determine the need for correction defect.
Signs of seal wear
Among the main signs that it is necessary to change the oil seals on a Ural motorcycle, it is worth highlighting several points:
- normal engine start after a long period of inactivity (several hours or days), but after about five minutes the vehicle begins to lose speed, and it is impossible to reach the maximum speed at all;
- After stopping the engine and starting it again after about ten minutes, there was almost no reaction to the kickstart. It doesn’t start the first time, but then with effort it reaches an adequate speed;
- the engine stalls in the middle of operation (this easily happens on the road - one minute is enough);
- oil leakage onto the floor/asphalt. You need to look and look for characteristic marks under the motorcycle. If they exist and, moreover, you can see where the liquid is leaking from, it is necessary to change consumables;
- noticeable traces of burning on the candle;
- excessive consumption of gasoline. Changing the brand to a better one does not help.
Oil seals
It is also worth paying attention to the seals themselves during a routine inspection, when there are still no signs of malfunction mentioned above. If the seals have become wet on the outside (sticking dust and sand can directly indicate this), then this is a signal about the need for replacement - oil leakage can be dangerous not only due to its excessive consumption, but also getting under the wheels, as well as on the brakes. pads.
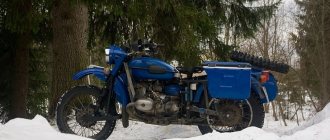
MY MOTORCYCLE
Slowly but surely we assembled the engine; The only thing left to do is to transmit the torque further. Our test subject's gearbox was in need of a rebuild for a long time: the oil was leaking, the gears were knocked out, so it was time to get into it.
Our test subject’s gearbox had difficulty working in conjunction with the old engine, and after the rebuild the engine promises to produce noticeably more power, so the need for an inspection is long overdue. In addition, polishing the engine crankcase would not make much sense without the gearbox housing, since both parts are clearly visible on the motorcycle and look like a single whole when assembled.
So what's hidden in our Pandora's box? First, you need to drain the oil, which is also half diluted with water - wintering in the open air, coupled with the lack of a plug for the speedometer drive, took its toll. We place the removed and washed assembly on a workbench and begin disassembly by unscrewing both “patches” and removing the gear shift sector along with the roller (photo 1). Then you need to unscrew the front cover of the kickstarter shaft spring and remove the spring preload so as not to damage it during disassembly. Now you can unscrew the nut of the elastic coupling disk (photo 20) and remove the disk, the kickstarter lever and the race of its shaft seal.
Unscrew the bolts of the front cover of the gearbox housing. Unlike modern ones, old M-72 boxes are disassembled not from the front, but from the back. We disassemble the modern box by tapping on the protruding front end of the input shaft, and the old ones by tapping on the rear of the secondary shaft (photo 2), and also, through a drift, on the rear of the input shaft, having previously removed the clutch release parts. If you try to hit the front end of the input shaft when disassembling an old-style box, you can easily damage the crankcase, and this is equivalent to the complete loss of the box.
The internal teeth of the fourth gear moving clutch are licked a little less than completely (photo 3), and the burrs left by the fork are clearly visible on the internal groove. It is clear why the fourth one barely turned on and constantly crashed. The situation is no better with the splines on the secondary shaft and for the gears, and for the fork on which the cardan elastic coupling disk is attached (photo 4). The fork itself is also discarded - longitudinal cuts in the oil seal area will never ensure proper tightness due to dirt that got in many years ago (photo 5).
Then, tapping with a mallet through a small punch, we press out the axis of the gearbox forks and examine them (photo 6): the power fork of the first and second is quite alive, but the third and fourth are the opposite (photo 7). From my attempts to “turn on the non-switchable” it overheated and led, and the output no longer fits into any gate. Now all that remains is to check the wear of the kickstarter shaft (photo and the condition of the bearings, which in our case almost always require replacement.
Initially, we wanted to install shafts from a modern Ural, which would provide smooth operation comparable to foreign cars, but their cost inflated the already long-overdue budget. Therefore, we decided to save money on them by taking as a donor a live box from an M-67 without reverse gear, lying around in the Tru Motor workshop, and removing the live shafts and forks from it. The design of the secondary shaft in boxes with or without reverse gear is different, so to replace the giblets of a box without rear gear, you must use a donor box with a similar set of gears. Attempts to introduce the first gear gear from later models into an old box are doomed to failure.
Now you need to press the new bearing into the rear wall of the gearbox and press the bearings onto the shafts (photo 9). A little trick: you can take the “closed” bearing for the input shaft and remove the cover from one side, pressing it with the closed side towards the engine. This will reduce the likelihood of leakage and make life easier for the seal. This is especially important on boxes of the late Soviet period, when, in pursuit of savings, oil deflector washers were abolished, which, rotating with the shafts, cut off excess oil from the seals. The shafts and all gears must be generously lubricated with transmission oil, after which they can be installed in place by tapping the spacer or bolt inserted into the shaft with a mallet. The main thing is not to hit the outer race of the bearing (photo 10).
An important feature of our box is the thrust plate attached to the kickstarter shaft (photo 11). She tightens the trigger ratchet pawl so that it does not wear out when the box is operating (the trigger shaft gear always rotates, its task is to spray oil around the box). When disassembling, it is better not to remove the plate, but before reassembling, make sure it is present and well fixed - otherwise you will have to disassemble the box again.
Now you can install the forks and carefully press in their axle, not forgetting to lubricate all working surfaces (photo 12). We install the kickstarter shaft and the secondary shaft cover, making sure to use a gasket 0.3–0.5 mm thick (photo 13). At this stage, it is important to check the ease of rotation and axial play of the shafts. It should not exceed 0.2 mm. A gap greater than permissible must be eliminated by placing adjusting washers between the bearings and the gearbox cover (photo 14). If the shafts have excessive axial play, this will lead to seal leaks, unclear gear shifting and accelerated wear of shifting parts.
The kickstarter shaft oil seal in our old-style gearbox is collar-type, it does not have an external race, you can find a suitable one on sale, but the quality of spare parts from Chang-Yang leaves much to be desired. Therefore, the Tru Motor workshop found another way out - to grind adapters for modern imported oil seals (photo 15). The starting shaft oil seal is ideal for the Dnepr gearbox, size 20x34. This is exactly what Vasily installed in our control room.
We turn the gearbox over and begin installing the kick spring. First, we make a control assembly and check the axial play of the kickstarter shaft. It is especially important to take this into account in a gearbox with reverse gear: with large backlash, extremely unpleasant effects can occur, such as failure to engage reverse gear or, even worse, failure to turn it off when the rear gear remains engaged simultaneously with one of the forward gears. The consequences can be extremely severe, including jamming of the gearbox, causing the motorcycle to fall, or breakage of gears and shafts.
If the gearbox is without reverse gear, then the consequences of negligence with longitudinal play can result in a leak of the kickstarter shaft seal: after all, in our boxes this shaft is the only one located below the oil level, and its rattling will certainly affect the operation of the seal. So, in our case, the axial play of the shaft was 3 mm. To eliminate the gap, we placed a couple of washers in its front cover, and to prevent them from falling out during installation, we lubricated the insides of the cover with thick lubricant (photo 16). Now you need to align the spring antenna with the hole in the cover, press it and cock the spring ¾ of a turn (photo 17), then tighten the screws with an impact screwdriver (photo 18). All that remains is to press in the oil seals of the primary and secondary shafts and install the clutch fork. To prevent oil from escaping through the fork splines, they can be lubricated with sealant before installation (photo 19). We tighten the installed fork with a new slotted castle nut (torque 8-10 kgf m), insert the key and use a cotter pin (photo 20).
After this, you can assemble the pedal mechanism, having previously pressed a new oil seal into the cover. We place the spring with its tendrils down and tighten the gear sector to the pedal axis with the nut on the thread lock (photo 21).
Perhaps the most difficult and important procedure in assembling a gearbox is its configuration. There are only two adjusting screws, but it is extremely difficult to “guess” the gear shift blindly, so Vasily made a special plate that imitates part of the gearbox cover and fixes the shaft with the fork grooves (photo 22). So, inclusion or non-engagement is visible to the naked eye, and by rotating one or another screw, you can accurately adjust all gears (photo 23).
But they decided not to skimp on the release bearing: even though the original one is sold on every corner and costs a penny, its service life tends to zero, so Vasily insisted on installing a modern one, developed by SKF specifically for our Urals. The part, although expensive, is much more reliable (photo 24). Now you can install the kickstarter and release lever, as well as the backup shift lever (photo 25).
At this point, the box is ready and, together with the engine, is sent to await installation on the motorcycle. Next in line are ignition and wiring, which we will talk about in the next issue.
To be continued…
Issue: MOTO Magazine - October 2015
Author: Dmitry FEDOTOV, photo by the author
Tools for replacing oil seals
Every garage/workshop should have the following items that allow you to gain access to oil seals and change them:
- a set of ratchet attachments and open-end wrenches;
- set of hexagons;
- rags for cleaning the floor from leaked old oil;
- plastic pipe;
- fresh oil for replacement;
- container for drained oil;
- new seals and anthers. They must match in width, diameter and height for a tight and reliable installation.
It is worth considering that when filling in new oil, you will need to study the technical data sheet of the motorcycle indicating the required amount of consumables. If you have an assistant who will support the vehicle, the master will be able to disassemble a certain motorcycle component much faster and easier.
Some motorcycle owners recommend installing car oil seals and boots that are resized to fit motorcycle consumables, but this operation should not be carried out without skill and preparation.
Analogs of oil seals
Here I riveted a plate of imported oil seals for the boxer. The amount turned out to be 731 rubles. The question is, are the analogues selected correctly in size, will there be a leak?
Sizes in the store - the size from the package "Ural motorcycle oil seal kit" from the market.
I don’t have exactly the answer, but information about what kind of oil seals I installed in the engine: 1) Crankshaft oil seal 50x70 (external 70 internal 50 width 10) installed ZIL 5301 (bull) cuff (Oil seal) 50*70*10 (VRT) crankshaft front 2) Camshaft oil seal 16x30 (external 30 internal 16) - VAZ08.09 gearbox slides size 16x30 - in the VAZ spare parts store there were very good imported ones for sale. Both options suit me - I fill it with semi-synthetic. And for myself, I decided to buy oil seals and bearings in large specialized rubber and bearing stores. Basically everything is there. There are both cheap and good-expensive imported oil seals and bearings. It is enough to take with you old bearings, seals and a caliper)
Well, in general, there are no questions with these two oil seals. More interested in whether minor deviations from dimensions are critical or not?
Minor ones are not critical, but look at what happens: those size values that are indicated with a fraction indicate the dimensions EXACTLY of the oil seal, and integers indicate the dimensions of the shafts and holes for which they are intended.
Why can't the seal have an integer size? I don't understand. How then to distinguish where the dimensions of the oil seal are written, and where the dimensions of the shafts and seats are written.
Well, as is customary, the dimensions of the oil seal are indicated as a fraction: 31.4x45.1x8 - here 31.4 is the internal diameter of the oil seal; 45.1 is external, and, for example, 32x45x8 - here 32 is the diameter of the shaft, and 45 is the diameter of the seat in the housing. In this case, the first oil seal will most likely replace the second one (the tension along the shaft is 6 tens, along the mounting hole is one), but on the contrary, I don’t know, you need to measure it. Something like this.
1 tenth of the role does not dance. If there are doubts (the fit is too loose), sealant will most likely not be needed to help.
If the height is greater, it is again adjusted with a file after the fact. In some , but their warehouse availability leaves much to be desired (in my experience, there are such ones at AVO and there weren’t any). If it is smaller - in some cases (for example, a socket + a cover covering it) - a PCB spacer MAY be useful. The problem is different - when the height changes, the working surface of the edge on the axis “moves” to the side. On the one hand, this is a minus (there may be a rough surface there), on the other hand, it is a PLUS for the used unit, because The groove machined by previous use turns out to be slightly to the side, and the edge rubs against the “clean” surface. YOU NEED TO LOOK LOCALLY, in short.
4 tens on the shaft is a bigger argument, but who’s stopping you from taking an internal whole with a smaller one?
Source
Preparing to replace oil seals
The motorcycle will need to be placed on a flat surface (asphalt/concrete) so that it can be lifted up a few centimeters - this will be needed to rotate the wheel and disassemble the fork. For fastening, you will need a separate box with cells where everything will be collected. This way you won’t be able to confuse the fasteners on the Ural motorcycle. In this situation, it is helpful to have a toolbox that contains a box like this.
An assistant will assist in removing individual small elements and will ensure that nothing is mixed up during assembly.
Replacing the oil seal in the Urals
All work begins with loosening the front axle bolts located where the shock absorber is. Next, you will need to hang the vehicle, and then follow these steps:
- the fender and front wheel are removed from the fork;
- the nuts securing the feathers are unscrewed, and then the springs are removed from the fork. It is necessary to ensure that the installation sites are not damaged during the procedure;
- it is necessary to unscrew the nuts securing the lower bridge;
- removing feathers - remove the upper boot of the feather using a slotted screwdriver or a special puller (much faster and more reliable - nothing unnecessary will be affected);
- you need to remove the retaining ring with pliers (attention - this element must not be damaged, so you need to be careful not to pause the process because of the search for a replacement ring);
- loosening the bolt that holds the fork in the yoke - thanks to this, the structure can be removed manually;
- Next, you will need to loosen the bolt securing the shock absorber rod;
- remove the boot and the retaining ring of the feather from below;
- you need to turn off the headlight, which prevents you from removing the remaining elements;
- Place two containers of about 0.5-1 liters near the motorcycle (with a sufficient diameter so that nothing falls on the floor);
- the nuts are unscrewed using a spanner;
- the seals are retracted to the side;
- the fork pipes must be directed into containers to drain the oil - in order for it to flow, you need to unscrew the rod axles;
- dismantling the supporting and sliding pipes.
The main difficulty of the procedure is that the feathers may not be pulled out from the places where they are attached. This can be solved by turning the nut in the opposite direction, as well as by lightly hitting it with a wooden object. If it doesn’t help the first time, you should do it again - the disassembly procedure will be much easier. After replacing the oil seal, boot and other elements that have become unusable, you can reassemble the motorcycle - all operations are carried out in the reverse order.
It is worth considering that when replacing oil seals/boots, you cannot use abrasive tools to clean adjacent elements, otherwise you will have to change not only the oil seals in the foreseeable future - the parts are treated with a special coating that protects against premature wear. Before installing the oil seal in its place, it will be necessary to process this element inside and outside, eliminating premature obsolescence.
Useful videos on the topic:
Ural/Dnepr. Bearings and their imported analogues. Oil seals.
Dear Colleagues, Brothers! I decided to write another article on the selection of bearings for the Urals and Dnieper to help you. I work for a bearing company, so you can rest assured of my knowledge and understanding of this issue. I think that my experience and information that I want to share with you will be useful to you.
TABLE OF BEARINGS FROM THE MANUAL : Motorcycles Ural Dnepr. Operation and repair. (Initial information)
The electronic version of the manual can be viewed here https://v-karbyrator.narod.ru/motocikly-ural-dnepr-ekspluataciya-i-remont…
BEARING SELECTION TABLE . (slightly modified, repeats the previous table, taking into account additions and corrections)
All POSSIBLE ANALOGUES (in blue) can only be used with modifications to the design!
ROLLERS in the gearbox 5x12 only in the drive gearbox (differential) 3x15.8 gearbox (driven gear wheel hub)
TABLE OF CONFORMITY OF IMPORTED ANALOGUES WITH DOMESTIC ANALOGUES . https://bearing-service.ru/info/table_ob/ Instead of the last two zeros, we substitute the diameter of the shaft divided by 5. Example In the corresponding line of the table we substitute Shaft 25 25/5=5 we substitute 200+05=> 205 = 6205 Shaft 50 50 /5=10 substitute 300+10=> 310 = 6310
————————————————————————————— TECHNICAL INFORMATION ABOUT BEARINGS ————————————————— ———————————- DRAWINGS AND DIMENSIONS OF BEARINGS BY MARKING (enter the designation in the line - Search by designation) IMPORTED https://www.skf.com/portal/skf_ru/home/products?maincatalogue=1&lang =ru&n... IMPORTED NEEDLES https://iko-bearings.ru/podshipniki/ DOMESTIC (by marking) https://autoshtamp.ru/encatalog.phtml For sizes on the same site, go to the tab - DIRECTORIES / TECHNICAL SEARCH
—————————————————————————————————————————————— TOLERANCES, LANDINGS, DESCRIPTION BEARING TYPES, DRAWINGS, DIMENSIONS ———————————————————————————————————————————— — Look HERE (download — General Catalog) https://www.pkspb.ru/support/catalogues/skf/
—————————————————————————————————————————————— DECODING MARKINGS AND LETTER DESIGNATIONS BEARINGS ——————————————————————————————————————————————— I describe the interpretation of bearings with a ball bearing groups, since ball bearings are generally more common in the motorcycle industry.
IMPORTED BEARINGS LETTER DESIGNATIONS
2RS - contact seal on 2 sides made of rubber, reinforced with sheet steel (and various variations) RS - contact seal on one side made of rubber, reinforced with sheet steel (and various variations) 2Z - protective washers made of metal on both sides (and various variations) Z – protective washers made of metal on one side (and various variations) C3 – increased thermal gap (for high rotation speeds and temperatures) As a rule, C3 is used at high speeds, or when the temperature from adjacent parts is transferred to the bearing at a temperature of more than 70-80 degrees (from 70-80 to 100), usually from the shaft. The thermal conductivity of housings is almost always higher than that of shafts; therefore, the temperature of the inner ring of the bearing and its rolling elements is 5–10°C higher than the temperature of the outer ring. C3 and C4 are needed to prevent the bearing from jamming due to overheating. N, NR - retaining ring with soda groove (NR - complete with retaining ring) Separators: Steel (J), Brass (M), Polyamide (TN9) - textolite.
Example decoding: 6204-2RS/С3 (analogue 76-180204) 2RS - contact seal on 2 sides made of rubber, reinforced with sheet steel C3 - increased thermal clearance 204 - standard size of the bearing in internal and external dimensions
— I RECOMMEND installing bearings with increased thermal clearance C3 for high rotation speeds and temperatures
— Of the normal imported bearings, I recommend using the following brands: SKF (Sweden), FAG (Germany), IBC (Germany), IKO (Japan) - needle, Asahi (Japan), Nachi (Japan), NSK (Japan), NTN (Japan) ).
——————————————————— DOMESTIC BEARINGS ———————————————————
ALPHANUMERIC CODING OF DOMESTIC BEARINGS (for your understanding): The number of a domestic bearing consists of: Clearance - Accuracy class - Perfix - Number (by size) - Letter designation
ACCURACY CLASS (up to the bearing number) 0, 6, 5, 4, 3, 2, 1 Sometimes, when repairing old equipment, you encounter bearings with an accuracy class indicated by the letters N-, P-, VP-, V-, AB-, A-, SA-, C is the old designation of accuracy classes.
0, 6 - accuracy class for everyday use 5, 4 - accuracy class for machine tools (more accurate) - The rest are not important for us (no point, high cost and not available, it’s better to use imports)
Application of accuracy classes in industry https://nacherchy.ru/klassi_tochnosti.html
An example of decoding numbers 76-180204 A (analogous to 6204-2RS/C3) 76 – gap (corresponds to C3 - increased), accuracy class 6 180 – contact seal on 2 sides made of rubber, reinforced with sheet steel (in import 2RS) 204 – bearing size according to internal and external dimensions A - bearings with increased load capacity
Explanation of perfixes (in the bearing number itself, on the front): 180 – contact seal on 2 sides made of rubber, reinforced with sheet steel (in import 2RS) 160 – contact seal on one side made of rubber, reinforced with sheet steel (in import RS) 80 – protective metal washers on both sides (in import 2Z) 60 – protective washers made of metal on both sides (in import Z) 76 – gap (increased thermal gap C3), accuracy class 6 70 – gap (increased thermal gap C3) 50 – under retaining ring (in import NR)
NOTE In imports as well as in Russia, the last 2 digits are the shaft diameter 04x5 = 20 mm (the last 2 digits are multiplied by 5 with the exception of small diameters up to 10 mm)
COMMONLY USED LETTER INDEX (after bearing number)
L - Separator made of brass (in import M) E - Separator made of textolite (in import TN9)
If there are no letters (L, E, G, D) at the end of the bearing number, the cage is steel. — You can probably only pay attention to the letter indices L, E. — You can ignore the rest. Most likely, these requirements are not met or are not essential.
More details on domestic designations and decoding https://autoshtamp.ru/oboz.phtml https://www.epkgroup.ru/content/blogcategory/82/140/lang,ru/ https://podshipnik.narod.ru/ p2.html/name_bearings23.htm
— From normal domestic ones, you can use bearings produced by: Samara Bearing Plant OJSC (SPZ or GPZ-9) Volzhsky Bearing Plant OJSC (VPZ) Previously, bearings were also supplied for import.
SEAL SELECTION TABLE.
And also the size of the cuffs
Engine Ural 650 and lower valves (50x70, 16x30)
Engine Ural 750 (55x80, 16x30)
Engine Dnepr (60x85, 16x30)
Ural gearbox until 2005 (32x45, 35x48, 20x40, 12x25 2 pcs, slider ring)
Gearbox Dnepr (32x45, 35x48, 20x34, 16x30, slider ring)
Gearbox Ural until 2006 (45x59)
Gearbox Ural after 2006 (45x60)
ATTENTION - check the dimensions of the gearbox secondary shaft oil seal - 35x48 or 36x48. The earlier ones are 35, the later ones are 36.
AUTOMOTIVE SEALS
I came across one link Seals for imported cars https://cars.febi-parts.com/3d.php Interactive catalog In order to view the seals you need to type: Universal parts and parts according to DIN/Seal (click on the picture of the seal and a list will appear )
For each oil seal there are dimensions, material, make of car where it is installed and the code number of the oil seal.
I think this link will be useful.
—————————————————————————————————————————————- I hope that this article is helpful to you will help you select the right bearings and seals! -------------------------------------------- GOOD LUCK TO ALL!!!! ! NO NAIL, NO ROD!!!!!
Advantages of replacing oil seals yourself
The advantages of personally changing oil seals and anthers on a Ural motorcycle are:
- the master/owner knows for sure that the spare parts and consumables are completely new (if it is necessary to replace individual components), which excludes the replacement of spare parts in good condition with those that have been “restored” or simply used without any corrections;
- the ability to modify yourself and adjust all parameters taking into account your own preferences;
- gaining experience in motorcycle repair, which will allow you to personally carry out the entire operation much faster than what can be offered at a service station. Similarly, funds for all work are saved.
The procedure for working on the Ural motorcycle in terms of replacing oil seals is similar to other brands, especially some Dnepr models, so the instructions are suitable for them as well. After replacing the oil seal, the motorcycle will run smoothly without unexpected decreases in speed and other similar problems associated with braking. Oil leakage, grinding noise and unstable vehicle control are completely eliminated. Regardless of the speed, the trip will be comfortable and safe.
5/5 — (2 votes)