In this article we will look in detail at how to reupholster seats with your own hands.
Reupholstery of the interior may be required due to wear and damage to the factory upholstery, as well as due to the desire to change the upholstery material and its color. Reupholstering interior panels and seat upholstery allows you to add individuality to the interior and reflect the personal preferences of the car enthusiast.
Most often, old fabric upholstery is replaced with leather.
To reupholster the interior, you can give the car to professionals, or try to update the interior yourself. A beginner should not expect a perfect result on the first try. Reupholstering seats with your own hands requires certain knowledge, the necessary tools and materials. In this article we will look at basic knowledge on this topic that will help you understand the reupholstering process.
The content of the article:
- Tools needed to reupholster seats
- Types of seat upholstery materials
- Removing and disassembling seats
- Creating a pattern and sewing new upholstery
- Types of seams used when reupholstering seats
- Seat reupholstery with airbag
- Putting on new upholstery and assembling seats
In general, reupholstering car seats with your own hands requires patience and accuracy. Changing seat upholstery is the most difficult process when reupholstering the interior. You need to be prepared to redo unsuccessfully done work. If you take the process of reupholstering seats seriously, you will be surprised how you can transform the interior yourself.
So, where to start reupholstering? First of all, you need to plan the entire process. It is necessary to buy a sufficient amount of material, prepare a workplace, and prepare the necessary tools. It is better to additionally buy less expensive material and practice making seams before starting to reupholster with a new, more expensive material. Seating may require approximately 8–10 square meters. meters of upholstery material. It is better to take material with a reserve. The stock is necessary, since a certain percentage of the material will be spent on scraps and possible errors. Genuine leather, for example, may have some small imperfections, so not all leather can be used.
Tools needed to reupholster seats
- Sewing machine. This is the most expensive device required to create new upholstery. A simple home sewing machine may not be able to handle all materials. It can sew through fabric and artificial leather, but it will not sew through natural leather and several layers at the same time. There may be skipped stitches and displacement of the top layer of material relative to the bottom. The sewing machine must have a special foot (walking foot). It helps sew several layers of fabric without moving them. She seems to be walking, climbing up all layers of any thickness. This presser foot mechanism is designed for sewing thick and durable, multi-layered materials. The “walking” foot synchronizes the advancement of the bottom and top layers when sewing. The material does not wrinkle and the seam is very smooth. Some non-professional home sewing machines may use a special connector to add a walking foot. If you plan to sew upholstery regularly, then you need a professional machine. As a more affordable option, you can buy a used sewing machine in good condition, specifically suitable for sewing upholstery materials. Examples of suitable sewing machines include Consew 206 RB‑4, Seiko STH 88, Singer 211, Juki LU562..
The “walking foot” consists of two independent “legs”. As the needle foot rises, the presser foot lowers and presses down the material. When lowering the foot with the needle, the presser foot rises. When lowered, the foot with the needle is clearly aligned with the material engine below, the needle at this moment makes a puncture and the foot with the needle moves along with the material, as if “walking”.
- Cutting tailor's scissors. They are capable of cutting a variety of upholstery materials such as leather, textiles, vinyl, as well as cardboard for templates. These scissors can be purchased at a specialty store.
- Special pliers for hog rings that secure upholstery. Used to compress these rings. You will also need the rings themselves (before compression they look like staples). As an alternative, high-quality nylon ties can be used instead of rings.
- Nippers for removing old rings that hold upholstery in place. These can be simple wire cutters or metal scissors.
- Long ruler. You will need a ruler at least 1 meter long. You can use a large construction square.
- Chalk. You can use chalk to make marks on fabric and outline patterns.
- Seam ripper tool. It is more convenient to remove seams with this tool, but you can use a blade or a sharp knife.
- Steam generator. Helps remove minor creases from upholstery. Can relax (soften) the upholstery material for easier installation on the seat.
- Hair dryer. If you don't have a steam generator, then you can use a hairdryer. You need to be careful not to bring the hair dryer too close to the skin so as not to damage it. Heating with a hairdryer will also make the skin more pliable.
- Prepare a camera or phone with a camera to take photographs of the stages of disassembling the seat. When reassembling, you will be able to see where and what fasteners were located.
Preparatory stage
The reason for seat repair is either long-term use or an emergency situation that leads to slight deformation. You need to select the appropriate material.
Genuine leather has considerable advantages. While some people pay attention to the beautiful design and natural color, others value elasticity and strength, the ability to withstand pressure without consequences.
The skin really does not harm your health and is able to provide microcirculation of air. The surface will not allow moisture, oil or gasoline to pass through. There is no fading, despite direct sunlight. Manages to withstand hot sun and frost.
Alcantara has become a worthy rival. The developed artificial suede is close to the strength and wear resistance of a natural product. The surface is soft and pleasant to the touch, despite the roughness and texture.
Dirt-repellent properties are considered important, preventing the seat from easily getting dirty while traveling. Alcantara is also breathable and does not require special care. The color scheme can be the most unexpected.
A fairly standard set of tools is assembled. You need screwdrivers, wrenches, a hammer, a stapler, staples, a marker, scissors, sandpaper, a spatula and foam rubber. Find a sewing machine with a retractable foot and a hair dryer with power. Construction is best suited.
Workplace
Do-it-yourself seat reupholstery requires sufficient space to disassemble and place the removed seats.
Take the time to design your desktop. It should be even, smooth and large enough to easily roll out the material on it. The table should be well lit. It will be convenient for the material table to be directly connected to the table on which the sewing machine is installed. So, when working with large pieces of upholstery, the table will support the material while sewing. It will be convenient to mark and cut the material on the table.
Do-it-yourself seat reupholstery. What do you need to know?
Sewing on a sewing machine is the most difficult part of interior restoration. If you have no experience, then it is better to practice on unnecessary matter, and also, if possible, you need to ask a professional to help you understand the intricacies. If you want to engage in interior reupholstery on an ongoing basis, as a business, then a lot of practice is required to do the job efficiently and quickly. Forming the skill of sewing on a machine can take more than one month. Again, the rate of learning varies from person to person.
To understand the process of reupholstering the interior in all its intricacies, you need to study a lot of information on this topic.
Types of materials for seat upholstery
You need to decide what material you want to use to replace the old one.
The material chosen for seat upholstery determines the level of comfort, wear resistance and ease of maintenance. There are many materials. In general, it all comes down to the choice between textiles and leather.
Let's consider the materials most often used for upholstering seats, their advantages and disadvantages.
- Genuine leather is the most expensive material. This material is timeless and fashionable. It is practical, aesthetic and durable. Leather gives an expensive look to the interior. It is easier to clean than fabric and is more resistant to stains from various types of dirt. Leather also has its drawbacks. It heats up quickly in hot weather and remains cold for a long time in winter. Imprints on the skin from heavy objects can remain for a long time. The skin is susceptible to sharp objects, and over time it rubs and cracks. Modern genuine leather has a protective layer. Modern dyes have good protective properties. Now urethane paint can be used for protection, which is very wear-resistant and flexible, not prone to fading and cracking. In high-quality leather, the dye is not only on the surface, but passes through the entire layer. This provides richer color and increased wear resistance. Caring for natural leather is more difficult than caring for its artificial counterpart. To do this, you need to buy special cleaners and conditioners. You can read more about this in the article “leather interior care.”
- Faux leather. A very versatile material that can look like anything. It can be either an imitation of regular, crocodile or snake skin. The key factor determining the quality of artificial leather is its harmlessness, the level of VOC (Volatile organic compounds). The gap between real leather and synthetic leather has narrowed as the aesthetic and tactile properties of chemically produced materials have improved significantly. Many manufacturers are moving towards faux leather for ethical, practical and financial reasons. Faux leather is easier to clean than real leather.
- Alcantara. It is an artificial ultra-fine suede. Alcantara is pleasant to the touch and more functional, unlike suede. It offers better stain and abrasion resistance, as well as fire and fade resistance. Like all materials with pile, Alcantara has a directionality (direction of the pile). This should be taken into account when sewing. This will be discussed in more detail in this article below.
- Textile. This is a cheaper option. It gets dirty more easily and absorbs liquid. The fabric can have different textures, colors and patterns. Cloth upholstery in most cars is usually made of nylon or polyester. These are wear-resistant and affordable materials.
- When reupholstering the interior, you can combine different materials.
What causes saddle wear?
First of all, the material is strongly influenced by sunlight. Leave your pet in the open air for a couple of hours, and ultraviolet rays cause the rich color to fade. The heated upholstery also expands. Therefore, when the owner sits on the seat, small folds form, due to which the material begins to crack and wear out.
Household factors also influence. Accidentally catching a rivet from jeans can damage the integrity of the fabric. After this, air enters the resulting hole and bubbles form. In addition, long-term use causes dents.
Soft backing
A soft lining can be glued to the back of the upholstery. It is especially relevant for the skin. This is a foam material with fabric. The material helps to hold the thread, and it does not fall through the material when sewing. This soft material performs three functions. Firstly, it helps to eliminate wrinkles on the fairly thin upholstery material, and secondly, the soft lining gives better tactile sensations to the surface. Thirdly, this material provides a smooth, even appearance and fullness of the upholstery after installation.
The soft backing is glued with special glue from a can with the soft part to the upholstery, and the fabric outside. The principle of gluing and leveling is the same as when repairing ceiling trim. In addition to gluing, you can additionally stitch along the very edge of the upholstery part. This way the backing is guaranteed not to come off. After this, the excess along the edges of the upholstery part is cut off and the individual upholstery piece can be considered finished.
Threads for sewing seat upholstery
Threads can be cotton, nylon, polyester, dacron (chemical fiber).
The strongest are dacron threads, followed by nylon (better known in Russia as nylon) and polyester (polyester).
Cotton threads are not strong enough and break down quickly, so they are not suitable for upholstery.
For seats, it is necessary that the seam be able to stretch under the weight of the person sitting and then recover again. Polyester and nylon threads have these properties. These two types of threads are very similar in appearance and in technical properties such as strength and elongation. Polyester is better than nylon when you need to sew items that will be exposed to sun and moisture for a long time. That is, they are better suited for outdoor use. Nylon is considered a little more durable. Polyester and nylon threads are most often used for sewing seat upholstery. The thickness of the threads must be selected depending on the type of material.
As you know, most modern sewing machines form a seam of two threads. One thread comes from the top, from the spool, and the second from the bottom, from the bobbin. The same type of thread should be used for the bottom and top stitch. If you use a different type, then nylon thread, as it is stronger, can cut through polyester thread.
What upholstery color should I choose?
Everyone has the right to choose the color they prefer. But still, you should not lose sight of the moment of combining color with other interior details. An important rule is to avoid mixing cold and warm tones. Next, consider combinations of light and dark colors. We all know that light colors make the interior look larger. They also reflect light more than they absorb light, so they fade less and keep the interior cooler. However, black skin color is universal. It’s difficult not to please someone with this color or to spoil the interior. It will look good with interior details that have a different, even contrasting color.
A combination of colors and materials is also popular. How many times have you heard the statement “less is more?” Don't try to use many colors, textures and sewing details in a design at the same time.
Bright colors such as bright red, yellow, and bright blue tend to fade quickly. Therefore, it will be better to use calmer tones. When creating a salon using materials with unusual shades, you need to take into account that this is everyone’s individual taste and not everyone can appreciate this preference when selling.
Removing and disassembling seats
To reupholster the seats, you must first dismantle them, remove them from the interior to the workplace, disassemble them and remove the old upholstery. Each car interior has its own characteristics. Therefore, it is impossible to create one instruction that is universally suitable for all seats. Let's look at the main points that are similar for most cars.
- Most front seats are fairly easy to remove from the interior. The front seats slide on the tracks (slides). They are bolted to the floor at the front and back. Typically, the places where the slide is attached to the floor are covered with plastic covers. To get to the bolts, you need to move the chair to its extreme position (forward or backward, in turn).
Front seat mounting
- Before removing the seats, you must disconnect all electrical wiring plugs at the bottom. If the seats have side airbags, you need to disconnect the battery and wait 3 minutes before disconnecting the connectors at the bottom of the seats.
- Carefully remove the seat from the interior, do not scratch the plastic trim of the interior with the slide. You can wrap the sharp corners of the seat slide with rags before dismantling. This will protect the interior from accidental scratches. The second front seat is removed in a similar way.
- To remove the rear seat, you usually need to first remove the lower part of the seat. There are two different methods that are used to secure the bottom of the rear seat. These are two bolts or two latches on the front that secure the seat to the floor. You need to unscrew or snap off the bottom of the seat and pull it out. After removing the lower part, the bolts securing the rear seat back become visible. After unscrewing them, you need to move the seat back up and remove it.
- Disassemble the seat. You will need a large area in which to work comfortably with the seats. This can be done either on a large table or on the floor. First you need to disconnect the seat back from the seat itself. You need to fully recline the backrest with the seat mechanism. Remove the skids. To disassemble the front seats, it may be necessary to remove plastic trim parts.
- Before removing the upholstery, the headrest must be removed.
- Remove the old upholstery from the seat and backrest. The upholstery is usually attached to the seat frame and soft base with special staples. There can be quite a lot of such staples (rings). To remove the old upholstery you need to cut off all these rings. They are not easy to cut. You can use a special tool, wire cutters or metal scissors. It is necessary to draw a diagram of the location of the fastening rings so that, when installing new upholstery, you know where to install the new brackets. During disassembly, you can also take photographs of the stages. This way, you will know which bolt was unscrewed and where it came from.
- The upholstery can be attached with rings to metal rods built into the upholstered part of the seat structure. In this case, the seat upholstery must be lifted from the edges to see the fastening points, and all fastenings (rings) must be cut off. Instead of rings, there may be textile fasteners (Velcro), then you just need to pull the upholstery to remove it.
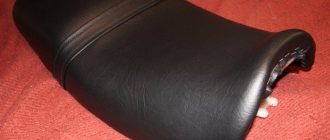
How to make a seat for a motorcycle.
How to make a seat for a motorcycle? This is a question asked by many motorcycle owners who decide to improve the appearance of their bike, redo the frame, or build from scratch. After all, the appearance of many production motorcycles leaves much to be desired, and in order to make the bike stand out from the crowd, many people tune the motorcycle by replacing serial parts with more exclusive ones. But it’s almost impossible to find a great-looking standard seat, or one that fits the motorcycle without modifications, on sale. And the saddle is exactly the part that should be made specifically for each motorcycle and each rider. In this article we will look in detail at a couple of options for making a motorcycle seat with your own hands and what you will need for this.
I have already written about how to restore a standard standard motorcycle saddle, worn out by life, by re-upholstering it, and those interested can read about it here. And in this article we will get acquainted with a couple of technologies for making a motorcycle seat from scratch.
You can, of course, order an exclusive saddle for your favorite bike in some workshop. But if you find one, the price for a high-quality exclusive saddle will not be small, and in many small towns there are simply no competent workshops. And if there are, then only those sewing studios that can only sew the saddle shell (cover).
And to the question: will they make the base of the saddle from metal or plastic (and the soft upholstery) - they may look at you like you’re crazy, and rarely anyone in ordinary sewing workshops is able to do this competently from scratch. Therefore, it makes sense to try to make a motorcycle seat with your own hands, and if you study this matter in more detail, you can achieve a good result.
But already having some experience in this matter and going through a lot of information on the Internet on making a seat for motorcycles, it became clear to me that most of this information is quite superficial, and many of the nuances about how to properly make a seat for a motorcycle are not described at all.
This article will describe exactly a step-by-step guide on how to competently make a saddle for your bike from scratch, taking into account the frame configuration and general shapes. And although only two options for seats and their shapes will be considered, on their basis and using the same technology it will be possible to make a saddle of almost any shape, for any frame and the driver’s fifth point. In addition, the same shape, color and size of the saddle cannot be liked by everyone, as they say, there are no comrades according to taste and color.
I will not list what tools and materials will be required in this matter, there is no point, since they will be described during the work process. So - let's go.
How to make a seat for a motorcycle - the first option.
With this method, the base of the saddle is made of homemade fiberglass. You can, of course, make the base of the saddle from sheet metal, and I had to do this (I like working with metal more than with plastic). But ensuring that the metal base accurately follows the contours of the frame is not so easy for beginners, and some people who do not have the appropriate tools and devices for this will have to bend the edge of the metal base with a hammer directly on the frame to stiffen the base of the saddle. And if the frame is painted, the paint will be damaged.
To impart rigidity to the metal base of the saddle, you can weld a rod or thin tube along the contour, but you will have to precisely bend them along the contour of the base of the saddle and tack it by welding. Or bend the edge of the metal base of the saddle using a zig machine.
And in general, you can give the base of a seat made of a steel sheet any convex anatomical shape (for example, as in the photo on the left), and according to the laws of sapromat, the convexity and the edge curved along the perimeter will give rigidity to even a thin steel sheet. By the way, I showed one of the options for a durable and lightweight bobber saddle base in a video on my suvorov-custom channel (I publish this video just below). But firstly, such a saddle is only suitable for old-school or bobber-style choppers, and secondly, this method requires some tools for working with sheet metal, some of which are described here, or here, or shown in the video on my channel (a little higher). And not every beginner has such tools.
Of course, there are several options for making a saddle base, and each depends on the frame configuration, the style of the motorcycle, personal taste, the availability of appropriate tools and equipment, and therefore everyone chooses a method based on their skills and capabilities. But for beginners, below I will describe a simpler method of making a fiberglass saddle base, which allows you to make a good saddle, even without expensive equipment.
And in this way it is easier to achieve an exact repetition of the contours of the frame with the base of the saddle, and this is important, since if there are no gaps between the base of the saddle and the frame, then the seat will lie and look harmonious on the frame like a glove. For example, for high-tech style choppers, a saddle is required that exactly follows the contours of the frame (for old-school style choppers this is not important and for them the second saddle option will be described below).
And so, as I already said, for beginners and those people who have neither equipment nor skills in working with sheet metal, it will still be easier to work with fiberglass, which will be described below.
To begin, we tightly cover the frame in the area of the saddle (as in the photo on the left), first with masking tape, and then with ordinary transparent stationery tape, or black plastic tape, as in the photo below.
Masking tape is not so sticky and it will then allow you to peel off the frozen base of the saddle from the frame. And the office plastic tape over the masking tape is needed so that the epoxy resin does not saturate the masking tape and stain (not stick) the frame (especially if the frame is painted).
After completely covering the frame with tape, you can dilute epoxy resin (10 parts of resin and one part of hardener) and soak pieces of fiberglass with resin, apply them to the tape (as in the photo). There should be enough layers to obtain a fiberglass shell thickness of at least 3 mm.
The number of layers depends on the thickness of the fiberglass and, of course, the thicker the fiberglass, the fewer layers will be required, but thick fiberglass is not very convenient to work with (thin fiberglass better follows the outline of the frame and the protruding battery if it sticks out). I have already written in more detail about working with fiberglass here and here, so I will not repeat myself.
After the epoxy has hardened, you can use a marker to draw a line along the contour, along which the excess fiberglass will subsequently be trimmed. By the way, the frozen fiberglass base can already be peeled off and removed from the frame, for more convenient work on a table or workbench.
Now you need to decide where to drill holes in the plastic base of the saddle, for the bolts securing the saddle to the motorcycle frame, in accordance with the holes in the frame, or based on where the lugs with holes for the mounting bolts will be welded on the frame.
It is also useful to weld rectangular sheet metal plates onto the heads of the mounting bolts and after that, inserting the bolts from the inside of the base (so that the threads of the bolts stick out to the frame), the bolt plates are covered with fiberglass and coated with epoxy resin (that is, the bolts are glued into the base of the saddle so that the threaded part of the bolts sticks out towards the frame.).
The next operation will be sanding the plastic base with sandpaper in order to create a fine scratch on the surface of the hardened plastic, which will improve the adhesion (adhesion) of the glued polyurethane foam.
We cut and glue polyurethane foam so that it fills the entire surface of the saddle, and then trim the excess material along the contour. It is better to trim the contours of the plastic base (along the lines marked with a marker) before gluing the polyurethane foam.
If you are going to ride long distances often and want a softer saddle, then you can also glue on a layer of sheet felt (if thin, then two layers), or other material that you find, but I don’t recommend using foam rubber, as it dents a lot and crumbles over time. .
It is better to look for a sheet of rubberized foam rubber for the top layer (the kind that is used on the factory seats of production motorcycles or scooters).
After gluing the additional layers, of course, we cut off the excess material along the edge of the saddle base and round the edges with a grinding wheel.
Excess material should not stick out beyond the edge of the base, and if necessary, everything is trimmed (even small tubercles), it should turn out something like in the photo.
Saddle pattern.
Now all that remains is to make a pattern, cut and sew the leather. For many beginners, this is not so easy to do, but the same masking tape will help you make an exact pattern that follows the contours of the saddle.
We completely cover the soft surface of the saddle with it.
Next, use a marker to mark the lines of future seams along the contours of the bends, as in the photo on the left. At the bottom of the saddle, we also draw a line with a marker along the inner bend, as in the photo below.
Now all that remains is to carefully cut out the tape with a blade along the lines outlined with a marker and then remove the patterns from the saddle, and we will get accurate saddle patterns from tape, which we transfer to the skin.
All that remains is to cut out pieces of leather according to paper patterns and check them by attaching them to the saddle, and then sew them together.
For those who don’t have a sewing machine, we take the finished patterns to the nearest studio for stitching.
The last operation is to put the finished cover on the saddle and secure the leather to the back of the saddle.
There are several ways to secure leather, you can use good glue, rivets, but a stapler is also suitable for plastic.
But before you attach the skin to the plastic with staples, coat it and the base of the saddle with glue, it’s more reliable.
And when sticking and shooting, ask an assistant to stretch the skin to prevent the formation of folds.
Although if an accurate pattern is made, then there should be no folds at all.
But small folds can be easily removed by stretching the leather and shooting it with a stapler from the back of the saddle base.
We install the finished saddle on the motorcycle and admire the result.
How to make a motorcycle seat in old school style - the second option.
This option is simpler and more pleasant to work with, I don’t know for anyone, but for me for sure, since the work will be done with real chopper materials - steel and thick leather (saddle cloth). But such a saddle is not suitable for motorcycles intended for long trips, as it is not comfortable enough.
But as they say, beauty requires sacrifice, and such a saddle looks quite elegant on cracker choppers, bobbers, and indeed on real iron choppers of the old school of customization (old school).
To begin with, again, you should decide on the material for the base of the saddle. You can make the base from plastic 6 millimeters thick, but it is better from sheet steel, since durable plastic is not so easy to find. And for old-school choppers, steel is more suitable in style. Although some customers ask that the steel be covered with a carbon-look film, and this option will be shown in the photographs below.
In addition, a variant of manufacturing a saddle will be described, for which on a metal base it will not be necessary to bend the edge to impart rigidity. The edge is bent if a thin steel sheet is used (1-1.5 mm - as in the very first photo at the beginning of the article).
And when using a steel sheet with a thickness of 4 - 5 mm, the sheet of such thickness is already quite rigid and without any stiffening ribs or bent edges. It just needs to be heated and slightly bent to the shape of the future saddle.
If a steel base made of a sheet 4-5 mm thick seems heavy to someone, then you can lighten the base of the saddle by drilling many holes in it. And then cover the bottom of the saddle completely with leather or carbon-look film and the holes will not be visible even from below. But who cares.
But before we start working with metal, we first cut out the saddle template from whatman paper, fold it in half to check symmetry (we trim it if necessary), then try it on the motorcycle.
If the size and shape of the paper base of the saddle are still satisfactory, then place the paper template on a metal sheet and trace it with a marker.
Next, we cut out the metal along the outlined contour. After cutting, we process the edges of the saddle base with a cleaning disc (to remove burrs), and for those who have the luxury of a grinder, then, of course, it is most convenient to clean and smooth the edges on it.
We apply the saddle base cut out of sheet metal to the motorcycle, check it, and if the dimensions and shape are satisfactory, then mark the places where the saddle is attached to the metal base (more on saddle attachments below).
Next you should make a template for the seat leather and paper will help here again. We apply a sheet of paper to the first paper template or to the cut and processed metal base of the saddle and trace the sheet of paper with a marker so that the drawn line deviates from the edge of the iron (or from the edge of the first paper template) by about 12 mm. If you want a thicker saddle (place more soft material), then make the allowance larger than 12 mm.
We cut out a second template for the leather along the contour, which should be one centimeter larger along the edge than the iron base of the saddle. We apply the second paper template to thick leather (it is better to use 4 - 5 mm leather, the so-called saddle cloth) and trace it with a marker, then cut it out.
Using the second template, you should cut out another leather piece as in the photo on the left, which will be installed under the base of the saddle (bottom).
We put both cut out leather parts together and along their contour (perimeter), stepping back from the edge by about 5 mm, we punch many holes, as in the photo on the left (we use a punch with a diameter of 2 - 3 mm), which will later be needed to sew both leather parts together. on the saddle.
In the metal base, you should also step back from the edge by about 10 mm and drill holes around the perimeter (the diameter of the drill is a couple hundred hundred more than the rivets that will be used), the distance between the holes is approximately 30 - 40 mm. Drilled holes should be countersunk (remove burrs).
At the bottom of the saddle base, you should weld the mounting bolts for the saddle springs (or threaded plates), and which bolts and in what place to weld depends on the springs that you find and on the fastening parts (as well as on the mounting points on the frame) . But usually it is enough to weld three M8 or M10 studs in the three drilled holes - they are visible in the photo below (one stud in the front and two in the back), which are enough for reliable fastening.
After this, you can prime and paint the base of the saddle to let it dry while you work on the leather.
And some also cover the lower part of the base of the saddle with a carbon-look film, black plastic (as in the photo on the left) or just thin leather, but here, as they say, it’s a matter of taste and color.
In addition to thick leather for the saddle, you should cut polyurethane foam to the shape of the base of the saddle and round its edges, as in the photo. But it’s too early to stick it on the base of the saddle. First, rivet the bottom leather piece to the bottom of the saddle base (photo on the left).
And after that we glue the polyurethane foam (see photo) to the upper part of the base of the saddle and round off its edges using coarse sandpaper or a sander.
Now all that remains is to cover the polyurethane foam with leather and sew the leather parts together on the saddle, and paint the leather. To do this, you need a powerful sewing machine, and many people don’t have one.
But you can do without it, and that’s why we used a punch around the perimeter of a hole with a diameter of 3 mm.
Through these holes, the leather parts are sewn together using leather cord.
Next, the fastening elements of the seat and springs are screwed with nuts to the pre-welded studs.
You can make fasteners yourself, or you can order them from catalogs. The same springs can be ordered as regular bicycle springs, or pin type ones.
In general, there may be other options for connecting parts, for example, using grommets, as in the photo on the left. Or using rivets, as in the photo below. Here, as they say, whatever suits anyone's liking.
Well, there are even more ways to apply designs on thick skin - this includes embossing, engraving with special pens, and even tattoos using a special machine, as shown in the video below this article.
Here the flight of imagination is not limited and this is what makes this type of art such as customization interesting.
Of course, there may be other ways to make a motorcycle seat from scratch, but it’s impossible to describe everything in one article. But I still hope that many beginners, having read this article, will now find the answer to the question - how to make a seat for a motorcycle, good luck to everyone!
If this article is useful to you, please share it on social media. networks by clicking the buttons below. Thank you.
RќСЂР°РІРёС‚СЃСЏ
Creating a pattern and sewing new upholstery
- If the old upholstery is not stretched, then it can be used as a template. To do this, it is ripped apart at the seams into its component parts. Before disassembling the old upholstery into parts, you need to make notes on each part, where it comes from, which part is adjacent to what. Each piece is placed on new material and a weight is placed on it so that it fits tightly. Next, part of the old upholstery is outlined along the edge.
- When outlining old upholstery, if the new material is face down, then the old upholstery must be face down, otherwise you will end up with a mirror image of the old upholstery, which will only be suitable for sewing with the back side facing out.
- You can first make templates from cardboard or thick paper so that you can use them to cut out parts for the new upholstery from the new material.
- Each new piece of upholstery also needs to be marked which part of the upholstery it belongs to and which edge is adjacent to what. The marks help to align the stitched parts evenly. Some materials can stretch from edge to edge, corner to corner. The marks help control the tension along the seam when sewing.
- You can make small cutouts at the marks. This way the marks will be visible from the front side. Marks/cuts are especially important on curved edges.
- When all the parts of the upholstery from the new fabric have been cut out and the soft backing has been glued and sewn, they need to be sewn together using a sewing machine. Use the correct needle and thread depending on the upholstery material you choose.
- Old upholstery will serve as a good hint for creating new one. Study how the seams were made, with what allowance, and reproduce them on the new upholstery.
- The seam allowance (the distance from the edge to the seam line) can be controlled using the sewing machine, and you can also mark the seam line before sewing. Marking the seam line allows you to better concentrate on the seam itself while sewing, without being distracted by special marks on the sewing machine.
Masking tape pasted at the required distance from the needle makes it easier to control the required seam allowance (distance from the edge to the seam) and make an even seam.
- Start by sewing simpler upholstery from the headrest or armrest. Already at this stage experience will be gained.
- Pile material has directionality. The direction of the pile is usually indicated on the back of this material with an arrow. If you run your hand over such material in the direction indicated by the arrow, the pile will smooth out. If you do this in the opposite direction, the pile will “rise.” Incorrect orientation of parts of such material relative to each other can cause a difference in shade. When installing such material on panels, the direction of the pile should be downward (the arrow will point down the panel). On seats, the backrest pile should “look” down, towards the seat itself. On the seat, the pile should be located towards the back of it.
Required materials and tools
Before repairing a motorcycle seat, you need to collect everything you need for the job.
List of necessary resources for reupholstery:
- Seat material. Of course, it is best to take leatherette; it is great for all types of designs. However, if desired, any other type of matter that you like will do. So feel free to choose what you think will be perfect. The only thing worth emphasizing is the slipperiness of the material. To avoid falls and discomfort, you should take rough or rubberized material.
- Base (soft part of the seat). Even foam rubber will do for comfortable movement. Any soft base that restores its shape is perfect for these purposes. The layer thickness should not be large. 1-2 centimeters is enough.
- Glue. You need a durable and easy-to-set viscous adhesive. Such as “Moment” will do.
- If the seat is designed for two people and there is a handle (border), then cardboard will be needed to create a durable strap. You can also use a suitcase handle or something similar as a border. Of course, the handle has more of an aesthetic purpose than a safety feature. However, its presence is necessary due to the conditions of operation and transportation of passengers .
- a sewing machine will be needed to give the material the shape of the seat and firmly secure the material to the base;
- hammer, for hammering in staples after tightening;
- furniture stapler and staples for it;
- pliers to remove old staples and for other small jobs.
You can not only reupholster the old seat, but also remake it for greater comfort. Having come up with seat options for a motorcycle, sketch out a small sketch to make it easier to imagine the essence of the work.
After purchasing everything you need, you can get to work. So, how to cover a motorcycle seat:
- First you need to remove and disassemble the old seat. In most cases, to remove the saddle, the passenger handle is unscrewed and the brackets are removed. The base is almost always made of plastic. Therefore, do not use much force when soldering the seat, as this may break the frame.
- After removing the chair, disassemble it into its components. If the seat frame is in excellent condition, it can be used further. Otherwise, it is worth sanding it down and soldering it in places where cracks and dents have formed. Separate the cover and passenger handle. Carefully unravel the old seams with a razor blade. Most handles are made on the basis of nylon and leather braiding and mounting bolts.
- After disassembly, cover the frame with foam rubber. If you make a layer that is too thick, you will fall through while riding, and vice versa, a layer that is too thin will provide rigidity. It is recommended to make the thickness approximately 1-2 centimeters.
- Spread the glue evenly on the foam and base. After a short wait, 2-4 minutes, connect both parts.
- Wait until the glue has completely dried, then remove the excess foam from the sides of the seat.
- Now take the old seat cover and trace it with chalk or a piece of soap on the new material. It is worth making a sketch with a reserve. Then cut out the sketch.
- Try it on using a light stitch of thread.
- Machine sew the fabric with two seams for greater strength.
- Cover the passenger handle. Cut out the material as well, with a margin. After gluing, cover the handle on both sides, this will add beauty to the product.
- When the motorcycle seat cover is finished, put it on the saddle and tighten it well so that there are no folds and the fabric is elastic. Before stretching, spread a thin layer of glue on both parts.
- Nail the cover from the inside with furniture staples. Then pull it from the center to the edge, trying to ensure that the folds go towards the corners. This work process is difficult to complete alone, so ask someone to help you.
- After tensioning, excess sections of material are cut off, and the staples are driven into the frame until the end.
- Now install the handle. Measuring in advance at what length the ends need to be bolted. It is better to tighten it as much as possible so that there is less gripping and stretching.
- After cutting the ends of the belt, burn them with a lighter to prevent the material from unraveling. After this, secure the handle from inside the seat with bolts.
This completes the process of reupholstering the seat. As you can see, you should choose the material with which the least problems will arise. It should be moderately elastic, smooth and take shape well at angles.
If you don’t want to do this yourself, you can always contact a studio, where for a small amount, 2-4 thousand rubles, your seat will be completely reupholstered with high-quality and stable material.
Types of seams used when reupholstering seats
The main point when reupholstering the interior is to create seams using a sewing machine. Practice as much as possible. You need to learn how to easily make even seams on a sewing machine.
Let's look at the main types of seams used when reupholstering car seats with your own hands. How the seams are made will determine not only their appearance, but also their strength.
Basic seams:
Right side of a simple connecting seam (stitch seam)
- Basic connecting seam (so-called stitch seam). Two parts of the material are applied to each other with their front sides, a certain indentation is made from the edges, and the materials are sewn together with a single seam. The edges on the reverse side can be folded to one side or each edge separately in its own direction, ironed and glued. This will create a flat seam.
- Adjustment seam. It is done as follows. First, two parts of the material are taken, joined with the front side and sewn together with a distance from the edges of approximately 1.5 - 2 cm. In the second stage, we move the sewn part to the side, the front part of the material remains on top and one edge hangs over one of the parts of the material (see photo). A second seam is made along it. This seam will be visible, so it needs to be made even. It must pass through all layers of material underneath.
Adjustment stitch
- The French seam (double) begins in the same way as the previous seam. Two pieces of material are sewn together, right sides pressed against each other. The distance from the edge should be greater (2–2.5 cm). Next, on the reverse side, between the edges of the two parts, a strip of the same material (or stronger, but thinner, so as not to increase the thickness of the seam) is sewn with two seams. The seams go through all layers of materials. For convenience, before sewing, the strip can first be glued to the material. This strip will not be visible from the front side. It reinforces the main seam. The two seams on the front side must be smooth and symmetrical relative to the junction of the two materials. To improve the appearance of the seam, thicker threads are often used. The French seam is often used in the manufacture of upholstery made of natural and artificial leather. When sewing thinner materials and in sewing other than upholstery, the French seam may have a different technique. This seam turns out beautiful, but not the most durable. All threads and folded edges of the material are exposed to sun and abrasion.
French (double) seam
- Seam with elastic cord insertion (edging seam). The purpose of the cord is to create an even and tightly wrapped material. After this, it is included in the process of creating a common seam. This requires a special cord and setting the sewing machine in a certain way. First you need to align the base material and the strip with the cord and carefully sew them (3 layers are sewn). Next, the second part of the material is placed face down on the stitched strip of material with a cord and sewn. To properly stitch the insert with the cord, you need to use a special foot on your sewing machine. This allows the sewing machine to hold the cord and fabric close to the needle for more precise stitch control. This seam can be called the most durable. The cord provides protection to the seam and edges of the material, eliminating the destructive effects of the sun and abrasion. After the insert wears out, it can be replaced with a new one.
Seam with cord insertion (edging seam)
- When making new upholstery, non-structural, decorative seams can be sewn. This is done to add detail to the upholstery design. There are two basic ways to create such seams. The first and most common is to simply stitch a seam through the upholstery to which the lining is glued. A certain relief is created, as the seam presses the upholstery, compressing the soft lining. The second method is a folded seam. First, a seam is made as described in the first case. Next, the material is folded along the seam line, right sides facing each other. Then a second seam is sewn on the reverse side, approximately 3 mm from the edge of the fold. This way the front side looks like two separate pieces are sewn together (see photo). In addition to an additional design element, such a seam has practical benefits. It is hidden and indestructible.
Decorative seams
- The beginning and end of the seam must be secured so that the seam does not unravel. This is done by the reverse function on the sewing machine. You need to sew 1 cm forward, then 1 cm back and continue the seam. It turns out that 3 lines go through one place and the thread is secured. Also, modern models may have a built-in thread fastening function. On sewing machines that do not have a built-in reverse or thread-locking function, you can do the same thing by raising the foot, leaving the needle down and turning the fabric 360 degrees.
Required materials and tools
Before repairing a motorcycle seat, you need to collect everything you need for the job.
List of necessary resources for reupholstery:
- Seat material. Of course, it is best to take leatherette; it is great for all types of designs. However, if desired, any other type of matter that you like will do. So feel free to choose what you think will be perfect. The only thing worth emphasizing is the slipperiness of the material. To avoid falls and discomfort, you should take rough or rubberized material.
- Base (soft part of the seat). Even foam rubber will do for comfortable movement. Any soft base that restores its shape is perfect for these purposes. The layer thickness should not be large. 1-2 centimeters is enough.
- Glue. You need a durable and easy-to-set viscous adhesive. Such as “Moment” will do.
- If the seat is designed for two people and there is a handle (border), then cardboard will be needed to create a durable strap. You can also use a suitcase handle or something similar as a border. Of course, the handle has more of an aesthetic purpose than a safety feature. However, its presence is necessary due to the conditions of operation and transportation of passengers .
You can not only reupholster the old seat, but also remake it for greater comfort. Having come up with seat options for a motorcycle, sketch out a small sketch to make it easier to imagine the essence of the work.
After purchasing everything you need, you can get to work. So, how to cover a motorcycle seat:
- First you need to remove and disassemble the old seat. In most cases, to remove the saddle, the passenger handle is unscrewed and the brackets are removed. The base is almost always made of plastic. Therefore, do not use much force when soldering the seat, as this may break the frame.
- After removing the chair, disassemble it into its components. If the seat frame is in excellent condition, it can be used further. Otherwise, it is worth sanding it down and soldering it in places where cracks and dents have formed. Separate the cover and passenger handle. Carefully unravel the old seams with a razor blade. Most handles are made on the basis of nylon and leather braiding and mounting bolts.
- After disassembly, cover the frame with foam rubber. If you make a layer that is too thick, you will fall through while riding, and vice versa, a layer that is too thin will provide rigidity. It is recommended to make the thickness approximately 1-2 centimeters.
- Spread the glue evenly on the foam and base. After a short wait, 2-4 minutes, connect both parts.
- Wait until the glue has completely dried, then remove the excess foam from the sides of the seat.
- Now take the old seat cover and trace it with chalk or a piece of soap on the new material. It is worth making a sketch with a reserve. Then cut out the sketch.
- Try it on using a light stitch of thread.
- Machine sew the fabric with two seams for greater strength.
- Cover the passenger handle. Cut out the material as well, with a margin. After gluing, cover the handle on both sides, this will add beauty to the product.
- When the motorcycle seat cover is finished, put it on the saddle and tighten it well so that there are no folds and the fabric is elastic. Before stretching, spread a thin layer of glue on both parts.
- Nail the cover from the inside with furniture staples. Then pull it from the center to the edge, trying to ensure that the folds go towards the corners. This work process is difficult to complete alone, so ask someone to help you.
- After tensioning, excess sections of material are cut off, and the staples are driven into the frame until the end.
- Now install the handle. Measuring in advance at what length the ends need to be bolted. It is better to tighten it as much as possible so that there is less gripping and stretching.
- After cutting the ends of the belt, burn them with a lighter to prevent the material from unraveling. After this, secure the handle from inside the seat with bolts.
This completes the process of reupholstering the seat. As you can see, you should choose the material with which the least problems will arise. It should be moderately elastic, smooth and take shape well at angles.
If you don’t want to do this yourself, you can always contact a studio, where for a small amount, 2-4 thousand rubles, your seat will be completely reupholstered with high-quality and stable material.
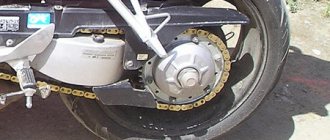
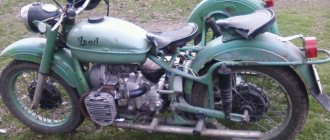
Replacing the seat cover of an IZH motorcycle
seat reupholstery Minsk, Voskozh, Izh,
Stitch and its length
Stitch length is the distance from one stitch to the next. The length of the stitch affects the strength of the seam, its appearance and elasticity. Stitch length is usually selected based on the specific sewing task. A shorter stitch is used to join the material together, while a longer stitch is preferred when you want it to be more visible. Edges with significant curves are easier to sew with a shorter stitch because the machine moves the fabric under the presser foot more slowly. Additionally, short stitches make the curves smoother, while long stitches can make the curves more angular.
The stitch length is adjusted on the sewing machine. Leather is usually sewn with longer stitches (6.7 or 8 mm). If the seam is clearly visible and has a contrasting color with the upholstery material, then a longer stitch will look more beautiful. If the stitch is too short, the thread may tear through the material between the holes and the seam will weaken. Wool or cotton materials should have a shorter stitch (4-5mm) to better secure the material.
The stitch length affects not only strength, but also elasticity, which is very important for seat upholstery.
Upholstery design
The design of motorcycles can vary quite widely: from a simple coating to the most varied and multi-colored. Today, multi-color seat upholstery is quite often used.
As for the cost of carrying out such work, it varies between 2 and 2.5 thousand rubles. There are cases when the cost exceeds this amount. It all depends solely on the size of the seats and the material that will be directly used.
Thus, you can choose the seat upholstery for your motorcycle according to your own preferences.
Seat reupholstery with airbag
Airbag-equipped seats may have a plastic cover that deploys when the airbag deploys, similar to that found on the dashboard or steering wheel. However, most often, the area with the airbag on the seat is simply covered with upholstery. At this point, the upholstery has a weakened seam that should rip easily when the airbag deploys.
If the seams in the side of the seat where the airbag is located do not meet certain specifications, then in a crash it may deploy too late or in the wrong direction.
Sewing station for sewing upholstery with control of seam characteristics.
There is special equipment (Durkopp Adler sewing station 550–867) for stitch control when sewing upholstery for seats with airbag. Thread tension and stitch length are controlled to meet industry standards. The sewing station produces a seam that is strong enough for the seat to be used and, at the same time, must ensure that the seam breaks when the airbag deploys. Such a system is expensive and not available to every workshop.
You can use the following technique for seats with airbags. Sew with thread of normal thickness on the top and bottom of the area where the airbag should fire. The seams are secured at the ends. The place where the seam should separate when the airbag deploys is stitched with a thinner thread. A seam with a thinner thread is made to overlap the previous seams, but is not secured.
For the top seam, use nylon thread (Bonded Nylon Upholstery #69 T70). The stitch length should be at least 6 mm and the tension should be reduced.
The airbag deploys with tremendous force and speed. A seam with such threads and with such a stitch length will not be able to hold such force.
Seat covers for various motorcycles
As you know, there are a large number of motorcycles in the world. This includes scooters, mopeds, scooters and motorcycles themselves. A wide range of different services are offered for such equipment: repairing a seat, covering a motorcycle seat, changing its shape and much more. The so-called change in seat anatomy is very common among customers. If this is relevant for you, then the seat can be given a comfortable and beautiful appearance that you will undoubtedly like.