Scooter tuning, how to properly tune a scooter Scooter tuning using the example of Honda Dio AF-18 Remove 50 - put 72. Replacing the piston on a scooter CVT tuning. Adjusting the weight of the variator weights using available materials
How do you do your own scooter tuning? Why does a scooter need tuning at all? To answer, we need to figure out why we need a scooter at all?
It’s one thing when a scooter makes it possible to forget about traffic jams and heat, and the fuel consumption is minimal. Everything is clear here with fifty dollars - the time comes when more dynamics and maximum speed are required/wanted. By intelligently approaching increasing the performance of a scooter, we will get the desired result. It’s another matter if we have a scooter as a means to stand out from the crowd, to amaze everyone with amazing acceleration and an impressive bass note from the exhaust. Here the direction of tuning is completely different. And in general, it often makes sense to simply change the scooter to a more powerful one rather than tuning a fifty-kopeck piece.
Speaking of low-budget boosting, click here, Cheap tuning of the Honda Dio scooter, and read the article about wallet-friendly tuning.
Well, later in this article we’ll talk about how and what to do for tuning, and for serious tuning of a scooter, with your own hands or someone else’s, and most importantly, wisely. And to such things as His Majesty, sir, “big scooter tuning”, i.e. Scooter tuning, which is noticeably superior to budget ones both in scale and in cost, must be approached extremely meticulously and carefully. This means that you can’t do it without the skill and instinct of a mechanic.
However, let’s start small here too.
So, after running in and removing the speed limiters (chokers), we have several ways to increase the maximum speed a little and get a much more powerful engine with almost the same resource. Don’t forget about the technical condition of the remaining parts and components of your scooter, otherwise the simplest and most inexpensive do-it-yourself tuning can result in a rather complicated and expensive scooter repair! already, perhaps, by someone else’s, more skillful hands . So:
- Change the scooter muffler to a tuning resonance pipe that fits your CPG (pipes such as Laser X, LeoVince ZX, Technigas Next - R in various versions may be suitable) or to a “torque” exhaust (Polini No Smoke, LeoVince SP3/Turing, Techigas Silent Pro). Also rebuild the transmission part in accordance with the characteristics of the installed tuning pipe. This will allow you to raise the maximum speed of the scooter by another 10-15 km/h (for resonant exhaust) and will give an increase in dynamics.
- Get a carburetor with an optimal diffuser diameter. For 50-70cc, the most convenient to configure and install is a carburetor with a diffuser diameter of 17.5 mm, the most commonly used carburetor. There is an opinion that DellOrto tuning carburetors are of the highest quality, although by and large, the manufacturer does not really matter.
- CVT - replace with a sports one. In tuning CVTs, the process of adjusting to new parameters of a scooter’s engine is more accurate and of better quality - due to more advanced kinematics of moving weights. Tuning CVTs produced by Polini after 2005 are equipped with a rod lubrication system, which increases the efficiency of the entire scooter transmission. And due to the smoother and easier movement of the variator cheek along the guide sleeve, it improves the acceleration response of the scooter.
- The main way to increase the power of a scooter is, of course, to install a Sport class of increased volume. Generally speaking, this is the most radical and most effective method of increasing the performance of a scooter. Thus, you not only have an increased cylinder volume, but also a more competent and thoughtful system of the cylinder purging process (for a two-stroke engine) - that is, even more power. The main difference between two-stroke piston tuning kits from different manufacturers is precisely the different placement of windows. A cylinder head with an optimized combustion chamber shape - usually complete with a tuning CPG. Keep in mind that when installing piston engines with a larger piston diameter (volume), it is extremely important and necessary that the crankshaft and bearings be in perfect technical condition, otherwise large loads will simply destroy them very quickly.
In principle, the average person can stop at this level of scooter tuning, because the next stage is do-it-yourself scooter tuning, which allows you to develop up to 12-17 hp. on the shaft - this is the “design” of an engine on a tuning piston class Mid-Race and Race. And this is a qualitatively new level of tuning, and as mentioned above, for many it is easier to simply purchase a more powerful stock scooter than to tune it. So, tuning Mid-Race and Race class scooters.
Such engine tuning requires the installation of a reinforced crankshaft - with suitable bearings and a corresponding reinforced connecting rod. Only such tuning parts of a scooter engine are able to withstand increased shock loads and realize new power. Otherwise, you can forget about stable and trouble-free operation of the engine.
The crankshaft speed of an engine of this class begins to set the rhythm. 10,000 rpm requires adequate reliability of the components, which stock (i.e. standard factory) parts, such as main bearings, are not able to provide. In addition, the new thirsty engine needs appropriate power - the diameter of the carburetor diffuser should not be less than 17.5 mm for a racing piston engine. Also, the carburetor setting for this tuning engine must provide a good mixture at high speeds, otherwise overheating and further “sticking”, and in severe cases, the wedge of the cylinder cannot be avoided. It would be nice to install a 19 mm carburetor paired with a tuning sports air filter.
In fact, all the following steps for further tuning the scooter with your own hands will repeat the previous stage of boosting, only with the difference that it is necessary to use higher quality and more productive components of tuning kits. That is, instead of a regular sports CVT, it is strongly recommended to use Polini Evo or Malossi OverRange transmission tuning kits.
Tuning in this class allows you to develop dizzying dynamics and a hurricane maximum speed of over 100 km/h. In general, for normal use of a scooter in the city without too much investment in fuel and lubricants and consumables, this is the maximum possible tuning of the scooter. But such tuning allows you to enjoy real amazing dynamics and speed (this especially traumatizes the already unstable psyche of drivers of pseudo-sports cars, who for some reason underestimate the possibilities of tuning a scooter with their own hands and are perplexed when a “crazy stool” gives them heat from a traffic light as if they were standing , and often leaves them no chance for revenge  ).
).
So we have reached the pinnacle of boosting - tuning a Hi-End . These are uncompromising solutions that allow you to increase the liter power of a scooter engine to a figure exceeding 300 (three hundred!) horsepower per liter of volume! And this is without the use of all sorts of turbines and other sophisticated solutions like nitrous oxide or special fuel!
There are not so many companies involved in such developments. The main players in this field are Malossi, Polini, Kunda, 2Fast, Fabrizi, MetraKit. These are elite components and a triumph of high technology.
With this tuning, engine speed comes close to 20,000 rpm! There can be no savings here, the work is only for the result - the task of such a motor is to work out two 15-minute sessions and several hours of training, after which it is sent for inspection and subsequent replacement of worn-out components. Even crankshaft bearings most often come in special series and can only be purchased from the tuning studios themselves (Malossi and Polini have their own special bearings that were developed and manufactured exclusively for them).
Installation of the crankshaft, CPG and other components requires a very serious modification of the engine crankcase and chassis of the scooter; the use of rotary ignition is mandatory (which allows you to spin the engine to insane speeds without losing spark power), which implies the absence of all electrics not related to the scooter’s ignition system . The ratio in the gearbox is left to the taste and wishes of the owner.
The best examples of fine-tuning scooters using components of this class allow achieving time at a completely “adult” distance of 402 meters within 12-14 seconds, and not everyone, even seriously “charged” cars, are capable of such “feats”.
In urban use, the service life before replacing the ring is expressed as a figure from 1500 to 4000 km, so if it is possible to “feed” such an engine with first-class 98 gasoline (not the kind that is poured at 99% of gas stations, but real) and very expensive oil, then you can and sometimes ride such a monster to scooter-moto parties and amaze the imagination of those passing by with shining sides and polished engine covers, and after the cool motorcycle racers stop nervously giggling from the chirping of a newly started engine, accompanied by a fair amount of smoke from the exhaust pipe (you will have to pour oil “by eye” and, preferably, and, naturally, in not the most optimal proportions), open the trigger fully and take out a couple of “purebred” (ZZR 400 =) sports bikes. So let someone after this say that scooters are consumption for children “under 16”...
This, in general terms, is all about tuning scooters with your own hands. But each scooter is unique, each scooterist has his own requirements, so each scooter should be prepared based on many conditions - budget, requirements and the feasibility of one or another modification, because it is not for nothing that there are so many “transitional” classes on the scooter tuning market that do not fit into the standard ones the framework of one or another forcing class.
The following is a list of tuning kits provided by various scooter parts manufacturers.
Scooter tuning - CPG tuning
| The variety of tuning cylinders offered is quite large, including standard 50cc and more powerful 70cc. Standard 50 cc tuning cylinders provide an increase in scooter power due to the improved design of the cylinder itself, and 70 cc cylinders also due to a 40% increase in volume. In this case, the scooter becomes much faster than stock. But comparing cylinders of the same displacement, it is clear that they all produce different results. This is due to the fact that different cylinders are designed for different operating speed ranges of the engine. Hence the differing effective power. Tuning cylinders for scooters are usually classified into Sport, Midrace (Racing) and Hi-End. The lifespan of the scooter's Sport cylinders is approximately equal to the lifespan of the standard ones, since these cylinders are adapted to the same engine speed. In addition, these Sport class cylinders are usually no more expensive than similar standard parts Different racing tuning piston class Racing 70cc differ from each other. These are such manufacturers of CPGs as Top Due Plus, Polini Corsa, Malossi MHR Replica, Hebo Manston Replica. For example, cylinders from Hebo and Malossi have high quality, wear resistance and power. These are aluminum CPGs with a very durable chrome-nickasil coating. Cast iron racing scooter cylinders from Top Performances and Polini are generally just as good. An aluminum cylinder undoubtedly has the best heat transfer. But if it is damaged, you will have to change both the piston with rings and the cylinder (this can happen from, for example, a lack of oil in the mixture, or when it is depleted). However, cast iron piston engines in such emergency situations can only get by by replacing the piston, and the surface of the cylinder should be polished. Racing cylinders have much higher compression and compression ratios (up to 14:1), as well as engine speed. All this requires mandatory strengthening of the crankshaft; it should be replaced with a tuned one from a racing kit. |
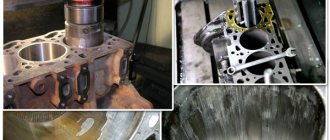
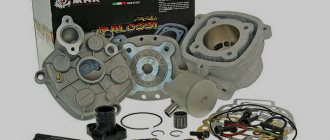
Cylinder-piston group.
Finally, the most effective improvement for any engine is replacing the CPG. But not just a replacement, but the installation of a new, larger piston. Fortunately, there are now many ready-made kits on the market; you don’t have to sharpen or adjust anything, as with Soviet equipment. Moreover, there is even a lot to choose from. For example, for various models with a volume of 50 cubic meters, they offer kits to increase to 63, 72, 82 and even 90+ cubic cm. In some cases, this is an almost double increase in power.
Alas, for some, increased power does not promise anything other than breakdowns or inadequate performance. This is because by significantly increasing power, you inevitably entail work on all other nodes. Let's imagine that we installed a new 92 cc CPG on an old 50 cc engine. The first thing to check is the condition of the connecting rod, crankshaft and bearings. Otherwise, they will fly first, followed by our new system of both cylinder and piston.
As a result, after replacing almost all the components, we got a very fast “flea” that can surprise your friends and experts in this technology. Over time, you can make changes to the chassis system, replace shock absorbers, and install more attractive wheels. Often, the modernization process does not stop there, and after tuning a scooter 50, 150 with your own hands, impressive improvements in appearance are made. The moped is repainted, panels are changed, new devices, lighting, and so on appear.
Scooter tuning - crankshaft tuning
| Once you have decided on the cylinder, the next question is whether to change the crankshaft. The answer to this largely depends on the class of cylinder that you have chosen for yourself. When using Midrace and Hi-End class cylinders, replacing the crankshaft is mandatory! Installing cylinders of the indicated classes in combination with a standard crankshaft is a gross violation and an indicator of the unprofessionalism of the people involved in installing parts on the scooter. In all the variety of tuning crankshafts, it is necessary to distinguish two groups. The first one is simply reinforced . They replicate the corresponding standard crankshafts in all respects, but have greater strength (and therefore a longer service life), as well as improved heat removal from the piston pin. Reinforced crankshafts are great for use with Sport class piston when there is a need to replace the standard one. The second group is racing crankshafts (the abbreviation HPC is often used - high primary compression). Such crankshafts significantly affect engine performance, as they provide an increase in the compression ratio in the engine crankcase. This significantly improves the efficiency of cylinder scavenging at high speeds, providing an increase in power. At the “lower” ranges, the efficiency of purging, on the contrary, suffers, but for forced engines this is not significant. Racing crankshafts are indispensable when it comes to tuning based on Racing class piston engines. When replacing the crankshaft, it is recommended to replace the main bearings with oil seals. |
Scooter tuning - muffler tuning (exhaust system)
| A good exhaust system can easily help you add horsepower to your scooter. The operating features of a two-stroke engine are such that a well-chosen exhaust system can increase power by up to 20%, which is a very significant amount. Moreover, modern scooters, forced to meet the most stringent environmental requirements, are equipped as standard with exhaust systems that have a detrimental effect on performance. Exhaust systems, like cylinders, are divided into different classes, so you need to choose a system based on the piston system that will be used on the scooter. Sport class exhaust systems are quite versatile. Many of them show excellent results with both standard 50cc cylinders and 70cc Sport class cylinders. But not all, so you should be careful when choosing. Pipes from certain manufacturers have proven themselves to be extremely short-lived and fragile, so you should not buy the first pipe you come across. Chrome-plated exhaust systems deserve special attention: they retain their appearance much better and are also protected from corrosion, which is very important in Russian operating conditions! |
Shaping
The body is shaped using 40mm coarse sandpaper. By wrapping it around a stick, you will get an excellent file. An electric knife is a good tool for creating a rough outline. Use a magpie to create a rough shape. Having reached the limit of half a millimeter to the desired result, switch to 80 mm sandpaper.
Regardless of what part of the body kit you are making, you need to make every effort to achieve complete symmetry. Before moving on to the next stage, carefully check that all parts of the body kit fit tightly to the body. This work is the most difficult in the question of how to make a body kit with your own hands. Use 40mm sandpaper for adjustments.
Scooter tuning - carburetor tuning
| You can get more complete output from a larger-volume piston by appropriately improving the operation of the power system. First of all, we are talking about the carburetor. Scooters come standard with carburetors from a variety of manufacturers, but they all have a common feature by which they can be classified - the size of the diffuser. On standard 50cc engines there are carburetors with diffusers from 12 to 17.5mm. Tuning carburetors are also diverse: there are cases of installing even 28mm carburetors on 70cc tuning engines, but all this is already in the realm of experimentation. Carburetors with a diffuser diameter of more than 17.5 mm (19, 21, 24, etc.) are impractical to operate and require regular attention and reconfiguration. Of course, all this is not important if you are going to make a street rocket out of a scooter, sacrificing convenience and reliability. A standard and proven recommendation for 70cc cylinders is to install a 17.5 carburetor, if one is not included in the standard equipment (for example, on the latest Piaggio HiPer2 engines). |
Scooter tuning - air filter tuning
| To properly power the engine, you need not only gasoline, but also air. Excess gasoline will do nothing for your engine unless it is enriched with enough air. To improve the air supply to the cylinder, special air filters are used. The most universal and balanced solution is to use a more efficient filter element, for example, Malossi Red Sponge, instead of a standard filter element. It is installed in the standard air filter box. Another type of tuning air filters is the so-called zero-resistance filters (or simply - FNS). When installing them, the standard box is completely removed, and in its place is a small filter element, usually either cylindrical or cone-shaped. It has less resistance, which improves cylinder power at high speeds. However, firstly, these filters are almost not protected from external influences of dust, dirt and water, and secondly, unlike standard air boxes, they do not have a resonance effect. As a result, installing such a filter requires a thorough and precise reconfiguration of the carburetor, which only a few specialists can handle. If the service center tells you that they can “simplely” and “easily” set up a carburetor to work with the Federal Tax Service, most likely the qualifications of the workers there are below average. Leave and never come back! |
What should a homemade shield look like?
When making a windbreak, it is necessary to take into account that exactly how the oncoming wind will blow will depend on its size and position. Of course, it is best that it is not aimed directly at the driver’s eyes. If the upper edge of the windshield is located significantly below the eyes of the owner of the iron horse, then he is guaranteed to experience inconvenience.
Let's take a closer look at the figure.
In the first version, the shield is straight and installed vertically, which creates a large space between it and the driver himself, into which wind turbulence falls. Such air currents carry with them dirt, dust and midges. All these elements impair visibility, and although there is no direct wind blowing into your eyes, it brings a lot of inconvenience.
To avoid such consequences, it is better to make the shield at an angle of 36-46 degrees (as shown in the second figure). In this case, the edge of the shield will be as close as possible to the driver’s face and lowered below the motorcyclist’s eyes, so there will be no strong turbulence. However, it is worth paying attention that the upper edge of the plexiglass is bent by approximately 10-15 degrees. This is necessary so that the driver of the iron horse does not accidentally hit his face on the shield.
The third photo just shows an unsuccessful option with the glass being too close. In this case, there will also be no problems with aerodynamics, but there is a high risk of injury. If this option still warms your soul more, then you will need to equip the edge with a rubber pad, which will help soften the blow if driving on an uneven road surface. Also don't forget about the helmet. It is able to protect not only in case of a fall, but also from unpredictable wind currents.
Scooter tuning - intake pipe tuning
| The gasoline-air mixture prepared by the carburetor then flows into the crankcase through the inlet pipe. This part is sometimes mistakenly called a manifold, which is incorrect, since this pipe does not collect anything, but only directs the mixture into the crankcase. It is important that the flow area of this part is no less than the size of the carburetor, otherwise there is no point in installing a carburetor! The flow area of the standard pipes on most scooters is such that you can easily use a 17.5 mm carburetor instead of the standard one. The same cannot be said about 19 mm carburetors! What can we say about such scooters, subjected to grief tuning with the help of 21 or even more carburetors without replacing the intake pipe!? Through tears, we call these “scooters named after the 19th carb”... An anecdote comes to mind: Stirlitz gave the dog gasoline and let him go. The dog ran 5 meters and fell. “The gasoline has run out,” thought Stirlitz. |
We remove the engine.
Specialists, experts or garage technicians begin tuning a scooter with their own hands by dismantling the factory limiters. They are necessary to, firstly, keep the equipment within the established speed limits (Japanese models), and also to increase the service life of the motor. The problem is that you can find this element only after studying your engine model on various forums. The reason for this is the different locations of these same limiters, it could be a blind fork in the exhaust, an electronic limiter installed on the variator or even in the carburetor.
Scooter tuning - reed valve tuning
As a rule, a reed valve is installed directly at the inlet of the crankcase, also known as a “house” for its traditionally angular shape. However, not all reed valves have the characteristic “house” shape. The following engines use single reed valves as standard:
It is these scooters that, first of all, require a tuning flapper valve, even when tuning the Sport class. In many other cases, you can easily use a standard valve, but with carbon petals. Of course, if we are talking about tuning of the Racing class and above, a tuning valve is required! |
Scooter tuning - CVT tuning
| Despite the fact that a variator is essentially the entire scooter transmission system, including 2 pulleys and a belt, in the world of scooter tuning the term “variator” is assigned to only part of this system - the moving (internal) part of the drive pulley. As a rule, installing any tuning part, for example a muffler, is quite simple, but often after installation new tuners are perplexed... Why did the scooter start to ride worse? The answer is simple - the scooter is not configured. But even when more than a dozen tuning configurations made from weights and springs have been tried, it is not always possible to achieve smooth acceleration at constant speeds. This is where the tuning CVT comes to the rescue. By smoothing out failures in the transmission, it allows you to configure it optimally. Sometimes you can easily do without a tuning variator, but sometimes it is simply irreplaceable!! |
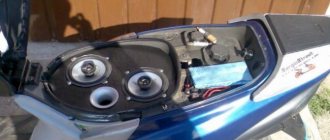
Scooter tuning - impeller tuning
| If on one side the belt in the drive pulley rests against the variator, then on the other it rests against the impeller. The impeller got its name for the additional function it has - transmission cooling. Tuning impellers have larger blades, allowing them to operate with greater productivity. Considering the low price of this part, we can safely recommend it for purchase. Sometimes, when installed with an appropriate variator, the impeller allows for a larger operating radius of the drive pulley, for example in the case of the Polini kit for the Honda X8R scooter. |
Fastening parts
Take a blank made from a template from the factory bumper mount. Attach it to the skirt using fiberglass and resin. Once the structure has hardened, secure the skirt to its original places using the factory bolts.
There is a high probability that the part will not fit well. Cracks and discrepancies may occur, but this problem can be solved.
In this case, masking tape and elastic putty will help you, which should be applied along the contact line of the skirt and bumper. We are waiting for the material to harden. After this we dismantle the skirt. The sagging will be clearly visible on it. Remove them carefully.
Now you should increase the flow in the lower part of the skirt, located on the wheel side. To do this, take a piece of cardboard. Cut out the required template and glue it with tape. To prevent the cardboard from losing its shape, strengthen it with two glazing beads. There are a few steps left to complete the body kit on your car yourself:
- Apply several layers of fiberglass resin to stiffen the structure
- After applying the resin, we treat the part with putty and smooth the surface with sandpaper.
- Most likely, you will have to apply several layers of putty to obtain a smooth surface.
- Try the element on the car
When you have completed the entire scope of work, you need to pay attention to one detail. When turning the wheels of the car to the side, a gap in the skirt will be visible, so it is necessary to make protective corners, which are made using elastic putty, cardboard and masking tape, similar to the stiffening rib. Now you know how to make body kits for a car.
Scooter tuning - belt tuning
| The role of the belt in the transmission of a scooter cannot be overestimated. By connecting the drive and driven pulleys, it is the belt that transmits torque from the crankshaft to the gearbox mechanism. As you know, the belt on a scooter is a consumable item and wears out quite quickly. When tuning, the load on it increases, so the wear process accelerates. A variety of manufacturers, right up to the tire giant Continental, offer samples that are more wear-resistant than the standard one. Rigid Kevlar belts are not recommended for use with a standard CVT to avoid premature wear of the latter. The choice of belt should be approached very carefully, since according to the tests carried out, different belts can work completely differently in the same transmission. And sometimes, without appropriate settings, they can only worsen the dynamic and speed performance of the scooter. |
Scooter tuning - gearbox tuning
| What scooterists often complain about, even after a little tuning, is that they cannot reach the maximum speed. After all, when tuning the Sport class, the maximum engine speed increases quite slightly, which means that there is simply nowhere to get a significant increase in the maximum speed. However, the increased volume gives the motor more traction, which allows you to overcome hills at maximum speed, which previously could not be done without slowing down. A new gearbox, or rather, gearbox gears, will help turn this increase in traction into additional km/h on a straight line. With their help, you can change the transmission ratio, thus increasing the maximum speed. Of course, the engine’s thrust reserve is not infinite, so you won’t be able to increase the maximum speed endlessly! |
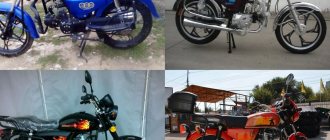
Features of moped tuning
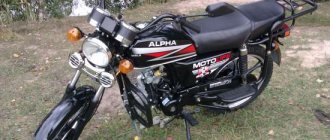
The alpha moped is one of the most popular mopeds today. Its popularity is due to its low price and the large number of opportunities it gives its owner. Most often, models with an engine capacity of 100-125 cm3 are chosen for purchase. This power is enough to accelerate the moped to 100 km/h and feel comfortable. Alfas are also famous for their low fuel consumption, which is also very important. But, perhaps, the main advantage of this moped is its maintainability, because there is not a large amount of electronics, and all power units, in principle, are quite simply designed. In general, the alpha moped is a pretty good motorcycle for rural areas or small towns, where it is much faster and more convenient to travel on two-wheeled vehicles. However, every Alpha owner sooner or later comes up with the idea of modifying and tuning the moped. What to do in this case?
Scooter tuning - clutch tuning
| The centrifugal clutch, installed on the shaft of the variator driven pulley, gives the scooter the ability to move away independently as the engine speed increases. Often, when tuning, the scooter receives a fundamentally new character of the engine and, in order to fully realize its capabilities, the clutch must operate at higher speeds. Sometimes this can be achieved by replacing only the clutch springs, but sometimes (as a rule, starting with the Midrace tuning and higher) you have to change the entire clutch. Tuning clutches have pads made of more advanced material, and also often offer more options for tuning - it all depends on the class of the selected product. When tuning Midrace and above, the load on the clutch assembly is sometimes so high that in order to avoid overheating it is wise to replace the clutch complete with a bell, which is also offered by various tuning manufacturers. |
Making a fairing
Before you make a homemade moped fairing, you need to think about the design of the future accessory. After this, you need to measure the headlights and, taking into account the dimensions of the future product, prepare a pattern (for this it is best to use cardboard).
Blank
The next step will require a blank. It is best to use penoplex for this (of course, you can also purchase cheaper foam, but this material quickly crumbles, so it will be very difficult to give it the desired shape). The fairing pattern is applied to the material (it is better to leave a margin of 5 cm on the sides), after which we perform the following steps:
- We give the workpiece a streamlined shape (you can use a jigsaw and any available cutting materials).
- We cut the shape in half and cut off a little material at the joints and at an angle (thanks to this, the product will be even more voluminous). After this, both parts are fastened with paper tape.
- We cover the entire fairing with the same tape (so that it covers the entire surface).
- We apply packing (ordinary brown) tape to the model (this will help protect the penoplex from corrosion). We cover the product with cling film on top, this will simplify the process of removing the model from the workpiece.
- We install our fairing in a horizontal position at some distance from the surface so that there is access to all sides of the product.
- We cut the required size of fiberglass (preferably with a margin) and moisten it in a solvent.
- We cover the fairing with fiberglass, straighten it so that there are no folds or creases, and pour epoxy resin over the mold, distributing it evenly.
Healthy! Some people use any available rag material instead of fiberglass.
- We lay another layer of fiberglass and repeat the procedure. In total, you need at least 3 layers (the optimal thickness for the matrix is 10 mm). After this, we leave the workpiece to dry.
- We remove the penoplex.
The resulting semi-finished product, made by hand, already resembles a motorcycle fairing, but there is still a lot of work ahead.
Fitting and preparation for painting
At the next stage we do the following:
- On the inside we glue a plastic element (you can use a piece of plastic and give it the desired shape using a hair dryer) for fastening (its size and shape depends on the motorcycle model).
- We cover the entire surface of the fairing with a large piece of fiberglass and again pour it with epoxy resin.
- We apply several more layers of material, but this time in small pieces, to give strength to the sides and joints (the more pieces of fiberglass that are applied, the stronger the product will be).
- Using a grinder, we cut out holes for the round headlights.
- We cover the motorcycle headlights with polyethylene so as not to damage them and install the manufactured fairing in its rightful place.
- We take fiberglass automotive putty (mix with hardener) and use it to work out the holes for the lighting elements so that there are no unnecessary gaps. You need to work quickly, as this material sets very quickly.
- Remove the fairing and sand it thoroughly.
- We putty the front side of the product with fiberglass automotive putty.
- Sand the surface.
After this, you can work on the fasteners. As a fastening, you can install a metal plate on the motorcycle, to which another metal element mounted on a plastic blank (prepared earlier) will be attached.
Healthy! If the fairing made for a motorcycle with your own hands is stationary, then it is attached to the frame. If it must move, then it must be attached to the front fork.
After this, you can begin to prepare the fairing for painting. For this:
- We cover the surface with automotive primer (it is better to apply a thick layer using a spray gun).
- After the soil has dried, apply the developing mixture.
- We sand down minor defects, if any. To do this, we use small-sized sandpaper (first 800, and then 1200).
- We paint the product to match the motorcycle using a spray gun (for convenience, the fairing can be hung on a hook).
After this, all that remains is to make a windshield from plexiglass. To do this, it is enough to cut the product to the required size and give it a curved shape using a hair dryer.