Electrics play one of the most important roles in ensuring the safe operation of your vehicle. The choice in favor of halogen, xenon or LEDs is made taking into account the budget, desired visual and technical expectations: intensity, beam range, flux stability and other characteristics.
As sellers with extensive experience, we note that LED lamps for scooters are one of the most popular products in our online store. And further we will explain why this is so.
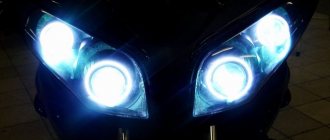
LED lamps with H4 socket for motorcycle
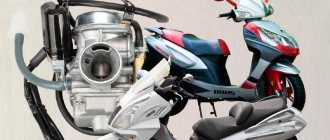
Hi all! Continuing the motorcycle theme, in this review I will tell you about the LED headlight lamp. Anyone who is interested in reading, I invite you to the cat. I started having problems with lighting on my maxi scooter as soon as I bought it new at a motorcycle dealership. After all, the technology is Chinese, and you yourself understand what standard lamps can be installed in it these days. The original lamps simply sucked, because the cheap flashlight and street lighting shine much brighter. I immediately replaced them with other super white 35-watt halogens. I traveled with them for several seasons, they shined better compared to the original ones, but still not enough. May the opponents of LED lamps forgive me, I decided to try installing LED lamps, since I don’t have much of a choice. I can’t install 55W halogen, because they will melt the reflector in the headlight even more and in the end it won’t be very good. And driving in the dark is very dangerous, you can hit a hole or bump, but I don’t want that. Let's start unpacking:
The lamps are supplied in a simple box. The contents inside the package are culturally placed in a form made of foamed polyethylene without additional films. Nothing shakes inside. Nothing was damaged during transportation.
Specifications
Connector type: H4 Operating voltage: 9v - 16v Power: 32w (6500k, 3000lm) Number of LEDs: 3pcs (2 LEDs - low beam, 3 LEDs - high beam) Operating temperature: -45 - 125℃ Waterproof: yes, IP67 Material: aluminum Size: 81.5×45mm (length/width)
In addition to the lamp itself, the kit includes: four adapters for different types of sockets, a shock-absorbing spring and an O-ring. By the way, this very sealing ring is very bad, it is small and soft. After installation in the headlight, the lamp was very loose. I cured this problem with the help of a sealing gasket from the faucet. Now the lamps are held securely. It is best to use a flat gasket rather than a round one; it is much stiffer and denser. Usually such seals are sold with a mesh; it can easily be torn out with pliers.
The lamp consists of three LED matrices which are made in the shape of a triangle. The two upper ones on the side are responsible for the low beam, and the third lower one is connected to the high beam. The lamp body is made of aluminum, it has a built-in driver and a forced cooling fan. The lamp is also waterproof, but after opening the cover I saw that the copper winding was coming out of the driver housing. This means that if you immerse a lamp in water, it will fall inside and cause death. So I don't recommend immersing it in water.
Installing the lamps is not difficult, but very time-consuming; I had to completely disassemble/assemble the entire beak. First, we place the o-ring on the grooves. We select the adapter we need, press it a little against the ring and turn it to the side. Thus, we fixed the adapter on the lamp and now it can be inserted into the headlight. There is another simpler method: you can first screw the adapter itself to the headlight, and then insert the lamp into it. But there is a small nuance in this method: if you choose a more rigid gasket, you will have to make an effort so that the lamp fits onto it, fits into the grooves and you can screw it on. The main thing is not to damage the reflector body. Choose for yourself. Do not forget about the dimensions of the lamp; it cannot be installed in every motorcycle! Also, in addition to the lamps, I ordered internal boots from Aliexpress so that the body would be cooled better and dirt would not get inside the headlight. But I didn’t take into account that my seat was not located strictly in the center, but slightly lower. I had to put the original ones back - closed, since these couldn’t be adjusted
Temperature readings were carried out in high beam using a pyrometer, moving it from bottom to top. The lower part of the housing with the driver does not heat up more than 50-55 degrees. A little higher it’s already 65-70 degrees, the stand itself with LEDs produces 80-90 degrees, and the matrices heat up to 110 degrees. In low beam the temperature is slightly lower. You won't be able to hold onto the body with your hands for long. The lamp reaches the established heating mode inside the headlight in about 10-15 minutes.
Now let’s compare the light of halogen and LED lamps. With halogen lamps, all the light is concentrated in the center in the form of a beam, without cutting due to the unusual shape of the headlight and reflector. The shadow border in the low beam is a little blurred, in the distant light we see a clear beam. This is the whole problem of weak halogens. Ahead of me I see a narrow beam, which is also not bright enough. Very small beam angle.
LED lamps shine an order of magnitude brighter than halogen. The glow angle has increased significantly. In low beam, a wide band is visible, with a blurred shadow border. But the high beam upset me; if the low beam is even more or less okay, then it’s no good at all. It shines like a spotlight around the entire perimeter. This problem can be partially cured by simply adjusting the headlights and lowering the reflector down. This way, the low beam will be even clearer, and the high beam will not dazzle oncoming drivers so much. I haven’t adjusted the headlights yet, but I’ll do it soon; I don’t have time for that yet.
A few more additional photos
Adjusting the headlights for LEDs is absolutely necessary in order to somehow “lower” the bright high beams. Perhaps they will not pass MOT, although the arrangement of the LED matrices is similar to halogen. The whole problem lies in the structure of the scooter lamp itself. But to be honest, motorcycles are not actually checked, so this bureaucratic process can be skipped. Opponents of LEDs say “they are bright like xenon, they blind very much.” Nothing like this! Having driven with them, I also thought so, but they are not as bright as all the other lamps and motorists also blinded me with their powerful xenon, halogen, and fog lights. But at least now I see what road is ahead of me, there was trouble with the previous halogen. In general, I noticed that many people drive with misaligned headlights, compared to them, I’m just white and fluffy. In general, the lamps are purely motorcycle, not too bright. If adjusted well, they will shine normally. Of all the ones I've seen on the Internet, this one shines the most adequately of all. I will not advise anyone, the choice is yours. I wish everyone good luck on the roads!
The product was provided for writing a review by the store. The review was published in accordance with clause 18 of the Site Rules.
If you are expecting another review, which is like dirt on the Internet, then pass by.
We will focus on points that almost no one pays attention to. We will talk about the thermal mode of operation of an LED lamp in a headlight, an example of incorrect installation and, as a consequence, its premature failure. We will also touch on how to evaluate the real luminous flux from LED lamps without instruments and not be deceived by their sellers. Not all modern motorcycles produced, and even more so motorcycles from previous years, have LEDs in the headlight(s). Good, right light (yes, right - more on that later) is never enough. That's why many people are replacing their halogen lights with LEDs. For motorcycles, this is usually a replacement for the standard two-strand H4. We will talk based on a real example. This incident forced me to dig deeper into the topic under discussion. My nephew, who at that time had a Chinese enduric checker, asked me to help him figure out why the LEDs in the headlights fly out so often - one or two per season. I don't think so. LEDs have a service life of tens of thousands of hours under normal use. For example, 10,000 hours of predominantly city driving approximately correspond to 250-300 thousand kilometers, that is, it covers the average service life of a Chinese car several times. Well, I say, show me what lamps you installed. He takes out a box with 2 pieces for the car. I’ve already installed one, and the second one is, like, in reserve—the first one will crash soon anyway. Firstly, the placement of the LEDs on the substrate is not good. If you look at a standard H4 halogen, this is what the configuration and location of the low beam filament looks like, as well as the small screen on the right: The correct distribution of the luminous flux of the low beam is very important, since otherwise you will blind oncoming traffic. High beam in this case does not matter. The main thing is that the road is well illuminated, because there is no one around anyway. That is, the light-emitting component of the low beam, in our case the LEDs on the substrate, must be exactly in the same place and at least approximately the same dimensions as the tungsten filament in the H4 lamp, for which the reflector in the moto headlight is designed. This point has already been chewed a million times on the internet and we won’t dwell on it any more. LED lamps, like my nephew’s in the photo above, do not even have a hint of the above. It is not surprising that his low beam shone throughout Ivanovo. However, taking into account the fact that he hardly rode at night, and in the daytime with such a “nearby” the visibility of the moto increases noticeably, we decided to leave these LED lamps. Now we move on to the second part of the Marlizon ballet.
We are looking for why the LED lamps flew out so quickly. I measure the voltage in the on-board network at medium speeds - 14.6 volts. A bit too much, but for LED lamps that have a current source inside, this is no big deal. But for batteries - yes, it’s a bit much, although not fatal. It will recharge slightly. By the way, if anyone wants to return the voltage to normal in order to avoid disassembling the RR (and it is filled with compound) and its additional adjustment, you can simply connect a 20-30 ampere Schottky diode in series with the RR output. The voltage drop across such diodes is about 0.5 volts, in contrast to silicon diodes - 0.7 volts. This will give us the required 14.1 volts at the PP output. I’ll note right away that the standard RR on motors, with rare exceptions, includes a powerful single or three-phase diode bridge rectifier. Let's move on and look for the problem. One guess has dawned. I ask my nephew to come to me immediately after the next rides. I measure the temperature of the LED lamp radiator with an IR thermometer. That’s right, the idea turned out to be correct - the surface temperature was 91 degrees, despite the fact that that day was quite cool - about 15 degrees Celsius. This is the reason - banal overheating. And the reason for the overheating was revealed very simply. On all halogen headlights, the lamp base is covered with a dust-proof, splash-proof rubber cap with a small diameter hole designed for a halogen base (as mentioned above - H4). Moreover, this hole is usually located in a recess surrounded by a collar of the same rubber cap. And if the rubber cap can still be pulled onto the LED lamp before installation, then the collar ends up almost at the level of the edge of the radiator, shown as a red line in the photo of the LED lamp above. That is, virtually all the heat is dissipated only through the upper flat surface of the radiator. Naturally, this area is not enough. Of course, some of the heat is dissipated through physical contact between the radiator and rubber and rubber and air, but this is only a small fraction, since the radiator touches the rubber with an edge and not with the entire flat surface. We removed the cap and did a test ride:
The radiator temperature dropped to 60 degrees.
Excellent result. We cut the cap in height so that the entire radiator was on top of the rubber, and put everything back together. Another test ride. The temperature rose to 64, but this is understandable, since the air flow of the lower part of the radiator was now tightly blocked by the upper part of the trimmed cap. And even these 64 degrees are wonderful. Since then, the LED lamps on my nephew's moto have not burned out. So he sold it. Now let's think about it with numbers in hand. As they say, an engineer without numbers is just an outsider with his own opinion. The current consumed by the described lamp at 14.6 V was 1.6A, which corresponds to a power dissipation of 23.4 watts. An approximate thermal calculation, taking into account the volume of air flow in the area of the lamp base somewhere in the region of 0.1-0.2 l/sec (depending on the speed of the motor), shows that the temperature of the transitions of the LEDs themselves on the substrate at the radiator temperature measured above of 91 degrees should be in the range of 160- 170 degrees. I don't know the type of LEDs used, but the typical maximum temperature for gallium arsenide or gallium phosphide diodes is 150 degrees. So, the numbers explained everything to us. As it turned out later, the case described turned out to be atypical - everything just didn’t come together well. Both the rubber protective cap is too large and the design of the LED lamp radiator is poor. Then, out of curiosity, I repeatedly measured the temperature of LED lamps from those of my friends who replaced the original incandescent lamp with it. I have always found confirmation of the above conclusions. Due to the fact that on different bikes the rubber protective cap had a different shape, in some places more or less in others, blocking the fins of the LED lamp radiator, the measurement results varied greatly. Two people had lamps with a fan (which had not yet been covered at that time) - the results of measuring the temperature were satisfactory. Now, armed with a detailed analysis of the example described above, it will not be difficult to analyze and make the right choice of LED for the headlight. I have chosen four of the most typical designs. Let's consider them from the point of view of thermal conditions (this is our topic today, in case anyone has forgotten). Option 1. Passive cooling. Everything said above fully applies to this option. Make sure that the rubber dust cap is below the radiator. If necessary, trim it. The disadvantage of this design is that over time, dust and dirt settle on the radiator, compacting itself in humid weather, worsening the already intense heat exchange. Option 2: A perfect example of a terrible LED placement. It will be torture for oncoming cars. Further. As for the protective cap, the same as for N1. Here we have active cooling (fan). The thermal conditions of this solution are good. The disadvantage is the same as in N1, but to an even greater extent. Such fans do not have dust and moisture protection and are designed for operation inside electronic equipment. It’s not for me to tell you how much dust accumulates in the area of the back of the headlight on a motorcycle. But the fan pumps all this dust through itself and its unprotected sliding bearings, and also drives the lamps, partially covered with a rubber cap, into the windproof cavities of the radiator. Option 3. From a thermal balance point of view, this is the best solution. But the dimensions... But the look of the dangling tinned copper “stockings”... I don’t know... There is such a thing as “technical aesthetics”. This is a purely subjective concept, common among professionals. Let’s say in electronics a printed circuit board with components can look “beautiful” or “so-so”. Although this will not affect the functionality (with the exception of microwave design). Only fellow development engineers can evaluate this among themselves. Same with this LED lamp. I wouldn't put a squid like that on my boat. For plastic bikes that are closed on all sides, it may roll, although dust and dirt will also begin to accumulate on the “stockings” over time, to which, due to their size, they are exposed to an even greater extent than in examples 1 and 2. Option 4. At first glance - the best option.
And you are protected from dust and moisture, and there are no radiators/fans sticking out from the outside, and the arrangement of the LEDs on the substrate exactly corresponds to the standard H4 halogen. But this is a deception for suckers. We have already said a million times that LED lamps emit a lot of heat in addition to light. An axiom in thermodynamic calculations of electronic equipment is that for a given radiator of finite geometric dimensions, even the most optimized one, there is a certain limit on the power dissipated by natural convection. All. Either blow on it or reduce the power input. The developers of this option did just that - they reduced the power. As a result, this option 4 slightly exceeds the standard H4 halogen in terms of light output. In this option, the main advantage of LED lamps is lost - a greater luminous flux than incandescent lamps, with a lower current consumption. It would seem - so what? After all, the body of the factory headlight is designed to dissipate the power consumed by a standard incandescent lamp, and it, as written above, is 60 W for H4. That's right, but the same halogen lamp feels great at a cylinder temperature of several hundred degrees, but what about LEDs on a substrate? And without partial natural air circulation around the radiator, as in options 1 and 3, the dimensions of the radiator in this option would take up a significant part of the internal space. Can you imagine what it will look like? Well, you say, even that’s not right for him, and that’s bad, but then what’s good? Very simple. The disadvantages of option 4 include the phrase “Either blow on it...” and the conclusion suggests itself. So, the best option, free from all the disadvantages listed above, which I installed on my Versys-X:
As you can see, this is the same as option 4, but with forced cooling by a built-in fan, which operates in ideal conditions (and therefore has a long service life). Good heat dissipation made it possible to increase light output and this option has approximately 3000lm. Comparing visually with the stock H4, I can confirm that this is really close to the truth. Note: 3000 lm luminous flux is determined as described below in method 2, although the manufacturer claims 8000. This is complete bullshit. Comparing by eye the light spot from H4 before replacement and from this LED lamp, even after the palette it will not be possible to discern an almost 7-fold difference. This is what the installation of the selected LED option in the headlight looks like: It turned out that there was not enough space on the Versys-e and this lamp simply did not fit in length. I had to trim the contacts and solder an adapter made from the base of an old H4 lamp: After modification, the lamp became perfect. Results. After driving in 1-3 gears around the city on a hot summer day with a temperature of +35 in the shade, the temperature of the headlight glass did not exceed 40-45 degrees. Light. Those who have ever changed their original H4 halogen to an LED lamp will understand me. Questions about comparing road lighting before and after replacement disappear automatically in the very first seconds, once and for all. A comparison of the low beam light spot on the wall before and after replacement showed almost complete agreement with the stock H4. The high beam beam turned out to be slightly narrower than the old one and about half higher. Visually on the road it looked like the distant one began to “hit” further.
The third part of Marlizon's ballet - don't screw it up.
And now, as the unforgettable Kapelyan said, food for thought. The standard incandescent lamp most commonly found in motorcycle headlights is the H4 halogen. Its luminous flux is 1200/1600 lumens low/high beam. It consumes 60 watts on high beam and 55 watts on low beam. Why am I mentioning this? The fact is that manufacturers of LED lamps are simply talking about the luminous flux of their products. You can see absolutely fantastic numbers of 15,000 and even 20,000 lm for an ordinary H4 equivalent. Therefore, if there is no luminous flux meter, you must rely only on your eyes, comparing the light spot before and after replacement. After all, in the end, it is your eyes that are the final evaluative authority for which we change the lamp in the headlight.
Second method. The description sometimes indicates the type of LEDs used. We go to the website of the diode manufacturer (often Cree) and find the Maximum Efficacy at Binning Conditions parameter, which is expressed in lm/W (lm/watt). This parameter indicates the maximum efficiency of converting the power supplied to the LED into light. Also, the parameters sometimes indicate the current consumption of the LED lamp (or you can ask the seller to measure it, or try it yourself). Knowing the power consumption and the Maximum Efficacy at Binning Conditions parameter, you can calculate the maximum light output. For example, if the purchased LED lamp has a current consumption of 2A at 12V, then its power consumption will be 24W. For Cree diode XHP50 (often used type) Maximum Efficacy at Binning Conditions parameter = 149lm/W. Thus maximum light output = 24×149 = 3576 lm. The actual light output is, of course, less and depends on the amount of current through the LEDs selected by the manufacturer. But, since all manufacturers are measured by their pussies, there is a high probability that LEDs are used with the highest possible efficiency.
And the third method. Keep in mind that this is a very rough and approximate method. We use this method if the type of LED used is not known. Also, as in the second method, we calculate the power consumed by this LED lamp. So, taking into account the efficiency of modern LEDs, the real luminous efficiency of such a lamp, in terms of the equivalent of an incandescent one, will be approximately 6-8 times greater than the power consumption at a voltage of 12V. For example, if the purchased LED lamp, as above, has a current consumption of 2A, then its power consumption will be 24W. This means that the equivalent light output will correspond to an incandescent lamp with a power of 144 to 208 watts. Please note that the luminous flux of incandescent lamps is not proportional to the power consumption. This means that if the H4 lamp we are familiar with has, as stated above, 1600 lm at 60 watts, then with the 208 watts calculated above, another lamp will not have 1600x(208/60) = 5546.7 lm. Therefore, in this method we do not make estimates in lumens.
Well, and finally, about installing additional DRLs (daytime running lights). The fact is that using only low beam headlights when driving during the day is not enough due to the cutoff of the light beam. Under certain road conditions (for example, a motorbike is driving up the side of a hill), its headlight will be below the line of sight of an oncoming driver turning left. In this example, the headlight light will be almost invisible, especially in direct sunlight. DRLs do not have such a clear boundary and will be clearly visible to everyone. From my own experience, I will say that after installing DRL, box truck drivers began to give way much more often than before. Here is the installation option on my Versys-X. We place it on the protective arch using additional corners. We use two double LED flashlights of 1500 lm each.
The headlights, together with the low beams, are automatically lit by a relay, which supplies voltage only after the engine has started. A similar relay is found on almost all modern motors. The adjustment is very simple. Against the wall, we turn on the low beam and install the spots from the DRLs so that they shine a little above the low beam end line of the headlights and slightly to the side.
For those who were reluctant to read this post, the conclusion will be this: he who is forewarned is forearmed. Everything else is at your personal discretion.