When asked what a new motorcycle should be like, users often answer the same way. They call it maneuverability, controllability, rigidity . People “in the know” will add fuel consumption and driving characteristics.
The brand is mentioned last, Chinese ones are not mentioned.
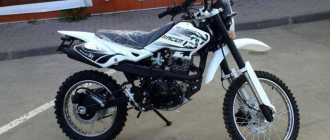
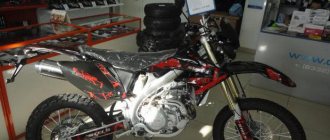
But few people think that new versions of the Japanese, Americans, and Europeans are assembled... in factories in China. When buying a bike at a dealership, the owner will receive the same Chinese motorcycle, paying extra for the letters on the tank and saddle. Racer Fighter was released for those who do not want to overpay just for the name . This is a road motorcycle with a good price/quality ratio , as well as power reserve/fuel consumption.
Prices
You may be interested in: a large review of the IRBIS TTR 250 motorcycle and a review of the Bars Dakar 250
As an example of the maximum levels, the cost of a practically new Racer RC250XZR (1 km of run) will be 168.75 thousand rubles. A car manufactured in 2014 with a mileage of 1.15 thousand km is sold at a lower price. – 43 thousand rubles. Prices of new cars vary depending on the region within significant limits from 112 to 181 thousand rubles.
Screenshot of prices from Avito.ru
Similar models
- Stels Enduro 250. A motorcycle proven over the years, inexpensive and therefore very popular. From time to time it is gradually modernized by the manufacturer.
- Kayo T4 250 Enduro. A serious unit with good capabilities, comparable to the Racer Enduro RC250XZR in both price and technical characteristics.
- BM 250 Enduro . An off-road motorcycle from the Russian-Chinese tandem Baltmotors, proven over the years. Particularly interesting is its modification called Dakar.
Spare parts
The availability of spare parts, as well as their prices, can be considered satisfactory. The price level for spare parts also depends on the region, but let’s say in the Central Federal District a carburetor can be purchased for 11.5 thousand rubles, an intake manifold for 400 rubles, and a kick starter lever for 2.5 thousand rubles. Do not forget that the instability of the ruble exchange rate significantly affects prices, and they can quickly change in one direction or another.
Read other motorcycle reviews Stels Benelli 600 motorcycle review
Here you can find a catalog of spare parts.
Total
There are not just a lot of different 250 cc enduros on the market in Russia and the CIS countries, but a lot, and such a choice makes your eyes wide open. However, the Racer 250 Enduro definitely deserves close attention. With a price of about 170-180 thousand rubles, it is currently head and shoulders above many competitors. Sure, the Racer 250 Enduro will cost you a little more than some of them, but isn't the extra $500 worth a lot more interesting specs?
Specifications
| engine's type | RACER, 4-valve with balance shaft |
| Engine volume, cm3 | 250 |
| Engine power, hp | 27.2 (9000 rpm) |
| Maximum torque, Nm/(rpm) | 23 Nm (7000 rpm) |
| Overall dimensions, mm | 2120x810x1250 |
| Wheelbase, mm | 1400 |
| Maximum speed, km/h | 115 |
| Cooling system | Liquid cooling |
| checkpoint | Clutch (1-N-2-3-4-5-6) |
| Carburetor | Dellorto (Italy) |
| Starting system | Electric and kick starter |
| Fuel tank volume, l | 7 |
| Fuel consumption, l/100 km | 3,2 |
| Wheel size | 80/100-21 / 110/100-18 |
| Wheels (material) | Spoked (aluminum rims) |
| Tires | Nylon (Taiwan) |
| Front/rear brakes | Double-piston disc/Double-piston disc |
| Front suspension | Telescopic with adjustable stiffness and rebound |
| Battery | 12V, 6.5Ah |
| Maximum load, kg | 150 |
| Weight, kg | 115 |
| Dashboard | Electronic |
| Rear suspension | Monoshock absorber with adjustable stiffness and rebound |
| Color spectrum | Orange |
| Note | PTS, hand protection, aluminum steering wheel with variable section |
Fuel consumption based on the manufacturer's data is 3.2 liters per 100 km. Speeds up to 115 km/h.
Reviews from Racer Skyway RC250CS owners
A normal bike for the money, it looks modern and not cheap, like most other Chinese. The plastic is rather weak, once I put the bike on its side at zero speed, the side plastic cracked. I gave it to the craftsmen, they soldered it, then they tinted it. Igor, Miass, Racer Skyway '2017
I bought a bike with a mileage of 3000 km, counting, only after running it in. The previous owner was a slob, after the purchase he didn’t really do anything, the wires were hanging like snot under the plastic, some of the bolts were stupidly not tightened all the way. Although I read about minor assembly problems even before the purchase in reviews of the Racer Skyway 250, so this did not come as a surprise. In general, a normal motorcycle, an ordinary Chinese bike, cheap, but worth the money. It drives normally, doesn’t cause any problems, the main thing is to keep an eye on the equipment. Alexander, Moscow, Racer Skyway '2017.
I haven't seen anything better for this money! It looks really stylish, without the cheap “sport type” styling that a lot of other Chinese have. It drives quite briskly, the gears are short, so it accelerates quickly. Fifth can be engaged already at 60 km/h, then as if on an automatic transmission. After 100 km/h it goes sluggishly, but it still picks up to 120. There is not much tuning on the Racer Skyway 250, but it is not needed, I don’t see the point in pouring money into a cheap bike, which almost all owners will change anyway as soon as the opportunity arises. There is one design flaw with the exhaust gas outlet - a very thin pipe that becomes clogged with carbon deposits. It needs to be cleaned periodically, which means dismantling the entire exhaust system. If you clog it, it can clog up thousands in 10 km so that the traction is lost. Sergey, Krasnoznamensk, Racer Skyway 250 '2017.
Advantages and disadvantages
pros
- Good engine protection.
- Light weight.
- Acceptable price.
- Reinforced pendulum made of pipe profile with variable cross-section.
- Inverted front fork.
- Availability of spare parts
- Plastic hand guards, reinforced with a duralumin plate;
- Window for optical monitoring of the throttle cable condition;
- Automatically folding footrests and speed and rear brake levers.
Minuses
The model's shortcomings are quite traditional for Chinese technology in terms of build quality and the quality of some components. After purchase, the motorcycle must be inspected; all joints and components have to be re-lubricated, the wiring also needs to be checked, some of the nuts and mats require tightening.
- Sensitive valves often begin to knock when overloaded.
- The chain does not always have uniform tension.
- The fuel consumption meter is very capricious and often its readings do not correspond to the actual availability of fuel.
- The spark plugs quickly become covered with carbon deposits and it is necessary to constantly adjust the carburetor needle level.
First look
The exterior of the Racer Skyway stands out noticeably among the galaxy of other Chinese small-capacity bikes. Of course, its appearance bears a subtle resemblance to several Japanese models, but we can still safely say that in this case the Chinese designers did a good job. Externally, the motorcycle turned out to be interesting and quite harmonious-looking. The developed front fairing with side plastic and large headlight optics looks advantageous. Thanks to this decision, the Skyway Racer looks modern and stylish, and at the same time does not try to pretend to be a sports bike, unlike some other “Chinese” ones, which often looks inappropriate and sometimes even funny. The appearance of the Racer Skyway 250 turned out to be solid and consistent with the class and purpose of the motorcycle.
Flaws
And of course, the Racer Enduro 300 RC300-GY8A, in addition to bright advantages, such as an awesome engine and carburetor, also has no less striking disadvantages.
Wheels
The wheel rims on this enduro motorcycle are steel. I can't say they aren't durable. My test drive lasted about 20 minutes, but I need to drive it for at least a day. But the fact that they are heavier than aluminum ones is a fact. But most likely, they are unlikely to be particularly durable.
Star mount
The driven star is fixed to the hub with only 4 mounting points. And even through stupid silent blocks. This solution was taken from the Yamaha YBR 125 and is found to reduce shock loads on the chainring. But based on the operating experience of other Chinese motorcycles, this system doesn’t last at all. YBR has a star mounted on a separate bearing. In our case, there is no bearing and the silent blocks begin to loosen and tear out. The solution is to drill the holes all the way through and install the star firmly on the bolts. Why not do it right away?
Chain trap
Another obvious and incomprehensible jamb for me is the chain trap. Or rather, its complete absence. The chain itself, by the way, is 520, which is good. But the savings on matches from many Chinese manufacturers are absolutely incomprehensible to me.
Steering wheel
But the steering wheel will definitely have to be changed immediately. There is the cheapest iron steering wheel here, which will not withstand even the weakest falls. In addition, it has a diameter of 22 mm, instead of the now usual 28 mm.
Front fender
In general, the plastic on this motorcycle is not bad at all. This applies to the sidewalls and rear wing. They are made of ABS plastic in the style of KTM 12-16 years of production. This, by the way, is installed on many Chinese motorcycles. But the front wing is like a mare’s tail that wasn’t sewn on. Not only that, in my opinion, it has a stupid, shortened shape. It was also made from some kind of bucket. In short, together with the steering wheel, we immediately order a front fender, well, at least in the same KTM style and made of normal, high-quality plastic.
Workmanship
Let me remind you that products under the Racer brand are manufactured at a plant in the city of Barnaul from Chinese components. The plant also produces frames for motorcycles. And there are still complaints about the quality of these same welds. I haven’t seen any obvious flaws in welding for a long time; everything was welded reliably. But the aesthetics of these very seams is simply darkness. The second problem of most manufacturers and suppliers of motorcycles from China is a complete misunderstanding and ignorance of motorcycles in general and enduro motorcycles in particular. If you are not technically savvy, is it really impossible to invite a consultant? Any experienced endurist will immediately point out most of the mistakes and they can be avoided. But apparently the Racer company has not yet matured to this point.
Design and appearance of Racer Storm RC250XZR-A
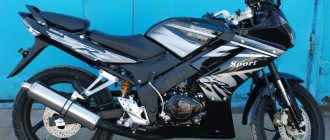
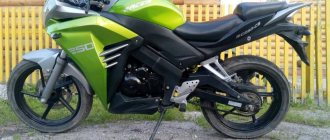
Racer Storm RC250XZR-A is designed in a sportbike format, although, of course, it is far from powerful liter sports models. But this look is appreciated by buyers, the motorcycle looks menacing, so why not. Moreover, a slight improvement in dynamics due to body kits will also not be superfluous.
The motorcycle frame is steel, tubular, welded. The front suspension is telescopic, the rear suspension is a pendulum and a monoshock absorber. It supports hardness adjustment. Disc brakes, with one disc at the rear and two at the front. Of course, these are not Brembo, but they are enough for safe braking, considering that you can’t accelerate to 200+ km/h on the Racer Storm RC250XZR-A even if you wanted to.
The wheels are cast, with spokes, like those on “adult” sportbikes. Both have a diameter of 17″, with 100/80 tires on the front and 140/60 tires on the rear. These wheels have a good strength-to-weight ratio, so the motorcycle is not too heavy.
Racer Storm RC250XZR-A weighs 136 kg dry, which is quite acceptable for a bike of this class. With a full tank and all fluids, the bike weighs a little more than 150 kg, which is also not bad. Many Chinese models are equipped with a slightly weaker engine, but they weigh more, and therefore their dynamics are worse.
Tips for choosing
You can choose a really high-quality model, taking into account our tips and recommendations. It is useful to know the classification of motorcycles and their characteristics, then it is important to be able to choose a vehicle to suit your needs.
Classification:
- Hard – this class is suitable for more professional drivers. Motorcycles of this type have lower weight and good strong parts.
- Soft – great for traveling over rough terrain and the city.
- Tourist - this type has rather poor cross-country ability, but the positive aspects include a comfortable fit and the provided protective arches.
Engine capacity:
- Up to 250 cc see - the presented type of motors performs well in urban conditions, thanks to its maneuverability. Air cooled.
- From 250 to 300 cc. see - will be a good option for beginners to understand all the tricks of driving a motorcycle not on asphalt.
- From 400 to 800 cc. see - this type of engine is perfect for traveling over rough terrain, as well as for city driving. Perhaps the only negative side is the huge mass, which is approximately 140 kilograms.
Eachine Racer 250 DIY KIT Racing Quadcopter Review
Hi all. Today we are reviewing a racing quadcopter with BC motors and an FPV system, Eachine Racer 250 DIY KIT. The review is rather dedicated to beginners who are far from assembling, configuring, and flashing any operations necessary for it to finally take off. An introductory review with a description of all the necessary little things that anyone who wants to delve into the subject of racing quadcopters will encounter.
First, a little theory. This quad is 250-size, the diagonal distance between the axes of the motors is 280m. Dimensions: 220x233x50 mm. Weight: 400 g (without battery) Designed exclusively for racing flights with freestyle elements. This class of quadcopters is not at all designed for smooth aerial photography, so if your goal is to fly slowly and smoothly, as well as get beautiful aerial shots, then these quadcopters are not for you! If you want to race, fly, do flips and various “tricks”, as well as feel like a pilot and see the flight from the first person, the way flying birds and the heroes of the movie “Star Wars” see it, then this is all for you! I myself have been skeptical about all these quadcopters for quite a long time, although for a couple of years now during the summer period the musk has been literally inundated with reviews about all kinds of quadcopter options. Usually this is RTF (Ray to Fly - ready to fly out of the box) for 15-50 bucks. But one day I accidentally came across a video on Youtube and I really wanted to experience all the delights of a live broadcast of flights myself.
This type of quadcopter is usually sold separately. those. literally, if you want to assemble something similar, then in addition to the quadcopter itself you will need to purchase: 1) Control equipment with a receiver, which we install in the quadcopter; 2) Batteries (at least 2-3 pieces); 3) Video glasses, helmet or monitor for FPV flights. 4) Well, and the usual consumables in the form of spare blades, a pair of motors, etc.
For beginners, perhaps, it should be separately noted that equipment from quadrics such as Syma, Tarantula, JJRC, etc. do not fit, you need equipment of the same type - Flysky FS-i6, Radiolink AT9, etc.
Regarding batteries, 3S or 4S batteries are suitable for this type of quadcopter; as a rule, batteries with a capacity of 1500 to 2200mAh are most often used. Video glasses and helmets are needed, first of all, in order to get the maximum pleasure from the flight. Flying racing quads on a monitor is inconvenient, although possible. Most often on alieexpress, banggood, gearbest you can find simpler ZMR250 and QAV250 kits; they are, of course, cheaper, but the equipment is much poorer and the assembly is more complex. If we make a simple comparison, the ZMR and QAV kits do not include a heading camera, an FPV transmitter, or LED backlight, and the assembly is also more complicated due to the fact that the Eachine Racer 250 has all the contacts and power wiring for the motors/controllers already soldered on the bottom of the frame, which greatly simplifies assembly. Accordingly, the assembled model looks more presentable and neat due to the fact that there is no need to solder and hide a bunch of wires inside. So the best choice for a beginner, given the desire to assemble a quad on his own, would be Eachine Racer 250.
And so, we decided on the tasks and choice of model. Let's move on to the review of the kit itself. The order was placed on March 4, transferred for delivery on March 8, and on March 31 the parcel fell into my hands. Delivery is quite prompt. The parcel number was tracked all the way. The box with spare parts was wrapped in one layer of isolon and packed in a simple bag.
The box took a beating (well, our Russian Post just can’t master neat and fast delivery methods).
The weight of the entire box is 567 grams. Opening the box, we see instructions and a bunch of parts, each of which is placed in a separate antistatic bag.
The kit includes:
1) Frame + anti-vibration platform for the camera The frame consists of a lower part made of textolite, on which capacitors and contacts for powering regulators and motors are soldered, and there are also all the necessary connectors for connecting LEDs and additional small items. The upper part of the frame is made of 1mm carbon fiber.
2) 4 ESC Simonk 12A regulators (they are responsible for controlling each motor) 3) Naze32 10DOF flight controller with barometer and compass on the F1 processor (you can choose CC3D) - responsible for controlling the entire quadcopter, to put it simply, this is its brains. 4) 4 motors 2204 2300kv (different directions), the direction of the motor usually means the rotation of the motor opposite to the direction of tightening the propeller fixing nuts, CW and CCW 5) 4 beams - many are confused by the plastic legs, but on specialized forums some owners of both types of quadcopters (with plastic and carbon beams) they write that in practice, plastic legs are in no way inferior in strength.
6) Aluminum head
7) Front LEDs
 Heading camera 1000TVL - a non-recording camera, intended only for orientation during flight, with viewing through video glasses or a helmet
9) Video transmitter 600mW 5.8G for 32 channels - designed to transmit a video signal via radio channel from the camera to a monitor/glasses/helmet 10) Antenna for the TX “mushroom” video transmitter. Important!!! You cannot connect the power of the quadcopter without a screwed antenna to the video transmitter!!! Burns out very quickly!
11) 2 sets of screws, size 5045, the screws are hard, rather fragile.
12) Velcro for the battery, a carbon wrench for unscrewing the propeller fastening nuts, three hex keys required for assembly
Assembly:
We begin assembly with the flight controller. I initially started assembling the quadcopter according to the instructions, and only then found out that the instructions incorrectly indicated the position of the flight controller. So some photos will have conflicting information. The controller must be installed so that the micro-USB slot is on the left side of the quad, with the arrow pointing forward. We take our Naze32 controller and attach nylon legs to it so that the nuts are on top. The green textolite board on the controller does not allow the nuts to be installed evenly to install the legs (the corners get in the way); it needs to be filed with a file. Then we connect the supplied wiring and install the controller on the bottom of the frame.
And we fix the flight controller to the bottom of the frame with 4 screws. Next, we take the “face”, install the front LEDs in it and fix them with small, hidden screws. The fastening is so-so. It holds, of course, but it would be much safer to tighten the LEDs onto the nut from the reverse side. Recently there was a review on Muska where running lights for a car were assembled from exactly the same LEDs. Then we put the lower part of the frame aside and take the upper one. We attach a video transmitter to it. To do this, unscrew the nut from the antenna connector, take 2 nylon spacers and two screws and secure the transmitter to the housing.
The next step will be installing the regulators and connecting the motors to them. This is the only part of the assembly that requires a soldering iron and minimal soldering skills. The contact pads are already all tinned, so all we have to do is solder 12 wires from the regulators to the frame. Do not mix up the order of soldering the wires. This time, everything in the instructions is correct.
We install the motors on the “legs” of the quadric and fasten them to the screws. Motor installation order: top left and bottom right clockwise (CCW), top right and bottom left counterclockwise (CW). The easiest way to figure out which one to put where is to check which way the nut is screwed. If clockwise, then the motor rotates counterclockwise, it must be placed on the top right or bottom left.
Scheme
We pass the wires from the motors through the partitions of the legs and connect the motors to the regulators.
After successful soldering, we install the “legs” and secure them to the bottom of the frame with 2 screws. We install the muzzle, connect the front LEDs. We fix it with screws to the bottom of the frame.
Then we take the anti-vibration platform and “push” the dampers into the holes of the platform and the upper part of the body. I installed the platform after I assembled the entire frame. I had to suffer. It is easier to install while the top of the frame is not secured. After this, you can begin installing the upper part of the frame. First, we connect all the connectors of the video transmitter and camera. It is very convenient that all the connectors are different - there is no possibility of mixing something up and plugging it in the wrong place. The camera must be installed in such a way that the longest “tongue” of the board faces upward. It allows you to adjust the tilt of the camera as long as the screws on the top frame cover are not tightened. Then we take carbon spacers and apply them to the top of the beams. And we lay the upper part of the frame on top. We look for a position so that the holes for the screws in the frame and supplies match and tighten the screws.
Almost done. Take the remaining screws and tighten them.
The quadcopter is assembled. We apply cosmetics. We hide the excess wires and secure the regulators to the legs using nylon ties
Ready. Assembly is complete.
The total weight of the quadcopter, with installed protection, battery attachment and battery was 550 grams
The next stage is updating, flashing and configuring the flight controller. For this we need any computer with Internet access. Download the Cleanflight Configurator application for Google Chrome. Let's launch. The main program window will open, and the first thing we do is download the CP210x Driver to connect the quadcopter to the computer.
We take the quadcopter and a USB cable to connect to the computer, connect it and press the green “Connect” button in the upper right corner. The flight controller settings window opens.
After we have successfully connected the quad to the computer, we move on to the firmware update stage. There are several firmwares: openpilot, cleanflight, betaflight... Here you need to try and choose the best one for yourself. We will analyze the option for beginners - the more popular and stable version of Betaflight from Boris... to do this, go to the website and download the current firmware. It is always advised to download the penultimate version of the firmware as it is more stable and functional. Download Betaflight 2.6.0 “betaflight_2.6.0_NAZE.hex”, remember the file location. Launch Cleanflight again (the quadcopter is connected to the computer), and without pressing the “Connect” button, select “Firmware Flasher” (1) from the menu on the left side of the screen and click on the icon in the right, bottom part of the screen “Load Firmware (Local)” (2 ) - indicate the path to the firmware file that we downloaded earlier. Then click Flash Firmware (3). And we wait for the firmware to finish. (4) The entire procedure takes less than a minute.
After successful firmware, the first thing to do is turn off the compass and barometer (1) (the version with the CC3D controller does not have them). I don’t know about others, but with the compass and barometer turned on, my quadcopter is unpredictable. It can turn on its own, spin around the rudder, or even roll over. For a long time I could not understand why he behaved this way; a solution was found, but not immediately. To disable, go to tab (2) “CLI”
On the bottom line, enter the following commands one by one:
1) set baro_hardware = NONE 2) set mag_hardware = NONE
and save the changes with the command 3) save After entering the “save” command, the flight controller should reboot and the compass and barometer at the top of the screen (2) will stop lighting.
Let's move on to the next setup step. In the first tab “Setup” we check that the accelerometer is working correctly, i.e. whether the flight controller correctly determines the position of the quadcopter in space. To do this, we tilt the quadcopter in different directions and the image on the computer screen should correspond to the tilt of the quadcopter. On the screen, the front of the quadcopter is indicated by a large green arrow (1). If all the movements of the quadcopter correspond to the image on the screen, then we place the quadcopter on a flat surface and press the button (2) “Calibrate Accelerometer”, after successful calibration we go to the tab (3) “Configuration” (If the movements of the quadcopter do not correspond to the image, then we you will need to programmatically set a different location for the flight controller, more on that below)
Here we see the main settings: 1) The first thing to choose is the type of our quadcopter, and check again that the rotation pattern of the motors matches ours. 2) Motor settings item, here we set the minimum/maximum gas and configure the motor blocking. MOTOR_STOP - blocking of motors during arming, i.e. When you connect the controller to the quadcopter, your motors will not rotate when activated. If the slider is removed, then when the ap is connected, the engines will start at minimum gas. ONESHOT125 - does not work on our regulators. If I'm not mistaken, this is a technology for high-speed data exchange between the controller and motor controllers. Minimum Throttle - the minimum throttle value, it is important that this value is greater than the value at which the motors begin to rotate. You can determine the minimum value for the start of motor rotation in the “Motors” tab, but more on that below. Middle Throttle - average throttle value, set to 1500. Maximum Throttle - maximum throttle value, set to 2000. 3) If your accelerometer did not correctly display the position of the quadcopter on the PC screen (the quadcopter in the image is upside down, or its sides are inverted), then just In this menu you can programmatically change the position of the quadcopter. To do this, using an experimental random method, we try to replace the angle so that the position of the quadcopter corresponds to the image on the screen. 4) Menu for selecting the method in which you connect the control equipment transmitter. In this kit, with a useful controller, there was a wire only for connecting via PWM (i.e., each channel is transmitted via a separate wire). Via PWM it connects normally, it works! But for some reason everyone likes to connect via SBUS. An adapter for connecting via SBUS (all channels go via 3 wires) must be purchased separately. 5) Be sure to click the “SAVE and Reboot” button to save all changes. The next item “PID Tuning” is for tuning the PIDs. The thing is very incomprehensible and most complex. Everyone changes them regularly, argues about the settings, and everyone has their own. In simple terms, this is adjusting flight stability. 1) choose LuxFloat - as the most stable and does not require changes. 2) Roll rate is an adjustment of the sensitivity of your sticks. The thing is quite individual. Whichever is more convenient for you. To begin with, we leave it as default, try it and adjust it in the right direction. 3) Setting up the pids themselves. To begin with, we fly by default and as we master control skills, we read more and more about these same PIDs and customize them for ourselves. In the “out of the box” version and by default, the quad flies, not perfectly stable of course (there is also “chatter” and swaying, etc.), but it’s good for training.
The next Receiver item is setting up the equipment connection. 1) Select the type of our equipment. The main thing is to choose the type so that the movement of the gas stick corresponds to the Throttle slider. And the second nuance - we turn on the equipment, set both sticks to the central position and the first 4 values should be equal to 1500, and in the extreme positions 1000 and 2000, respectively (this is arranged in the menu of the equipment itself in the “Sub-Trim” and “End-Point” items And then we set up the remaining channels on different switches to switch modes, arming, etc. Since everyone’s equipment is different, detailed settings can be found on Youtube.
Next, the “Modes” tab is the setting for switching flight modes. Without this setting, the engines will not be able to start. ARM - arming (connection of equipment with a quadcopter). I configured the arming on a separate, two-position switch (I have channel 4). ANGLE is the simplest stabilization mode. Very smooth. Recommended for beginners. It is also turned on during landing for a smooth descent and landing. I set it to channel 3 (three-position switch, down position). HORIZON is also a fairly stable and smooth mode, but it’s a little sharper and allows you to do flips (by holding the right stick to one side). I set it to the same channel 3 (three-position switch, in the middle position) AIR MODE - a more advanced mode, many fly in it. Maximum stabilization regardless of throttle position. It's still difficult for me. I set it to channel 3 (three-position switch, in the upper position, but I don’t use it yet) ACRO - a mode for experienced pilots, enabled by default, i.e. If we disable all our modes, then we’ll get ACRO. I don't recommend it to beginners. The quad becomes sharp and fast.
And the last setting item we need is Motors. Here we can see the minimum value at which the motors begin to rotate (for the Configuration item), and we can also calibrate all the motors. To calibrate the motors, first of all we remove all the blades from the motors!!! IMPORTANT! If not removed, injury may occur. Then activate (1) the slider. Raise the general (2) motor slider up. Connect the battery to the quadcopter. A short signal will be heard, then lower the slider (2) down, the usual signal for turning on the quadcopter will be heard. After this, slowly raise (2) the slider up. At the same time, the motors will start spinning. Raise it to the maximum value and release it down. Calibration is complete. Right there, with the slider for each motor, you can see the motor start value.
Save all the settings again and turn off the quadcopter. After this, we install the propellers, connect the battery and you can proceed to the first flight.
Flight. Honestly, I didn't think it was so powerful. I already have a couple of quads (Cheerson CX-10, Tarantula 1505), but compared to them this is just a monster. It's like comparing a Lada with a 1.5 liter engine to some Ferrari. At the first launch, the adrenaline went through the roof. He's very sharp. Even in ANGLE mode. It will take more than a dozen flights to get used to it and learn to fly. The video captures the first test flight, nothing extraordinary, just the fact that it flies) Our weather is not yet suitable for flying, there is still knee-deep snow in the open fields.
Of course, you need to fly in open space, outside the city. To prevent the quadcopter from falling on someone's head. And at first we will fall - very often. Most often, out of fear of the quadcopter “flying away” back to China. In this regard, the purchase of the following spare parts is strongly recommended:
1) Spare blades. It is advisable to buy 10-20 pairs at once. They break very often. Blades of sizes 5040 and 5045 are suitable (5045 were included in the kit, I bought the same ones). On the forums they advise buying KingKong blades.
2) Motor protection (sold there on Banggood and costs a penny). Protects the motor housing, taking the blow.
Additional Information
3) Spare beams. Definitely take it as a spare. In a week of flights, I haven’t broken a single one yet. But I didn't fly high either. For now only training flights. It is also recommended to wrap them with electrical tape, which increases their strength. There were cases when people managed to fly after a broken leg and successfully land the copter on “duct tape”.
4) It is advisable to print a partition for fixing the battery. In early revisions, the frame included a carbon partition, which did not allow the battery to demolish the flight controller due to inertia. Now there is no such partition. And if the quadcopter falls face down, then the battery, by inertia, flies deeper inside the frame, tearing out all the brains of the quadcopter. Here you can download a 3D drawing of this partition and print it at any advertising agency. For installation you will need 4 more M3 screws, 16mm long, with nuts. The frame already has holes for its installation. The weight of the part is only 13 grams.
Additional Information
5) I also took Velcro, because... The complete set is quite short. Of course, you can use it, but one is not enough to attach a GPS tracker and camera.
At your discretion, you can buy a couple of spare motors and regulators.
Conclusion: The quadcopter is fast, playful, powerful, and angry! Flying at first is scary. Requires long training to master all flight capabilities. It is more difficult to control than cheap RTF quads with collector engines. It takes time to study specialized forums. It is necessary to buy a lot of things, without which it simply will not fly. You can, of course, buy a complete set, but the cost is many times higher. The quadcopter is not at all suitable for filming and smooth flights. Not suitable as a first quadcopter to gain skills in controlling quadcopters.
But on the other hand, it is ideal for those pilots who have already “grown up” from ordinary small quadcopters with manifold motors. A completely different feeling from flying!!! Even without taking into account FPV. After mastering its flight characteristics and with more or less confident flight, you can immediately move on to FPV flights and again get a lot of new emotions! And if you consider the fact that the assembly process is also a pleasure. Then we get a triple bonus!)
Eachine Racer 250 is an ideal transition from small quadcopters with brushed motors to the class of racing quadcopters with BC motors! Budget-friendly, simple and reliable.
Thank you all for your attention. Good luck on your flights!)
