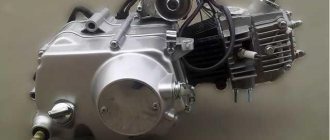
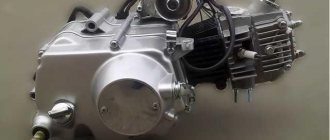
Box Voskhod disassembly repair
The purpose of the gearbox is to transmit torque from the crankshaft to the rear drive wheel of the motorcycle.
Using a set of gears and a shift mechanism. Therefore, you can change the load on the engine without changing the speed of the rear wheel. And also increase or decrease the number of revolutions of the drive wheel without changing the crankshaft speed.
Consists of three steel shafts - primary, intermediate and secondary. They rotate on bearings installed in the crankcase.
Gears are installed on the shafts, which can be moved using a switching mechanism. At certain positions, torque coupling and disconnection occurs.
Disassembling the box of the Voskhod motorcycle
Press out the secondary shaft bearing race, making sure that there are no distortions.
Press the intermediate shaft bearing out of the right half of the crankcase, remove the adjusting washers and retaining ring.
Remove the shift shaft.
Remove the intermediate shaft gear.
Press out the intermediate roller.
Remove the moving gears of the second speed and the stationary gears of the first speed.
Unbend the washers, locking bolts securing the roller stop and the switching mechanism, and unscrew the bolts.
Remove the stop of the roller, the shift mechanism together with the 2nd speed moving gear.
Press out the input shaft.
Remove the shift mechanism retainer and spring.
Press the bearing out of the left half and remove the adjusting washers.
MY MOTORCYCLE
If you have become the proud owner of a Voskhod motorcycle, then this article is for you.
Sooner or later, if you don’t immediately sort out the hoe, you may encounter the problem of poor gearbox performance. And then it’s time to start adjusting it, if you’re not afraid to look there yourself. Throughout the entire period of operation, changes occur in the components of the Voskhod motorcycle due to the natural wear of parts. Many years of failure analysis, special studies and tests show that the durability of a motorcycle depends primarily on correct operation and compliance with the recommendations for maintenance and repair set out in the instructions.
One of the first jobs that has to be done after a significant mileage is adjusting or repairing the gearbox. The signal for this is the appearance of jerks when driving in any of the four gears. The malfunction is explained by the small meshing area and the crushing of the edges on the gear cams. Do not rush to remove the engine from the motorcycle - in most cases you can do without it. Most often, jerking occurs when driving in fourth gear, and the reason is increased axial play (along the input shaft) of the main gear.
Here proceed as follows. Set the transmission gears to neutral. Remove the generator cover and remove the clutch release rod. Bend the sector of the washer on the rear gear gear bent onto the edge of the nut and unscrew the nut (note that the thread is left-handed). Remove the washer, teeth (possibly together with the chain) and adjusting washers. Remove the spacer sleeve with the rubber ring and remove the oil seal from the crankcase using a special tool. Try to carry out this operation carefully to preserve the seal. Remove the retaining ring and shims.
Picture 1.
Now, using a special mandrel N1
(Fig. 1), press the main gear bearing race inside the crankcase until it stops, as shown in Fig.
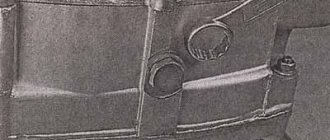
2, ensuring its easy rotation. The axial play of the gear should be 0.3 mm. This operation also requires care. The cage must be further pressed with gentle blows on the mandrel: excessive force can lead to breakage of the collar in the left half of the crankcase. At this point the adjustment can be considered complete. When reassembling, replace the adjusting washers removed during disassembly, and additionally install the same ones to fill the space between the race and the retaining ring. If the working edge of the oil seal has defects, it should be replaced with a new one. Without removing the engine from the frame, jerking in second gear can be eliminated. To do this, with the gear removed from the main gear, remove the rubber-metal plug of the intermediate shaft, remove the retaining ring and adjusting washers. Using a special mandrel No. 2 (Fig. 3), press bearing 202 until it stops, as shown in Fig. 4. Replace the removed adjusting washers and additionally install the same washers flush with the edge of the groove under the retaining ring. Place the retaining ring in the groove and the rubber-metal plug of the intermediate shaft in its place.
When jerks appear when engaging third gear, they can also be eliminated without disassembling the box. First, carry out the work outlined in the section “Removing and installing the clutch, motor transmission and kickstarter mechanism” of the operating instructions for the Voskhod-ZM motorcycle or in a similar section of the instructions for any Voskhod motorcycle. Then remove the retaining ring of the bearing 203 of the input shaft and the adjusting washers, using light hammer blows through mandrel No. 1, press the input shaft bearing until it stops, as shown in Fig. 5. Replace the adjusting washers and use additional washers to fill the gap to the retaining ring.
Carry out further assembly in the reverse order of disassembly. If the described methods failed to eliminate the jerks, then the cause of the malfunction is wear on the cams of a pair of gears. In this case, it is necessary to remove the engine from the motorcycle and, having disassembled it according to the recommendations set out in the operating instructions, replace the worn parts. After this, you will need to adjust the box, but first you should check the gear shift mechanism. If its forks have a lot of wear, they should be replaced. If there is no wear on the working surfaces of the forks, check their play on the axles: it should not exceed 2 mm. If there is more play, place additional washers under the locking rings on the axle, ensuring that the forks move within 0.1-0.3 mm (Fig. 6).
Now you can start adjusting the box. With the right half of the crankcase removed, set the gears to the neutral position and check the gap between the cams of the stationary (on the input shaft) and the movable third gear gears. It should be no more than 0.8 mm, and when they come together, the cams should not touch each other. If these conditions are violated, ensure them in the following way. Remove the clutch. Remove the retaining ring from the input shaft bearing on the left half of the crankcase. By pushing the bearing deep into the crankcase and thus displacing the input shaft with the fixed gear, set a gap (not more than 0.8 mm) between the moving and fixed gears of the input shaft. Next, you need to check the presence of a gap between the cams of the main gear and the moving gear of the 3rd-4th gears in the neutral position. To do this, remove the gear from the main gear. Carefully, so as not to lose the rollers, remove the main gear from the cage, press out the oil seal, remove the retaining ring and adjusting washers. Place the main gear on the right end of the input shaft and check for clearance between the cams. They should not touch each other. If there is contact, the input shaft should be slightly pushed down. This completes the box adjustment. It remains to check its work. Shift into each gear in sequence. The box will operate reliably when the gear cams are fully engaged.
Now you can assemble the gearbox of the Voskhod motorcycle.
First, install the shims and retaining ring for the input shaft bearing in the left half of the crankcase. Place the assembled main gear in place in the right half of the crankcase. Connect the crankcase halves and check for axial play at the main gear - it should be in the range of 0.15-0.3 mm. This is achieved by pushing the main gear race deep into the crankcase. Rotate the gears in neutral. There should be no noise in the box from the contact of the gear cams. When installing the clutch, take into account the amount of displacement of the input shaft and compensate for this displacement with washers, installing them at the inner race of the input shaft bearing so that the drive and driven sprockets of the motor transmission are in the same plane.
Well, as a result, timely and correctly adjusted adjustment of the Voskhod motorcycle transmission ensures reliable and durable operation of the entire motorcycle transmission.
Assembling the Voskhod box
Assembly is carried out in reverse order. At the factory, the gearbox is adjusted, so the consumer, when disassembling and assembling the gearbox, must pay attention to the correct placement of parts and adjusting washers. It is possible that during the rebuilding process, due to the grinding in of parts and their partial wear, additional shims will be required.
Normal operation of the gearbox is ensured with a gap of 0.3-0.8 mm. This gap should be between the cams of the fixed gear of the 3rd gear and the moving gear of the 2nd gear on the input shaft. And also between the cams of the fixed gear of the 2nd gear and the moving gear of the 3rd gear on the intermediate shaft with the gearbox in the neutral position and the forced approach of these gears. The specified clearance is ensured by adjusting washers, which are installed between the retaining rings and bearings of the 202, 203 series in the left half of the crankcase.
Device
Rice. 1. Gear shift mechanism: 1 - fork axis; 2—locating pin; 3 — pawl body axis; 4 - fork; 5 — base of the mechanism; 6 — pawl body; 7 - locking pin; 8 — disk; 9 - dog quencher; 10 - dog; 11 — roller driver; 12 — lock body; 13 - spring; 14 - latch.
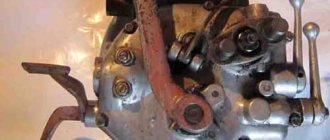
Let's start with the switching mechanism (Fig. 1). Its base 5 is fixed in the left half of the crankcase by means of bolts and pins 2. On the central axis 3 of the base, a housing 6 pawls, a disk 8 and forks 4 are installed, which move the gearbox gears.
The stroke of the spring-loaded pawls 10 is limited by a pin 7 passing through the body and the cutout in the pawl and cored at both ends. The same pin holds the pawl spring in the housing. Two axes 1, which carry the forks of the mechanism, move in the curved grooves of the disk.
When the gear shift roller is turned all the way, located in the left half of the crankcase, the roller driver 11 with its spherical head turns the body 6, and one of its pawls, entering the window, turns the disk. At the same time, another pawl is pushed into the body by a sinker 9 riveted to the base of the mechanism. The disk moves the axles 1 with forks 4, which, entering the annular grooves of the movable gears of the box, move them along the shafts. When the disk is engaged in gear or neutral, it is locked by a lock 14, which fits into the slots on the outer surface of the disk.
Rice. 2. Gearbox: 1 - fixed gear of third gear; 2 — movable gear of the second gear; 3 - secondary shaft; 4 - input shaft; 5 — intermediate shaft; b — intermediate shaft gear; 7 — fixed gear of the second gear; 8 — movable gear of the third gear; 9 - first gear gear.
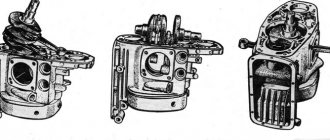
The gearbox (Fig. 2) consists of a 4 primary, 5 intermediate, 3 secondary shafts and a set of gears.
Gears 1 (third gear) and 7 (second gear) freely rotating on the shafts are protected from axial movement by locking rings. Gears 2 (second gear) and 8 (third gear) are connected to the shafts by means of splines along which they are moved by the forks of the shift mechanism. These gears are equipped on both sides with cams, which, when the gears are engaged, enter the windows of adjacent gears and force them to rotate along with the shafts.
The positions of the gears and the shift mechanism when the box is operating in different gears are shown in Fig. 3.
Troubleshooting and repair of the Voskhod gearbox
At some point, a very unpleasant breakdown occurs in a motorcycle gearbox. When the motorcycle moves, the speeds begin to turn off, jump out and turn on again, the motorcycle begins to howl and jerk. Many people encounter this breakdown in the gearbox.
The gearbox needs repair. Almost everyone, having disassembled the engine and checked the fastening of the gear shift mechanism and found no damage, begins to adjust the gearbox. It is not advisable to reset the factory settings. You just need to repair the gears.
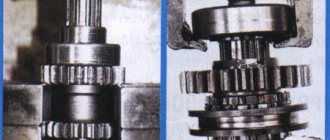
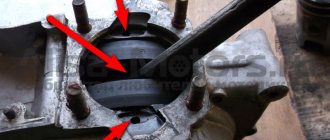
The first photo shows a faulty gear. In photo 2 it is repaired. After repairing the gearbox, the speeds will not jump out.
Signs of a faulty gear shift shaft
Press the shift lever and engage first gear. The speed was turned on and we started moving. We accelerate, we need to turn on second gear, but we can’t shift. We find out that pressing the pedal and releasing it does not return to its original state. We try to force the lever back into place with our foot. We are trying to turn on a different speed. Switching on is usually successful. Conclusion: The return spring of the gear shift shaft is broken.
Gear shift shaft repair
The repair consists of completely disassembling the engine and replacing the broken return spring with a new one.
Source


