Size markings on the Ural motorcycle engine crankcase
The factory designation of the interaxal dimensions KB and PB of the motor crankcases, on which the correct fit and correct operation of pairs of gear wheels (GK) depends, or in other words, the marking (numbers) of the size group (RG) is carried out by the manufacturer's workshop using an impact method outside and on top of the crankcase, to the right of the generator.
The filled-in RG number allows you to identify the assembly unit by its individual parameters without wasting time on measurements and allows the worker to select an appropriately sized set of gears for subsequent installation according to the index available on them according to the recommendations presented in the table below. There can be seven crankcase groups in total: 0; 1; 2; 3; 4; 5; 5.5. Place of application of RG on the crankcase
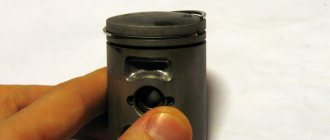
Pistons Automotive technology is the key to trouble-free motorcycle engines
Autotechnology pistons serve as a good replacement for the original pistons of Soviet motorcycles. In our online store you can buy piston rings for the Ural motorcycle at prices below the market average. For example, if you need to replace the piston system, we suggest ordering a set of forged pistons from Autotechnology. We also have universal kits that are suitable for Ural, Dnepr, K750 and M20 motorcycles. The range also includes comprehensive sets of spare parts from different manufacturers: Avtotekhnologiya 79 mm pistons, Kobelshmit rings and KIA pins. To make sure that a specific spare part is suitable for you, the technical specifications listed on the website under each item will help.
All parts presented on the site are characterized by high resistance to thermal and shock loads, hardness, durability and reliability. We offer our customers a wide range of only certified spare parts with a guarantee from the manufacturer and delivery throughout Russia without a minimum order amount.
Size markings on gear set
The index of a set of gears is currently indicated on the large gear to the right of the notch.
On the KV and RV gears, the factory applies a dimensional index marking on the end part with an electrographic pencil, in the same place where the notches are made.
These marks are applied for precise installation of the timing belt in the TDC position of the crank mechanism. There are 7 indexes of the ZK set until 1991: 13-18; 12-17; 11-16; 10-15; 9-14; 8-12; 6-10. Subsequently, the same numbers began to be stamped on the gearbox as for the crankcase. According to the requirements of the design and repair documentation, when operating the coupled gearboxes KV and RV, a lateral clearance of 0.1-0.12 mm should be provided for new gears, and should not exceed 0.3 mm for worn ones. If you do not comply with these requirements, you will soon have to make another repair.
It's time to take stock of the past tense from the first blog in 2012, taking a little bit of the beginning of 2013, and unsubscribe for what I have done recently. Since I already wrote in the first part, I ordered forged pistons, posted photos of them, and so it turned out that I had already assembled the piston, although this was not part of my plans, and it was done purely out of idleness. Photo of the motorcycle with me =D, alas, there are no beautiful photos because I’m just repairing it.
So, let's begin. Everything went great, to begin with I decided to weigh the old piston with the new one and the pins. Everyone probably knows why. The fingers had the same fun, which made me very happy, and the pistons generally have a good seven-fold weight. But it was a little upsetting that the pistons that were standing were with a difference of 2 grams, well, it’s not scary, but it’s not good either...
Photo of pistons with weight.
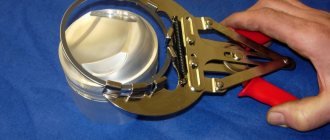
And since I was doing everything for the first time, it was a little scary. First, I had to find something to press out my fingers to remove the old pistons. After looking for a tool in the garage, I dug out the necessary thing. I pressed them out after school, without coming home, I immediately went to the garage and one day carefully pressed out one piston, the next day the second. At home I did a small inspection of the pistons, the inspection revealed scratches on the piston, while the cylinder liner was mirror-like, I also found sagging rings, since they all had different sizes in the locks, comparing them with the new ones, I noticed that firstly there was no one oil scraper The rings are the same as on the standard one, and the fact that the new ones are better than the old ones, they are thinner, and the oil scraper has a herringbone (direction), while the standard ones are simply flat.
Photo of the rings.
After a detailed inspection, it was decided to install pistons =). They made a tile to heat the pistons, but it was prophesied, in the end the machine flew out, then they took a long time to disassemble it, then they wound a new thinner and smaller spring from nichrome wire and installed it, they made a spring approximately 30 cm long, turned it on and it works!
Photo of the tiles.
Then they heated the pistons and installed them. With the left one everything went well, but with the right one we suffered a lot, but in the end everything worked out and fell into place, we also sweated with the locking bolts since they were too long and did not fit completely, we ground them down a little, after installing them, we checked whether they would fly out, everything turned out to be normal.
Photo of installed pistons.
Hooray done =).
After that, a week passed. Next was the installation of pistons with new rings that were hard in the cylinder, I thought about many options in the end, I pressed them with my fingers and inserted them, everything was inserted neatly, all the rings were intact, which cannot be said about the fingers, which were not very intact. Then assembly, final installation of heads, gas tank, everything in place =). It was purchased, transmission oil, engine oil was purchased, and gasoline was purchased 92.
Photo of oil and a can of gasoline.
All this was filled in and ready to start the engine.
Many people probably saw the video of how I then tried to start it. If not, I'll post it again.
In the end, we started it, the next day, when it was already dark, I got behind the wheel, turned on second gear and my father pushed me, something was catching, but it was not the same after the next day they rushed me to adjust the ignition approximately =), everything was adjusted according to the book, in the end the picture repeats itself, only my father and brother are pushing me from behind =D, 2nd speed is on, I press the clutch, the ignition is on, everything is ready, they push and accelerate, I turn on the clutch, puff puff puff puff but in the end stalled... They pushed me further, I got off, and the three of us pushed to a higher place to then push from there, everything is ready, I got behind the wheel, turned on the first gear, got everything ready, press the clutch, they push, accelerate, I let go, I hear contractions puff puff puff, and that's it more often, more often I end up seeing something being pushed quickly…. I look around Hurray!!! I'M GOING!!! they are long gone, I drove to the city, I kept the revs and didn’t lower them below 1500, after that I started to work fine at idle, then I saw that the right cylinder was not working... but it only worked at revs and that was not correct, but that wasn’t important then, what was important was that he's totally turned on!!!
After that, I spent a long time digging into the motorcycle, why the right cylinder was not working, and in the end I reviewed everything from the carbs to the ignition... There was a lot of discussion... (and a little driving)
This ride is closer to the moment after it was started, it’s already the second winter =). (in these videos the right cylinder does not work, so you have to give so many revolutions)
Here I show how the engine worked.
Here is a video where I tried to show that I discovered that the coil breaks through, but it’s not really visible =)) when I looked at the original it was visible, but when it was converted it became invisible... After that, I blamed my judgment on the fact that the cylinder works like that because of the coil.
Then I examined the two carburetors in detail and noticed one nuance: the main fuel needles are DIFFERENT! they are longer and thinner than the other... (here I thought it was all because of the carburetor).
Well, the new year is coming soon!!! Happy New Year!
And it ended something like this. =D
As a result, after the New Year I was able to determine the exact reason, it was compression...... I determined it like this: I unscrewed the right spark plug, pressed the kick with my hand, there were moments when I pressed with difficulty, I screwed it back into the right spark plug, turned it out from the left, I pressed no resistance =). After a couple of tests were done, why is it missing somewhere? They listened and listened, then they took out the pushers and continued to press, nothing changed, they put the pusher back on the intake valve, nothing changed, they decided to remove the plug, they removed it, the idea came to listen, inserted the pipe from the other cylinder with the hole up, and the ear went there, the father works with a kick to the place where the compression is and I hear shhhhh in my head immediately BL... It was decided to remove the head, but since it is on the right and it is impossible to remove it simply by sliding it off the pins, since the frame of the stroller is in the way, it was decided to unscrew them. In the end, everything was unscrewed. At the same time I looked at the piston.
Photo of the piston.
How come I ground it, filled it with kerosene, nothing is clear, it didn’t leak, but now what the... As a result, they quickly checked, refilled it from the side of the valve and I blew into the place where the muffler was and heard a blow, looked at the bubbles, in the end everything was clear... Now the question was, how to properly grind the valves since I had worn out palms, the manual method was no longer necessary...
Everything was cleverly thought out, the valve was inserted into place, a hose was put on it, and a clamp was put on top to better press it to the hose so that it would not fly out when I pulled, and the other end was clamped into a screwdriver, the lowest speed was set, lapping paste was applied, and pressing, I made half a turn or a turn as it turned out, then I switched the switch and half a turn in the other direction opened closed repeat, and so I ground the whole thing.
Then it was necessary to assemble it all, I went to collect it, assembled it, put everything in place, screwed it on, and now is the moment when you need to start your motorcycle! As a result, I started it up, puff puff puff puff all the same, tightened the idle speed screw, raised the needle and it started working!!! Happy, I finished work and went home =D. Then I showed up in the garage only 2 days later, I started it up and sneezed puffed puffed again…. I immediately think the carb adds zero sense, then I look at the connection between the head and the cylinder where the butt is located, it bubbles from there, I thought that’s why it doesn’t work...
I took off the cover, after that, I found the head at 12 and 13, why is it so at 13 because there is one nut from the factory that is different, I took it and tightened it specifically, then I checked the gap, it wasn’t normal and I took it and reset it, I cranked the engine a couple of times and checked again, everything is fine, complete.
Screwed on the valve cover. I started the engine and there was nothing bubbling, but it still didn’t work…. I turned the spark plug out, before that the spark plug was fine, since the cylinder wasn’t working, it was clean, but now it was black and wet! I replaced the spark plug and everything worked. =O. It was decided to adjust the carbs and ignition, since the carb is overflowing and I’m not sure about the ignition.
Video of the engine running before the head lift, after the head lift.
This is where it all ended, but every day everything is moving forward little by little =).
Photo for backfill. =Ъ
Thank you all for watching, Good luck!!! (PS If there were any mistakes, I apologize in advance =D)
How to select timing gears depending on the crankcase group
The selection of an internal combustion engine seal kit is selected according to the table below, where an index is indicated under the crankcase group.
| Crankcase group | 0 | 1 | 2 | 3 | 4 | 5 | 5,5 |
| Suitable indexes for gear sets after 1991 | 0 | 1 | 2 | 3 | 4 | 5 | 5,5 |
| According to labeling before 1991 | 13-18 | 12-17 | 11-18 | 10-15 | 9-14 | 8-12 | 6-10 |
| Correspondence of the indices of the timing gears “HERZOG” of the new Ural 750cc engines. | 0 | 1 | 1 or 2 | 2 | 2 or 3 | 3 | — |
If you do not find a set of timing gears with the required indices, you will have to make a test shaft from an old CV with a mounted bearing for installation in the seats without interference. To do this, you need to grind the outer race of the bearing and the seats for the gear and bushing. Try to maintain minimal clearances so that the shaft with the bearing and the gear do not dangle in the fit. In this way, you can use the selection method to select the gear with the smallest lateral clearance when mating with the KV gear, but in this case you need to take the crankcase and the test shaft with you to the store.
