Design Features
A snowmobile is a highly efficient means of transportation that allows you to move through shallow snow and snowdrifts in winter. The main elements of transport design are:
- engine;
- caterpillars;
- skis;
- transmission.
By type of construction, a snowmobile can be two-track (two tracks, one ski) or single-track (one track, two skis). Single-track vehicles are considered more manageable.
Among the advantages of this technology is the ability to move through fairly deep snow at high speed. No other type of transport can compare with the efficiency of even a homemade snowmobile. Finished structures are divided into sports, work and mountain. Before moving on to creating a product, you need to decide on the necessary parameters.
Formation of the drawing is one of the most important stages in the creation of this vehicle. If a person has not previously engaged in design, then it is better to make a preference in favor of ready-made plans.
Two-track
Single track
Drawing and materials
The drawing should be created based on individual requests and your own capabilities. When creating, you need to pay special attention to the dimensions of the product and each individual element. You can also use ready-made projects of homemade tracked snowmobiles with an engine from a chainsaw or motorcycle.
The exact list of necessary materials and tools will be determined after drawing up the drawing. Among the things that you will definitely need when creating a snowmobile with your own hands are:
- steel sheets, pipes or wooden blocks;
- soft seat of the desired shape;
- disc brakes;
- steering column;
- caterpillar mechanism consisting of a belt and a roller;
- chain for connecting the engine and the track;
- skis;
- fuel tank.
Individual parts can be purchased or made independently. The frame is made from profiles and sheets. For maximum savings, you can create a structure without a suspension, but it will be extremely uncomfortable to use.
Among the tools that will be required for the job: a welding machine, screwdrivers, wrenches, a hammer, a pipe bender (if the frame will be created from pipes), and a grinder. It is advisable to provide yourself with everything you need in advance. If difficulties arise during the work, you can purchase the missing parts or tools.
Soft seat Tracks Skis Fuel tank
Metal frame
Of course, a metal structure is not as practical as a wooden one. The material is very expensive and heavy, and creating a snowmobile will be more difficult.
In addition, the disadvantage of metal is its cold surface, which must be covered with something in order to move in it. But there is one big advantage of this option - the durability of the finished structure.
To create a metal snowmobile frame, you will need some materials and tools. The tools include welding and electrodes, a hammer, a grinder, pliers, a set of keys and fasteners for the system.
As for the material, here you will need to prepare metal pipes, a metal corner, steel sheets and a channel.
Before building the frame, be sure to make a drawing here with precise dimensions. This will help you select the quantity and type of material as accurately as possible.
Using a grinder, pipes are cut and welded into a frame. Fastenings for all parts of the snowmobile will be made from the corner. You can make them from channel wood.
Only after this is everything sheathed with sheet metal. In order to make a snowmobile from a walk-behind tractor, it is necessary to provide a place to place the motor.
Manufacturing stages
You can make a homemade snowmobile by following step-by-step instructions. If you approach each stage responsibly, you will ultimately be able to obtain a reliable vehicle. First of all, you need to manufacture or purchase ready-made individual elements of the product, after which you need to correctly assemble them together.
Frame
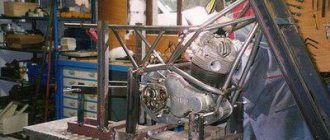
After creating the drawing, they proceed to work with the frame. It can be welded from metal pipes or made from wooden blocks. The second option is considered more budget-friendly, but less reliable. The metal frame is created as follows:
- A suitable pipe is selected. As a rule, a square cross-section material with a diameter of at least 40 mm is used.
- The pieces are cut to the required length.
- The pipes are connected to each other by welding. A structure of the desired shape is created.
- Corners are welded for fastening various structural elements.
A wooden frame is formed according to the same rules, but special plates are used for connection, into which bolts are screwed. The finished frame must have a load-bearing capacity higher than the future load.
It is better to make a homemade snowmobile with a large margin of safety. That is why it is recommended to make the frame from metal. The joints must be welded securely. If a person does not have the necessary welding skills, you can contact a professional welder who will create a frame according to the finished drawing.
Skis for speed
The front of the vehicle rests on skis. With their help, it is possible to navigate even in deep snow. In addition, they help manage equipment. Guide skis must be as reliable as possible, so it is recommended to purchase ready-made solutions created specifically for snowmobiles.
You can make your own skis from metal or wood. They can be created from durable birch boards. The ski of the required shape is simply cut out. The product is created from metal by welding two plates and a thin corner.
The skis are installed on an already assembled suspension. In order for the equipment to work well in holes, it is necessary to use high-quality shock absorbers. A tracked snowmobile must be created on the basis of high-quality suspension and transmission.
Track wheels
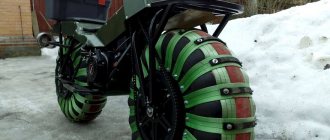
To make a homemade caterpillar for a snowmobile, you will need to perform the following algorithm of actions:
- Pre-prepare the tire and lugs. For a large shaft, a tire from an MTZ tractor is usually used.
- Next, cut off the tire beads. You can cut with a sharp knife.
- Attach lugs to the cut fabric. As a replacement, they can be cut plastic pipes attached with bolts.
Lugs are used to increase the adhesion of equipment to snow.
The caterpillar is installed on the drive shaft. It should be mounted with slight tension. The selection of the tire from which the caterpillar will be made must be carried out taking into account the size of the shaft. If you need a small product, then a small car tire will do.
The stronger the raw material used, the longer the track will last.
How to choose an engine
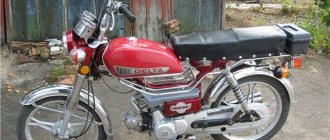
In order to create a snowmobile, it is necessary to take into account the most important and central part of the entire mechanism - the motor. The motor must have decent traction in order to move the entire mechanism in difficult snowy weather conditions. For everything to work out as it should, a powerful motor from the Neva walk-behind tractor will do.
If such an engine is available, one or two people will be able to move on a homemade snowmobile from a walk-behind tractor with their own hands. The engine power is 6-7 horsepower, which is quite enough to move on snow cover.If you add a snowmobile stand to the walk-behind tractor, the lifting force will increase and you can easily load your walk-behind tractor for snow trips.
What is good about this engine, many ask. In fact, there are many more advantages than you might think:
- First of all, it is an affordable price.
- Also good quality is proven by Japanese production.
- The motor has an additional air cooling system.
Also note that gasoline can be used as fuel.
Assembly nuances
Homemade tracked snowmobiles are assembled as follows:
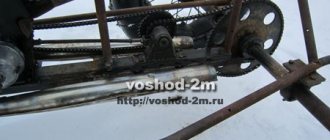
- A fixing shaft with a receiving star is installed on the frame.
- Next, the engine is installed with a transmission sprocket and a gasoline tank. The motor and shaft stars are connected to each other by a chain.
- The front and rear wheel axles for the tracks are mounted. As a rule, the front axle is fixed with a fixed mount or welding, and the rear axle with a movable mount.
- The front suspension with guide ski and steering column is assembled.
- The seat, brakes and individual body elements are installed.
To tension the track, a movable rear axle mount is used. After installation of the main components and assemblies, the brakes are installed. Typically, disc brakes are used, which stop the track shaft when the handle is pulled.
When assembling, you need to pay special attention to fasteners. All bolts must be tightly tightened. Pre-prepared fasteners must be properly welded to the frame so that not a single unit falls off the equipment while driving.
Having studied in detail the information on how to make a snowmobile, you can proceed directly to creating and assembling the vehicle. You need to understand that the homemade version will be inferior in quality to mid-budget store models. The main advantages of homemade products are extremely low cost and the ability to set your own parameters for the product.
