Many of our compatriots dream of such a vehicle as an ATV. This hybrid of a tractor and a motorcycle combines their best qualities. It is used for driving over rough terrain, trips to nature or picnics, fishing, etc. The all-terrain vehicle is also actively used when performing various household tasks. An ATV is a fairly expensive vehicle, so many people decide to assemble it themselves. To do this, you will need to prepare the appropriate equipment and components. One of the popular options is to assemble an ATV from Oka with your own hands.
Many of our compatriots have an old but working car gathering dust in their garage. Oka is ideal for assembling an ATV. To do this, you will have to spend a certain amount of time and purchase the necessary parts. You will also need a welding machine and grinder, a set of keys, screwdrivers, and other hand tools. This is an exciting process during which the master will acquire new skills. If desired, a specialist will be able to assemble a homemade ATV from Oka with all-wheel drive.
At the initial stage, a drawing of the future vehicle is developed. You can use a ready-made scheme, but it is much more effective to create your own. When developing drawings for an ATV from Oka, you need to take into account that most of the parts can be removed from the old car.
Preparation for work, tools and equipment
First of all, you need to carefully consider when, where and for what purposes the future ATV will be used - hunting and fishing, motorcycling in nature, transporting goods, etc. It is on this basis that you need to make a choice of a “donor” vehicle, deciding how powerful the engine is needed, what kind of suspension is suitable, what kind of trunk, etc.
You can take ready-made drawings from the Internet, create them from scratch yourself, or combine both options and ready to remake them at your own discretion.
List of required tools:
- welding machine;
- Bulgarian;
- drill;
- a set of keys;
- various small tools - calipers, hammer, knife, screwdrivers, pliers, etc.
To make your own frame, you will also need equipment for bending pipes. If you don’t have one, you can rent it or outsource the necessary work to another craftsman. Only with remarkable skill can you bend the pipes manually by heating the bend with a gas cutter or torch.
- engine;
- frame;
- rear and front suspension;
- steering;
- brake system;
- cooling system;
- muffler;
- electrical equipment - battery, headlights;
- body, body kit
It is quite possible to make a muffler yourself. Everything else is to purchase used parts on the shadow market.
Accessories
It is recommended to use the engine, power and ignition from one scooter so that the entire system functions smoothly. It is advisable to modify some components; for example, it is advisable to equip the ignition system with a battery with characteristics suitable for an ATV. It is better to take the fuel tank from a scooter, as it is large enough for such a system.
The front and rear axles are taken from a cargo scooter, since they are subject to heavy loads. If these system elements are not strong enough, they will quickly deform and fail.
Springs for the shock absorber can be taken from any motorcycle that is large enough. They are fixed on the frame movably, with a configuration resembling the letter “A”. You can purchase shock absorbers separately, as they should provide a smooth ride. New parts perform better than used parts.
Control can be either steering or motorcycle. The choice depends on the taste preferences of the master. The brake lever is connected to the transmission brake, connecting the system to the rear axle sprocket.
Exterior body kits can be made from fiberglass material or old motorcycles or cars. To make the body, it is recommended to glue a “blank” of plastic or wood. When using this technology, it is possible to fit the parts of the body kit to each other as efficiently as possible. Fiberglass is applied to the model, forming the parts of the body kit.
After this, the body needs to be sanded and primed. When the layer dries, special paint is applied. Then the operation of all systems and mechanisms is checked, and appropriate modifications are made if necessary.
Parts selection
ATV frame
Depending on the “donor” and the design of the quad, you either have to make the frame yourself, or you can reconstruct a finished, used one.
The most important thing is that the engine is securely bolted to the bottom along the frame, which can be located either front or rear. The transmission and drive should also be firmly attached to the frame to avoid play.
Homemade frame
The material used is ordinary water and gas pipes with a wall thickness of no more than 3 mm:
- for spars - 25 mm;
- for crossbars and struts - 20 mm.
The pipes are connected using spot welding, followed by solid welding. Ears for attaching shock absorbers and levers are welded to the frame immediately. Brackets - during installation of units and components.
Reconstruction of an existing frame
To reconstruct a finished frame, you should remove everything, leaving the frame, dismantle the back part and build up the front. Then weld elements for fastening a complete set of components and assemblies of the ATV. When reconstructing a motorcycle frame, the seatposts should be moved back by 40 - 45 cm.
The front and rear luggage racks are cut out of a metal sheet and welded to the frame. Finally, the finished frame is painted; there is no need to varnish it.
Additionally, we recommend reading our expert’s article on how to choose a roof rack for your car.
We also recommend reading our specialist’s article, from which you will learn how to select and install a box on the roof of a car.
Engine
The engine is suitable for a car, motorcycle or scooter. Some “Lefties” even construct an ATV from a walk-behind tractor with their own hands, since newer models are equipped with four-stroke engines, the power of which in heavy devices reaches 15 “horses” - versus 11 hp. "Ant."
The engine of a scooter has the advantage of low fuel consumption; in addition, the scooter-based quad is the lightest, which makes it easy to pull it out when stuck in mud and sand. But a quad to transport cargo and/or drive off-road requires a more powerful engine.
The engine power of the Izh-1, Izh-2 and Izh Jupiter is 24 hp, the old Ural is 32 or 36 hp, the two-cylinder engine of the old Oka is 35 hp. , a three-cylinder car of a later release - 53.
Suspension
The suspension can be used both rear and front. The easiest way is to take the front one from a motorcycle.
2 rear suspension options:
- The rear axle of the car, shortened to fit the dimensions of a quad. The advantage is the presence of a differential. Disadvantage - the design will be heavier.
- Cardan-gear design - with a gearbox mounted on the rear axle.
Please note: the quad all-terrain vehicle requires an independent suspension with high ground clearance.
The suspension arms are bolted to the frame through rubber-metal hinges - silent blocks.
The shock absorbers are suitable from Izha, but if the budget allows you to purchase gas-oil shock absorbers with pumping, the driver will be able to adjust the suspension according to road conditions.
Steering and chassis
The steering system of an ATV can be based on a car - with a steering wheel, or with a motorcycle steering wheel. Some craftsmen combine both types: motorcycle handlebars, levers and shafts at the top, car tie rods at the bottom. It is advisable to take the fuel tank along with the motorcycle handlebars.
A homemade steering shaft is made from a 20 mm pipe with walls up to 3 mm. A travel limiter must be installed at the bottom.
We recommend a manual gearbox, since it improves maneuverability; moreover, when driving an ATV, you still have to shift the rear, low or high gear manually.
The wheels are most often taken from small-sized VAZs (“Oka” or “Niva”) and are shod with tires that correspond to the operating conditions (weather, terrain, etc.). The brake system is selected depending on the wheels. The steering knuckles are also from Niva or Oka.
Four-wheel drive
All-wheel drive ATVs are characterized by particularly good cross-country ability - of course, if they have a fairly reliable engine and studded tires (read about the law on winter tires).
If you choose a four-wheel drive vehicle, vehicle steering, differentials, and a manual transmission are required.
The suspensions, like the steering system, must be taken from the car. On the front it is necessary to provide space for installing the gearbox.
Installing an all-wheel drive model requires not only special skills of the craftsman, but also additional labor costs. The alternative is to buy a ready-made all-wheel drive unit - it costs money.
Frame
Making the body is far from the simplest stage of the story called “how to assemble an ATV with your own hands.” Suitable materials are fiberglass and fiberglass; it is easier to make a body kit from the second.
Manufacturing
Making an ATV from a motorcycle with your own hands is quite a responsible task, we have already noted this above. Having prepared all the tools and components, we proceed to assembling the model according to the drawings. We begin to make a homemade version of four-wheeled equipment in stages.
Let's start with the frame, which needs to be either welded or remade from a finished sample. When making a frame yourself, you will need metal pipes 3 mm thick; they are welded according to the drawn drawing and tested for welding strength. When upgrading a finished frame, we leave the frame on which we remove the back part and build up the front. We also install ears and brackets for fastening all components and parts using welding. Then we cut it out of a sheet of metal and weld the cases, which we install at the front and rear. The next step will be welding them to the frame and painting the entire structure.
The third stage will be the installation of suspensions, chassis, braking system, shock-absorbing elements and wheels. We secure the suspension arms with bolts to the silent blocks. Don't forget to tilt the strut at the front of the suspension. We use shock-absorbing elements from a motorcycle, but if possible, buy gas-oil shock absorbers with pumping. It is best to install a chain drive, this makes the maintenance of your device easier and cheaper. The brakes depend on the wheels from which vehicle will be used.
After that, we install the engine, install the gearbox and assemble the drive. We take the engine depending on the planned model. For normal operation in hot weather, it is necessary to install a cooling system. It will fit well from a VAZ 2108 car. We install a mechanical transmission, direct the input shafts to all axles. Then we install the fuel supply system, mount all the electrical equipment: turn signals, headlights, instruments and battery.
We make the body from fiberglass. To create it, you need to make a model from foam plastic; it is quite easy to do it yourself. Fiberglass is applied to the model in layers, and each layer must be coated with epoxy. Don’t forget about the metal fasteners; they are used to mount the case. Dry, prime, sand and paint. Attach the body and install the driver's seat
Stages of assembling an ATV
To create a homemade ATV with your own hands, you need to go through 9 stages of work step by step:
- Acquisition and preparation of everything necessary;
- Welding (alteration) of the frame;
- Installation of suspensions, brakes, chassis, shock absorbers, wheels;
- Installation of engine, gearbox, drive assembly;
- Installation of the fuel system;
- Installation of electrical equipment - turn signals, headlights, dashboard, battery;
- Case manufacturing;
- Priming, sanding and painting the body, (if desired) sophisticated custom tuning;
- Installation of the body and seat.
After the final stage, the finished miracle of home-made equipment will need to be thoroughly tested, gradually making road (and off-road) conditions more difficult.
Homemade ATV based on Oka and VAZ units
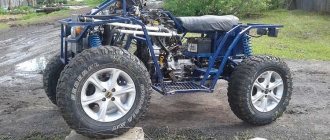
We present the ATV of our regular author S. Pletnev from the city of Ocher, Perm Territory. The next machine he built testifies to the increased design level and professional skills of its creator. However, judge for yourself.
A year of work of 3-4 hours after work and on weekends - and the new car was ready for testing, only minor (and I would say pleasant) modifications remained: connecting lighting equipment, installing an ignition switch, rear-view mirrors and other little things.
DIY Oka ATV
The power unit for my homemade ATV was the engine from the Oka car - 32-horsepower, two-cylinder, four-stroke, liquid cooled. And if its power was often not enough for a car, then for an ATV it should have been more than enough.
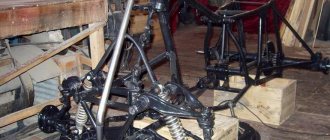
The machine frame is spatial, welded. Its main elements (two pairs of side members: upper and lower) are made of round pipes of the VGP-25 type (water and gas pipes with a diameter of 25 mm and a wall thickness of 3.2 mm), auxiliary (struts, cross members, etc.) - from VGT-20. The spars are bent: the lower ones are in the horizontal plane, the upper ones are in the vertical plane. I bent the pipes on a pipe bender, “cold”. Eyes (pairs of ears) for attaching suspension arms and shock absorbers were welded to the frame immediately, and various brackets were welded as components and assemblies were installed (in “place”).
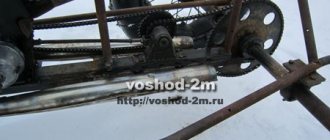
The transmission of the all-terrain vehicle is unique. Although the car is all-wheel drive, it does not have a transfer case. As you know, in the Oka the engine is located transversely, while on an ATV it is installed lengthwise. This made it possible to direct the output shafts from the gearbox (Gearbox) not to the right and left wheels (as in a car), but to the front and rear axles. It’s just that the power unit itself, interlocked with the clutch “basket” and gearbox, had to be shifted slightly to the left relative to the longitudinal plane of symmetry in order to reduce the horizontal angle of the longitudinal articulated shafts of the transmission. Well, their vertical angles turned out to be insignificant.
The transmission is assembled from units of various domestic cars, mainly VAZ models. But ready-made industrial units also had to be modified. For example, from the gearbox (from Oka), to ensure optimal (reduced) speed and increase torque, I removed the main gear pair and replaced it with a chain drive. The gearshift rod was also made different - elongated, with outlets on both sides of the gearbox. The rod can be locked in three positions: to engage 1st and 2nd gears, 3rd and 4th and reverse. The lever for selecting these positions is on the right side, and the gear shift lever is on the left.
The inter-wheel gearboxes are from the rear axles of the VAZ “classics”, only their axle shafts along with the “stockings” were removed and replaced with shafts with CV joints from front-wheel drive models. CV joints are also used as hinges in the remaining intermediate shafts of the transmission.
There are no low gears or differential locks.
The steering is motorcycle type (lever and shaft) at the top and automobile type (with tie rods) at the bottom, only simplified, without a steering mechanism, with one bipod. At first I used the steering wheel from a Minsk motorcycle, with a pipe diameter of 22 mm, but it turned out to be a little thin. Later I found and installed it from a Ural motorcycle. The steering shaft is made of a pipe with a diameter of 20 mm and a wall thickness of 2.8 mm. It has a travel stop at the lower end. At the bottom, the shaft rests on a thrust bearing, and in the middle part it rotates in a detachable nylon bracket-sleeve.
The bipod is made of 8 mm thick steel sheet in a shape resembling the letter “T”. At the edge of the “rack” there is a hole with a diameter of 20 mm - the steering shaft is inserted and welded into it, and in the ears there are conical holes for the ball ends of the tie rods. These holes are reinforced with suitable welded washers. The bipod ears are bent down slightly so that they are almost parallel to the rods.
The wheels of the ATV are 15-inch, from a Chevrolet Niva car. Tires with the appropriate landing diameter dimensions 205/70 (width/height as a percentage of the width) with an off-road tread pattern. The wheel running diameter is about 660 mm.
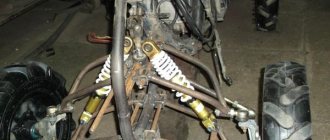
The wheel suspensions are independent, on two triangular wishbones each (upper and lower) with shock absorbers from the Oka car (front). The levers are welded from round pipes of the VGP-20 type. Elastic elements (springs) and shock absorbers are from the Oka
"(rear). Wheel hubs and steering knuckles are welded into the wheel ends of the front arms - from a VAZ-2109 car. Both had to be modified. I installed studs for Niva wheels in the hubs, and homemade swing arms in the front knuckles.
The muffler is homemade, two-section. To protect the body kit from temperature warping, I covered it with a remote cover, and insulated the inlet pipe with asbestos.
New posts:
Children's electric ATV El-Sport Junior ATV 500W 36V/12Ah
| Speed: | 25 km/h |
| Power: | 500 W |
| Power reserve: | 20 km |
| 60 kg | |
| Weight: | 40 kg |
| Wheel diameter: | 13″ |
| Battery: | |
| Charging time: | 6-8 hours |
| Suspension: | Front and rear spring |
| Drive unit: | Chain |
| Brakes: | Disk |
| Dimensions: | 1020×660×650 |
| Color: | Green, black and white |
| Additionally: | Wheelbase 13x5-6 |
| Type: | Electric ATV |
Price: RUB 36,845 RUB 29,900
Children's ATV with battery El-Sport Kid ATV 800W 36V/12Ah
| Speed: | 25 km/h |
| Power: | 800 W |
| Power reserve: | 20 km |
| 60 kg | |
| Weight: | 40 kg |
| Wheel diameter: | 13″ |
| Battery: | SLA (Lead Acid) 36V/12Ah |
| Charging time: | 6-8 hours |
| Suspension: | Front and rear spring |
| Drive unit: | Chain |
| Brakes: | Disk |
| Dimensions: | 1020×660×650 |
| Color: | Orange |
| Additionally: | Wheelbase 13x5 - 6″ |
| Type: | Electric ATV |
Price: RUB 37,670 RUB 34,500
Children's electric ATV El-Sport Children ATV 1000W 36V/12Ah
| Speed: | 25 km/h |
| Power: | 1000 W |
| Power reserve: | 20 km |
| 60 kg | |
| Weight: | 55 kg |
| Wheel diameter: | 13″ |
| Battery: | SLA (Lead Acid) 36V/12Ah |
| Charging time: | 6-8 hours |
| Suspension: | Front and rear spring |
| Drive unit: | Chain |
| Brakes: | Disk |
| Dimensions: | 1020×660×650 |
| Color: | Green, blue spider |
| Age: | From 4 years |
| Additionally: | Wheelbase 13×5 – 6″ |
| Type: | Electric ATV |
Price: 43,470 rub. 37,900 rub.
Electric quad bike Mytoy 500D
| Speed: | 35 km/h |
| Power: | 500 W |
| Power reserve: | 35 km |
| 90 kg | |
| Weight: | 70 kg |
| Material: | steel, tubular |
| Wheel diameter: | 14″ |
| Battery: | 48V(4x12V)/20Ah |
| Brakes: | |
| Dimensions: | 1150x550x700 |
| Color: | Autumn camo, hip hop, matte khaki, red |
| Shock absorbers: | front/rear |
| Age: | from 4 years |
| Additionally: | Electric motor, brushless, 500 watts, built into the rear axle; Full rear axle differential; Speedometer with battery charge indicator. Front LED headlights. Turn signals; Remote control on/off at a distance of up to 50 meters; Possibility of setting automatic shutdown for 5-10 minutes; Speed limiter from 5 to 35 km/h; Reverse; Pneumatic rubber tires tubeless 14x4,10-6; Reinforced steering rods; Steering hubs on bearings; |
Price: 63,000 rub.
Electric ATV Mytoy 750E differential
| Power: | 600 W |
| Power reserve: | 25 km |
| 100 kg | |
| Weight: | 70 kg |
| Material: | Reinforced steel frame, tubular |
| Wheel diameter: | 16″ |
| Battery: | 48V(4х12V)20Ah |
| Suspension: | Independent front |
| Brakes: | Front/rear manual disc hydraulic |
| Speeds: | Three speed limiters: First speed: 7-9 km/h; Second speed: 12-15 km/h; Third speed: up to 25 km/h; |
| Dimensions: | 1400x760x900 |
| Color: | yellow camouflage, autumn camouflage, maple |
| Shock absorbers: | Oily |
| Age: | from 6 years |
| Additionally: | Electric motor, brushless, 600 watts, built into the rear axle; Full rear axle differential; Speedometer with battery charge indicator; Headlight; Rear stop; Sound signal; Turn signals; Mirrors; Remote control on/off at a distance of up to 50 meters; Possibility of setting automatic shutdown for 5-10 minutes; Reverse; Pneumatic rubber tires tubeless 16×8.00-7; |
Price: 77,700 rub.
Electric ATV Mytoy 500D Lux
| Speed: | 30 km/h |
| Power: | 500 W |
| Power reserve: | 35 km |
| 90 kg | |
| Weight: | 70 kg |
| Material: | steel, tubular |
| Wheel diameter: | 14″ |
| Battery: | 48V(5х12V)/20Ah |
| Brakes: | Rear foot disc hydraulic |
| Dimensions: | 1150x550x700 |
| Shock absorbers: | front/rear |
| Age: | from 4 years |
| Additionally: | Electric motor, brushless, 500 watts, built into the rear axle; Full rear axle differential; Speedometer with battery charge indicator; Silencers-speakers imitating the sound of an engine when you press the gas; Front LED headlights; Turn signals; Remote control on/off at a distance of up to 50 meters; Possibility of setting automatic shutdown for 5-10 minutes; Speed limiter from 5 to 30 km/h; Reverse; Pneumatic rubber tires tubeless 14x4,10-6; Reinforced steering rods; Steering hubs on bearings. |
Price: 69,300 rub.
Electric buggy MYTOY 500W
| Speed: | 30 km/h |
| Power: | 1000 W |
| Power reserve: | 30 km |
| 60 kg | |
| Weight: | 68 kg |
| Wheel diameter: | 13″ |
| Battery: | 48V/20Ah (removable) |
| Brakes: | Disc hydraulic |
| Speeds: | First 5-8 km/h; The second is 15-18 km/h; Third 25-30 km/h |
| Dimensions: | 1330x810x930 |
| Color: | Red Blue |
| Age: | From 7 years |
| Additionally: | Charging indicator; Safety belt; Smooth gas pedal; Reverse speed: (reverse); Seat adjustment (forward, backward); The frame is steel, tubular; Front LED headlights; LED strip around the perimeter; 13x5.00-6″ (rubber, pneumatic, tubeless) |
Price: 82900 rub.
How to make a homemade ATV is a question that is the dream of almost every young designer.
However, not everyone’s dreams of this kind come true and not at the age at which they would like. But sometimes dreamers still make their dreams come true.
Drawing skills, the ability to carry out complex technological processes, the availability of funds and time - these are the basic requirements when creating a homemade vehicle.
Today we will tell you how to construct a homemade ATV using spare parts from Oka and show this process with the help of a photo selection.
You can find out one of the ways and see the reality of creating an ATV yourself from car parts in the example below.
DIY ATV body kit
Do-it-yourself ATV body kit - fiberglass. I glued it in for the first time, and therefore first studied the recommendations for performing the relevant work. But as it turned out, this process is painstaking, although the result is worth it.
First, I made the required contours of the body kit from a square steel pipe with a cross-section of 10x10x1 mm. Fortunately, this pipe bends easily even with your hands over your knee. The contour was welded to the frame using jumpers from the same pipe, in places where later (after gluing the body kit) the “tacks” could be easily cut off. Then I bent “wings” from hardboard (fibreboard) and fixed them with self-tapping screws to the contour and jumpers. Where the bend turned out to be steep, I attached separate strips of the same hardboard. The front end was made with polystyrene foam purchased at a hardware store. It was possible to use polystyrene foam or the same polystyrene foam, but polystyrene foam turned out to be a more suitable material - it cuts well with a sharp thin knife. I glued individual elements from it into the overall structure on polyurethane foam.
Motor
An ATV with a scooter engine will not differ in significant power. But when driving off-road, the driver will be able to get his share of drive. Once the frame is assembled, the motor can be mounted on it. This is a painstaking process that requires accuracy from the master. The motor must fit firmly into its seat. Otherwise, it will be subject to strong vibrations.
The motor shaft must be connected to the gearbox on the rear axle. To do this, you need to attach a chain drive to the gear. The transmission is installed immediately after this, bringing all controls, including those from the engine, to the frame. The pedals and control levers are secured to the appropriate seats.
DIY ATV frame drawings
The false tank has a complex shape. It was not possible to bend it out of hardboard. Therefore, having wrapped the engine with plastic film, I began to fill the space intended for it with layers of polyurethane foam. After each layer, drying is mandatory, otherwise the thick volume of foam may not dry out inside. Filled until the layers went beyond the contour. Finally, after the foam had completely dried, I began to draw out the desired shape with a knife. The edges were smoothed with coarse sandpaper.
Do-it-yourself homemade ATV: how to make a decent device
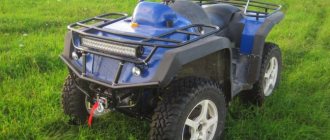
An ATV is a vehicle equipped with four wheels. The main manufacturers of mini cars are: Yamaha, Polaris, BRP, CF Moto. Utilitarian quadrics are used as all-terrain vehicles, and stunt models are used for fast driving. The categories differ from each other in technical characteristics, which is taken into account when you need to assemble an ATV with your own hands.
Wheels
It is better to choose wheel rims from light alloy materials, since otherwise the weight of the vehicle will be significant. You can take wheels from a walk-behind tractor, the tread of which has a rather aggressive pattern. But for a light ATV you should not choose wheels from a car. They are large and heavy, so there will be a high load on the engine.
Description of the vehicle
A modern ATV is equipped with four or six small wheels, but with increased maneuverability. The main technical characteristics include: light weight, all-wheel drive and low gear. Due to the unique configuration, the vehicle can easily travel on country roads. It can be used in summer and winter.
To make a homemade ATV, it is recommended to decide on its type:
- Utilitarian. The model has a lot of weight and good maneuverability. The vehicle easily carries several people and accelerates to 90 km/h.
- Stunt. Equipped with a narrow platform and radiator. The car weighs little and can accelerate to 137 km/h.
Vehicle assembly is carried out taking into account technical characteristics, equipment, and operating conditions. To perform independent work, you will need to have skills in working with a welding machine and a lathe. To build a car, you will need a spacious garage. Taking into account suitable parameters, a do-it-yourself drawing of an ATV is prepared.
Preparatory stage
When assembling the structure yourself, the power of the motor, the type of suspension, and the need to install a trunk are taken into account. To perform the upcoming work you will need: a welding machine, drill, grinder, keys, hammer, pliers, jack. As a basis you can take:
- Motorcycle Ural.
- Motorcycle Izh.
- Scooter.
- Oka or Niva car.
If necessary, transport is assembled from motorcycle and car parts. If the frame is made independently, special equipment will be required to deform the pipes. In this case, it is recommended to separately make drawings of the frame for the ATV with your own hands. This will simplify the process of assembling components:
Recommendations
To simplify the work, it is best to assemble the ATV with two people. Oil for four-stroke engines is changed after the first, or maximum after the second start. If you don’t have a syringe on hand for refilling oil cans, you can contact any car service center - they will definitely do this job. Electrical connectors should be filled with lithol or sprayed with a waterproof spray. The wheels are inflated with a simple pump or taken to a tire shop.
Here are some more tips:
- read reviews of the design you like;
- provide power reserve;
- Put tires with good tread on the rear wheels and regular road tires on the front;
- consider using fenders and mudguards.
The following video provides an overview of a homemade ATV.
Selection of systems
The brake system uses new parts or with minimal mileage. It is dangerous to install old brakes. The muffler is removed from the old car or made independently from a pipe. If a frame from another machine is used, it must be securely bolted to the bottom of the motor. The power unit is installed at the rear or front. Experts advise securely attaching the drive and transmission to the frame.
If the frame requires reconstruction, the component elements are dismantled. The front part needs to be extended onto the frame. At the next stage, the components of the frame are welded. When reconstructing the frame of a motorcycle, the seatposts are moved back by 40-45 cm. Racks are cut out of metal and welded, which are then fixed to the frame. The resulting homemade quad part can be painted with any paint.
To make your own frame, use a regular pipe with a wall thickness of up to 3 mm. It is better to make the spars from a pipe with a diameter of 25 mm, and the struts from a 20 mm pipe. The elements are fixed by spot and then solid welding. In a similar way, the ears from the levers and shock absorbers are welded to the frame. It is recommended to fix the brackets when installing other components and assemblies.
Increased functionality
Now that the frame and chassis of the ATV are assembled and the engine is installed, you need to think about secondary structures that will make it practical to use the equipment. The fuel tank is well suited for a Ural motorcycle. Its impressive capacity will be enough even for a car engine
An important modification would be the installation of a snorkel. Since the engine is located quite low in the frame, the air filter accordingly takes air from below
To prevent water from getting into it when fording, it is highly recommended to do this. The exhaust system also needs to be completely redone, with exhaust gases being removed at a fairly high level so that water does not get inside. Also, for an ATV you need a large, wide seat; by moving your body weight, you will be able to achieve better control when moving. An underbody skid plate can be made from aluminum sheet metal to protect the front suspension arms and engine. A winch installed in the front part would be useful in the forest. You can use car fog lights to illuminate the road.
Front and rear suspension
Homemade ATVs are equipped with front or rear suspension. It is easier to mount a ready-made front suspension from an old motorcycle. You can use other options:
- Rear axle from the car. It must be shortened to fit the parameters of the quadric. The advantage of this method is the presence of a differential. The disadvantage of the bridge is its large mass.
- Cardan + gearbox on the rear axle. An independent suspension with high ground clearance is suitable for an all-terrain vehicle. In this case, the suspension arms are fixed to the frame using bolts.
To prevent the ATV from turning over while driving, it is recommended to tilt the front suspension strut. The shock absorbers are from Izha. If you have the financial opportunity, it is better to install gas-oil shock absorbers with pumping. They provide suspension adjustment based on the road surface.
The steering system of an ATV is similar to that of a car. A steering wheel or motorcycle handlebar is installed . Some experts advise combining 2 types:
- motorcycle handlebars, shaft and lever at the top;
- parts of the steering system from the car are below.
You can make the steering shaft with your own hands. For this, a pipe with a diameter of 20 mm and a wall thickness of 3 mm is used. You will need to install a travel stop at the bottom of the part.
Transmission
It must be installed efficiently so that there is no play. The engine and drive can be removed from the motorcycle, and the wheels can be used from the car. The trunk is easily made from pipes with thin walls. There are two possible control options:
- Using the steering wheel (in this case, the base from the car is taken).
- Using a motorcycle handlebar. The fuel tank comes with the steering wheel. For a homemade steering shaft, a 20 mm pipe with 2.8 walls is suitable. There should be a limiter at the bottom.
The suspension can be made either front or rear. There are two options for making the rear:
- The rear axle of the car is used. It will need to be shortened. The design will be heavy, but there will be a differential, which will be useful on the highways.
- A gear-shaft design is used. A gearbox is mounted on the rear axle, and wheels are mounted on the disks. This is a lighter version of the suspension for a homemade ATV. It lacks a differential, but this is not critical.
The front suspension is used from a motorcycle. It is possible to make an all-wheel drive model, but this is much more labor-intensive work, and also requires certain skills in turning.
The pendulum arms are installed so that when turning the ATV wheels do not catch the engine. If you are using a Ural frame, you should move the wheels further out. Two bipods are welded to the steering column: on the left and right wheels. The front pillar should be inclined.
Gearbox and brakes
If the quad is assembled on the basis of a car, the chain drive is replaced. This greatly simplifies vehicle maintenance. A manual transmission is installed, as it improves maneuverability. The input shafts are directed to the front and rear axles. Wheels can be removed from small cars: Oka, Niva.
The brake system is selected taking into account the mounted wheels. The steering knuckles are removed from the Niva or Oka. To assemble an all-wheel drive model, you will need: car steering, transmission drive and differentials. In this case, the frame is not used. It is better to weld the structure to suit the engine size.
The suspension is also removed from the car. A gearbox is installed on the front-wheel drive model. The next stage is the manufacture of the body. For this you will need fiberglass, fiberglass. Experts advise using the first material, as it is easier to work with.
A drawing is pre-prepared and body elements are cut out from polystyrene foam. To fix them together, glue or foam is used. Fiberglass is glued to the foam. The resulting structure is attached to the frame. The body is well dried, primed, sanded and painted.
Tires of the required size are selected. If the vehicle will be used off-road, it is necessary to create the appropriate ground clearance (distance from the bottom to the surface of the earth). For this, R17 wheels are installed.
The resulting ATV is equipped with turn signals, headlights, a dashboard, and a battery. Electrical equipment is connected according to a pre-designed diagram. For this, wiring and a multimeter are used to check the voltage in the network. The next step is to install the seats. The vehicle is checked for serviceability, and the data displayed on the drawings is compared. A quadric, correctly assembled, is not inferior in technical and operational characteristics to finished vehicles.
Step by step instructions
To make an ATV from a walk-behind tractor, you do not need to significantly alter the equipment. The process itself includes the following steps:
- The wheelbase is expanding. Since the disks of the walk-behind tractor are located directly under the walk-behind tractor, they are moved apart. The inserts are turned on a machine, and if there is none, then they simply purchase suitable adapters that serve to expand this base.
- The frame is being installed. It must be strong and reliable. Usually a ready-made motorcycle frame is used, but with certain skills you can weld pipe cuttings together. A significant load will be placed on this part, since it is on it that the engine and all the main components are mounted. The frame is connected to the entire unit using two special pins and a swivel joint.
- Wheels are installed, the size of which varies, depending on the purpose of the motorized device. The first step is to select the disks. It is better to use automobile ones, under low-profile tires, so that the camera fits tightly to them. To maintain integrity and longer service life, it is recommended to place a durable but soft cloth between the disc and the camera.
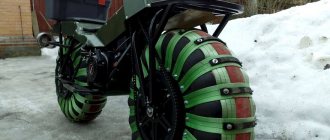
Instead of tires, you can use tubes from heavy-duty vehicles, which will increase stability and traction area. Their use will also help increase the depreciation of equipment. But they are thin and do not have a margin of safety, so such wheels will be easily damaged by thorns, twigs and sharp objects. One way out that protects tires from damage is to wrap them with a tarpaulin hose and then fix it with instantly hardening glue.
This is how a walk-behind tractor can be easily and simply transformed into a unit that can quickly and maneuverably move across fields, hills, steep ravines and other places where there is no asphalt road surface.
A self-assembled ATV is no worse in functionality and characteristics than factory devices. The main thing is that you know its strengths and weaknesses, and the unit made with love will last a long time and without any problems. You just need to carry out maintenance on time and monitor the condition of all systems.
This is interesting: a snow blower made from a trimmer with your own hands.
You should take into account all the little details, carefully select all the necessary materials and accurately carry out all the work.
In general, having special and simply basic and additional tools available, you can expand the capabilities of your walk-behind tractor, provide new functionality and use for many new actions.
