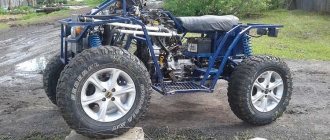
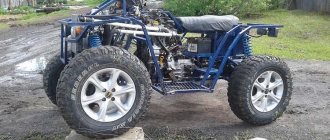
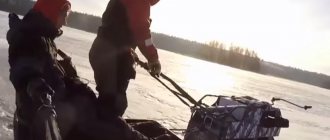
Dear visitors to the “ Samodelkin Friend ” website, today we will look at step-by-step instructions on how to independently assemble an ATV with an engine from an OKA car with your own hands. The author and designer of the presented ATV is Alexey Brazgin. According to Alexey, he had long dreamed of assembling his own ATV, before starting construction of the machine, he looked through many forums, homemade sites, which was pleasantly surprised... Mother Russia is rich in Kulibins)) see the ATV section And began designing, collecting the necessary spare parts, components and assemblies . Basically, all the parts are taken from used domestic cars, for example, the OKA engine, VAZ suspension elements, NIVA-214 satellites, VAZ-2109 grenades. The frame is welded from corrugated pipe with sections: 20×40, 20×25 and pipes of 20 for the manufacture of suspension arms. Ball from the classics, OKA springs, silent blocks, also classic, 24 pieces. Drive shafts from a VAZ 2109, electrical wiring from a scooter, R-15 wheels, Forward Safari 540 tires. The fuel tank is also homemade, welded by Alexey from sheet stainless steel, tank capacity is 18 liters. The front and rear kenguryatniks are also homemade, welded from pipes.
This ATV is quite powerful and easily overcomes any off-road obstacles, holes, ditches, ditches with or without water, steep ascents and descents, deep and loose snow, this beast is no match for anything)
Well, let's move on to looking at step-by-step photos of the assembly of Alexey Brazgin's ATV.
Materials
- OKA engine
- VAZ suspension elements
- professional pipe 20×40 and 20×25
- pipe 20 mm
- OKA springs
- classic shock absorbers
- R-15 wheels
- tires "Forward Safari 540"
- fiberglass and epoxy resin
Tools
- welding inverter
- Angle grinder (grinder)
- drill
- set of wrenches
- spray gun
- roulette
- screwdriver
Step-by-step instructions for assembling an ATV with an engine from an OKA car with your own hands.
First quad bike
Second quad bike.
Having a clear example makes it much easier to create your own equipment, but Alexey’s path faced a difficult task and more than six months of painstaking work.
It all started with the collection of spare parts and other scrap metal from the Domestic automobile industry)
OKA engine.
Gearbox with grenades from VAZ 2109
View from above)
A satellite from NIVA 214, bored out by a turner for a nine-point grenade.
Satellite on a grenade.
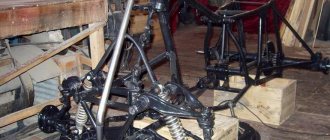
The frame is welded from professional pipe 20×40 and 20×25, suspension arms are made from pipe 20 mm.
Before.
Balls from the classics.
Bottom from VAZ 2109.
Classic silent blocks 24 pcs.
Reworking nine-arm fists and combining them with classics.
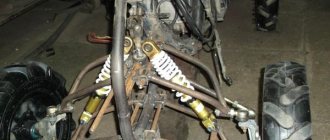
The front shock absorbers were created by crossing OKI springs with its rear shock absorbers, and this is what happened.
Bottom mount.
Rear springs from OKI + classic shock absorbers.
Steering. The radiator is located on the frame.
The frame was pre-welded with tacks so that errors in the design could be corrected during the process.
Steering wheel mount.
Shortened drive shafts of VAZ 2109. Rear-wheel drive.
Front wheel drive.
Reworking the exhaust system.
The resonator from the VAZ 2109 was opened and a partition was welded.
Installation of radiator and engine cooling system.
Gearbox lever.
Fastening at the bottom.
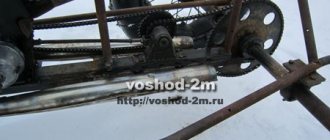
Transmission of torque from the gearbox to the gearboxes.
View from the checkpoint.
Original grenade from OKI, drive also from it.
The fuel tank is welded from stainless steel, capacity 18 liters.
Tank neck.
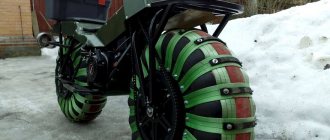
R-15 wheels.
Alexey in the process of construction.
Tires “Forward Safari 540”
Facing, beginning)
Kanguryatnik.
Front kenguryatnik.
Basis for application of fiberglass and impregnation with epoxy resin.
Homemade seat.
First test ride on an ATV.
Quad rides with the guys)
Frame primer.
Primer for the gearbox.
The frame is painted black.
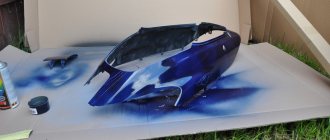
Gearbox in blue.
Working with fiberglass is very labor-intensive and painstaking.
DIY Oka ATV
The power unit for my homemade ATV was the engine from the Oka car - 32-horsepower, two-cylinder, four-stroke, liquid cooled. And if its power was often not enough for a car, then for an ATV it should have been more than enough.
The machine frame is spatial, welded. Its main elements (two pairs of side members: upper and lower) are made of round pipes of the VGP-25 type (water and gas pipes with a diameter of 25 mm and a wall thickness of 3.2 mm), auxiliary (struts, cross members, etc.) - from VGT-20. The spars are bent: the lower ones are in the horizontal plane, the upper ones are in the vertical plane. I bent the pipes on a pipe bender, “cold”. Eyes (pairs of ears) for attaching suspension arms and shock absorbers were welded to the frame immediately, and various brackets were welded as components and assemblies were installed (in “place”).
The transmission of the all-terrain vehicle is unique. Although the car is all-wheel drive, it does not have a transfer case. As you know, in the Oka the engine is located transversely, while on an ATV it is installed lengthwise. This made it possible to direct the output shafts from the gearbox (Gearbox) not to the right and left wheels (as in a car), but to the front and rear axles. It’s just that the power unit itself, interlocked with the clutch “basket” and gearbox, had to be shifted slightly to the left relative to the longitudinal plane of symmetry in order to reduce the horizontal angle of the longitudinal articulated shafts of the transmission. Well, their vertical angles turned out to be insignificant.
The transmission is assembled from units of various domestic cars, mainly VAZ models. But ready-made industrial units also had to be modified. For example, from the gearbox (from Oka), to ensure optimal (reduced) speed and increase torque, I removed the main gear pair and replaced it with a chain drive. The gearshift rod was also made different - elongated, with outlets on both sides of the gearbox. The rod can be locked in three positions: to engage 1st and 2nd gears, 3rd and 4th and reverse. The lever for selecting these positions is on the right side, and the gear shift lever is on the left.
The inter-wheel gearboxes are from the rear axles of the VAZ “classics”, only their axle shafts along with the “stockings” were removed and replaced with shafts with CV joints from front-wheel drive models. CV joints are also used as hinges in the remaining intermediate shafts of the transmission.
There are no low gears or differential locks.
The steering is motorcycle type (lever and shaft) at the top and automobile type (with tie rods) at the bottom, only simplified, without a steering mechanism, with one bipod. At first I used the steering wheel from a Minsk motorcycle, with a pipe diameter of 22 mm, but it turned out to be a little thin. Later I found and installed it from a Ural motorcycle. The steering shaft is made of a pipe with a diameter of 20 mm and a wall thickness of 2.8 mm. It has a travel stop at the lower end. At the bottom, the shaft rests on a thrust bearing, and in the middle part it rotates in a detachable nylon bracket-sleeve.
The bipod is made of 8 mm thick steel sheet in a shape resembling the letter “T”. At the edge of the “rack” there is a hole with a diameter of 20 mm - the steering shaft is inserted and welded into it, and in the ears there are conical holes for the ball ends of the tie rods. These holes are reinforced with suitable welded washers. The bipod ears are bent down slightly so that they are almost parallel to the rods.
The wheels of the ATV are 15-inch, from a Chevrolet Niva car. Tires with the appropriate landing diameter dimensions 205/70 (width/height as a percentage of the width) with an off-road tread pattern. The wheel running diameter is about 660 mm.
The wheel suspensions are independent, on two triangular wishbones each (upper and lower) with shock absorbers from the Oka car (front). The levers are welded from round pipes of the VGP-20 type. Elastic elements (springs) and shock absorbers are from the Oka
"(rear). Wheel hubs and steering knuckles are welded into the wheel ends of the front arms - from a VAZ-2109 car. Both had to be modified. I installed studs for Niva wheels in the hubs, and homemade swing arms in the front knuckles.
The muffler is homemade, two-section. To protect the body kit from temperature warping, I covered it with a remote cover, and insulated the inlet pipe with asbestos.
Preparation for work, tools and equipment
First of all, you need to carefully consider when, where and for what purposes the future ATV will be used - hunting and fishing, motorcycling in nature, transporting goods, etc. It is on this basis that you need to make a choice of a “donor” vehicle, deciding how powerful the engine is needed, what kind of suspension is suitable, what kind of trunk, etc.
You can take ready-made drawings from the Internet, create them from scratch yourself, or combine both options and ready to remake them at your own discretion.
List of required tools:
- welding machine;
- Bulgarian;
- drill;
- a set of keys;
- various small tools - calipers, hammer, knife, screwdrivers, pliers, etc.
To make your own frame, you will also need equipment for bending pipes. If you don’t have one, you can rent it or outsource the necessary work to another craftsman. Only with remarkable skill can you bend the pipes manually by heating the bend with a gas cutter or torch.
- engine;
- frame;
- rear and front suspension;
- steering;
- brake system;
- cooling system;
- muffler;
- electrical equipment - battery, headlights;
- body, body kit
DIY ATV body kit
Do-it-yourself ATV body kit - fiberglass. I glued it in for the first time, and therefore first studied the recommendations for performing the relevant work. But as it turned out, this process is painstaking, although the result is worth it.
First, I made the required contours of the body kit from a square steel pipe with a cross-section of 10x10x1 mm. Fortunately, this pipe bends easily even with your hands over your knee. The contour was welded to the frame using jumpers from the same pipe, in places where later (after gluing the body kit) the “tacks” could be easily cut off. Then I bent “wings” from hardboard (fibreboard) and fixed them with self-tapping screws to the contour and jumpers. Where the bend turned out to be steep, I attached separate strips of the same hardboard. The front end was made with polystyrene foam purchased at a hardware store. It was possible to use polystyrene foam or the same polystyrene foam, but polystyrene foam turned out to be a more suitable material - it cuts well with a sharp thin knife. I glued individual elements from it into the overall structure on polyurethane foam.
To forgotten estates. ATV tour in the Kostroma region.
A manager will contact you shortly!
The journey begins in Kostroma, where you need to get there on your own. We recommend buying tickets for trains departing from Moscow to Kostroma at 00:35 (arrival at 06:40) and back from Kostroma to Moscow at 23:20 (arrival at 05:40). We are ready to help with the purchase of train tickets; if necessary, leave a comment in the application.
Day 1
Route to the Denisovo estate
You will be met at the Kostroma railway station and taken to the recreation center. You will check into your rooms, have breakfast, and then receive instructions on how to operate an ATV and adjust your equipment. The route will start with flat terrain, where everyone can get used to the technology and practice their driving skills.
Then you will go on a journey through the picturesque area of the Kostroma region. Visit the ancient Denisovo estate - a monument of noble architecture of the 19th century. Along the route, flat sections of fields will alternate with hills, forest swamps and streams. Along the way there will be stops for rest, snacks and photos of the surroundings.
In the evening you will return to the base, where a hot dinner and a sauna will await you.
The length of the route is 40 km on ATVs.
Day 2
Route to the Sledovo estate
After breakfast, you will set out on the route to the Sledovo estate. The path will pass through forest and dirt roads with areas of complete off-road, endless fields and swamps.
There will be several passes along the route where you can relax, have a snack and have a photo shoot in nature.
You will visit the ancient Trinity Church in the village of Kostenevo, and then arrive at the final point of the route - the Sledovo estate. This is the family estate of the noble Kartsev family, built in the 18th century. During the excursion you will get acquainted with the history of the ancient estate and stroll through the beautiful park.
You will then return to base and have dinner. Afterwards you will be taken to the railway station in time for the departure of the train to Moscow.
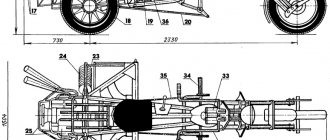
DIY ATV frame drawings
The false tank has a complex shape. It was not possible to bend it out of hardboard. Therefore, having wrapped the engine with plastic film, I began to fill the space intended for it with layers of polyurethane foam. After each layer, drying is mandatory, otherwise the thick volume of foam may not dry out inside. Filled until the layers went beyond the contour. Finally, after the foam had completely dried, I began to draw out the desired shape with a knife. The edges were smoothed with coarse sandpaper.
Part of the Oka dashboard was used under the instrument panel. I secured it to the blank also using polyurethane foam. Since the foam is large-porous, the pores were filled with gypsum and then processed. When the shape of the blank began to correspond to the intended design and its surface became more or less smooth, I coated the blank with PF-115 paint. Since I was not going to make a matrix for gluing the body kit on the block, but immediately glued the body kit on it, followed by finishing the surface to an ideal state, putting plaster and painting the block could be neglected.
So, the blockhead is ready and to glue a high-quality product, it was required: 10 kg of epoxy resin, 1 kg of plasticizer for it and 1 kg of hardener, 15 linear meters of thin fiberglass fabric, 5 m of glass mat, brushes, gloves. It is highly advisable to wear breathing protection. And the more expensive they are, the more reliable they are. But, as you know, you can’t buy experience, so I gained it in the process of work.
I used transparent tape as a separating layer between the block and the product. The whole idiot covered it with stripes carefully, without any omissions. It only took 1.5 rolls of wide tape.
I diluted the resin in 200 - 300 grams with a hardener and plasticizer. I used measuring cups and syringes, which is not very convenient. Before this, I cut strips of fiberglass in such sizes that large canvases would lie on flat surfaces, and on uneven surfaces, pieces of fabric could repeat them without making folds. By the way, fiberglass stretches moderately along the diagonal of the weaves, “flowing around” the desired shape.
First, I thickly coated one area of the blockhead with epoxy resin, placed fiberglass on it and impregnated the top with resin again. The adjacent piece of fabric was glued using the same technology with an overlap of 3 - 5 cm. We had to work quickly - the resin sets quite quickly, and the higher its temperature, the faster. Yes, I also heated the resin a little near a powerful lighting lamp for better fluidity.
After covering the blockhead with fiberglass in one layer, I began to cover it with glass mat. The fiberglass mat I got was quite thick, and it turned out to be good for gaining the thickness of the product. But it does not hug uneven surfaces, so I used it only on flat (or slightly sloping) surfaces and without overlap. Impregnation with resin was carried out in the same way as when working with fiberglass. Just keep in mind that it takes a lot of resin to impregnate glass mat, so you need to dilute it more. After gluing the glass mat, uneven surfaces were glued in several layers with cloth. Each subsequent layer was applied after the previous one had set a little, so that the resin would not leak. And since the process of gluing the body kit took more than one day, after a day of break it was necessary to “roughen” the surface with coarse sandpaper and degrease it - after all, the resin cures completely during this time. The final layers on top of the mat were again covered with fiberglass, and not even just one layer.
Since I needed the surface, as they say, the smoother the better, and I didn’t have enough experience, dips and holes still remained - I filled them with resin alone, and with pieces of fiberglass applied there. There wasn't enough resin. I already bought more at the hardware store, in boxes. I liked working with it more because it was already packaged, and all I had to do was mix the ingredients. And it dried faster than the one purchased from the company.
After the glued body kit had completely dried, I made cuts in it, dividing the product into three parts: rear fenders and rear, false tank with seat, front fenders and front end. Carefully, slightly prying and pulling with his hands while picking, he separated the product piece by piece without much effort from the blockhead.
Now, having removed the parts, I began to process them separately, bringing them to the desired result. In general, ordinary preparatory and painting work using “all” technology: first, rough grinding with the removal of large bulges of resin and fiberglass; then painstakingly filling the recesses with putty and fiberglass; then grinding the outer surface and priming with a plasticizer. Finally - metallic painting and varnish with a plasticizer.
The blockhead also carefully cut it off and put it in the far corner - just in case. The body kit was attached to specially made and welded “in place” mounts on the frame.
Finally, I welded front and rear luggage racks from thin-walled steel pipes with an outer diameter of 20 mm, and in addition to them, “kangaroo bars” that replaced the bumpers.
