Modifications
Shadow 400 Slasher is a popular modification of the model.
- In 2000, the Shadow 400 Slasher appears (in the 750 Shadow Spirit or Shadow 750 Slasher for Japan).
- October 2008 is marked by a massive restyling of both lines. As a result, the Shadow 400 receives the Classic prefix (the appearance becomes similar to the Shadow 750 Aero).
- The Slasher 400 becomes the Shadow 400 Custom (the 750 has a similar model, the VT750C2 Shadow Spirit).
and competitors
However, such a leapfrog of names did not prevent competitors from showing their answers to the 400.
- Kawasaki offered the VN 400 Vulcan.
- Yamaha one of its “shooting stars” XVS 400 Drag Star.
Suzuki has produced as many as 3 versions:
- Intruder VS400;
- Intruder VL400 Classic
- Desperado 400.
Specifications
Technical characteristics of Honda Shadow 400:
| Model | Honda Shadow 400 |
| Motorcycle type | cruiser |
| Year of issue | 1997-2016 |
| Frame | steel tubular |
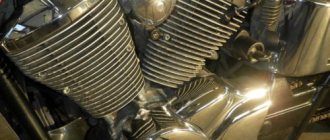
| engine's type | 2-cylinder, 4-stroke, V-shaped |
| Working volume | 398 cm³ |
| Bore/Stroke | 64.0 x 62.0 mm |
| Compression ratio | 9.8:1 – Shadow 400 (1997-2008), Slasher 10.3:1 – Classic, Custom, VT400S |
| Cooling | liquid |
| Number of valves per cylinder | SOHC, 3 valves per cylinder |
| Fuel supply system | Carburetor, 2x Keihin 34 mm – Shadow 400 (1997-2008), Slasher PGM-Fi (electronic injection) – Classic, Custom, VT400S |
| Ignition type | digital transistor |
| Maximum power | 33.0 hp (24.3 kW) at 7500 rpm – Shadow 400 (1997-2008), Slasher 31.0 hp (22.8 kW) at 7000 rpm – Classic, Custom, VT400S |
| Maximum torque | 34 Nm (3.5 kg*m) at 5500 rpm – Shadow 400 (1997-2008), Slasher 33 Nm (3.4 kg*m) at 3500 rpm – Classic, Custom 32 Nm (3.3 kg*m) at 3500 rpm – VT400S |
| Clutch | Multi-disc in oil bath, cable drive |
| Transmission | 5-speed |
| type of drive | Chain – Shadow 400 (1997-2008), Slasher, VT400S Driveshaft – Classic, Custom |
| Front tire size | 100/90-19 (57H) – VT400S 120/90-17 (64S) – Shadow 400 (1997-2008), Classic 110/80-19 (59S) – Shadow 400 Slasher 90/90-21 M/C (54S) – Shadow 400 Custom |
| Rear tire size | 170/80-15M/C (77S) – Shadow 400 (1997-2008) 160/80-15M/C (74S) – Shadow 400 Classic, Custom, Slasher 150/80-B16 M/C (71H) – VT400S |
| Front brakes | 1 disc, 296 mm, 2-piston caliper |
| Rear brakes | drum |
| Front suspension | Telescopic fork, 140 mm – Shadow 400 (1997-2008) Telescopic fork, 108 mm – Shadow 400 Slasher Telescopic fork, 117 mm – Shadow 400 Classic Telescopic fork, 115 mm – Shadow 400 Custom Telescopic fork, 118 mm – VT400S |
| Rear suspension | pendulum with two shock absorbers, 90 mm – Shadow 400 (1997-2008), Classic, Custom, VT400S pendulum with two shock absorbers, 80 mm – Shadow 400 Slasher |
| Motorcycle length | 2455 mm – Shadow 400 (1997-2008) 2310 mm – Shadow 400 Slasher 2510 mm – Shadow 400 Classic 2445 mm – Shadow 400 Custom 2295 mm – VT400S |
| Motorcycle width | 945 mm – Shadow 400 (1997-2008) 795 mm – Shadow 400 Slasher 920 mm – Shadow 400 Classic 835 mm – Shadow 400 Custom 870 mm – VT400S |
| Motorcycle height | 1105 mm – Shadow 400 (1997-2008) 1060 mm – Shadow 400 Slasher 1125 mm – Shadow 400 Classic 1130 mm – Shadow 400 Custom 1135 mm – VT400S |
| Wheelbase | 1625 mm – Shadow 400 (1997-2008), Slasher 1640 mm – Shadow 400 Classic 1655 mm – Shadow 400 Custom 1560 mm – VT400S |
| Seat height | 695 mm – Shadow 400 (1997-2008) 645 mm – Shadow 400 Slasher 660 mm – Shadow 400 Classic 650 mm – Shadow 400 Custom 750 mm – VT400S |
| Minimum ground clearance (clearance) | 140 mm – Shadow 400 (1997-2008) 130 mm – Shadow 400 Slasher, Classic, Custom 155 mm – VT400S |
| Acceleration to 100 km/h | |
| Maximum speed | 145 km/h |
| Gas tank capacity | 14.0 l (including reserve - 3.6 l) – Shadow 400 (1997-2008), Classic, Custom 13.0 l (including reserve – 4.0 l) – Shadow 400 Slasher 10.0 l (including reserve – 2.5 l) – VT400S |
| Motorcycle weight (dry) | 225 kg – Shadow 400 (1997-2008) 217 kg – Shadow 400 Slasher |
| Motorcycle weight (curb) | 242 kg – Shadow 400 (1997-2008) 232 kg – Shadow 400 Slasher 255 kg – Shadow 400 Classic 244 kg – Shadow 400 Custom 229 kg – VT400S |
S OPERATING MANUAL…
HONDA motorcycles
- Image
- Text
- Content
MOTORCYCLE HONDA VT750C2B/C2S
MANUAL
- Cover1.pdf Page 2
- Page 4
- Page 12
- Page 16
- Page 17
- Page 90
- Page 91
- Page 92
- Page 93
- Page 100
- Page 101
- Page 101
- Page 103
- Page 112
- Page 134
- Page 1
Driving performance
Due to the production upgrade, the maximum speed increased slightly compared to the prototype - 145 km/h. However, the owners noted that this did not have the best effect on the dynamics.
Dynamics (overclocking)
The 400 is certainly not a liter cruiser; it clearly lacks power on the highway.
A normal cruiser is 100 km/h.
Acceleration from zero to 100 km/h in 11 seconds. When compared with the prototype, users noted that it was almost identical, maybe a fraction of a second faster.
Fuel consumption
According to the manufacturer's documentation, consumption is 2.5 liters per 100 km before restyling in 2008, almost 3 liters after. But since the motorcycle is for the domestic market, the indicators are also indicated in an internal manner. Owners from the Russian Federation note an average consumption of 4.5 liters. A more accurate result depends on the traffic situation.
Provided that the tank is 14 liters, you can drive up to 200 km at one gas station, if “dry” - 280 km.
Important information
Page 2
- Image
- Text
2
IMPORTANT INFORMATION
DRIVER AND PASSENGER
•
This motorcycle is designed to carry a driver and one passenger. Never exceed the maximum lifting capacity stated on the equipment and rating plate.
DRIVING ON THE ROAD
•
This motorcycle is intended for use on paved roads only.
PLEASE READ THIS INSTRUCTION MANUAL CAREFULLY
•
Pay particular attention to the safety information provided at various points in this manual. This information is most fully presented in the “Safety Information” section located before the “Contents” page.
This Manual should be considered an integral part of the motorcycle and be passed on to the next owner when it is sold.
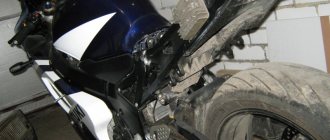
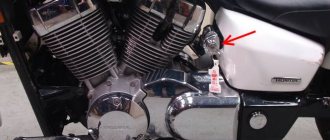
Diagnostics and replacement of timing chain, repair of timing chain tensioner Honda VT 400 Shadow
Quite often, a malfunction of the Honda VT 400 Shadow timing chain is caused by an increase in the pitch between the links. As a result, the engine begins to idle incorrectly. Therefore, it is not at all surprising that the chain begins to jump several teeth at the same time. What does this mean? Firstly, the engine will stall. Secondly, the valves may be jammed. This, in turn, may require expensive engine repairs. Therefore, when the first signs of a malfunction are detected, it is recommended to replace the timing chain on the Honda VT 400 Shadow.
Shadow economy
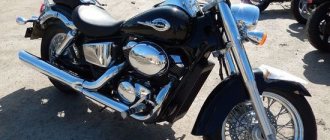
Honda Shadow is a cult motorcycle, we can say that it is a favorite of the masses. Take a look on the Internet: the variety of fan clubs is simply amazing. The epicenter of the craze, of course, is in the USA: there are clubs in almost every state, some of them for fans of the ACE Tourer or Shadow Saber. Moreover, the Americans say in all seriousness: the Honda Shadow is the best motorcycle produced by the Japanese over the last half century!
You have to try hard to earn such love. And Honda tried. First of all, let us note the amazing reliability of the motorcycles. Mechanics assure that the device can only be ruined by the blatant disregard of the owner.
The second plus is good (but only by cruiser standards) driving performance. Let us note the advantages of the “small” Shadow – VT600C and the Steed, which is identical to them in terms of chassis. The landing position on them, especially after the modernization in 1997, is close to the classic one, which greatly facilitates traffic in the city. On the VT1100C you won’t be able to follow traffic lanes on the roads - the geometry is not the same. But fussiness does not fit into the canons of American style. But the low center of gravity makes low-speed maneuvering surprisingly easy.
But the main thing in the origins of people's love is, of course, style (have you noticed how often Honda adapted it to the trends of changing fashion?), and for reasonable money - not at all “Harley” prices. What's on the other side of the scale? Perhaps it’s just the difficulty of maintenance - the layout is too dense
To get to some components, you will have to almost disassemble half the motorcycle. But this is a common problem with many cars with a V-shaped engine and a small cylinder angle.
What's on the other side of the scale? Perhaps it’s just the difficulty of maintenance – the layout is too dense. To get to some components, you will have to almost disassemble half the motorcycle. But this is a common problem with many cars with a V-shaped engine and a small cylinder camber angle.
In 2000, a more advanced family of 2-cylinder cruisers, the VTX, debuted in the concern’s program. Its creators started with a mind-blowing 1800 cc displacement, then released a 1300 cc modification that clearly takes the place of the VT1100. But even after Shadow finally goes into obscurity, motorcycles from this series will continue to fill the ranks of Russian second-hand stores for a long time.
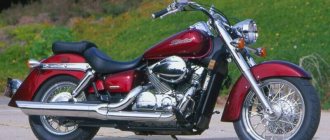
Features of HONDA Shadow 400
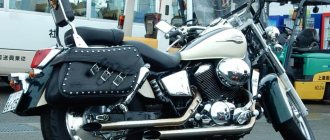
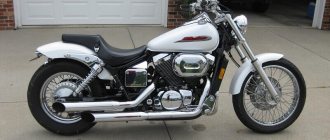
In terms of its parameters and appearance, the HONDA Shadow 400 is a typical classic cruiser.
Apart from interesting decisions regarding changing the chassis, the bike has few differences.
- Suspension with short travel that cannot be adjusted.
- 2 springs on the rear shock absorber provide a soft ride, but they also make their way with a bang even with a small load (it’s better not for two burly men to sit on this bike together).
- A motorcycle for the city - it’s better not to meddle with the Moscow Ring Road with its flow speeds.
- The chopper seat allows you to change the position of your legs when driving, and the soft sofa allows you to cover significant distances in “one sitting.”
My horse's mileage by the end of the season was 25,200 km, the new season is already open. It's time to change the oil, oil and air filters, spark plugs (recommended for a mileage of 25,600 km). I wanted to figure it out and do everything myself, and the motorcycle itself is conducive to this. The main source was the service manual, based on it. Perhaps for some this post will be more visual and simpler than the manual. Let's change the oil! As far as I know, this engine was installed not only on cruisers (Shadow/Steed), but also on enduro (XL400/600/650 Transalp and XRV750 Africa Twin), neoclassics (Bros 400/NTV650), tourists (NT650V Deauville and PC800 Pacific Coast ) and the VRX400 roadster, so the information is relevant not only for owners of the Honda Shadow VT400/VT750.
What we need 1. SF or SG oil according to API classification for 4T engines. I used Motul 5000 10W-40 4T because... there was a discount on it, and according to the SG classification it is suitable (viscosity is selected according to ambient temperature, 10W-40 is used at temperatures of -15...+40 degrees) 2. Funnel 3. Oil filter, original number 15410-MCJ-505 (15410- MFJ-D01 is old), from analogues you can take Hiflo Filtro HF303, Mann MW 64/1 and Champion 301 should also be suitable. I used Hiflo Filtro HF303. 4. A 17 key, you may also need a screwdriver and a hammer if the filter cannot be unscrewed by hand. 5. 4 liter container for draining old oil 6. You may need a large syringe ~50 ml with a dropper tube
The oil and oil filter are replaced according to the maintenance schedule specified in the instructions (manual) for your motorcycle. For Shadow VT400 and VT750 this is after the first thousand km, and then every 12,800 km, i.e. 1000/12800/25600/38400, etc. km run. If possible, it is better to change the oil and filter more often, ideally change them before each new season.
Changing the oil and oil filter 1. Warm up the engine for 2-3 minutes, or, on the contrary, let it cool down if you have just arrived. This makes the oil more liquid and easier to drain. 2. Place the motorcycle upright and place something under the rear wheel to prevent the motorcycle from rolling. The drain bolt is on the left, so there should be easy access from the left side. Ideally, put the motorcycle on a stand or jack it up. 3. Unscrew the dipstick, this will make it easier for the oil to drain. 4. Unscrew the drain bolt with a wrench, as soon as it goes, then unscrew it by hand and substitute the container. We hold the bolt tightly, it just wants to slip out and plop down at the bottom of the container with the drained oil! We wait for the oil to drain. 5. Try to unscrew the filter by hand. If not, use a screwdriver and a hammer to break through the old filter and unscrew it. We move the container for draining to the filter. Let the remaining oil drain. 6. Pour new oil into the new filter up to the threads, wait until the oil is absorbed, then pour more. Lubricate the rubber ring and threads of the new filter with oil. 7. Tighten the filter, if you have a torque wrench, then according to the instructions, the tightening torque of the filter is 10 Nm (1.0 kgm), if not, tighten it by hand as far as possible. We wipe the joint. 8. Check the condition of the sealing washer of the drain bolt, tighten it, the torque is 29 Nm (3.0 kgm). Wipe so that there are no traces of oil. 9. Pour oil into the neck from where the dipstick was unscrewed. The oil volume is 2.2~2.4 liters with a normal oil change, 2.9 liters if the engine has been completely disassembled. 10. Insert the dipstick without twisting it, the motorcycle is standing vertically. We check the level, it should be above o and below o. 11. Start the engine and make sure that the low oil pressure lamp goes out. Let the engine run for 2-3 minutes. 12. A few minutes after stopping the engine, the level on a vertically standing motorcycle should be at the top mark of the dipstick. If it’s not enough, add it, if it’s too much, pump out some of the oil using that same large syringe directly through the filler neck. It's easier than draining it again. 13. Check for oil leaks. 14. We rejoice!
Valve adjustment Honda VT 400 Shadow
Check the thermal valve clearances according to the service manual for your Honda VT 400 Shadow, as well as after disassembling the head or replacing the timing chain or when a characteristic “clunking noise” appears from the cylinder head.
Increased valve clearances lead to increased noise when the engine is running, and if the clearances are too small, the valves will not close, and the engine will not develop rated power, and sometimes it will be difficult to start.
Our service center provides:
Adjusting valves using a rocker mechanism Adjusting valves using washers (Washers are available for adjusting valves with a diameter of 7.48 mm and 9.48 mm)
Please note that after adjusting the valves, in some cases it is necessary to synchronize the carburetors
OPERATING MANUAL All information in this...
Page 3
- Image
- Text
3
Honda VT750C2B/C2S OPERATING MANUAL
All information in this “Manual” corresponds to the state of the products as of the date the document was signed for printing. Honda Motor Co., Ltd reserves the right to make changes at any time without prior notice and without any obligation on its part. This publication may not be reproduced in whole or in part without the written permission of the copyright holder.
Symptoms of engine repair on a Honda VT 400 Shadow are:
- Extraneous noise in the engine
- High oil consumption
- Coolant flow
- Low compression in the engine or large difference between cylinders
- Excessively high compression associated with carbon deposits in the combustion chamber
- Blue smoke from the muffler
- Obvious oil leak from the engine
- Transmission problems
Disassembling a Honda VT 400 Shadow to remove the engine Removing the engine of a Honda VT 400 Shadow Cleaning the engine before disassembling Disassembling the engine Complete troubleshooting of the engine Cleaning the engine of metal shavings and other contaminants Diagnostics of all bearings and gears of the engine Replacement of worn / broken / bent parts Assembling the engine Checking valve clearances mechanism Installing the engine on the Honda VT 400 Shadow Final assembly of the Honda VT 400 Shadow, starting All engine repair work is carried out by a highly qualified mechanic with extensive experience. A 1 year guarantee is provided for all work performed.
A few words about safety
Page 6
- Image
- Text
6
A FEW WORDS ABOUT SAFETY
Your safety and the safety of others is extremely important. Therefore, driving a motorcycle in full compliance with safety rules is your direct responsibility.
Appropriate safety information located on vehicle placards and in the Owner's Manual is intended to make it easier to drive safely. This information is intended to alert you to situations where there is a risk of harm to you or others around you.
Of course, it is impossible to warn about all the risks associated with operating or maintaining a motorcycle. Therefore, in your actions, first of all, you must be guided by common sense.
Important safety information will come to you in a variety of ways, including:
• Warning signs
- on the motorcycle itself.
• Safety Information
— in front of which the attention symbol is placed
and one of three
Signal words: DANGER, WARNING
or
ATTENTION
.
These signal words mean the following:
Brief history of the model
Model
: Honda Shadow 400 (Japan).
Frame number
: NC34-100XXXX.
Factory designation
: NV400C2V.
Model
: Honda Shadow 400 (Japan).
Frame number
: NC34-110XXXX.
Factory designation
: NV400C2W.
Model
: Honda Shadow 400 (Japan).
Frame number
: NC34-120XXXX, NC34-125XXXX.
Factory designation
: NV400C2X, NV400CX.
Model
: Honda Shadow 400;
Honda Shadow 400 Slasher (Japan). Frame number
: NC34-140XXXX;
NC40-100~, NC40-110~. Factory designation
: NV400C2; NV400DCy.
Model
: Honda Shadow 400;
Honda Shadow 400 Slasher (Japan). Frame number
: NC34-150~;
NC40-120~. Factory designation
: NV400C21; NV400DC1.
Model
: Honda Shadow 400 Slasher (Japan).
Frame number
: NC40-130~.
Factory designation
: NV400DC2.
Model
: Honda Shadow 400 (Japan).
Frame number
: NC34-160~;
NC34-230~. Factory designation
: NV400C23; NV400C3.
Model
: Honda Shadow 400;
Honda Shadow 400 Slasher (Japan). Frame number
: NC34-170~;
NC40-140~. Factory designation
: NV400C4; NV400DC4.
Model
: Honda Shadow 400;
Honda Shadow 400 Slasher (Japan). Frame number
: NC34-180~;
NC40-150~. Factory designation
: NV400C5; NV400DC5.
Model
: Honda Shadow 400;
Honda Shadow 400 Slasher (Japan). Frame number
: NC34-190~;
NC40-160~. Factory designation
: NV400C6; NV400DC6.
Model
: Honda Shadow 400;
Honda Shadow 400 Slasher (Japan). Frame number
: NC34-400~;
NC40-170~. Factory designation
: NV400C7; NV400DC7.
Model
: Honda Shadow 400;
Honda Shadow 400 Slasher (Japan). Frame number
: NC34-410~;
NC40-180~. Factory designation
: NV400C8; NV400DC8.
Model
: Honda Shadow 400 Classic;
Honda Shadow 400 Custom (Japan). Frame number
: NC44-100~;
NC45-100~. Factory designation
: VT400C9, VT400CA9; VT400C29, VT400C2F9.
Model
: Honda Shadow 400 Classic;
Honda Shadow 400 Custom; Honda VT400S (Japan). Frame number
: NC44-100~;
NC45-100~; NC46-100~. Factory designation
: VT400C9, VT400CA9; VT400C29, VT400C2F9; VT400S.
Model
: Honda Shadow 400 Classic;
Honda Shadow 400 Custom; Honda VT400S (Japan). Frame number
: NC44-100~;
NC45-100~; NC46-100~. Factory designation
: VT400C9, VT400CA9; VT400C29, VT400C2F9; VT400S.
Model
: Honda Shadow 400 Classic;
Honda Shadow 400 Custom; Honda VT400S (Japan). Frame number
: NC44-100~;
NC45-100~; NC46-100~. Factory designation
: VT400C9, VT400CA9; VT400C29, VT400C2F9; VT400S.
Model
: Honda Shadow 400 Classic;
Honda Shadow 400 Custom; Honda VT400S (Japan). Frame number
: NC44-100~;
NC45-100~; NC46-100~. Factory designation
: VT400C9, VT400CA9; VT400C29, VT400C2F9; VT400S.
Model
: Honda Shadow 400 Classic;
Honda Shadow 400 Custom; Honda VT400S (Japan). Frame number
: NC44-100~;
NC45-100~; NC46-100~. Factory designation
: VT400C9, VT400CA9;
VT400C29, VT400C2F9; VT400S.
Model
: Honda Shadow 400 Classic (Japan).
Frame number
: NC44-100~.
Factory designation
: VT400C9, VT400CA9.
Model
: Honda Shadow 400 Classic (Japan).
Frame number
: NC44-100~.
Factory designation
: VT400C9, VT400CA9.
Brief history of the model
- 1987 - official start of production and sales of the Honda Shadow 1100. The model was also called Honda VT 1100
C. - 1991 – the model is not officially released.
- 1992 – Honda Shadow 1100 gets a 5-speed gearbox and a 17′ front wheel.
- 1995 is the last year of production of the motorcycle in the regular version (Honda Shadow 1100). The model is being replaced by the Classic modification in all markets except the US market. In the USA, in parallel with the regular version, the ACE modification appears. The model is also called – Honda VT 1100 C2
. - 1997 - the regular version of the motorcycle (for the US market) is called Spirit. In the same year, the ACE Tourer modification appeared.
- 1998 – appearance of the Aero modification. The model is also called – Honda VT 1100 C3
. - 2000 – appearance of the Saber modification. The model is also called – Honda VT 1100 Saber
. - 2007 is the last year of release of the Saber modification.
Release Features
Thus, in 1997, in parallel with the “American shadow” (Shadow 750 ACE), a domestic Japanese version was produced - a smaller engine, power, worse dynamics, but at a very affordable price. Users who saw the new creation were delighted: “Yes, this is a real liter, only less voracious.”
Since the documentation of the bikes went through the factories at the same time, they copied many details from each other. But there is one small detail due to which the motorcycles had different fates.
This is a prototype model. The younger one was planned to replace the Steed 400, and therefore took many parts from it.
The model existed until 2016, receiving restyling in the same years as the older one.
Additional electrics - what goes where
It so happened that at the time of purchasing the Saber (my motorcycle), I had a remote control with buttons from the well-known Kuryakun company in my stash. He's in the title photo. If, like me, your motorcycle does not have a powerful plastic body kit, when installing additional electrics, the question will immediately arise - where to put the buttons that turn it on? Kuryakun made a good, elegant solution... and stuck a galactic price tag on this piece of iron with chrome and three buttons. My advice to you is better to order from Aliexpress. But they gave me this thing, so I’ll show it - on it. Since I am for safety, the main question that needs to be resolved is:
How to avoid burning anything and make it convenient?
To avoid burning anything, the best option is to make separate wiring for all our consumers. This way we won’t burn anything in the original wiring. But keeping our additional circuits always energized is not the best option. The same USB adapter also works in standby mode. Not much, but in a month there will be nothing left of the battery charge. You could make a button, but what if you forget to turn it off? And why, if there is a relay!
So our wiring will use:
- Our common fuse is as close as possible to the battery positive, so that in case of any damage we immediately get a blown fuse, and not a local fire.
- The relay that I will connect to the ignition switch so that as soon as I turn it off, everything turns off for me.
And to collect all this we will need:
- wires (preferably at least 2 colors)
- heat shrink (an extremely necessary thing - put it on in advance, twist the wires, put it on top, apply it with a hairdryer or lighter and that’s it)
- circuit breakers
- fuse blocks
- relay
- relay block
- button/buttons
- terminals for buttons
- battery terminals
However, I’ll say more about all this
And now in more detail.
If you don't know anything about electrics, to hell with it - I'll explain it in my fingers. Because I'm not very good at it either. Imagine that current is water that flows from plus to minus and that we are building a water supply system. So, I hope it will be clearer.
I give a general scheme for my particular case. We will use it to navigate - you can open it in a new tab and take a look.
Looks complicated? This is just for now.
Step 1
In our electrics, step 1 is the red wire. So, we take the current from the battery positive and immediately put it on the fuse. This is necessary so that if there is a short circuit somewhere further, our fuse will blow and the current will stop flowing there. A kit for a beginner amateur radio maniac will help us with this (can be found in auto parts stores or markets):
terminal:
or
The only difference is that the top one is more convenient to put on and take off, and the bottom one is better fixed. Of course, keep in mind that the battery bolts also have a diameter - it’s better to look in advance. You strip the wire, insert it inside and clamp the legs with a special tool or pliers.
And a fuse, preferably with a block:
Its ring wire can be cut as conveniently as possible - into equal or unequal length ends. The ideal option is if the fuse is the same type as the rest of the motorcycle - this way you won’t need to carry several types with you.
Step 2
After we have protected ourselves from our own crooked hands, we will turn it on automatically. A regular 4-pin mechanical relay from VAZ will help us with this. I don’t even know its part number or name - the phrase “4-pin relay” was usually enough.
I also recommend buying a block for it - a set of connectors into which you won’t insert the relay incorrectly. This way you won't get confused if you turn off the relay:
There can even be 5 wires in the block - the central 4-pin relay is not needed.
It works incredibly simply - when a current passes through 2 specific contacts, this current closes 2 other contacts designed for a higher current. It's convenient - small buttons turn on powerful things. And in our case, this is necessary because the lock is not designed for the current that we may be using (it will not withstand the water pressure in our water supply).
If you followed my advice exactly and you have the same relay in your hands as I do, then the contacts will be 30, 85, 86, 87 (that’s what it says there). The pair 85 and 86 is a “weak” pair, and 30 and 87 is a “strong” pair. I don't know why exactly this is. If you have different numbers, look in the search engine or look at the diagram on the relay itself.
Accordingly, we must connect the relay like this:
87 is our incoming wire from the battery after the fuse (let me remind you, in our diagram it is red)
86 is our output wire of the “weak” pair, it will need to be connected to the negative (green)
85 is our incoming wire of the “weak” pair, it needs to be connected to the lock (thin red)
30 - our output wire of the “strong” pair - this is what will go to all consumers (orange)
I’ll add right away - how to twist the wires?
If you know how to work with a soldering iron, honor and praise to you. No - you can just do a normal twist and close it with heat shrink - it all holds up for me.
You can argue about twisting for a long time, but if you use it, I recommend the “bandage” principle:
In our case (most likely you have multi-core wires) it will look like this:
And twist the wires relative to each other. Don't forget to isolate the connection.
In addition, the question arises - where should we connect to the lock?
Step 3
To connect to the lock, we will have to find the motorcycle's electrical circuit or poke it with a tester. Our goal is to find the wire on which voltage appears when the ignition is turned on and disappears when it is turned off.
- in the diagram this is usually the wire that goes from the ignition switch to the fuse box. If the diagram is colored, then the ignition switch will probably have 3 wires - one of them to the battery, but some other one is needed
— on my Honda it’s a red wire with a black stripe
- if you are working as a tester, set it to the mode for measuring direct current V= and poke one probe into the negative of the battery, and the second into all the wires in turn, carefully piercing the insulation with the tip of the probe. If you guessed right, the tester will show 0 when the ignition is off and 12 when it is on.
Sorry, I can't explain better how to connect the relay. If you still don’t understand, just put a button in step 2, or better still, ask someone you know to help with this.
When you have found a wire, all you need to do is connect to it without breaking it, that is, in essence, branch it. There is such a special thing called a “splitter” I think:
The point is that 2 wires are threaded into it - the old one and the new end. After that, you clamp it with pliers, inserting a metal knife and it remains inside, connecting the 2 wires. And the last step is to slam the tail so that it does not open. Convenient, but in theory they should be selected according to the thickness of the wire.
An alternative solution if you purchased heat shrink/insulating tape but did not find such a thing:
Step 4
After we have received our “ideal” plus, we need to connect it to consumers. Consumers can be very different:
- additional light
- music
- Charger
- DVR
And so on and so forth and so on. The principle is essentially the same everywhere, but due to the fact that I drew my diagram earlier, it will be a little more complicated than necessary. In general, the connection procedure is as follows: we connect one contact of the button to our orange plus, we connect the second contact of the button to the consumer itself (for example, a cigarette lighter), and the minus of the consumer (green in our diagram) - either to the general minus or to the minus Battery, or on the frame. Additionally, I would recommend installing a separate fuse in front of the button (for some reason on Kuryakuns it is after the button, in the diagram, too) for each consumer. Otherwise, it will be a shame if at night in the rain, because the cigarette lighter is flooded, your additional light dies.
About fuses - as a rule, devices have declared data, including current consumption. So, if your charger consumes up to 1 Ampere, then put a fuse on it that is a little larger (in my opinion they go 1 2 5 10 15, etc.). And the general one for everything is based on the sum of all the individual ones.
That is, if you know that your light consumes 10 Amperes, your mobile phone charger 1A and your navigator another 1A, then you will easily understand that all together this cannot consume more than 12 Amps and it is enough to install the very first fuse at 15A.
To connect consumers, if you don’t have buttons yet, we may find it useful:
Button. By the way, the third, yellow contact is (if I remember correctly) the minus of the internal light bulb. If you connect it to minus, the button will light up when turned on.
Terminal for connecting the wire to the button.
An alternative option from aliexpress, already with a wire:
The last point - on my diagram there is a cross in a circle - the charger. Since I’m a little paranoid and decided to play it safe, my friend assembled a voltage stabilizer based on the LM317, and when I explained this last time, I added it there. This is an optional element.
Step 5
If there are several consumers, the question arises: how to divide 1 wire into several? Or, in the case of a minus, how to collect several wires into 1. In addition to the thing that I talked about in the step with the lock, there is also a thing called a terminal block. In particular, I found the Wago terminal blocks very convenient (although they seem to be 220)
They opened it, inserted the stripped (and twisted, if stranded) wire, and closed it.
That's basically all. Based on the results of this work, we get that when the ignition is turned on, the relay will open, passing the current further. And when the button is turned on, the circuit will open completely, passing current to the consumer. At the same time, if you have something that works constantly (for example, a DVR), you don’t have to put a button on it - the lock and relay will do all the work. This is how I did it too.
I really hope that based on the comments I can improve this article and make it even more understandable.