Hello motorcycle masters!
No spark on dio 34 is a common problem. This topic is mostly discussed on forums, without specifics. Therefore, I decided to collect and present my experience on this topic in a general article for those who themselves want to understand and identify the reason for the lack of spark on the scooter. This principle can be used for Honda Dio 35, 27, stroke, 18, as well as for other 2t mopeds and scooters. Finding an electrical fault is much easier with a moped wiring diagram. But if the scooter is rare, then you can use a circuit diagram of a similar model from the same manufacturer.
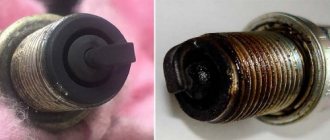
Dealing with the candle
If the dio 34 does not start, then first of all we check the serviceability of the spark plug. We unscrew the candle, insert it into the candlestick and connect the ground to it using an additional wire. We pull the kickstarter leg. Let's see if there is a spark.
If it is not there, then disconnect the battery. And again we check with kickstarter for its availability.
If it does not appear, then you can determine the performance of the spark plug on another scooter or using a test gun.
In order not to waste time checking the old spark plug, it is better to immediately take a new one and continue working with it. I always take branded NGK or Denso from the catalogue, it is guaranteed to last for a year, or 5 - 6 thousand km.
When checking, with the battery disconnected, a weak spark may appear. The scooter will even start, but will not develop speed and will not move. The first impression is that the switch is faulty, but there is no need to rush to conclusions.
How to choose the right spark plugs for your car
Similar articles
- Spring chassis maintenance. What you should pay attention to.
- How to check the ignition coil if there are several of them
- Choosing a tire pressure monitoring device
Caring for the ignition system in its simplest form is the timely replacement of spark plugs . Everything seems to be correct, simple and clear. However, more and more often cars are brought into service with a failure of the ignition system. Let's figure out the intricacies of its maintenance together.
To begin with, let's look at the features of existing types of spark plugs and their service life. So, there are three types of candles - regular candles, platinum and iridium.
Regular spark plugs are used on most cars. They are distinguished by low cost and relatively short service life. As a rule, such spark plugs require replacement every 20,000 - 30,000 km. However, if we are talking about Russia, where, unfortunately, the quality of gasoline still leaves much to be desired, then the spark plug replacement interval should be reduced to 20,000 - 25,000 km.
Platinum spark plugs were developed in the 1980s. They are distinguished by the presence of precious metal in the design, which provides a more powerful spark, as a result of better combustion of the air-fuel mixture. In addition, one of the advantages of platinum spark plugs is their extended service life. According to the manufacturer, platinum spark plugs require replacement once every 100,000 km. Applying the “error” for Russia we get 40,000 – 70,000 km. These spark plugs usually cannot show more on gasoline with “iron” additives.
| Platinum spark plug device | Iridium spark plug design |
Iridium spark plugs were developed in the 90s of the twentieth century. This is the next step in spark plug development. The manufacturer claims that these spark plugs are capable of operating for about 200,000 (!) km without replacement, which is actually twice the warranty period of a car in Japan. Undoubtedly, 200,000 km of spark plug operation is a “spherical horse in a vacuum” - ideal operating conditions, ideal gasoline, ideal air temperature, etc. Unfortunately, in the prism of Russian reality, the maximum mileage on such spark plugs does not exceed 70,000 - 100,000 km. Then, as a rule, the resistant iridium tip of the spark plug burns out, and the spark plug fails.
According to candle manufacturer catalogs, most of their products are interchangeable. For example, on a car in which it is recommended to install regular spark plugs from the factory, you can install platinum or iridium spark plugs, thereby improving the quality of the ignition system. Indeed, in most cases, such tactics are fair. Installing iridium spark plugs, instead of conventional ones, significantly improves the combustion of the mixture, adding noticeable power to the car.
Does the above mean that for the sake of savings and simply using common sense, you can replace the spark plugs recommended by the manufacturer with cheaper ones? Unfortunately, no. Moreover, this cannot be done in principle, because reverse replacement does not exist! Such a “downgrade”, as a rule, leads to serious problems.
Drivers often contact the service center with complaints that the engine is “troubling” and does not maintain speed. Essentially, the term “engine tripping” means misfire on one of the spark plugs. As a rule, this is preceded by the following story - the client comes to a car service center, where during the service he is offered to replace the spark plugs. Without looking at the VIN or body number of the car (much less looking at the equipment, and for Honda this is very important), the master opens the spark plug manufacturer’s catalog and, based only on his experience, suggests installing a certain type of spark plugs.
Sometimes, technicians select the required spark plugs based on the car’s data, without taking into account its technical features (for example, the presence of a CVT). Very often, with such a selection, ignition coils designed for a certain load and the corresponding type of spark plug fail. This, in fact, leads to the “triple” effect. In most cases, clients receive an unfounded recommendation to replace an expensive iridium or platinum spark plug with a cheaper regular one in car services, from the specialists whom they are accustomed to trust. The “master” in this case proceeds from his own considerations, that exactly the same car drives with ordinary spark plugs. At the same time, it does not take into account the technical and design features of the car. What does this ultimately cost the client? Let's do the math.
The cost of a prescribed original iridium spark plug is about $30. Four candles will cost the client $120. The cost of a cheap "artisan replacement" is $5 each, for a total of $20 per set. One new (to replace the “dead”) ignition coil for a common engine, K20A, costs from $100 to $200. In total, the technician's mistake results in wasted $20 for unnecessary spark plugs, $150 for replacing the ignition coil, and $120 for a set of necessary spark plugs. Who needs such savings?!
Another reason for unnecessary expenses is untimely replacement of spark plugs. In some Honda cars (for example, Honda Fit), monitoring the condition of the spark plugs becomes mandatory for the owner. The fact is that the 1.3-liter engine of the Honda Fit has eight spark plugs, designed to provide the car with excellent efficiency. Many “herbalists” believe the legend that the rear row of spark plugs, located in a hard-to-reach place, is installed for the entire life of the car, and often only the front four spark plugs are changed. Unfortunately, the consequences of this are very costly. Often you have to change all the rear row ignition coils, costing $110-150 each.
The most tragic thing in this whole story with Fit coils is that the car owner, faced with symptoms of problems with the ignition system, first of all sins on... CVT. The fact is that a car, with two or more failed coils, begins to vibrate strongly during acceleration, become “dull,” kick like an automatic machine, and generally obviously loses its dynamics. The explanation for this is simple - the fuel mixture does not burn in the volume calculated by the car’s computer. Trying to adapt to a new operating mode on the fly, the computer cancels previous commands and in the process the car begins to feel feverish. It doesn’t stall (fortunately, the other coils can ignite the mixture), but it also can’t drive with the same dynamics. During all these actions, the person sitting behind the wheel of the car begins to suspect the worst thing - the car “kicks”, “stumbles”, which means that the variator has broken down.
With these sad thoughts, he goes to an expensive “box” service, where the craftsmen famously disassembled the box and found wear and tear products in it (after all, fits have been produced since 2001), render a verdict - replacement of “tired” components + operation to remove, install and disassembling and assembling the variator. The total is an astronomical amount. Unfortunately, this is not a fictional story; we regularly encounter similar attitudes from both the driver to the car and the mechanic to the client. Everything would be different if the car owner changed the spark plugs on time, or, if he turned to the right service center, where there is an official Honda diagnostic scanner, which (in the hands of an experienced technician) shows which coils need to be replaced...
Another enemy of the ignition system is the opinion that, depending on the time of year, it is better to select spark plugs according to their temperature principle (the so-called “hot” and “cold” plugs, differing in the length of the white insulator). Of course, within reason, this is a competent and sometimes even correct approach, but it requires special training for the person who recommends such replacements. The technician must have a very clear understanding of the features of a particular engine before recommending something like this. Otherwise, we can return to the problem of replacing coils.
All of the above is also true for more “adult” cars with a distributor system, only in this case the only coil in the distributor fails. In such a situation, the car becomes completely unusable at one point.
How to avoid such troubles? The answer is extremely simple: install the spark plugs specified by the car manufacturer, and do it on time. Fact eight.
Hondavodam.ru
If you find an error, please select a piece of text and press Ctrl+Enter.
More interesting articles
Various switches
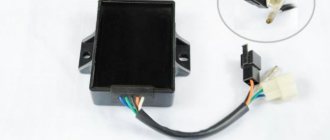
For example, on dio 35 there are 4 wires on the switch:
— s/w – the control pulse comes from the Hall sensor
- kr/h - with the engine running, an alternating voltage of 16.5 volts comes in, as well as + 12 volts of direct voltage from the battery. If the engine is not started, only + 12 volts come from the battery when the ignition is on
— z – ground (minus) or scooter body
— b/w – pulse voltage output to the ignition coil
And on the Honda Dio 34, another 5th wire with a reduced voltage of 9.3 V is connected to the switch. It is pink and goes from the ignition switch to the switch.
The lock contains an ordinary zener diode, connected to the network as an ordinary diode. It lowers the voltage from +12.5 V to 8 – 9.3 V, which is necessary to turn on the switch.
In the absence of reduced voltage, the scooter does not develop speed and does not accelerate. And when you increase the voltage on the pink wire to 12 V, the switch stops working altogether and the spark disappears.
The pink wire is provided as an anti-theft system so that it is impossible to start the scooter without a key by connecting the wires directly using a jumper.
Reed valve on a scooter - purpose, design features, breakdowns
The reed valve is located between the carburetor and the scooter engine in the intake manifold. The design of the location may vary significantly depending on the vehicle model, but the essence remains the same.
If you are the owner of a two-stroke scooter, you are used to carrying out its maintenance yourself, for example, cleaning the carburetor; in case of the above problems, do not be lazy to check the reed valve. It's very easy to get to. After dismantling the carburetor, take the time to also remove the inlet pipe. Below it you will see this most treasured petal valve.
Each scooter manufacturer has its own ideas about its shape and design; its shape can be single-slope or double-slope, in the form of a house, but the operating principle is the same in any case and the testing process is no different.
Check the condition of the petals; they should be perfectly smooth, without waves or distortions. There should be no cracks or chips. The petals should fit tightly to the saddle, the presence of gaps is excluded here. There shouldn't be any dirt either. For example, even a small grain of sand that gets under the petal valve can lead to serious interruptions in the operation of the scooter engine
Let's continue to figure it out
We remove the beak. It is secured with three bolts at the front, four self-tapping screws on the other side under the steering wheel, and two clips at the bottom, on the wheel side.
We get to the switch (with a 5-pin connector), the ignition switch (with three wires - two red, one pink) and the voltage regulator - rectifier.
We measure the voltage. Connect a charged battery to the scooter. We take a multimeter (tseshka) and set it to “V -” 20 V. Normally, when the ignition is turned on, the two red wires are closed together, +12 V on them,
and on the third pink one it goes through a zener diode to the switch 8 - 9.3V.
If the pink one shows 12 V or 0 V, then the fault is in the ignition switch, namely the zener diode has failed. And not a switch, as it seemed at first glance.
Installation of equipment on the heating system
Often, devices of this type are used when piping boilers located in the heating system. The relevance of this issue increases at the moment when it becomes necessary to connect several heat generators in a cascade or make the operation of several boilers simultaneously synchronized.
The installed valve will not allow the formation of parasitic flows inside the system, which often arise when parallel heat sources are turned on. Provided that the supply of the working medium will be carried out through a mounted pump, any of the known schemes for its installation using shutter mechanisms can be used.
When using gravity systems, it is recommended to give preference to reed or gravity valves. The rules for installation when using such equipment are the same. However, before purchasing all the necessary auxiliary components, you need to find out as much information as possible about the characteristics, compare with several similar units and get full advice from a specialist on this issue.
Checking the Pulse Generator
We measure the resistance of the Hall sensor coil at the switch connector. We set the device to 2 kOhm. We connect one probe to the green wire, and the second to the s/w. Should be 114 ohms. This means the wiring and Hall sensor are working properly.
If the circuit does not show resistance, then this indicates a break in the coil or electrical wiring from the pulse generator to the switch.
Next, we check the functionality of the entire pulse generator along with the mechanical part. Switch the device to 2 mA, leaving the probes in place.
We pull the leg of the kickstar. From the Hall sensor, for one rotation of the magneto, one pulse with a small current is supplied to the commutator. The meter should show approximately 0.6 mA. This means that all elements of the pulse generator are working properly and the reason for the lack of spark is not in the Hall sensor.
If the device does not show current, then you need to remove the air cooling casing. Look at the gap in the mechanical part of the generator, between the magneto and the Hall sensor. Check to see if the crankshaft bearings are loose or if the wire from the sensor is broken.
Checking the Zener diode
Before moving further, you need to once again verify that the zener diode is faulty.
To do this, remove the connector from the lock and use a meter (2 kOhm included) to measure the conductivity at the two outermost contacts. It should be like on a diode: if you swap the probes, then in one direction it will show 0, and in the other it will show resistance. If this is not the case, then the zener diode is definitely faulty.
Feel free to disassemble the ignition switch.
You will need the following tools: a T10N bit, a small key for a 6.5 mm bit, a soldering iron.
With the zener diode unsoldered, go to radio stores and buy a couple just in case. They are available everywhere and cost around 10 rubles.
We solder the zener diode, assemble the ignition switch, and connect the connectors. We connect the battery, turn on the ignition and again measure the voltage on the pink wire. It should be 8 - 9 V.
We look at the spark on the candle. If it is, then screw the spark plug into place, start the engine and ride all summer.
And if there is still no spark, then we look further and check: the ignition coil, Hall sensor, voltage regulator - rectifier, generator, switch. But more on that in the next article.
Subscribe.
Write how it works out for you, we’ll discuss it together.
Bye everyone.
Operation, maintenance and repair
manual
Replacing consumables
During operation, metal dust settles in the engine oil, which affects the structure and properties of the oil. That is why it must be replaced regularly. The first change is carried out immediately after purchase. The second is recommended after 1000 km, and after break-in - 3-4 thousand km.
Oils typically used range from SAE 5W-20 to 10W-40. A worn engine will accept SAE 20W-50 grade oil.
Before replacing, warm up your moped. This will thin the oil and mix it with any dirt that may have accumulated in it. To warm up a moped in summer, 5 minutes is enough, in winter – 10 minutes.
Ignition installation
The Honda af61 uses a CR7HSA spark plug with a resistor. To install the ignition, follow the instructions:
- Disconnect the spark plug cable;
- Connect two strobe wires to the battery and the third to the spark plug cap;
- Find the ignition timing timing marks (usually one mark on the generator flywheel, the second on the scooter body);
- Crank the engine and fix the strobe flash and markers. If the response time of the device coincides with the marks on the power unit, then the ignition is set correctly.
Adjusting valves on a scooter
Scooters with simple 50 - 150 cc engines have flooded the market and are now found on every corner. Why is this happening? First of all, they captivate with their low cost, unpretentiousness and every year the better and better quality of the main components and their assembly. Regardless of the year of manufacture, the entire scooter, and especially its motor, is subject to regular maintenance; this is the main requirement for maintaining the performance of the motors. One of the important adjustments that should be done regularly is adjusting the valves on a four-stroke scooter.
Many owners of scooters and motorcycles are afraid of this procedure due to ignorance and fear of damaging the engine. We believe that adjusting the valves on a 4t 80cc, 50cc, 150cc scooter is a task that any motorcycle owner can handle with a small set of keys and desire. Below, you will find step-by-step instructions on how to adjust the valves on a scooter with a 139qmb and 157qmj motor.
Source


