A procedure such as changing the oil in a motorcycle fork frightens not only beginners, but also experienced drivers. Even professional mechanics often spend a lot of time doing this job because they have to deal with so many details. In addition, it is necessary to choose the right oil, which will allow you to obtain the necessary parameters of suspension rigidity. Therefore, it is necessary to approach such a procedure only after careful preliminary preparation.
Why and how often do you need to change the oil?
If you buy a motorcycle without mileage in the Russian Federation, for example in Moscow this can be done at synergosmoto.com, then you will not be able to change the oil soon, but after prolonged use, even on such bikes you will have to change the oil, usually after 5000-7000 km. The oil in a motorcycle fork has two main functions - the role of a damper, and to absorb the remaining metal shavings. In the first case, loss of oil will lead to a deterioration in ride quality, the fork will begin to “peck”, may begin to lock, etc. Such behavior not only interferes with full movement, but can also provoke an accident. Oil contaminated with metal shavings loses its lubricating properties, which leads to rapid wear of parts.
In addition, the oil should be changed when:
- leak
- after winter downtime
- after a long period of inactivity
- within the period established by the manufacturer
The last option is the most preferable, because most often motorcycle owners carry out a scheduled oil change in the fork. Each manufacturer specifies how often the fork lubricant should be replaced. This parameter depends on both the type of bike and the design of the fork. For city motorcycles, it is recommended to replace them every 10-15 thousand km, and for motocross and enduro motorcycles this figure can drop to 5-10 thousand km.
Symptoms of a motorcycle engine repair are:
- Extraneous noise in the engine
- High oil consumption
- Coolant flow
- Low compression in the engine or large difference between cylinders
- Excessively high compression associated with carbon deposits in the combustion chamber
- Blue smoke from the muffler
- Obvious oil leak from the engine
- Transmission problems
Stages of motorcycle engine repair work:
Disassembling a motorcycle to remove the engine Removing a motorcycle engine Cleaning the engine before disassembling Disassembling the engine Complete troubleshooting of the engine Cleaning the engine of metal shavings and other contaminants Diagnostics of all bearings and gears of the engine Replacement of worn / broken / bent parts Assembling the engine Checking valve clearances Installing the engine on the motorcycle Final motorcycle assembly, launch
All motorcycle engine repair work is carried out by a highly qualified mechanic with extensive experience. A 1 year guarantee is provided for all work performed.
Oil selection
Looking ahead, it should be noted that it is best to give the choice of oil to the manufacturer. The problem is that choosing the right oil is quite difficult, because its viscosity is selected taking into account a specific design, its spring and a number of other parameters, for example, the preservation or change of astringent properties when heated. Yes, the fork heats up during riding, along with the oil, which changes its characteristics. If the manufacturer has not indicated the exact brand of oil, then we select it based on viscosity from 10 to 2.5 W, depending on the type of motorcycle.
Regular motor oil is not suitable, we should choose Fork or Suspension Oil. Do not forget that the market is filled with fakes and their use can lead to unpleasant consequences in the form of an accident. The volume of oil should also be indicated by the manufacturer; this is approximately 400 ml of liquid in each pen. The indicator may vary from model to model. If you do not find accurate data, then you can fill in the liquid by analogy with the volume of drained material; if there were leaks, then refilling can be done through the upper drain bolt. More experienced riders can adjust fork stiffness primarily by using different viscosity oils. For example, pouring thinner oil can soften the suspension and make it more comfortable to move over rough terrain. For country trips, you should fill in oil with a higher viscosity. The fork will become more elastic and the motorcycle will stay on the road better, especially at high speeds. The main thing is not to forget that the deviation of the selected oil from the recommended one should be insignificant, and it is also worth taking into account the change in its properties when heated.
Where did Motul come from?
So why are Motul oils so popular? Perhaps because of high consumer qualities, or is it just well-promoted marketing stuck in the minds of ordinary people? To answer this question, let’s go back a few years and remember the history of Motul’s formation in the Russian market.
Those who are older should remember that Motul appeared suddenly, boldly and very aggressively, advertising flashed at all auto and motorcycle competitions. This memorable bright red sticker with white lettering was everywhere, on the banners of racing events, on every racing car or motorcycle. Gradually, an opinion began to form that there was simply no alternative to oil for sports. And as you know, what is used in sports sooner or later flows to ordinary consumers. Everyone wants to use the best, what the champions use will definitely not let you down. But no one tells consumers how often athletes change their oil, and red stickers do not mean that this is the oil in the engine, sponsorship, a slippery business.
Thus, year after year, Motul conquered the Russian market and now every schoolchild knows that motor oil 5100 has a regular golden color, 7100 is red, and 300v is poisonous yellow-green. And if previously the price of Motul was quite affordable, now, thanks to the fact that they buy well, prices are kept at such a level that you can buy any other oil much cheaper.
Preparation
No matter how complicated the oil change process you choose, it can be speeded up if you have the right preparation. First of all, wash the front fork from adhering dirt and oil. Next, prepare a container for creaming the lubricant to avoid messing up your garage. If the fork is not high enough on the footrest, you can prepare small spacers for the footrest. Finally, you should prepare the tools:
- set of open-end and ring wrenches
- mallet
- kerosene
- funnel
How to check whether the engine was repaired by the previous owner
If you buy a motorcycle secondhand, it is worth checking it for any repairs. Perhaps it was not produced professionally, or even the symptoms were simply removed. In any case, you may have problems with further operation.
First of all, inspect the engine yourself. If the bolts on the parts are visually different, then the motor has been disassembled. Also, if there is no dirt and dust, this may indicate a recent engine overhaul. Although the latter may simply be a sign of a good attitude towards technology.
If in any doubt, take your motorcycle to a motorcycle restoration specialist. He will be able to accurately determine whether the unit has been repaired.
Changing the oil of a standard telescopic fork
The general oil change scheme is very simple: unscrew the drain plugs, wait until the oil drains, rinse the fork with kerosene if necessary, and then fill in new oil and put the plugs in place. But alas, practice shows that this procedure primarily depends on the design of the feathers. If the stay has a lower drain bolt, then the front chassis can be serviced without disassembly, but if the fork is of an inverted design or does not have lower drain holes, then you will have to completely disassemble the front suspension structure. Based on this, we divide the oil change process into two types:
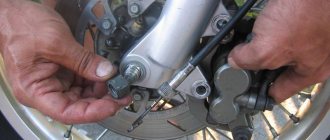
Incomplete disassembly of the front suspension: The case is suitable for stays with an end lower or side lower drain bolt. With proper skill, you don’t have to disassemble the suspension at all, but there is always a risk of getting the brake mechanism or wheel dirty with oil, and then you’ll have to do extra cleaning work. It is best to make the replacement as follows: First of all, we clamp the front brake or rest the wheel against the wall, sit on the motorcycle and with the weight of our body force the fork to work 10 - 15 times, this is necessary to warm up the oil, raise sediment and better clean the mechanism. We place the motorcycle on the main stand so that the front wheel is hanging in the air. Remove the front wheel and free access to the upper oil drain bolts from the feathers (the end part of the feather). Using a suitable spanner, unscrew the upper drain bolts (in some cases it may be necessary to loosen the upper clamps). Place a container to collect the oil under the lower drain bolt. Using a spanner wrench, unscrew the bolt and wait until the oil is completely drained. If necessary, rinse the fork with kerosene. We inspect the anthers and seals, replacing them if necessary.
Fill in fresh oil through the top, after tightening the bottom bolt. We tighten the top bolt and mount the wheel and other removed parts.
Note! In this position, after washing or simply draining the oil, some of the liquid remains in the feather and will slightly affect the quality of the mixture. The exception is feathers with a bottom drain plug in the end part.
Responsible process
The controllability of the motorcycle, and, consequently, the safety of the driver and others depends on the correct selection of oil for the fork. It is best to follow the recommendations of the motorcycle manufacturer, but increase the viscosity of the technical fluid when components wear in order to achieve good damping characteristics. It is also worth paying attention to the oil change procedure - the ability to adjust the suspension and obtain optimal rigidity depends on its correct implementation. We must not forget about flushing the fork after draining the old oil - drops of technical fluid remaining inside and chips obtained from friction between the components can significantly affect the characteristics of the shock absorbers. If you are not sure that you can perform an oil change and suspension adjustment yourself, contact professional mechanics, since your interventions can only cause harm.
Complete removal of fork legs
If you need to carry out not only an oil change, but also a high-quality flush, an inspection of the insides of the pen, or if there is no lower drain hole, then the pen is removed completely. The whole process looks like this: Warming up the oil in the fork (with the brake pressed, we force the fork to operate as much as possible). We remove the wheel, front fender and, if necessary, part of the dashboard, freeing the passage to the traverse fasteners. We twist the top cap of the pen without unscrewing the bottom (if any). We loosen the upper and lower traverses by removing the feather; if it does not give in, tap it with a mallet or unscrew the bolts further. We prepare a container for draining the oil, unscrew the drain bolt and drain all the lubricant, helping to compress and unclench the fork.
Important! When draining the oil through the top plug, the spring and bushings may fall out of the fork; carefully remove them to the side, observing the removal order.
We wash the fork, inspect the anthers and seals, replacing them if necessary. We install the parts removed from the pen in the reverse order and fill in the appropriate oil, its volume is indicated in the accompanying documentation and carry out the entire procedure for the other pen. We reassemble everything in the reverse order, carefully controlling the tightness of all bolts.
Motorcycle clutch repair and replacement
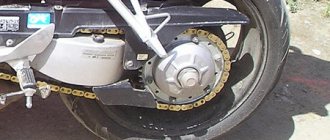
One of the most important mechanisms of motorcycles is the clutch. Although this is a fairly simple structural element, it has an important task. The operation of a motorcycle clutch is based on the frictional force between its discs. The torque of the motor is transmitted to the driven parts, which in turn transmit the torque of the gearbox.
The need for clutch repair in Moscow is dictated by various factors, among which are the intensive use of a motorcycle in the city. In addition, motorcycle clutch repair is in demand in case of planned wear of its individual elements.
Wear of friction linings. Deformation of damper springs. Malfunction of the clutch basket splines.
Replacing motorcycle clutch friction discs. Repair or replacement of the clutch machine. Replacing or servicing the clutch cable Replacing and adjusting the clutch lever
Useful tips
If the brake discs are stained with oil during operation, they must be treated with alcohol. After all procedures, check the functionality of the mechanism. If it starts to “peck” - air pockets appear - there is not enough oil. When there was strong kickback, too much oil was poured onto the steering wheel. Be sure to pay attention to the condition of the plug. Here is a list of fork maintenance: smudges - inspection of oil seals and anthers; incorrect operation - checking the spring and mechanism geometry; simple – complete revision; Suitable mileage - mandatory flushing and oil change.
Flushing is best done with low-viscosity oil. Despite the fact that the seals are able to withstand the effects of kerosene and other flushing liquids, they still become tanned and fail faster.
Sequencing
In order to understand what kind of oil to pour into the front fork of a motorcycle, read the manual or instructions for your vehicle. This information is very important because oil can have different densities. Therefore, the denser the oil, the stiffer the fork will behave. A rigid fork transmits more vibration, making movement less comfortable. However, the main advantage is the absence of strong shock and deformation of the fork if you catch a hole at high speed.
It will be necessary to very accurately fill the oil to a certain level. There are two ways to do this correctly:
- When removing the fork, measure the former level - this only works if there are no oil leaks or deformation of the glasses;
- Fill exactly the amount indicated in the manual.
A plug that is too airy or overfilled will not function properly. In the first case, the movement of the motorcycle will fail, in the second, the reaction to unevenness will be too noticeable. It is the oil level that determines the volume of the air gap, which interacts with the road
For expensive and sports motorcycles, it is important to know what kind of oil to pour into the front fork of the motorcycle. It comes in viscosities of 2.5, 3.5 and 7.5 W
It is noteworthy that by mixing two oils of different viscosities, you can obtain a medium viscosity.
Remaining oil is removed by moving the piston up and down. If you see a significant excess of service life based on the color and contamination of the drained oil, you need to wash the internal surfaces with kerosene. Having filled in new oil to the previously determined level, you can begin reassembly.
Important! If you have already disassembled the fork, immediately check all the elements for scuffs and damage. A caring motorcyclist immediately changes all boots and seals to prevent leakage in the future, so immediately take care of the availability of spare parts
Particular attention should be paid to inspecting the bushings, which should secure the fork and not interfere with the operation of the seals. Often, a broken bushing gives freedom to oil seals and anthers, which wear out quickly
An inexperienced motorcycle owner changes boots regularly, but does not eliminate the cause of their wear.
Dismantling the Ural motorcycle engine
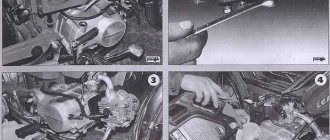
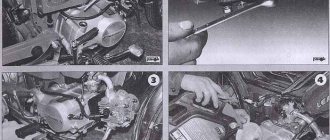
Repair of a Ural motorcycle should be carried out in stages. The first step is to prepare your garage and the engine itself. All dirt and oil must be washed off the engine so that they do not get inside. Laying a film on the floor will help protect the garage floor, because it is easier to throw away a piece of cellophane than to remove the remaining grease from the garage floor. Disassembly process:
- Unscrew the nuts holding the cylinder cover and remove it. Next, unscrew the nuts securing the cylinder head, put the rocker arms and rods into the box and pull the head off the studs.
- Remove the cylinder mounting nuts and, shaking, carefully remove the cylinder from the studs.
- We remove the retaining rings and press out the piston pin with a special puller.
- Unscrew the screws securing the gas distribution mechanism and remove the crankcase cover.
- Unscrew the camshaft flange, remove the plug in the upper part of the crankcase and the oil pump drive.
- Using mounting blades, remove the camshaft.
- We bend the lock washer and then unscrew the screw securing the gear on the crankshaft journal. Using mounting blades, remove the drive gear.
- Unscrew the screws of the upper clutch disc.
- We mark the disks in the position they were in.
- Remove the bolt securing the flywheel to the crankshaft.
- Remove the flywheel from the conical part of the shaft.
- Remove the bolts from the rear main bearing housing.
- We remove the engine sump, and with it the filter and oil pump.
- We press the crankshaft out of the front bearing and remove it from the crankcase.
Following this diagram, you will be able to get to the main parts of the engine in order to conduct a full diagnostic of the gaps and, if necessary, replace the parts with new ones. It is worth noting that if a part has a gap close to wear, then it is better to replace it, since most new spare parts lead to increased load on the entire engine while it is running in. Such increased pressure on old components can lead to their wear, which means the appearance of noise.
