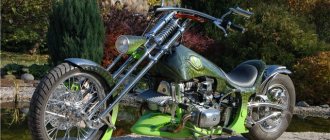
The current cross-country motorcycle is a combination of enormous engine power, lightness, unimaginable strength, maneuverability and ease of control. Many people dream about this, some try to do it on their own.
Instructions
1. You can become the owner of a motocross motorcycle by easily purchasing it in a store. In this case, the client's requests can be limited only by his financial probabilities. However, the purchased model does not invariably satisfy the client with certain parameters, and then the process of modifying the motorcycle begins in order to improve its features and appearance, known under the name “tuning”. Tuning is extremely famous among bikers who give their motorcycles the most incredible exotic look. 2. The most advanced followers of motorsports, and there are only a few of them, choose to make motocross motorcycles with their own hands. It's worth starting with the wheels. There is no need to invent a motorcycle wheel from scratch; you can easily purchase one. We maintain the standard for sports motorcycle wheels - front - 120/70-17 and rear - 160/60-17. There are several options to adapt the wheels to your motorcycle - purchase a rim and re-spoke it, as well as adapt sports or alloy wheels from a sportbike to it. 3. If we are talking about buying a rim, then experts recommend sparing no expense and buying an Excel. But this is not the most primitive way out, since re-spoke is a very troublesome, labor-intensive undertaking, so many craftsmen choose to adapt ready-made wheels to their brainchild. The option with cast wheels, which have greater endurance and strength when driving over rough terrain, is considered more preferable. 4. Racing motorcycles use mostly stock brakes. To increase their safety, it is recommended to increase the diameter of the brake disc or install a stronger brake system with a caliper. Special requirements apply to the suspension. 5. If you are converting an ordinary motorcycle into a cross-country motorcycle, then it is better to install a classic fork with a full range of adjustments. Absolutely quite 43 mm size. 6. It is better to choose shock absorbers for the suspension from the stock shock absorbers of current motorcycle models, taking into account the likelihood of their attachment to the frame and pendulum. You can order shock absorbers from the manufacturer, but in this case you must specify the expected weight of the motorcycle so that the appropriate springs are installed on the shock absorbers. 7. A few words about the motor. For a long time, motocross motorcycles were produced with four-stroke engines. However, now, due to technological progress and increased power, their place is gradually being taken by two-stroke engines. If funds allow, then we can recommend CRF, KTM, Kawasaki. But as the skill of domestic inventors shows, it is possible to improve even the engine from an old Soviet motorcycle. To increase traction, you must first reduce intake losses. To do this, the “native” paper filter should be replaced with a filter with foam rubber. Another modification consists of replacing the carburetor with a different one, which is likely to ensure that the engine operates at maximum cycles.
You recently purchased a motorcycle , and now you need to register it with the traffic police. Don't know where to start? Our instructions will help you. You will need
- – your civilian passport
- – vehicle passport
- – certificate-invoice or purchase and sale agreement
- – mandatory motor third party liability insurance policy
- – state technical inspection certificate
Instructions
1. Make a photocopy of the documents. You will need two copies of your vehicle's title and one copy of your vehicle liability insurance policy. 2. Find out where you can register your motorcycle . Traditionally, vehicles are registered at the place of registration. The most reliable way to find out which branch of MREO or MOTOTRER you should contact is through the help desk of the prefecture of your district or city. Many municipalities now have electronic versions of directories that are freely available on the Internet. 3. Submit documents. Having collected a complete package of documents and found out where you should do the registration steps, go to the branch and submit documents. Typically, each package is accepted at one window, so you don't have to run through each building. 4. Receive your documents. After some time, you will be given back a package of your documents, a registration application form and two receipts for payment of government fees. The application should be carefully filled out, and receipts should be paid at the nearest branch of Sberbank of Russia. 5. Be examined by a forensic specialist. After you have mastered the first bureaucratic part of the process of registering your motorcycle , you will need to proceed to a special site. There, the vehicle will be examined by a forensic inspector, and if everything goes well, two stamps will be affixed to your registration application. Now you can go back to the department. 6. You should give the complete package of documents, paid receipts and a completed application with stamps from the forensic inspector to the same window where your documents were checked the first time. Later, after everything is checked and properly completed, you will be able pick up your new documents and get numbers. Note! Most traffic police departments and state banks have a lunch break. Most often it lasts from 14 to 15 hours. Helpful advice: Come to the department as early as possible in order to complete each process of putting a motorcycle under control in one day. Try to schedule your visit to the department on a weekday.
What did our fathers and grandfathers make vehicles from? But homemade motorcycles are still relevant in our time. Fans of fast driving hold exhibitions where they show their works. And in some cases, such bikes are in no way inferior, and sometimes even superior, to vehicles manufactured at src=»https://st03.kakprosto.ru/tumb/680/images/article/2012/1/19/1_5254f7be85fe75254f7be86025. jpg" class="aligncenter" width="680″ height="453″[/img] You will need
- – a dilapidated bicycle;
- - fuel tank;
- – motor;
- – muffler.
Instructions
1. Independent assembly of a motorcycle is a wonderful opportunity to create a vehicle taking into account the individual needs of its owner. To begin with, you must mentally design a motorcycle. Think about how you would like it to be and what functions it should perform. 2. Sketch out a drawing of your motorcycle on paper. Quite an easy diagram to make the assembly work easier. 3. Now study the location of the document “Technical requirements for motorcycles, scooters and mopeds, manufactured individually.” A self-made motorcycle must comply with these requirements. 4. The lightest and most multifunctional option is a homemade mini-moped based on a bicycle. If you prefer this option, then a suitable bicycle should have a thick frame and large diameter wheels, then you will get the right vehicle. 5. Now you can easily begin assembling a motorcycle or moped. If you design on the basis of a bicycle, then you need to add a fuel tank, a motor and a muffler to it. 6. Use parts designed for motorcycles and mopeds only. Automotive and other spare parts are allowed to be used only in extreme cases. But then you will be able to use such a motorcycle only in the country. 7. A motorcycle assembled from various parts does not look very good, so it would be better to paint it better. Before painting, clean and degrease the vehicle parts. Use moisture-resistant and heat-resistant paint to protect parts from environmental influences for a long time and preserve the attractive appearance of the motorcycle. Video on the topic Please note! If a homemade motorcycle does not meet the technical requirements, then you will not be able to use it for its intended purpose. All parts, including the motor, must be mass produced. Moreover, the engine power should not be more than 60 l/s per ton of motorcycle and less than 12 l/s. The frame and other supporting structures of the motorcycle must be made of very strong materials.
Modern models of snowmobiles are quite expensive, so a wonderful solution to save money would be a snowmobile converted from a motorcycle . In addition, a snowmobile is a very massive thing and takes up a lot of space in the garage. And this problem will also be solved by a motorcycle, one that will help out both in summer and winter.
You will need
- - motorbike;
- – ski for snowmobile;
- – caterpillar belt;
- – lugs;
- – protective casing;
- - trunk;
- – braces and shock absorber rod.
Instructions
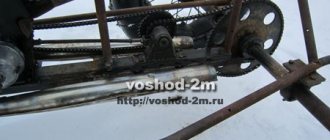
1. motorcycle steering wheel and replace it with an articulated snowmobile ski. In order for the ski to be movable and allowed to steer, you must combine its front part with the steering “fork” of the motorcycle . The back of the ski must be attached to the frame. 2. The front wheel that you removed must be installed behind the rear wheel and connected to the frame using a shock absorber rod and braces. Thus, there are no unnecessary parts left when transforming a motorcycle into a snowmobile. 3. Now you can put the caterpillar belt on the resulting structure of wheels. The tape must run correctly along the wheel rims. The belt lugs can be made of aluminum and have dimensions of approximately 25 by 25 mm. The lugs allow the snowmobile to have excellent traction with snow and ice. Without them, braking on a slippery road and at high speed will be virtually unthinkable. 4. The upper part of the caterpillar must be covered with a special box-shaped casing. This design will protect the driver from snow that will be captured by the snowmobile tracks. 5. You can attach the trunk to the casing. The trunk should not be very huge, so as not to get in the way behind the back of the person driving the snowmobile. Video on the topic Please note! Before operating a homemade vehicle, check it for safety and security. At first, it is not recommended to develop high speed on a homemade snowmobile in order to avoid unfortunate incidents. On frosty winter days, there is a huge risk of moisture getting into the fuel supply system. It is necessary to scrupulously ensure that this does not happen. Useful advice In order to make a snowmobile from a motorcycle, without having any special skills, you can use the EXPLORER MOTO system. This design is different in that it can be easily installed on a motorcycle and does not require its dismantling. And the main EXPLORER MOTO system provides a variable center of gravity of the snowmobile. If you move the track backwards, you will be able to overcome difficult obstacles created by deep snow.
If your good and faithful motorcycle looks unsatisfactorily stylish and its speed is unsatisfactory, turn it into a sportbike . Making a sportbike yourself is absolutely acceptable. And don’t be surprised if your friends start to envy you, and girls start looking dreamily at you.
You will need
- – a capable motorcycle;
- – warm garage;
- – locksmith tools, keys;
- – Bulgarian;
- – table with a vice;
- – welding unit and electrodes;
- – compressor for painting.
Instructions
1. Before you start upgrading your motorcycle, look through specialized magazines or websites with photographs of new motorcycle equipment. Choose for yourself the desired final outcome, which you have enough technical probabilities to achieve. Try to calculate the time and money so that the tuning process does not drag on for several years. 2. Disassemble the motorcycle and carefully inspect all the parts. Increasing speed requires all mechanisms to be more secure and coordinated. Wash all components and devices, lubricate, replace faulty ones. 3. If possible, lengthen the motorcycle frame by 50-150mm. In this case, it is possible to increase the length of the driveshaft or the front part. Please note that the resistance to oncoming air should be minimal, so there is no need to expand the frame. To radically transform the frame, cut it into pipes, and then weld it again, while trying to lighten the structure. When welding the frame, keep in mind that the seam must be combined in one pass along each perimeter. To ensure even alignment of the wheels, weld the frame on clamps (on the contrary, a discrepancy between the tracks can lead to an accident). 4. Raise the footrests and move them back so that they are likely to tilt forward when riding. Remove the passenger seat completely so as not to make the structure heavier. 5. Craft a stylish and quirky gas tank using bits and pieces from matching clocks on several motorcycles. First, clean the old gas tank from old paint using a grinder, replace the rusty areas with 1 mm thick sheet metal. Secure the extended tank with threaded rods or studs. Weld the pads. To ensure the tightness of the tank, rub special sealants or a mixture of aluminum powder and epoxy glue into a grease-free, clean weld. 6. To make the structure as light as possible, make decorative parts from fiberglass, impregnating it with glue. First, make a sample from polystyrene foam or other easy-to-process material, then apply fabric and soak it with glue, make several layers. After drying, sand and cover with a layer of enamel. 7. Put special rubber on the wheels, which will ensure maximum braking and steering performance. The brakes should also be strengthened to ensure maximum driving safety.
In order for the cylinders to work synchronously, owners of heavy motorcycles constantly have to adjust carburetors . But the way out of this situation may be to install one strong carburetor instead of 2. This operation can be performed in a home car service center, that is, a garage. You will need
- – four-millimeter metal plate;
- – nuts;
- – metal strips;
- - rubber hose;
- – spring;
- – carburetor;
- – tool kit.
Instructions
1. Using a metal plate, make an exact copy of the bottom of the carburetor. After that, cut the thread, screw the nuts onto it, and later weld these nuts to the plate. At the ends of the plate, make elliptical holes into which insert metal strips (each thickness is one millimeter), and weld them. 2. Upon completion of welding work, strictly level the plane where the carburetor will be screwed. After this, try on the carburetor. Later, cut a groove in the metal box (it is prepared for the accelerator pump lever). 3. Leave the original pipes. For the heads, you need to cut washers with holes into which insert a rectangle bent by a tube, and carefully weld all the elements. 4. To ensure a smooth transition from a large diameter (standard pipe) to a smaller one (head diameter), use a rubber hose and secure it with clamps. Combine the box with the gearbox, securing it with 3 MB screws. The caps of these screws should be correctly secured, preventing the metal plate from being turned out. 5. Upgrade the carburetor: namely, replace the part to which the choke cable was connected (install a wider part in its place). After this, improve the bolt that supports the sector by drilling a hole in its axis. Place the spring on the same stud, as well as the bushing and washer. 6. Solder the air filter housing using ordinary solder. Shorten the carburetor studs a little, and then fasten the pan with nipples from the spokes of the Ural motorcycle. Solder four L-shaped plates onto the body (the filter will be attached to them). 7. To ensure that each improved structure fits into its designated space, carefully file the bottom of the frame pipe. After this, install the carburetor. Note! Make sure the quality of welding of the parts installed on the Ural motorcycle. Helpful advice If you are not confident in your abilities, seek professional support from a car service center.
Cross-country motorcycles, unlike other types of motorcycles, are designed only for cross-country motorcycle racing (rough terrain) and sports stunts. Such motorcycles are produced for both adults and children.
Is it possible to make a motocross motorcycle yourself?
Many people dream of a cross-country motorcycle, since it gives a person unprecedented freedom of movement. Unlike most sportbikes and city models, such a motorcycle is capable of moving quite quickly even outside good roads, without threatening its owner with falling and injury. At the same time, a cross bike is much easier to control than an enduro bike and other heavy types of equipment, also adapted for off-road riding. However, many simply cannot afford a high-quality motorcycle, because cheap models of real sports SUVs with two wheels are practically not found on the Russian market. Therefore, you should learn how to make a motocross motorcycle with your own hands - this will help you save a lot of money and adapt the resulting equipment to your needs.
Popular models of motorized sleds for fishing
The most popular models that are in demand include:
Half of the models will be discussed in more detail below.
Snowstorm
- The unit is quite simple to operate, even a beginner can operate it.
- The model is equipped with a pair of skis that can move on snow without any problems.
- Can be transported assembled in the trunk of a car.
- The transformation from assembled to disassembled takes only 3 minutes and can be done by one fisherman.
- The cost varies from 50,000 – 60,000 rubles and depends on the place of purchase and the manufacturer.
Tourist
- The design is quite durable and at the same time lightweight.
- It does not consume a lot of fuel, which is a definite plus.
- It starts even with a big minus on the street.
- The footrests are suitable for large shoes.
- You can purchase such a device for 80,000 – 95,000 rubles.
Husky
- Unlike the above, the smallest one can fit even in a small corridor.
- The initial assembly takes 2-3 minutes, and later, after getting used to it, this task can be done in a minute.
- It moves through snow that reaches half a meter in length.
- Perhaps an additional trailer attachment with which the motorcycles can transport 300 kilograms.
- Price 50 – 55 thousand rubles.
Selection and preparation
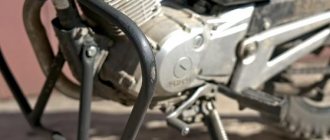
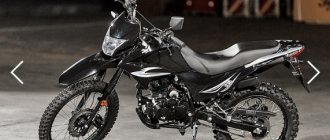
As a basis for a cross-country motorcycle, you can choose a used small-class bike - it is best to choose models with an engine capacity in the range of 125–350 cubic centimeters. The best option would be a road-going Japanese car aged 12–15 years with a well-preserved engine and an intact frame. In addition, you can even choose a Soviet motorcycle - for example, “Voskhod” or “Minsk”. It won't catch the stars from the sky at sporting events, but it will allow you to get a lot of fun from off-road adventures.
The motorcycle will have to be disassembled - you must remove all the components from it, leaving only the frame. It is better to go through the motor, transmission and drive components, diagnosing possible faults and eliminating them before starting assembly. The frame and tank of the future motocross motorcycle should be cleaned of paint, then covered with putty and a new coating applied according to your wishes. After such preparation, you can begin selecting components and gradual assembly.
Famous models
One of the brilliant proponents of motocross motorcycles is the Yamaha YZ250. The engine capacity is 249 cc, which provides quite a lot of power when moving. The model is produced in Japan, which guarantees high build quality. The Yamaha YZ250 is delightfully suitable for both beginners (training for at least six months) and experienced athletes. Similar in technical variations is the two-stroke model Suzuki RM250. The RM250 differs from the previous motorcycle in its more brilliant design and a huge number of modifications. The cost of a used motorcycle from 2009-2010 is about 60 thousand rubles; in terms of costs, it is more economical than the Yamaha YZ250, because it is easier to find spare parts for it. The rather famous Honda CRF250R model can be called an exciting motorcycle with a four-stroke engine. It is distinguished by a rather “hostile” temper, a higher torque, as a result of which the motorcycle can turn softer and accelerate faster and easier. For heavier motorcycle riders, the Honda CRF250R is a better choice than the roughly weightless 2T.
Parts selection
First of all, you need to pay attention to the wheels of the future motocross motorcycle, since they will bear the main load. It is better to immediately abandon the use of alloy wheels, since they will not be able to properly absorb strong impacts, which will lead to their rapid deformation. The best option is to buy ready-made wheels based on spokes. A budget-friendly way to get wheels for a motocross motorcycle is to buy rims and install spokes of the required length yourself. There is no need to think long about the size of the wheels and reinvent the motorcycle, since the sport has adopted the standard - 120/70-17 in the front and 160/60-17 in the rear.
If you want to make a cross bike from Minsk, you will have to tinker with converting the rear suspension to a monoshock absorber. It is much easier to disassemble and select a fork of the appropriate size from a 125 cc Japanese motorcycle. All that remains is to choose the shock absorber itself - in this case, it is better to select the desired model based on the weight of the vehicle itself and its rider, and then make adjustments after assembly. Remember that the rear wheel travel of a motocross motorcycle should be 200–280 mm - based on this value, rear suspension components are selected.
Next, you should take care of the front suspension, which is subject to the highest demands. Unfortunately, in this case it will not be possible to make do with economical compromise options, so it is better to buy a fork from a motocross motorcycle assembled. You don’t have to look at the performance of the shock absorbers and the presence of high-quality oil in them - some components of the fork can be changed during operation. For a motocross motorcycle, the ability to fine-tune the front suspension is very important, so you should pay attention to the integrity of the adjustment mechanisms. The fork travel should be approximately similar to that of the rear monoshock.
For safety reasons, you should also take care of installing other brake mechanisms that will effectively slow down the motocross motorcycle if necessary. The best option is to purchase a special sports kit consisting of other discs, calipers, hoses and fasteners. However, buying one can be quite expensive, so you can also buy used brakes from a larger motorcycle, which will provide fast deceleration without any problems. If your future motocross bike has drum brakes, you will either have to completely redo the wheels, or accept the mediocre performance of them, improving the deceleration slightly by fine-tuning the pads.
The last thing you need to take care of is the frame. Once you have purchased all of the above components to build your motocross bike, you will see that the standard mounting points need some work. Try to make maximum use of standard places for fixing certain parts, if possible without resorting to welding. However, you may need to completely reshape some parts of the motocross motorcycle frame, for which it is best to use high-strength steel pipes and a fairly powerful welding machine.
MY MOTORCYCLE
When you get behind the wheel of some “Japanese” car, be it a Honda CR cross-country bike or a Yamaha TDM 850 road bike, you involuntarily pay attention to the softness of the suspension. This quality is ensured by many forward and reverse adjustments. You can adjust the shock absorbers to suit your comfort and physical characteristics. In addition to the pleasure you get from the trip, safety also increases. The motorcycle confidently holds the road at speed, the suspension “swallows” bumps and dampens dangerous vibrations. This is how it should be, and this is how it almost always happens. But if you deal with “second-hand”, then you happen to observe something else. On some motorcycles, the springs have sagged so much that when braking, it nods like a dive bomber, and the lack of oil in the shock absorbers turns it into a wild mustang on bumps.
Operating the Java 638 on different roads, one can come to the conclusion that its suspension works very well on the highway.
Broken country roads with many ditches and ruts test its limits. However, one cannot demand the impossible from a purely road motorcycle. A more progressive model of the front fork is now equipped with the IZH-P5-015. Of course, this is not a product, but still a Japanese development, albeit in Russian design. The advantages of this design include greater bending and torsional rigidity, because the diameter of the feathers has been increased to 38 mm. The fork has sufficient travel, up to 200 mm, a progressive characteristic provided by two springs with different stiffnesses. By changing the pressure of compressed air pumped into the fork, you can change the compression characteristics. So, having these advantages, we will try to eliminate the disadvantages and improve the robot, and most importantly, make the fork adjustable, customizable to specific driving conditions. In addition, I wanted to deviate at least a little from the universal standard and make it more “enduristic”. Having started work and disassembled the fork, it becomes clear that its travel is only 180 mm instead of the announced 200 mm. Therefore, the first thing you will have to do is increase the stroke, make it maximum with standard feathers. It turned out to be 250 mm. Attention : further increase is extremely dangerous, since the fork leg may come out of the guide bushings, which will lead to a break and an accident when jumping! We manufacture a piston 36 extended by 70 mm (Fig. 1 and 2} and a guide sleeve 31 (Fig. 3), which plays a dual role.
Firstly, it lengthens the lower movable part of the feather and protects the fork from bending and breaking when encountering an obstacle in the maximum extended position, for example, when jumping. And, secondly, it contains another oil seal, which protects against air leakage under heavy loads and impacts. If guide surface A (Fig. 3) is worn during operation by more than 0.15 mm, as well as ovality, you can bore the inner diameter of 38 mm of bushing 31 to a diameter of 42 mm and press in a new guide with an outer diameter of 42 mm and a length of 80 mm with with a guaranteed interference of 0.017 mm and then expand to a diameter of 38 mm. In principle, a certain amount of oil from the fork leaks through the oil seals during operation, but in order to ensure that the guide surface A and the oil seal do not starve of oil, an M3 hole is made on the side for lubrication, which is closed with a screw. Through it, about 5 ml of oil is pumped into the internal cavity with a syringe, which is enough for a season. The oil is collected in three annular grooves connected to each other by a screw groove. Being in them, it additionally seals the fork. After manufacturing, the bushing 31 is pressed onto the chainstay onto a surface with a diameter of 58.4 mm. This surface must be aligned with the inner guide of the pen to within 0.08 lil. IF this is not the case - because there are manufacturing errors - grind it to a diameter of 57 mm and change the bushing diameter accordingly. The interference fit is 0.15 mm. We heat bushing 31 to 80'C, lubricate the seating surface of the chainstay with sealant and press on the bushing. At the bottom it has three MZ holes for fixing screws that go into the groove; they protect against parts coming apart. At the bottom of the movable feather there are bosses for drain bolts. Apparently they were on the Japanese original, but they were eliminated during production. Let's drill a hole in each feather and cut an M5 thread (position 43, Fig. 1) - this will greatly simplify changing the oil in the future without dismantling the feathers. Now let's start making a mechanism that allows you to adjust the rebound characteristic (Fig. 4) below. Damping of vibrations occurs due to resistance when throttling the oil flow through valve 38, located in the lower part of the movable feather, and oil flowing through the holes in the lower part of the piston. To regulate the flow, a replaceable jet 39 and a tube 40 with a conical hole are installed inside the piston. By changing the flow area of the tube by moving the needle 41, we can change the return stroke characteristic: from a sharp rebound to a smooth movement.
Instead of the standard M10x 1.25 bolt, we make a 45 needle body (Fig. 4). During final assembly, the body is screwed into the piston using a sealant; the needle is sealed by two 9x5x2 oil seals and a copper gasket under the fixing nut. The needle moves up and down, rotating along the M6x0.5 thread, and is additionally fixed with a nut 46. The body is protected from dirt and dust by a steel cap 47. To obtain a sharper movement on the return stroke, it is necessary to enlarge the holes at the bottom of the piston to a diameter of 6 mm, and a smoother the work is ensured by raising the needle. After preliminary adjustment, it is necessary to operate the device, that is, to ensure the same flow area in both feathers. To do this, instead of tube 40 with a conical hole, insert a solid sleeve with a diameter of 11 mm without a hole and screw the needle (carefully, effortlessly!) until it touches. We mark this needle position as “0”, and now during the adjustment process we will screw the needle the same number of turns in both feathers. We manufacture jets 39 with flow sections D from a diameter of 8.5 lil to a diameter of 2.5 mm in 0.5 increments with an accuracy of ~ 0.01 mm. Now that the fork travel has increased to 250 mm, it will become softer at the beginning of the stroke, since the spring preload has disappeared. But let's make it even easier. Why? So that the main rigidity at the beginning of the stroke is provided by compressed air, which, firstly, provides an excellent non-linear characteristic, and secondly, the pressure is easy and quick to regulate. To do this, cut off a piece approximately 60-70 mm long from the larger spring and insert it through the adapter sleeve 8 with a softer spring. The simplest way to determine the spring stiffness and choose a softer one is to apply the same load to the tested samples and measure the amount of compression. The larger this value, the softer the spring, and according to a linear law. So, the new spring should be about 1.5-2 times softer than the piece being removed. Now it will be necessary to pump the air not to a pressure of 0.2-0.4 kGs/cm2 (I wonder how this can be measured?), but to 0.7-1.0 kGs/cm2. Attention! Raising pressure more than 1.0 kgf/cm2 is not recommended. In order not to rack your brains over the equality of pressures in the feathers and to speed up the pumping process, let’s modify plugs 4 (Fig. 5). Now, instead of spool valves, bolts 1 are screwed into each of the plugs, the feathers are connected to each other by a hose (brake hose is best) with “earrings” at both ends, and the spool valve is screwed into one of the bolts. The process of filling the pen with oil is greatly simplified; there is no need to unscrew the plug each time, which can now be placed on the sealant. It is enough to unscrew the bolts after bleeding the air. More oil will now be required, since the volume of the pen has increased with the increase in stroke. You need 400 ml of MGP-10 liquid or oil with the same viscosity of 10 centistokes. Now that we have rebound adjustment, we don’t need to select formulations so carefully, mixing oils with different viscosities for winter and summer. Greater resistance to bending and torque when taking turns and jumping is provided by the connecting bridge 33 (Fig. 6). The height H is selected based on the 18″, 19″ or 21″ wheel used, only the gap between the wheel and the bridge must be at least 20-30 mm. With the upper wing position, it also acts as a dirt separator. Owners of motorcycles with a similar fork and a front disc brake, with frequent, intensive use, notice that after some time the wheel begins to point to the side in relation to the steering wheel. This is a consequence of the asymmetrical, on the one hand, location of the brake disc. Standard traverses do not provide the necessary rigidity. To eliminate this phenomenon, the upper (Fig. 7) and lower (Fig. 40 mm thick traverses were made from D16T duralumin. This doubles the contact area between the traverses and the stays. Also, the new traverses allow the steering wheel to be turned at a much larger angle and thus significantly reduce the turning radius.The upper yoke also provides for the installation of an anti-theft device, which works when the key is removed from the ignition, as on cars.
To do this, a lock from a VAZ-2101-07 is installed, and a steel sector 14 is welded to the head of the frame (Fig. 1), which, when the steering wheel is in extreme positions and the ignition is off, limits the movement of the steering wheel. Since now the rubber covers have become short, you can add them by cutting another cover in half and gluing this half to the whole. It must be glued with “Superglue”, since “Moment is not moisture resistant. You can also protect the feather from dirt with a duster. Since it is difficult to get the boot on a feather with a diameter of 38 mm, you can make it from fluoroplastic (Fig. 9) by installing a spring ring from the seal in the upper part. Fluoroplastic has the property of cold flow, and the spring will tightly press the edge of the boot to the feather. It’s best to install both the boot and the rubber covers at the same time. In general, you need to very carefully monitor the “mirror” of the feathers, because the durability and performance of the fork depends on this. The surface of the fixed pipes is coated with a layer of hard chrome, which protects them from corrosion and scratches. But if the latter still begin to appear, expect trouble soon, the seals are “running out”, the fork does not hold oil and air. If possible, you need to regrind the nib until the holes and scratches are eliminated and reapply an increased repair layer of chrome. Then polish the surface and check the outer diameter. You can repair the pen yourself. Carefully clean the shells of rust and, after treating with phosphoric acid, fill all cavities with solder. Carefully remove any remaining acid with water and sand to size, then polish the surface. This repair method is quite reliable, but it is necessary to eliminate the root cause of the defect - replace the leaky protective covers.
source "Moto" magazine 1998
Tuning
Once you're done with the must-have part, you can also upgrade the motocross bike to suit your needs. First of all, this concerns the installation of modern carburetors with high performance - they will inevitably increase fuel consumption, but will allow for stable engine operation at high speeds. You can achieve good results by adjusting the standard carburetors of the resulting motocross motorcycle. However, if you encounter troubles such as loud pops in the exhaust pipe or black exhaust, it is better to return to the standard settings or even contact a specialist. If you are going to make a dirt bike from Voskhod, you will also need to replace the standard paper filter with a foam filter, increasing its throughput without sacrificing performance.
Most experts advise taking care of high-quality tail when creating a motocross motorcycle. In this case, it is designed not only to improve the appearance of your bike, but also to protect its components from impacts on the off-road. Therefore, it is better to purchase a special tuning kit made of high-strength plastic. In addition, to save money, the necessary tail parts can be found at disassembly.
What are the results?
The resulting homemade motocross motorcycle will not be able to compete with factory models, no matter how much you might want it to. However, there is a way to make it truly perfect - for this you need to select components that perfectly match each other, as well as fine-tune them, which can take months or even years. Additionally, a motocross bike with custom components will require more frequent maintenance—you'd be surprised how many problems can arise when riding a homemade machine. Therefore, it is worth considering the option of saving up for an inexpensive used foreign-made motorcycle. Moreover, purchasing high-quality components separately will also cost a considerable amount.
Basic criteria for choosing a motocross motorcycle
The main combinations of a motocross motorcycle can be summed up in one phrase: “Nothing superfluous.” The design does not include headlights, turning lights, or an electric starter. Motocross motorcycles start with a kick starter. It is impossible to use cross bikes in the city and on highways because of the danger to the safety of other road users. The choice of cross-country motorcycle, the difference from a similar enduro class, is quite limited. For newcomers to motorsports, it’s better to navigate “iron horses” with two-stroke engines (in fact, children and teenagers starting to learn motocross start with two-stroke motorcycles). In addition, such models have a number of advantages over four-stroke ones. Firstly, light weight: light motorcycles are less dangerous and more maneuverable on cross-country. Secondly, it is much cheaper to maintain and repair a motorcycle with a two-stroke engine. It should be noted that, despite the technical pros and cons, the choice of a motocross motorcycle is a very subjective decision and sometimes depends on what kind of exterior the future owner will like, how much money he has at the time of purchase and what goals he pursues. So, 4T is the best choice for amateurs who are going to simply get adrenaline from off-road driving, without participating in competitions.
Homemade motorcycle: tips for making. How to make a motorcycle with your own hands?
Many people very often think about how great it would be to at least try to create their own motorcycle with their own hands, without resorting to the services of salons, craftsmen, etc. However, often such a desire remains unfulfilled due to the motorcycle enthusiast’s uncertainty about the success of his planned project. That’s why it’s worth figuring out how to make a motorcycle without anyone’s help.
How to make a motorcycle with your own hands
The process of creating a bike yourself, like most engineering structures, begins with the development of a project. At the stage of sketching the drawings of a homemade motorcycle, it is necessary to clearly determine whether the two-wheeled friend will be exclusively a garage showpiece or an original, but everyday means of transportation.
Most often, motorcycle engineers are inclined to the second, therefore, it is preferable to develop a future bike based on an existing two-wheeler with a legal registration certificate. This decision is explained by the unnecessary need to obtain additional permits
and licenses for the vehicle being created.
The next step in creating a motorcycle with your own hands is to create a list of necessary spare parts according to the design part. In addition to the main parts and components of the bike, you need to take care of special tools and consumables. An important point: it is strongly recommended to purchase products from the same brand, as this will greatly facilitate the upcoming assembly and fitting process.
Preparing to assemble the motorcycle
First, you need, of course, to decide what configuration the future “steel horse” will have, and also to resolve the issue of all the parts and tools necessary for the work. If you have some experience, some elements can be made independently, for example, on milling and lathe machines or by welding.
If during the assembly process the base is an old motorcycle, then you should not start work with the installation of small parts, universal joints, brake rods, etc. The best solution would be to start puttingty and painting the tanks and fenders. To avoid problems with the motor or parts of the gearbox bridge, they need to be placed in kerosene for a while. A homemade motorcycle will look much more expressive and impressive if its engine crankcases, covers, gearboxes and ignitions are well polished.
The engine of the old device needs to be completely rebuilt, and only then begin installing accessories, which, as a rule, include two main materials: leather and chrome.
Where to start assembling a motorcycle with your own hands?
Having ready-made motorcycle project diagrams at hand, as well as materials for their practical implementation, you can safely move on to the direct processing of pipes and metal sheets in the process of creating a frame. Each part of the chassis can be chromed or painted to give it a more aesthetic appearance. This is also done to prevent corrosion of the chassis. You can also create wheel rims with your own hands. Still, why “reinvent the wheel” if many compatriots know from practice how to make a motorcycle from the Urals or Dnieper MT, using the frame, engine and electronics of the latter. By adding other unique nodes to them, you will clearly get an iron horse that is unlike any other.
Having installed an extended fork (preferably adapted for a front disc brake), homemade traverses (created using a steel sheet with a thickness of several tens of millimeters), the bike’s handlebars are mounted using brackets. The brackets are also used to mount the rear shock absorbers. They are considered a secure base for holding the seat back. Here you can fix various panniers and the trunk of the bike.
How to assemble a complete homemade motorcycle
It is better to choose/create a two-level saddle for a two-wheeled custom. Before creating it, you need to find a thick sheet of steel (about 2 mm). The latter will bend along the contour from the future tank to the rear panel. To make the edges of the saddle more rigid, you need to bead its sides 1 cm down. The soft part of the seat can be made of ordinary thick foam rubber. Leather is best suited for all this as upholstery. When installing the seat, it is necessary to install rubber gaskets on the frame directly under it. Also make sure that in the future your homemade bike can be placed on a leg as easily as possible when parked. For these purposes, it is better to choose a side knife, which is mounted on the left side member of the frame and has the ability to easily recline in the presence of a spring.
The steering wheel should be attached not only to rear-view mirrors, levers, cables, but also to various electrical appliances, which can be purchased together with the body in many places. The devices that look most beautiful are those placed in chrome-plated boxes/cylinders.
You need to know how to make a motorcycle with your own hands as correctly as possible even before installing the throttle handle on the steering wheel. The latter should be made with small turned rubber rings.
Don’t forget about installing turn indicators on your homemade bike. Their absence on a motorcycle can lead to various dangers on the road. You can supplement the classic set of lighting devices (headlight, stop, turn signals) by installing small flashlights near the front headlight. Additional safety will be provided by installing safety arches on a homemade iron horse.
It is important to remember: when making a motorcycle with your own hands, make sure that in the future you will be able to register it with the road control authorities. Any major changes in the design of the bike must be registered with the traffic police/traffic police.
Bicycle as a basis for a motorcycle
It's no secret that often the basis for a motorcycle is just a bicycle, which is equipped with all the necessary equipment. When thinking about how to make a motorcycle out of a bicycle, it is important to understand exactly what materials should be used, as well as to know their technical characteristics.
Quite often you can find this option when the engine of a motorcycle-bicycle is a motor from a chainsaw. In this case, it is also worth studying its power, weight and size in detail.
Possible list of materials for creating a motorcycle from a bicycle
So, turning a bicycle into a homemade motorcycle, the most common option for a set of parts is the following:
- engine;
- pulleys;
- drive belt and tension roller;
- fasteners.
One way or another, making a motorcycle from a bicycle is far from a cheap pleasure, so sometimes it’s better to think about whether it would be advisable to do this or whether it’s better to buy a new moped or at least a ready-made bicycle motor.
Connecting individual parts to the frame
To create a motorbike, you can use any bicycle: old, rusty, folding. A motorbike requires only a strong frame as a base. If one is not available, you can make it yourself. To do this you will need several pieces of metal pipe.
The motor is attached to the frame at the junction of the lower and seat tube. This is the most optimal, but not the only option. Sometimes you can see a motor mounted on the trunk. The main thing is that the fastening is reliable. During operation, vibration will be felt, due to which the motor may fall if it is poorly secured. It is recommended to use metal clamps for fastening. A set for a motorbike may include special perforated mounts. But their use is not at all necessary.
In addition to the engine, it is necessary to attach the battery and fuel container to the frame.
DIY motocross motorcycle
Despite the highest technical indicators of this type of motorcycle, such as a cross-country motorcycle, it is quite possible to assemble it yourself. Of course, nothing prevents you from simply buying a ready-made model, but not always factory samples are able to satisfy all the desires of a particular motorbike enthusiast, besides, such a purchase will certainly not be cheap, and a homemade motorcycle will save a significant amount of financial resources. However, here it is necessary to strictly comply with all installation requirements, otherwise the end result may be very disappointing.
The procedure for self-assembly of a motocross motorcycle
It would be best to start assembly with wheels, which can be freely purchased at any motorcycle parts store. There are two most common options for attaching these elements: purchase a rim and replace the spokes, or simply install cast sports wheels on the device.
A fork for a motocross motorcycle should be classic and have a full range of adjustments. The optimal size for it would be 43 mm.
In order to increase the reliability of the brake system, it is necessary to increase their power. Alternatively, sometimes the diameter of the brake disc is simply increased.
Particular attention should be paid to the suspension, which is mounted on a homemade motocross motorcycle. The most suitable for it will be stock shock absorbers, which can be ordered directly from the manufacturer, but it is important to indicate the possible weight of the device so that the suspension elements are equipped with the appropriate springs.
If we talk about the engine, it is definitely worth mentioning that its thrust can be increased by reducing intake losses. To ensure this, the standard paper filter in the old engine is replaced with a foam one, after which the updated motor is installed in the system of the future motocross motorcycle. In addition, the carburetor is also subject to changes, which should ensure good engine operation at maximum speed.
How to make a homemade pit bike
For the manufacture of a pit bike were used:
- pit bike frame;
- engine with three speeds and 5 hp;
- 86cc carburetor, running boards, seat from an Alpha moped;
- Avid Elixir 5 hydraulic brake;
- aluminum pendulum;
- shock absorber (rear) Fastace;
- Rockshox Domane freeride fork;
- wheels: front - from BMX with DTSwiss spokes, rear - assembled from a freeride rim with 2.5 mm spokes from a Soviet moped;
- pipe, mesh, plastic bottle for the air filter (later a purchased filter was installed, since the homemade one was very inconvenient to clean, although it performed its functions perfectly);
- tank – 4 l, from a motorbike;
- halogen headlight 55 W.
This is how compact and light the bike was (50 kg net weight, 55 kg with a full tank):
Technical data.
If we talk about the technical characteristics of the resulting model, they are very good. The maximum speed on a flat surface is 79 km/h, while driving feels good dynamics. I am pleased with the economical fuel consumption - only 1.8 to 2.2 liters per 100 km. Two brakes: front disc for unexpected braking and rear drum for standard braking, perform their tasks optimally.
You can evaluate a self-made pit bike in motion by watching the following video:
We hope that the article was useful to you, and, thanks to the idea presented, you now understand how to make a pit bike, and will soon be able to assemble your own unique and inimitable model.
How to make an all-terrain vehicle from a motorcycle?
Recently, all-terrain vehicle designs that are made from ordinary motorcycles have become widely popular. In addition to the entertainment functions that such a device carries, it is also a very reliable means of transportation.
So, homemade all-terrain vehicles made from motorcycles can be divided into several categories, the main of which are, naturally, ATVs. These transport models amazingly combine the mobility of a motorcycle and the stability inherent in cars. Due to the fact that each of the ATV wheels has its own suspension, the device is able to overcome almost any, even the steepest, road irregularities.
Another category is motorcycles equipped with huge wheels. They are not afraid of absolutely any obstacles, but their stability leaves much to be desired.
The third type of all-terrain vehicle from a motorcycle is a vehicle equipped with tracks, with the help of which you can easily move through swampy areas.
However, we should not forget that any motorcycle, even a homemade one, is a vehicle characterized by increased cross-country ability. Therefore, in order to achieve the maximum value of this parameter, it will be enough to simply increase the cross-country ability of a standard vehicle, and the need for global modernization will disappear by itself.
Steps on how to make a motorcycle yourself
There are several stages in creating a motorcycle with your own hands:
Choosing a homemade motorcycle model
Before starting work, everyone who is going to assemble any thing should have an idea in their head. It is fundamental to creating a really good thing. It is very important to imagine the design and all the technical features of your future creation.
Drawing of a future motorcycle
Any master does not necessarily need to have the skills of an artist in order to draw his future creation. It is very important to indicate on a piece of paper those features of your motorcycle that are worth paying attention to.
Important:
It is necessary that everyone who makes a motorcycle with their own hands has a visual image of the future masterpiece.
Purchasing parts to create your own motorcycle
At this stage you will have to spend a little of your money. To create a motorcycle with your own hands, you need to purchase a large number of elements, including an engine, wheels, frame, and various metal pipes.
Assembly
At the final stage, it is necessary to assemble all the parts together to obtain a homemade vehicle. To do this, it is very important to have knowledge of how all the components and systems of motorcycle equipment work.
Homemade motorcycles video
1. Only by creating a motorcycle with your own hands can you make it to suit all your individual needs.
Decide what it should look like and what characteristics you would like to see in it. Make your work easier by drawing at least a schematic drawing of your future bike. 2. Do not forget that you must focus on the technical requirements that are established for motorcycles. Otherwise, neglecting these requirements, you will not be able to ride your bike.
3. Let's try to create a moped based on a bicycle. Get a bike with a thick frame and large wheel diameter. This is what will give reliability to the future bike. You will need to add a fuel tank, engine and muffler to the bike.
4. When assembling, you can use parts from motorcycles and mopeds, but in no case from cars. Remember this rule! When all the parts are secured, you will have a motorcycle. However, it is unlikely to look presentable. So start painting.
5. Clean and degrease all parts, and then use moisture- and heat-resistant paint to paint the parts. Do not forget that the engine power must be at least 60 l/s per ton of motorcycle, and the frame and other supporting structures must be made of very durable material.
Hai! How to make a motorcycle is what interests the most fanatical motorcyclists and bikers. Why? The point is not the high cost of new factory motorcycles or even the fashion for homemade vehicles. Such a desire is caused rather by the desire to express oneself, as well as to find a bike that is as customized as possible.
Will help you with this. Below you will find a list of tips for assembling a two-wheeler with your own hands.
Most riders prefer riding bikes with an upright stance. Therefore, we recommend developing a classic type iron horse or a chopper. It is also advisable to take into account that it is better to move the footrests forward for the purpose of comfortable eating.
When creating a first-class bike from the Urals, Izh, Minsk, Voskhod and other serial iron horses, do not forget about the aesthetics of a huge steering wheel extended over a long distance. The most attractive type of fuel tank will be the “droplet”. An extended type of front fork will also add maximum beauty to your motorcycle with your own hands.
Before making a motorcycle, it won’t hurt to study video lessons either. You need to understand what parts of the future bike you can make yourself (primarily the frame, instrument panels, cases, plastic fairings, wheel spokes, saddle, etc.), and what you can hardly even design in drawings (engine , wheel rims and electronic components).
How to make a homemade motorcycle?
First you need to decide on the frame, but we will talk about this below. Now let's move on to engine selection. There are many engine options. Internal combustion engines are created by factories in two types: four-stroke and two-stroke. As an alternative, you can install an electric motor. In the latter case, you need to provide a lot of space for batteries in the frame of the two-wheeler. Of the internal combustion engines, 4-stroke engines are more valued in practice and are also used. You don't have to buy a new engine. By visiting transport dumps/flea markets and searching a little on the Internet on bulletin boards, you can pick up quite good options for engines and spare parts for them. It's best to polish and tune everything you find.
These days it’s not difficult to find ready-made drawings and diagrams of unique motorcycles made with your own hands from paper, from a lighter, from Lego, from the Urals, etc. Experienced customizers from TV screens will also tell you how to make a moto. To this day, the “Western” media have produced many interesting television programs on this matter. You can also order custom assembly in a professional workshop by experienced mechanics who work in almost any city in our great homeland.
Homemade motorcycles for cross and enduro
Moderator: Neposeda
- Go to page:
#1 Post by Mycki » Thu Oct 18, 2012 4:20 pm
I decided to create the topic “Homemade motorcycles for cross-country and enduro.” The topic was created for discussions of motocross and enduro motorcycles for those people who do not have the opportunity to buy a motorcycle, but do not give up, and sharpen their scooters for this. We post photos of our motorcycles, with detailed descriptions of what was done; We discuss all kinds of tuning options and share our impressions.
#2 Post by Mycki » Thu Oct 18, 2012 4:23 pm
Here is my first mot, the well-known MACACA, which I created with the help of my father, and a person who is registered on this forum as dimooon, for which a huge THANK YOU to them:
— frame from chz-125516 (digested to fit the Minsk engine) and pendulum; — front fork and wheel from IZH-PS; — Minsk engine, slightly boosted; — tank from ShK “Voskhod”, cut off and digested; — self-propelled seat; — the front fender is soldered from a ChZ-Tov one, the rear fender is homemade (from a plastic sewer pipe), and the side numbers are also from the pipe; — I don’t know why the shocks came from (they were higher than the shocks from Minsk and Izh); — the rear wheel is from a road IZH-PS, with a machined rear sprocket, onto which a sprocket from the ChZ-500 (52 teeth) is welded; - standard ignition from 6v Minsk (of which there were very few
) it seems like we ask anyone who is interested in anything))) and don’t forget to throw in your MOTOs.
The main directions of change in homemade motorcycles
Recently, many countries have been holding exhibitions where designers present their homemade motorcycles. At such exhibitions, the imagination of designers is amazing. A motorcycle is an excellent way to implement the most amazing design solutions. Therefore, this motorized vehicle is very popular among inventors.
There is a huge variety of models that represent homemade motorcycles. But they can be classified in three directions.
First direction
The focus here is on off-road capability. They use large inflatable cylinders. Outwardly, such a motorcycle resembles three balls, among which the motorcyclist sits. This also includes motorcycles, instead of wheels on which wheels from tractors or heavy trucks are used. A homemade minibike with very wide tires also belongs to this trend.
Direction two
This is a more aesthetic sphere. Here designers are trying to merge a motorcycle with a car. If the wheelbase of a motorcycle is extended to the size of a car, the motorcycle can look like a very impressive open car. In this case, the motorcycle is mounted on three wheels. The rear of such homemade motorcycles have a variety of sporty and aerodynamic shapes. Some owners can seat five passengers on this motorcycle.
DIY dirt bikes
A motocross motorcycle is considered a rather loose concept. Therefore, homemade motocross motorcycles are made from any motor vehicle. Cross-country motorcycles are considered sports and have different engine sizes - from fifty to five hundred cubic centimeters. To make a motocross motorcycle yourself, take any basic model of a factory motorcycle.
What are the requirements for a motocross bike? One and the most important thing is that the motorcycle should be as light as possible. All possible parts are removed from the base model in order to make its design as light as possible.
Motorcycle racing, where such motorcycles were used, was held at the very beginning of the emergence of this sport on rough terrain. It was replete with a variety of natural obstacles. There were steep climbs, holes of varying depths, difficult turns and barriers.
Modern tracks are equipped with more complex obstacles, which are made artificially. To overcome a modern track, difficult jumps are made on a motorcycle, the bike rises with the help of its legs.
And for modern motorcycle racing, the most important task is the most lightweight motorcycle design.
You can replace the finished factory-made frame with aluminum structures. You need to remove the headlights and speedometers from the motorcycle.
To convert a bike into a motocross bike, you don’t need to do much work. A cross front fork is installed, which is more elongated. The rear suspension is being changed. Cross tires are required.
What else needs to be done? The gap between the seat and the rear wheel can be increased. This will allow you to make jumps and leaps on the motorcycle. Use a shock absorber from a different model motorcycle. The design can be changed in this way. Overcook it so that the rear of the motorcycle is slightly raised. If you decide to replace the engine when remodeling your motorcycle, you need to know the following. In this case, you will need certification to get you on the road.
How to make a dirt bike yourself
A modern cross-country motorcycle is a combination of high engine power, lightness, incredible strength, maneuverability and ease of control. Many people dream about this, some try to do it themselves.You can become the owner of a motocross motorcycle by simply buying it in a store. In this case, the buyer's requests may be limited only by his financial capabilities. However, the purchased model does not always satisfy the buyer with certain parameters, and then the process of modifying the motorcycle begins in order to improve its characteristics and appearance, known as “tuning”. Tuning is especially popular among bikers, who give their motorcycles the most incredible exotic look.
The most advanced fans of motorsports, and there are few of them, prefer to make motocross motorcycles with their own hands. It's worth starting with the wheels. There is no need to invent a motorcycle wheel from scratch, you can simply buy one. The known standard for sports motorcycle wheels is front – 120/70-17 and rear – 160/60-17. There are several options to adapt the wheels to your motorcycle - buy a rim and re-spoke it, as well as adapt sports or alloy wheels from a sportbike to it.
If we are talking about buying a rim, then professionals recommend not sparing the money and purchasing an Excel. But this is not the easiest way out of the situation, since re-knitting is a very troublesome, labor-intensive undertaking, so most craftsmen prefer to adapt already
ready wheels for your brainchild. The option with cast wheels, which have greater endurance and strength when driving over rough terrain, is considered more preferable.
Racing motorcycles use mostly stock brakes. To increase their reliability, it is recommended to increase the diameter of the brake disc or install a more powerful brake system with a caliper. Special requirements are placed on the suspension.
If you are converting a regular motorcycle into a motocross bike, then it is better to install a classic fork with a full range of adjustments. 43 mm size is quite enough.
It is better to choose shock absorbers for the suspension from the stock shock absorbers of well-known motorcycle models, taking into account the possibility of attaching them to the frame and pendulum. You can order shock absorbers from the manufacturer, but in this case you must specify the expected weight of the motorcycle so that the appropriate springs are installed on the shock absorbers.
A few words about the engine. For a long time, motocross motorcycles were produced with four-stroke engines. However, now, thanks to technological progress and increased power, two-stroke engines are gradually taking their place. If funds allow, then you can
recommend CRF, KTM, Kawasaki. But as the experience of domestic inventors shows, it is possible to improve even the engine from an old Soviet motorcycle. To increase traction it is necessary first of all to reduce intake losses. For this, a “native” paper filter
should be replaced with a foam filter. Another modification consists of replacing the carburetor with another one with greater capabilities, this will ensure that the engine operates at maximum speed.
Homemade motocross motorcycle
A homemade motocross motorcycle can be made from almost any model, since the very concept of a motocross motorcycle is quite flexible. The number of sports motocross motorcycles includes models with an engine capacity from 50 to 500 cubic centimeters, so almost any factory model can be taken as a base for conversion. From the point of view of an amateur, the modification is to increase the cross-country ability of the motorcycle and its ability to take on obstacles while moving.
The first and main requirement for such a motorcycle is that it should be as light as possible. Based on this, the initial model should be selected. Everything that can be removed should be removed to make the structure easier. Initially, the motocross motorcycle was used for motorcycle racing, which was held on rough terrain, replete with steep short climbs of several meters, pits, barriers and steep inclined turns.
Gradually, artificial obstacles of various designs began to be added to the track, and by now the track for such competitions has turned into a completely artificial structure with stairs, dips, corners and barriers. To overcome such a route, you often have to jump and lift the motorcycle using the muscular strength of your legs.
Therefore, lightweighting the structure is an important task. A ready-made factory frame can be replaced with aluminum structures, if there is anything available. Speedometers and headlights are removed for the same purpose.
When converting your motorcycle into a motocross bike, you generally don’t need much. You need to install a cross-country front fork, a longer one, install cross-country tires and change the rear suspension.
Since a motocross motorcycle will jump and jump, it makes sense to increase the gap between the seat and the rear wheel; it may be possible to select shock absorbers from another model. You can overcook the structure a little by lifting the back part. You can replace the engine with a more powerful one or not, at your discretion; The important thing to keep in mind here is that installing a different engine will require on-road certification.
Typically, a factory motocross bike is not considered a vehicle and does not require a license to operate, but since you are talking about customizing your motorcycle, you may not want to give it up as a vehicle.