001_MOTO_0410_060
Getting to the air filter may require not only skillful hands, but also a good tool.
Getting to the air filter may require not only skillful hands, but also a good tool.
The working mixture—air mixed with gasoline vapor—burns in the engine cylinders. If their masses have a ratio of 14.7:1, the mixture is called stoichiometric (with the correct ratio of parts). If there is more gasoline in it than the “norm”, it is considered rich, and vice versa, a mixture with less gasoline than is needed for a complete reaction with oxygen will be called lean. But the correct composition of the working mixture does not guarantee good engine performance. It is necessary to ensure its constant supply in sufficient quantity.
Here's an example from the world of big racing: an eight-cylinder Formula 1 engine with a displacement of 2.4 liters consumes 450 liters of air per second at a speed of about 18,000 rpm! It is not difficult to calculate that the engine of a modern superbike at maximum power requires about two hundred liters every second. But it's not just big engines that need good air supply. The smaller the engine, the more unwanted losses are felt. That is why for both small 50 cc engines and the most powerful large-volume units, it is extremely important that the condition of the air filter, intake tract, carburetor or throttle body of the injection system is as close to ideal as possible.
Breathing exercises - servicing air filters - Behind the wheel magazine
Getting to the air filter may require not only skillful hands, but also a good tool.
Getting to the air filter may require not only skillful hands, but also a good tool.
The working mixture—air mixed with gasoline vapor—burns in the engine cylinders. If their masses have a ratio of 14.7:1, the mixture is called stoichiometric (with the correct ratio of parts). If there is more gasoline in it than the “norm”, it is considered rich, and vice versa, a mixture with less gasoline than is needed for a complete reaction with oxygen will be called lean. But the correct composition of the working mixture does not guarantee good engine performance. It is necessary to ensure its constant supply in sufficient quantity.
Here's an example from the world of big racing: an eight-cylinder Formula 1 engine with a displacement of 2.4 liters consumes 450 liters of air per second at a speed of about 18,000 rpm! It is not difficult to calculate that the engine of a modern superbike at maximum power requires about two hundred liters every second. But it's not just big engines that need good air supply. The smaller the engine, the more unwanted losses are felt. That is why for both small 50 cc engines and the most powerful large-volume units, it is extremely important that the condition of the air filter, intake tract, carburetor or throttle body of the injection system is as close to ideal as possible.
Remove the filter carefully. Dirt from the joints tends to fall into the engine. A vacuum cleaner will help remove it in advance.
Remove the filter carefully. Dirt from the joints tends to fall into the engine. A vacuum cleaner will help remove it in advance.
A gas mask, respirator, gauze bandage are all options for air filters for people. It's hard to breathe with any of them. And if the bandage is too tight, the lack of air becomes more and more intense, oxygen starvation sets in and your strength leaves you. The same thing happens with a motorcycle engine, because the air supply to it directly depends on the condition of the air filter. Therefore, we should not forget about the important duty of any motorcyclist - to monitor the condition of the “lungs” of his ward.
So, the filter cleans the incoming air, but also makes it difficult to move. The dirtier the filter, the less air reaches the cylinder. Here are some typical manifestations of such a malfunction:
• Power is reduced, which is most noticeable when accelerating from medium speeds.
• When you suddenly open the gas at idle, soot comes out of the muffler.
• Increased fuel consumption within 10%.
• It is possible (if the contamination is very strong) that oil loss will increase. This is due to its suction (through seals and the ventilation system) due to the strong vacuum in the intake tract.
The dirtier the filter, the less air reaches the cylinder.
The dirtier the filter, the less air reaches the cylinder.
If the situation is not corrected in time, even greater trouble may occur. A filter clogged with dirt will not withstand the vacuum created behind it and will fall inside the housing. You may not hear it, but the engine, having received a suspended death sentence, will begin to count down the engine hours until its complete death. A rare motor will withstand more than 20 hours of active use without a filter. And, unfortunately, this happens not only to lazy and careless owners. After all, someone, having read in the operating instructions that the air filter must be changed at least once every 20,000 km, flies with a calm heart on their pet. And all around, it’s like in the song: “Poplar fluff, heat, June.” And by seven thousand, the filter is completely clogged with this very fluff... Depending on the place and time of year, the air can be replete with fine sand, steppe dust, plant seeds and even insects. Therefore, the period indicated in the instructions should be taken as the maximum and not be lazy to check the condition of the filter once again (and in Russia there is plenty of dust in large cities, on country roads, and even on highways, where roadsides are often turned into roadways). How to care for the filter depends on its design.
The Ural filter also requires maintenance: washing and soaking with clean oil every 15 hours. Fortunately, consumables are inexpensive.
The Ural filter also requires maintenance: washing and soaking with clean oil every 15 hours. Fortunately, consumables are inexpensive.
OIL INERTIA, as on old Urals, must be washed in diesel fuel or gasoline every 15 hours of operation, pour fresh oil into the “pan” and soak the metal filter element itself with oil.
The paper filter is the easiest to maintain: we replace it with a new one and move on.
The paper filter is the easiest to maintain: we replace it with a new one and move on.
PAPER FILTERS, which are most widely used in modern technology, are simply replaced with new ones. And, regardless of the instructions in the instructions, it is worth checking their condition at least once every 6–8 thousand km, especially on fast and powerful motorcycles. If the filter is very dusty and there is no replacement at hand, as a temporary measure you can blow it with compressed air from the inside out. When installing the filter, pay attention to its position: the rubberized edges should fit snugly against the plastic body.
“Gauze” (“zero resistance”) requires not only regular maintenance, but also reconfiguration of the power system.
“Gauze” (“zero resistance”) requires not only regular maintenance, but also reconfiguration of the power system.
"GAUZE" FILTERS. When replacing a standard filter with a tuning one, never (unless this is stated in the installation instructions) do not disconnect or change the design of the pipes leading to the filter housing, connecting pipes and any other elements of the intake system.
The filter housing performs several important functions. High-frequency vibrations occur in the intake manifolds of souped-up, high-revving motorcycles, which can either benefit power or cause serious problems. This depends on the setup of the intake system. Everything is important - the size of the air intake hole, the shape of the air filter housing, its volume and, of course, the throughput of the filter itself. The tuning is also complicated by the fact that it is impossible to calculate the exact dimensions of the air duct using formulas and all adjustments require many hours of experiments on engine stands. It can be especially difficult to adjust the intake on multi-cylinder carburetor engines with vacuum-operated dampers. That is why, when replacing a standard filter with a tuning one, it is very important to strictly follow the manufacturer’s instructions. Otherwise, instead of being useful, such a filter may cause harm.
The “zero” filter consists of layers of non-woven material laid between two metal meshes and impregnated with a special sticky oil. The finest dust simply sticks to the oil, while larger grains of sand get stuck in the gauze. The advantage of this design is the replacement of one dense filter layer with several less dense ones. The engine breathes easier and can add power at high revs. The disadvantage is the need for more frequent maintenance, somewhat less cleaning efficiency and expensive oil and cleaner.
The “zero” filter consists of layers of non-woven material laid between two metal meshes and impregnated with a special sticky oil. The finest dust simply sticks to the oil, while larger grains of sand get stuck in the gauze. The advantage of this design is the replacement of one dense filter layer with several less dense ones. The engine breathes easier and can add power at high revs. The disadvantage is the need for more frequent maintenance, somewhat less cleaning efficiency and expensive oil and cleaner.
Any intervention can have a very serious effect on engine performance. Also, never install alarm units, xenon headlight transformers, etc. inside the air filter housing. These warnings are based on life experience. One of my friends, for example, “to lighten the design” threw out the compensation chambers of the intake tract of the carburetor CBR1100XX. At the same time, the piston was bored out on the motorcycle, a sports jet set and a “gauze” filter were installed. After assembly, the motorcycle worked perfectly in place, but when picking up speed it immediately began to become terribly “poor.” Naturally, the reason was sought in the carburetor settings, filter and many other places. However, only the return of the intricately shaped tanks to their place instantly and completely cured the long-suffering “Drozd”.
So, the most popular filters among racers and simply tuning enthusiasts are “gauze”, multi-layer ones (they are also called “zero resistance” filters). They are distinguished from paper ones by the filter material itself and the method of its installation. If the purpose of installing a gauze filter is to improve the dynamic performance of the motorcycle, the following must be taken into account. Replacing a standard (paper) filter with a “gauze” filter without adjusting the carburetors often leads to a deterioration in engine performance, and not vice versa. An engine that receives more air (mainly at medium and high speeds) does not have enough gasoline, and running on a lean mixture, as we know, does not add power. And the carburetor vacuum flaps do not work quite correctly, since they are set at the factory to a different vacuum in the intake manifold. There are kits for adjusting the carburetors of popular sports motorcycles, but you will have to tinker with them if you want to get a really good result - to choose the best combination of jet diameter, needle lift height, quality screw speed.
Most modern motorcycles are equipped with fuel injection, so instead of adjusting the carburetors, you will need to change the injection control program. Companies specializing in tuning sports motorcycles produce programmable control units that allow you to enrich or lean the mixture using a computer, and change the ignition timing. In order not to get lost in the variety of settings, most motorcycles already have preset programs that take into account, among other things, the installation of “gauze” filters. Any intervention in the design of the motorcycle upsets the balance set by the factory engineers, so be prepared to gain in one area (for example, power at maximum speed), but lose in another (for example, traction in the mid-range). However, many people tune their motorcycle “out of love for art.” In this case, the main thing is not to do any harm, and how much the device was actually improved is not so important. Subjective assessment, fueled by the funds spent on your pet, will always be with a “plus” sign. And no measurements at the stand are needed!
Oil for “cross” filters is very sticky and, as a rule, colored so that the uniformity of impregnation can be controlled.
Oil for “cross” filters is very sticky and, as a rule, colored so that the uniformity of impregnation can be controlled.
It is advisable to service the “gauze” filter at least every 4–5 thousand km; with careful handling, it can withstand up to 10 oil changes. For flushing you will need a special product (in extreme cases, you can get by with kerosene or white spirit). The oil used to impregnate these filters is usually bright in color. This is no accident. The fact is that when impregnating, it is important not to miss a single centimeter of the surface, but also not to overdo it. Uniformly pink or blue white gauze is a sign of a well-saturated filter. At the same time, it is unacceptable for the oil to create a visible shine or, especially, to drip from the filter. In very dusty atmospheres, it is better to use a stickier “cross” oil for foam filters.
According to the principle of operation, foam filters are similar to gauze filters, but they are denser and more effective. An important structural element is the supporting frame. Without it, the filter will not work - make sure it is intact! Of course, here you also need to carefully monitor the tight fit in the case. Instead of standard single-layer ones, sometimes double-layer ones with reduced resistance are installed (their outer layer has larger pores). They may also require carburetor adjustments (slightly increasing the main jet and raising the needle). These filters have to be serviced every 2–10 thousand km, depending on conditions.
According to the principle of operation, foam filters are similar to gauze filters, but they are denser and more effective. An important structural element is the supporting frame. Without it, the filter will not work - make sure it is intact! Of course, here you also need to carefully monitor the tight fit in the case. Instead of standard single-layer ones, sometimes double-layer ones with reduced resistance are installed (their outer layer has larger pores). They may also require carburetor adjustments (slightly increasing the main jet and raising the needle). These filters have to be serviced every 2–10 thousand km, depending on conditions.
FOAM FILTERS are used on many motorcycles, but they are especially popular on enduro and motocross machines, where they work in very difficult conditions. The amount of dust and dirt that they have to hold would be the envy of any vacuum cleaner. Unlike “gauze” filters, these filters can also be washed in ordinary water and washing powder. But it is better (and more effective, especially if the impregnation is a special, sticky oil) to use branded compounds or white spirit, kerosene, or diesel fuel for cleaning. The instructions strictly prohibit the use of gasoline - and for good reason: it destroys both the material of the filter itself and the adhesive joints in it. And a crumbling filter itself throws debris into the motor and allows dust to pass through.
The filter can be washed from engine or transmission oil with soap and water or washing powder. For sticky impregnation, it is best to use a special cleaner or white spirit.
The filter can be washed from engine or transmission oil with soap and water or washing powder. For sticky impregnation, it is best to use a special cleaner or white spirit.
When squeezing the filter from water or solvents, do not twist it, just squeeze it between your palms. And before impregnation, let it dry thoroughly, otherwise the moisture will remain under the layer of oil. If branded oil is not available, you can use motor oil. True, in this case the degree of
cleaning and water resistance (and foam rubber with good impregnation to a certain extent protects against water hammer - water, unlike air, passes through with difficulty), and - significantly, about ten times - the service life before changing the oil. In addition, engine oil does not adhere well to the filter and flows down over time. The car transmission behaves much better. But special oil pays for itself both due to the duration of operation and due to better filtration. So we’ll leave ersatz impregnations for emergency situations.
You can apply the oil with a paint brush.
You can apply the oil with a paint brush.
Impregnating the filter with oil is also a non-trivial task. Beginners make two main mistakes: they saturate the filter unevenly (not only over the area, but also in depth) or overfill the oil, so that after installing the filter it continues to flow out from under the cap for a long time. To prevent this from happening, first carefully pour oil onto the surface of the filter, making sure that it does not leak through (or spray the filter if the lubricant is in a can). As soon as the filter has collected approximately 10–15% of its volume of oil, place it in a transparent plastic bag and gently knead it with your hands, distributing the oil. Impregnation can be considered complete when the filter is evenly colored both outside and inside, and no oil flows out of it when pressed. We squeeze out the excess - we don’t need snot in the airbox, and besides, it can plug the drain valve, an important part on enduro. It is best to let the soaked filter sit for at least a couple of hours, or preferably a day.
We saturate the foam filter with oil, kneading it in the bag.
We saturate the foam filter with oil, kneading it in the bag.
And don't forget that air filter oil is sticky, but a foam filter soaked in it feels dry to the touch. And filters coming from the store are sometimes saturated with clear oil. So be careful and don’t get “stuck” like one friend who, out of ignorance, saw a foam filter in a store window, similar in shape to a cap, and immediately pulled it over his head as a joke. It took a good forty minutes to wash the oil out of my hair.
Breathing exercises - servicing air filters
Error in the text? Select it with your mouse! And press: Ctrl + Enter
www.zr.ru
002_MOTO_0410_061
Remove the filter carefully.
Dirt from the joints tends to fall into the engine. A vacuum cleaner will help remove it in advance. Remove the filter carefully. Dirt from the joints tends to fall into the engine. A vacuum cleaner will help remove it in advance.
A gas mask, respirator, gauze bandage are all options for air filters for people. It's hard to breathe with any of them. And if the bandage is too tight, the lack of air becomes more and more intense, oxygen starvation sets in and your strength leaves you. The same thing happens with a motorcycle engine, because the air supply to it directly depends on the condition of the air filter. Therefore, we should not forget about the important duty of any motorcyclist - to monitor the condition of the “lungs” of his ward.
So, the filter cleans the incoming air, but also makes it difficult to move. The dirtier the filter, the less air reaches the cylinder. Here are some typical manifestations of such a malfunction:
• Power is reduced, which is most noticeable when accelerating from medium speeds.
• When you suddenly open the gas at idle, soot comes out of the muffler.
• Increased fuel consumption within 10%.
• It is possible (if the contamination is very strong) that oil loss will increase. This is due to its suction (through seals and the ventilation system) due to the strong vacuum in the intake tract.
Why use oil in a motorcycle air filter?
How does oil appear in a motorcycle air filter and what to do about it? The foam air filter plays an important role in the life support system of a motorcycle. These are the lungs of a motorcycle engine. When purchasing new equipment, there are no problems with it, but over time it begins to become dirty, refuse to function properly, and demand repair more and more insistently.
Air filter diagram.
What is the essence of the problem?
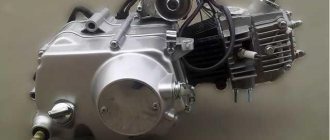
The problem is very serious. Air mixed with gasoline vapor burns in the cylinders of a powerful engine. The more gasoline is processed, the more it affects all the components of the motorcycle that participate in the internal combustion process.
The principle of operation of a motorcycle engine.
Neglecting to clean the working unit creates a very serious problem. If you do not take care of the condition of the air filter, the consequences will be as follows:
- The power will gradually decrease. This will become clearly noticeable when accelerating from medium speeds. The speed will decrease, which will be an unpleasant surprise for those who like to drive fast.
- When the gas flow is quickly and sharply opened, strong soot comes out of the muffler. Sometimes the exhaust gases may be black.
- Fuel consumption will increase by approximately 10-20%, and this entails an increase in the cost of each kilometer.
- Oil combustion may greatly increase, which is directly related to suction passing through the seal and ventilation system. Increased motorcycle oil consumption will be required.
Return to contents
If the current situation is not corrected in time, premature failure will occur. A dirty filter may not be able to withstand the created voltage and simply fall right into the inside of the housing. The engine may fail. It can work without a filter for no more than a day.
Characteristics of general purpose paper filters.
For good motorcycle performance and to save money, the foam air filter needs to be cleaned. This, of course, will take up personal time and money, but will keep the system operational for a long time without purchasing paper versions.
If the filter installed on the vehicle is made of paper, then there will be no problems with it. It is simply replaced with a new one. Such a filter itself quickly breaks down, but it is cheap and does not require careful maintenance. Those who do not want to bother themselves with taking care of the filter component will choose the paper version.
A foam rubber air filter is a high-tech invention that is more expensive than paper filters and requires a lot of attention and proper care. Of course, the air filter can also be changed, but it is very expensive.
There is another, cheaper way to make the filter work longer. We are talking about cleaning it using special oil for cleaning air filters. This is the most preferred way to solve the problem of device contamination. But this method requires knowledge of the cleaning process itself.
Return to contents
Oil viscosity.
To clean a dirty air unit, you first need to purchase filter cleaning oil. This product is very specialized and can be found at any motorcycle maintenance store.
The oil in a motorcycle air filter can clean all the insides of the unit. This is by far the best cleaning method.
When buying oil, it is important not to make two common mistakes motorcycle owners make. The first is to unevenly saturate the filter with the purchased oil not only over the area, but also to a greater depth. There is no need to do this, it will not bring any benefit and will only increase oil consumption.
The second mistake is that owners add too much oil. It flows out from under the cover even after the engine starts running. To avoid such mistakes, you need to know the procedure when cleaning the air filter.
After purchasing the oil, you must take the following steps to clean the foam unit:
Coarse oil filter.
- To get the filter, you need to remove the trim, seat or gas tank. In the latter case, it is necessary to turn off the gas tap, provided that it is non-automatic. After removal, you can directly begin working with the filter element.
- The filter element must be removed from the motorcycle body, and an empty rag must be placed in its place. This is not a simple precaution. The motorcycle engine will be exposed and dirt may get in, which can seriously affect its performance.
- The removed filter apparatus must be filled with warm water and washing powder. There should be just enough water so that the top of the filter, lowered into it, protrudes to the surface. Then you need to leave it to settle for one or two hours. This is not the cleaning process itself, but it is a preliminary stage, so that later it will be much easier.
- After settling, it is necessary to rinse the device. It is strictly forbidden to squeeze or squeeze it, rub it or twist it. If the filter is old, it may well not withstand such stress.
- It is necessary to hang the foam rubber to dry for 6-7 hours. Then open the oil for cleaning and start using it.
- Open the lid and pour oil onto the open surface of the filter. Be careful not to let it leak through. There is an alternative technique that involves spraying the filter with grease from a can.
- After the device to be cleaned has gained approximately fifteen percent of its volume, it is placed in a transparent plastic bag. Then gently press with your palms and fingers, thus distributing the oil there.
- Impregnation can be considered complete at the moment when the unit being cleaned is evenly colored on the outside and inside. When pressure is applied to it, oil does not flow out of the insides.
- Excess used oil is squeezed out, otherwise it can clog the drain valve, which can lead to breakdown of the entire system.
- The cleaned device needs to sit for several hours, or even better, one day. It is strictly forbidden to place the filter on the radiator or heater. Although this seems like a faster method, this approach will result in damage and defects to the device.
- When the air filter is completely dry, it will need to be impregnated using special liquids, sprays designed for impregnation of such devices. There is an alternative way. It consists of impregnation with the same oil that pours into the motorcycle engine.
- After impregnation, you need to let the filter sit for several hours.
- The filter should not be wet before starting work, but it should be damp.
- The filter is placed back in its place in the motorcycle, covered with a seat or gas tank and put back into operation.
The oil for cleaning devices is very sticky to the touch, but a unit treated with the same product seems dry to the touch. Therefore, you should be careful and try to come into contact with the sticky liquid less often; it is harmless to the body, but at the same time it is not so easy to wash it off later.
Also, under no circumstances should the filter be washed with solvents. The foam rubber will simply instantly split into them. Unlike special oils, solvents have very strong, splitting properties.
The entire process of cleaning a foam air filter is not difficult at all.
But this is completely justified in terms of saving money and maintaining the performance of the motorcycle.
Cleaning is necessary to ensure that the motorcycle continues to function without problems. If the engine breaks down, repairs will cost much more than cleaning the parts. With careful and careful care, foam rubber filter components can serve their owners for many years without fail.
Rate this article:
1 votes, average: 5.00 out of 5
vseavtomasla.ru
003_MOTO_0410_061
The dirtier the filter, the less air reaches the cylinder.
The dirtier the filter, the less air reaches the cylinder.
If the situation is not corrected in time, even greater trouble may occur. A filter clogged with dirt will not withstand the vacuum created behind it and will fall inside the housing. You may not hear it, but the engine, having received a suspended death sentence, will begin to count down the engine hours until its complete death. A rare motor will withstand more than 20 hours of active use without a filter. And, unfortunately, this happens not only to lazy and careless owners. After all, someone, having read in the operating instructions that the air filter must be changed at least once every 20,000 km, flies with a calm heart on their pet. And all around, it’s like in the song: “Poplar fluff, heat, June.” And by seven thousand, the filter is completely clogged with this very fluff... Depending on the place and time of year, the air can be replete with fine sand, steppe dust, plant seeds and even insects. Therefore, the period indicated in the instructions should be taken as the maximum and not be lazy to check the condition of the filter once again (and in Russia there is plenty of dust in large cities, on country roads, and even on highways, where roadsides are often turned into roadways). How to care for the filter depends on its design.
Air filter foam maintenance
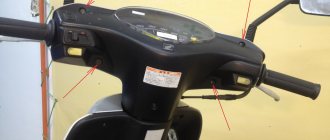
Some parts of your scooter will sooner or later need to be replaced or repaired, and one of them is the scooter air filter.
Let's look at replacing and cleaning such an important element. If you don't clean the filter on your scooter in time, you may feel a loss of power, notice carbon deposits in the combustion chamber, or your scooter will simply experience higher fuel consumption. Repairing the air filter on a scooter is necessary in any case, and let's face it, it's a very simple matter. Remember, you need to clean the filter every 500 - 1000 km. This period depends on the terrain in which you operate the scooter; therefore, if you ride in a village on a dirt road, you need to change or clean the filter as often as possible.
Nowadays, some scooter manufacturers are making their vehicles more suitable for difficult roads, so most Japanese brands produce scooters with an air filter that is protected from dust and dirt. So if you are the owner of something like this, you will need to clean the filter no earlier than after 2,000 km.
004_MOTO_0410_061
The Ural filter also requires maintenance: washing and soaking with clean oil every 15 hours.
Fortunately, consumables are inexpensive. The Ural filter also requires maintenance: washing and soaking with clean oil every 15 hours. Fortunately, consumables are inexpensive.
OIL INERTIA , as on old Urals, must be washed in diesel fuel or gasoline every 15 hours of operation, pour fresh oil into the “pan” and soak the metal filter element itself with oil.
005_MOTO_0410_061
The paper filter is the easiest to maintain: we replace it with a new one and move on.
The paper filter is the easiest to maintain: we replace it with a new one and move on.
PAPER FILTERS , which are most widespread in modern technology, are simply replaced with new ones. And, regardless of the instructions in the instructions, it is worth checking their condition at least once every 6–8 thousand km, especially on fast and powerful motorcycles. If the filter is very dusty and there is no replacement at hand, as a temporary measure you can blow it with compressed air from the inside out. When installing the filter, pay attention to its position: the rubberized edges should fit snugly against the plastic body.
How to clean a scooter carburetor?
Whether we like it or not, at a certain point changes appear in the behavior of our scooter, for example: failures during acceleration, the engine suddenly stalls for no particular reason, the idle speed begins to “float” or disappears altogether, difficulty starting the engine, and in many cases In general, it may be impossible to start it, the engine jerks during dynamic acceleration. All this is a consequence of improper operation of the carburetor, which in most cases is simply dirty or filled with water.
To restore the functionality of your scooter's carburetor, it will be enough to thoroughly wash it, disassemble it and blow out all the channels and jets with compressed air. That's exactly what we'll do today.
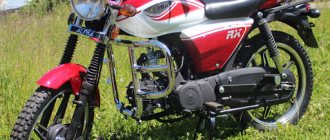
Today we will present such a “crazy guy” as a “guinea pig”
It would be good for such work to use a wooden table with a rail nailed around the perimeter; it is very convenient to clean the carburetor on such a table, everything is always at hand and most importantly: small parts will not be lost from you during the repair process.
Before disassembling, do not forget to wash the carburetor body from road dirt. We unscrew the two bolts on the mounting bracket and remove the starting enrichment from the well. More details about the operation, design, and performance testing of the starting enrichment are written in the article: Automatic starting enrichment of a scooter
Unscrew the float chamber. Well, here we have everything as always - “classics of the genre” - water and dirt.
I’m sharing with you one little secret: if you want to get rid of dirt and water in your carburetor once and for all, buy yourself a car fine fuel filter and install it in place of your original one. The price of a car filter is much lower and the quality of cleaning is several times higher.
We take out the float axis
Remove the float
Unscrew the main fuel jet
Unscrew the main fuel system nozzle
Unscrew the idle jet
Remove the throttle cable bracket
Unscrew the two bolts and remove the cover of the idle air shut-off system.
Remove the diaphragm along with the return spring.
Unscrew the two bolts and remove the diaphragm cover.
We remove the piston from the well.
We unscrew the starting enrichment well.
Unscrew the adjusting bolt for the “quality” of the mixture.
When reinstalling a “quality” bolt, do not swap the sealing elements; they should be in this order: first put the spring on the bolt, then put on the aluminum washer and only then put on the rubber ring. It happens that the rubber ring remains in the housing; in this case, remove it from there with a toothpick.
Be sure to remove the nozzle of the sprayer before blowing, otherwise it may fly off and you won’t find it later. It can be removed very simply: take a regular pencil and push it out from the side of the piston.
After completely disassembling the carburetor, we look for a suitable clean container, throw the carburetor body into it, pour in a sufficient amount of gasoline, take a clean paint brush and wash everything thoroughly. As gasoline becomes contaminated, we replace it with new one.
It is not necessary to wash the jets and other small parts with a brush; it will be enough to throw them into gasoline and swirl them thoroughly in it.
After washing, we dry all the parts well, take the compressor, set the pressure to higher, put a blow gun on the hose and blow through all the channels, jets, sprayers, in general we blow according to this principle: we look for a hole, point the gun at it and “blow”. If you do not have a compressor, “blow” the carburetor with a regular tire pump. Severe blockages that cannot be blown out can be easily cleared with a toothpick or fishing line, but in no case with wire.
After everything has been done, we assemble the carburetor in the reverse order, put it on the engine and carefully tune it.
006_MOTO_0410_061
“Gauze” (“zero resistance”) requires not only regular maintenance, but also reconfiguration of the power system.
“Gauze” (“zero resistance”) requires not only regular maintenance, but also reconfiguration of the power system.
"GAUZE" FILTERS. When replacing a standard filter with a tuning one, never (unless this is stated in the installation instructions) do not disconnect or change the design of the pipes leading to the filter housing, connecting pipes and any other elements of the intake system.
The filter housing performs several important functions. High-frequency vibrations occur in the intake manifolds of souped-up, high-revving motorcycles, which can either benefit power or cause serious problems. This depends on the setup of the intake system. Everything is important - the size of the air intake hole, the shape of the air filter housing, its volume and, of course, the throughput of the filter itself. The tuning is also complicated by the fact that it is impossible to calculate the exact dimensions of the air duct using formulas and all adjustments require many hours of experiments on engine stands. It can be especially difficult to adjust the intake on multi-cylinder carburetor engines with vacuum-operated dampers. That is why, when replacing a standard filter with a tuning one, it is very important to strictly follow the manufacturer’s instructions. Otherwise, instead of being useful, such a filter may cause harm.
Cleaning the foam filter
In short, let's get started. Let's start by removing the filter . Often, in order to reach the filter, you need to unscrew the seat and part of the plastic body kit. Before removing the filter cover, you need to make sure that there are no deposits of dirt, sand or dust in the filter housing that may have entered the intake distributor during dismantling. If there is, it needs to be cleaned before removing the filter. We remove the filter and look into the air intake. It's great if you can see the carburetor directly. We are looking for dust deposits and dark deposits on the carburetor diffuser, which indicate that the air is not being cleaned well.
At the next stage, after inspecting the intake tract, you should plug it with a rag (which does not leave lint and does not unravel into strings, well, it’s clean, of course) or a special lid. Since the next step in order will be cleaning the inside of the air filter housing, you need to be sure that nothing gets into the middle of the intake pipe. Why do you need to clean the air filter box? The cleaner it is, the slower the cleaned (new) filter will clog, and the box itself is also a good dust collector, especially if a crankcase exhaust is connected to it, due to which an oily deposit forms on the walls of the air filter housing. It would be advisable to clean all this with a cloth soaked in gasoline or white spirit. When working with white spirit and other solvents, it is good to use glasses, gloves and work in a well-ventilated area!
Now the fun part begins, which is actually cleaning and washing the removed foam filter .
There are a lot of specialized motorcycle chemicals for servicing filters, but a significant part of it is not approved for use in Europe due to toxicity and, accordingly, may not be officially supplied to our country. Some similar kits even come with a branded washing bucket, but considering the price products like this, I wouldn’t want to go bankrupt servicing the filter. But it needs to be serviced constantly, and no tuning bucket will reduce its dirtiness. That's why smart scooterists choose white spirit! It is prohibited to use gasoline, as there is a danger of affecting the glued seams of the air filter, and even more so, more aggressive solvents, which can directly turn foam rubber into glue, are not suitable. You need to purchase your own plastic bucket with a sealed lid and store a couple of liters of white spirit in it just for flushing purposes. This cleaning is rough and preliminary, so a couple of liters filled in is enough for repeated use.
You need to put something like a grate on the bottom of the bucket. This is so that the washed dirt particles quietly fall into the sediment and remain there without rising to the top, catching them with the filter when washing.
008_MOTO_0410_062
The “zero” filter consists of layers of non-woven material laid between two metal meshes and impregnated with a special sticky oil.
The finest dust simply sticks to the oil, while larger grains of sand get stuck in the gauze. The advantage of this design is the replacement of one dense filter layer with several less dense ones. The engine breathes easier and can add power at high revs. The disadvantage is the need for more frequent maintenance, somewhat less cleaning efficiency and expensive oil and cleaner. The “zero” filter consists of layers of non-woven material laid between two metal meshes and impregnated with a special sticky oil. The finest dust simply sticks to the oil, while larger grains of sand get stuck in the gauze. The advantage of this design is the replacement of one dense filter layer with several less dense ones. The engine breathes easier and can add power at high revs. The disadvantage is the need for more frequent maintenance, somewhat less cleaning efficiency and expensive oil and cleaner.
Any intervention can have a very serious effect on engine performance. Also, never install alarm units, xenon headlight transformers, etc. inside the air filter housing. These warnings are based on life experience. One of my friends, for example, “to lighten the design” threw out the compensation chambers of the intake tract of the carburetor CBR1100XX. At the same time, the piston was bored out on the motorcycle, a sports jet set and a “gauze” filter were installed. After assembly, the motorcycle worked perfectly in place, but when picking up speed it immediately began to become terribly “poor.” Naturally, the reason was sought in the carburetor settings, filter and many other places. However, only the return of the intricately shaped tanks to their place instantly and completely cured the long-suffering “Drozd”.
So, the most popular filters among racers and simply tuning enthusiasts are “gauze”, multi-layer ones (they are also called “zero resistance” filters). They are distinguished from paper ones by the filter material itself and the method of its installation. If the purpose of installing a gauze filter is to improve the dynamic performance of the motorcycle, the following must be taken into account. Replacing a standard (paper) filter with a “gauze” filter without adjusting the carburetors often leads to a deterioration in engine performance, and not vice versa. An engine that receives more air (mainly at medium and high speeds) does not have enough gasoline, and running on a lean mixture, as we know, does not add power. And the carburetor vacuum flaps do not work quite correctly, since they are set at the factory to a different vacuum in the intake manifold. There are kits for adjusting the carburetors of popular sports motorcycles, but you will have to tinker with them if you want to get a really good result - to choose the best combination of jet diameter, needle lift height, quality screw speed.
Most modern motorcycles are equipped with fuel injection, so instead of adjusting the carburetors, you will need to change the injection control program. Companies specializing in tuning sports motorcycles produce programmable control units that allow you to enrich or lean the mixture using a computer, and change the ignition timing. In order not to get lost in the variety of settings, most motorcycles already have preset programs that take into account, among other things, the installation of “gauze” filters. Any intervention in the design of the motorcycle upsets the balance set by the factory engineers, so be prepared to gain in one area (for example, power at maximum speed), but lose in another (for example, traction in the mid-range). However, many people tune their motorcycle “out of love for art.” In this case, the main thing is not to do any harm, and how much the device was actually improved is not so important. Subjective assessment, fueled by the funds spent on your pet, will always be with a “plus” sign. And no measurements at the stand are needed!
When to clean or replace the filter
Scooter air filters serve to clean the air entering the carburetor and then into the engine as part of the fuel mixture. The filter element of a moped performs the same function. The consequences of untimely replacement or cleaning of them can be no less disastrous than with the wrong approach to this issue in relation to automobile air filters. In any case, the owner of a scooter or moped will start filling up more gasoline and will be annoyed that his iron friend has become sluggish and no longer accelerates to the km/h required by the passport.
Manufacturers recommend replacing the air filter of a scooter or moped at least every 5,000 km, and cleaning it after every 1,000 km.
If the scooter or moped is used in very dusty roads or terrain, then maintenance and replacement should be carried out more often. In this case, cleaning should be performed at least every 500 km traveled, and, in order to prevent premature engine wear, you can start with a test inspection and cleaning (if necessary) of the filter after the first 100 km. Based on the results of this check, it will be clear whether it makes sense to service the filter element every 100 km or whether the mileage before the next cleaning should be increased. When the time comes to change the filter altogether, it will be clear either by its appearance or by the behavior of the scooter or moped engine - after the next filter maintenance, symptoms will remain that it is clogged and the motor does not have enough air for it to work.
009_MOTO_0410_062
Oil for “cross” filters is very sticky and, as a rule, colored so that the uniformity of impregnation can be controlled.
Oil for “cross” filters is very sticky and, as a rule, colored so that the uniformity of impregnation can be controlled.
It is advisable to service the “gauze” filter at least every 4–5 thousand km; with careful handling, it can withstand up to 10 oil changes. For flushing you will need a special product (in extreme cases, you can get by with kerosene or white spirit). The oil used to impregnate these filters is usually bright in color. This is no accident. The fact is that when impregnating, it is important not to miss a single centimeter of the surface, but also not to overdo it. Uniformly pink or blue white gauze is a sign of a well-saturated filter. At the same time, it is unacceptable for the oil to create a visible shine or, especially, to drip from the filter. In very dusty atmospheres, it is better to use a stickier “cross” oil for foam filters.
013_MOTO_0410_062
According to the principle of operation, foam filters are similar to gauze filters, but they are denser and more effective.
An important structural element is the supporting frame. Without it, the filter will not work - make sure it is intact! Of course, here you also need to carefully monitor the tight fit in the body. Instead of standard single-layer ones, sometimes double-layer ones with reduced resistance are installed (their outer layer has larger pores). They may also require carburetor adjustments (slightly increasing the main jet and raising the needle). These filters have to be serviced every 2–10 thousand km, depending on conditions. According to the principle of operation, foam filters are similar to gauze filters, but they are denser and more effective. An important structural element is the supporting frame. Without it, the filter will not work - make sure it is intact! Of course, here you also need to carefully monitor the tight fit in the case. Instead of standard single-layer ones, sometimes double-layer ones with reduced resistance are installed (their outer layer has larger pores). They may also require carburetor adjustments (slightly increasing the main jet and raising the needle). These filters have to be serviced every 2–10 thousand km, depending on conditions.
FOAM FILTERS are used on many motorcycles, but they are especially popular on enduro and motocross machines, where they work in very difficult conditions. The amount of dust and dirt that they have to hold would be the envy of any vacuum cleaner. Unlike “gauze” filters, these filters can also be washed in ordinary water and washing powder. But it is better (and more effective, especially if the impregnation is a special, sticky oil) to use branded compounds or white spirit, kerosene, or diesel fuel for cleaning. The instructions strictly prohibit the use of gasoline - and for good reason: it destroys both the material of the filter itself and the adhesive joints in it. And a crumbling filter itself throws debris into the motor and allows dust to pass through.
Air filter service interval
To avoid such problems, it is recommended to regularly clean the scooter's air filter. Depending on the model of the device, as well as the operating conditions of the scooter, washing can be carried out at intervals from 500 km to 2000 km. What does this mean? For example, a scooter is used in rural areas, where the concentration of dust on the roads is especially high, and the air filter is located close to the road surface, near the wheel. Naturally, it will need regular cleaning every 500 km and subsequent impregnation with a special composition (if the filter is foam rubber).
However, if the scooter is used in a metropolis, where there is quite a bit of dust, where the roads are regularly washed, and the suction pipe of the filter box is located in a protected place (for example, as on Honda Lead scooters), even after 2000 km the dust concentration in the foam element will be insufficient to create significant resistance to the passage of air flow to the carburetor, provided that the filter box lid is tightly closed. The tightness of the contour is determined by the presence and quality of the gasket between the two halves and the quality of the tightening elements, usually self-tapping screws.
011_MOTO_0410_062
The filter can be washed from engine or transmission oil with soap and water or washing powder.
For sticky impregnation, it is best to use a special cleaner or white spirit. The filter can be washed from engine or transmission oil with soap and water or washing powder. For sticky impregnation, it is best to use a special cleaner or white spirit.
When squeezing the filter from water or solvents, do not twist it, just squeeze it between your palms. And before impregnation, let it dry thoroughly, otherwise the moisture will remain under the layer of oil. If branded oil is not available, you can use motor oil. True, in this case the degree of
cleaning and water resistance (and foam rubber with good impregnation to a certain extent protects against water hammer - water, unlike air, passes through with difficulty), and - significantly, about ten times - the service life before changing the oil. In addition, engine oil does not adhere well to the filter and flows down over time. The car transmission behaves much better. But special oil pays for itself both due to the duration of operation and due to better filtration. So we’ll leave ersatz impregnations for emergency situations.
JavaScript is disabled in your browser
Most Chinese-made four-stroke scooters are equipped with a “wet” filter element. Sometimes you can find “dry”, but this happens much less often. The scooter air filter, which is a wet type, has a special oil impregnation. It traps dust of the smallest diameter that is present in the airspace. The scooter air filter itself consists of foam rubber that is resistant to various oils and gasoline.
As a rule, it consists of several layers that allow achieving the required performance characteristics. The outer layer of the scooter air filter has cells of a larger diameter, so small dust particles do not settle in it. But the inner foam ball retains fine dust.
Such a load on a motorcycle part requires constant cleaning of it from clogged elements, which over time significantly reduce the throughput of the foam rubber, and the scooter’s air filter practically stops passing air inside the carburetor, knocking down the operating settings of the latter. In order to prevent an emergency condition, it is necessary to regularly clean it, and every five thousand kilometers, replace the filter element.
Stages of cleaning the scooter air filter:
- It is necessary to disassemble the case and clean its internal surface from settled dirt and dust. To disassemble, six screws are unscrewed along the entire perimeter of the case, and then the cover is removed. Since there are no latches on it, it can be removed without effort, the main thing here is not to damage the filter itself.
- A visual inspection of the filter element is carried out. If particularly noticeable damage is detected, such as ruptures or a loose fit to the body, there is no point in cleaning it. It is necessary to immediately replace the damaged motor part with a new one. If there are no such defects, the foam insert is carefully removed and washed.
- The housing part of the filter is thoroughly wiped with a washcloth or a cloth with gasoline, and then wiped dry. After this procedure, no foreign particles such as dust or threads from a rag should remain, because they can end up in the carburetor, and there will be no benefit from such cleaning.
- The filter element itself can be cleaned in different ways. Each method has its own material costs, therefore, based on your current financial situation, you can choose either a more budget-friendly or a more expensive option. Option #1. Clean with a special product designed exclusively for the scooter’s air filter. As a rule, such products are quite universal, so they are suitable for both foam filter elements and gauze ones. Follow the instructions for cleaning. Option #2. You can wash the filter with gasoline. Before this, be sure to carry out a control test of the foam rubber for gasoline resistance. This procedure can be done on a small section of the filter from the very edge. If everything is fine and the foam has passed the test perfectly, you can proceed directly to washing. Cleaning operations must be carried out very carefully, without twisting the scooter’s air filter like a T-shirt or socks. Moderate pressure and release will suffice. After washing, the foam insert should dry completely. Option #3. The most budget-friendly. Wash the air filter in water with washing powder. All rules are the same as in option No. 2. Without taking precautions and accuracy, the foam element can easily be damaged or deformed; it can also delaminate and simply have to be thrown away.
- After cleaning and complete drying, the motor part must be soaked in oil. Important: the foam rubber must be completely dry. Impregnation can be carried out with special oil (the best option) or with regular engine oil. Transmission oil is not recommended at all. It is much more convenient to work with special tools purchased at a motorcycle parts store. All of them are placed in aerosol cans (sometimes red), so that the application is as uniform as possible. It is necessary to spray the oil not in circular, but in linear movements. Then you should wait about 20 minutes and saturate those areas that were missed. It is best to spray on plastic film, as the oil can fly in any direction.
- Then we replace the air filter and mount the cover.
010_MOTO_0410_062
You can apply the oil with a paint brush.
You can apply the oil with a paint brush.
Impregnating the filter with oil is also a non-trivial task. Beginners make two main mistakes: they saturate the filter unevenly (not only over the area, but also in depth) or overfill the oil, so that after installing the filter it continues to flow out from under the cap for a long time. To prevent this from happening, first carefully pour oil onto the surface of the filter, making sure that it does not leak through (or spray the filter if the lubricant is in a can). As soon as the filter has collected approximately 10–15% of its volume of oil, place it in a transparent plastic bag and gently knead it with your hands, distributing the oil. Impregnation can be considered complete when the filter is evenly colored both outside and inside, and no oil flows out of it when pressed. We squeeze out the excess - we don’t need snot in the airbox, and besides, it can plug the drain valve, an important part on enduro. It is best to let the soaked filter sit for at least a couple of hours, or preferably a day.
MY MOTORCYCLE
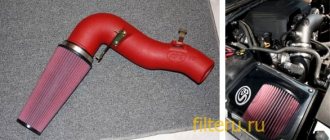
The air filter directly determines how long your piston engine will last and whether your motorcycle will be “easy to climb.”
Air is one of the components of the air-fuel mixture, which, when it enters the cylinder, ignites, causing the engine to work and give us pleasure from the trip.
A dirty air filter does not allow air to pass through properly, resulting in a richer mixture. That, in turn, burns more slowly than the adjusted mixture, and this leads to loss of power, overheating of the exhaust valves, and excessive fuel consumption. In addition, the level of air purification from road dust drops; accordingly, dust begins to enter the combustion chamber, settles on the walls of the cylinder and piston, increasing friction, and, accordingly, piston wear increases many times over. All this can be avoided if you clean the air filter periodically.
The three most common types of air filters are dry paper, dry foam, and oil-impregnated foam.
With paper everything is simple. If it got dirty, they threw it away and put in a new one.
With foam rubber it’s a little more difficult. Take a container, fill it with warm (not hot) water and dissolve a little washing powder in it. Now we disassemble the air filter, take out the foam rubber from there and lower it into a soapy solution. We saturate the foam rubber with the solution and leave it there for 10 -15 minutes. Then carefully wash it in soapy water and rinse in clean water. The rinsing procedure must be carried out carefully so that no powder remains in the foam rubber. Now all that's left is to dry the filter. Do not twist the foam rubber - this may damage it. Wring it out in your fist, after which you can place the filter in a dry, clean cotton cloth and squeeze it out - the moisture will go into the cloth and this will allow the foam to dry faster. If the weather outside is sunny and windless, you can dry the foam rubber by leaving it in the sun. While the foam dries, we wash the air filter housing clean. Often two-component foam rubber is used, in which the sides have differences in density. In this case, when disassembling and removing the foam rubber, you need to remember what position it is in, and when installing the foam rubber back into the air filter, place it as it was.
As for the impregnated air filter, another step is added here.
We disassemble the filter and take out the foam rubber from there. Further actions are similar to those described above. We wash the foam, rinse and dry. Wash the filter housing. When the foam dries, we will need to saturate it with oil. To do this, we need a plastic bag that can easily accommodate foam rubber. Take a bag and pour 50 grams of oil for air filters into it. Now we begin to saturate the foam rubber with oil. When the foam rubber is completely and evenly soaked, open the bag, take it out, squeeze it in your fist, without twisting it. After that, install it back into the air filter housing. Important! Foam rubber cannot be washed in gasoline or solvent! This will lead to its damage.
We put the air filter in place. The motorcycle will be immensely grateful to you for clean air and your care.
Source vk.com/motocar
012_MOTO_0410_062
We saturate the foam filter with oil, kneading it in the bag.
We saturate the foam filter with oil, kneading it in the bag.
And don't forget that air filter oil is sticky, but a foam filter soaked in it feels dry to the touch. And filters coming from the store are sometimes saturated with clear oil. So be careful and don’t get “stuck” like one friend who, out of ignorance, saw a foam filter in a store window, similar in shape to a cap, and immediately pulled it over his head as a joke. It took a good forty minutes to wash the oil out of my hair.
Maintenance of filters for mopeds and scooters
Maintenance of scooter air filters consists of cleaning and soaking them in oil if they are “wet” foam rubber (“dry” ones are blown or washed in water with washing powder).
We purchase a special product for high-quality cleaning of air filter elements - for example, K&N. Although this composition is intended for filters from this company, it is also perfect for foam rubber ones. Read the instructions and use them in accordance with them.
We wash the foam filter element in any gasoline (preferably AI-92). Gasoline is poured into a suitable container, where the foam is washed. We wash it carefully and carefully - just let the foam rubber absorb the gasoline itself, and then squeeze it out. After washing, the filter is wrung out - again, carefully, without twisting it. Then dry the foam.
We rinse in warm water with washing powder dissolved in it - excellent cleaning quality at minimal cost. During washing, you must follow the same rules as when processing in gasoline. Then wring out the foam, rinse thoroughly, and then dry.
After washing and drying, moped air filters should be soaked in oil. Or special is the best option. You can use impregnating agent for air filter elements from K&M or similar, cheaper ones from other manufacturers. Spray the aerosol from the can evenly in linear (not circular) movements over the entire surface of the filter. We wait about 20 minutes and then check the uniformity of application. If necessary, we “paint over” all identified spots that did not get oil.
Motor, diluted with gasoline 1:1. In this case, you can soak the foam rubber in a suitable container. Do not pour a lot of oil - its excess can significantly worsen the throughput properties of the filter. When the foam in the container is saturated, it is compressed. This will allow the oil to be better absorbed and remove excess. Then we dry the foam rubber from gasoline.