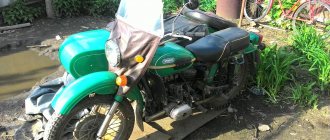
Many modern motorcycles are replete with plastic panels; they are needed to create a complete appearance of the bike, improve aerodynamics and protect important components. In order to protect these parts from damage, modern polymers are made flexible and shock-resistant, but even this does not save the motorcycle from falls and accidents. In such cases, the manufacturer offers to replace the part with a new one, which costs a lot of money. We have prepared several affordable options for making plastic for a motorcycle with your own hands.
When is it worth repairing plastic?
First of all, it is worth determining the extent of the damage. With the right approach, you can restore a completely broken part, but sometimes the cost will be the same as buying a new one. If the damage is relatively minor and relates to a non-load-bearing structure, such as part of a motorcycle body (maxi scooters), then cosmetic repair methods are suitable.
Cracks, chips and gluing of several pieces of plastic can be done using soldering with a hot air stream or a soldering iron. Critical, load-bearing structures, as well as parts with a high degree of damage, are best repaired using methods that involve restoring the mass of the plastic part and its characteristics (rigidity, elasticity, etc.). In cases where the plastic can no longer be repaired with a patch or gluing, there is an option to manufacture part from scratch. To do this, you will need to carefully study the entire modeling process and have a lot of combined time and nerves. Often, in such cases, it is easier to purchase a used spare part and repair it, or even buy new plastic.
DIY motorcycle repair
Motorcycles are loved by many and are a convenient means of transportation. To ensure that your iron friend does not let you down, you need to regularly check its performance. Breakdowns can happen at the most inopportune moment and in a variety of ways. Let's talk about some possible malfunctions and ways to eliminate them.
Motorcycle repair video
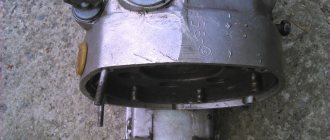
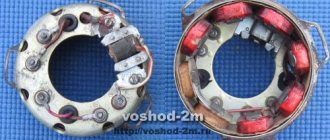
Motorcycle crankshaft repair
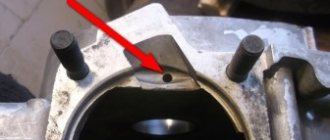
If this part fails, then the failure is considered quite serious. You can fix it yourself if you are repairing your motorcycle yourself. Otherwise, qualified specialists will help you in specialized services. The parts from which the crankshaft is assembled are pressed together. Therefore, you have the opportunity not to change the entire part, but only the part that has failed. Only for this you need to unpress it.
Repairing a motorcycle crankshaft will require some skill on your part. Here, knowing only theory will not help you. Using special devices, you need to measure the gaps in order to reduce or increase them if necessary. Plasma spraying can be used to restore the dimensions of the crankshaft. After this, the crankshaft is ground and brought to the desired size. On collapsible crankshafts, worn parts can be replaced. The last stage of working with collapsible and non-separable crankshafts is its alignment. But it is better for an inexperienced driver not to undertake this type of work himself.
Motorcycle plastic repair
When you fall on a motorcycle, the first thing that suffers is the motoplasty. And it is not always possible to throw away the damaged part and replace it with a new one. Plastic parts can easily be corrected and repaired.
You can repair motorcycle plastic yourself. Getting rid of cracks and making chipped pieces of plastic requires patience, desire and the right tools. The most difficult, and at the same time the most reliable method is the method using a hair dryer. If you follow the rules for such work, your part will be in no way inferior to a new one.
You can also use a soldering iron. Only with this method will the plastic seam be more fragile. It is not used for car repairs, but for repairing motorcycle parts, this method is quite suitable.
Repairing motoplastics allows you to use a special glue to glue the seam. This work will take a lot of time, and the strength is not very strong. If you wish, you can even make the missing piece of plastic yourself.
But if you don’t have the skills for repair work, or are sorely short of time, contact the specialists. In their work they adhere to the necessary technologies and rules. And all seams made have 85% strength. Parts restored in service centers will serve you for a long time.
Motorcycle frame repair
Repairing a motorcycle frame to restore all its technical characteristics should be entrusted to specialists. If cracks appear on the frame, the damaged area must be cut out and a new one welded. Couplings and reinforcing inserts are also installed. If the crack is small, you can simply weld it. If the surfaces of the bearing holes are worn, the hole must be welded and machined to the required size.
If the frame is deformed, it is corrected if there are no strong metal tears. After straightening the frame, you need to remove the dents that are on the frame, chips and paint it. Sometimes the fasteners on the frame need to be replaced. This means that with such repairs you need to have the parts necessary for replacement.
How to protect your motorcycle gas tank
Problems when starting the engine can occur with unclean gasoline, when it contains a large amount of impurities and debris. Such particles can clog the filter and settle in the fuel system. But sometimes the engine's operation is hindered by rust that appears in the gas tank. Even ideal conditions cannot guarantee the absence of rust.
Rust can get into carburetors. Black smoke appears, power is lost, and the motorcycle has difficulty starting. Repairing a motorcycle gas tank can be made much easier if you use epoxy resin to get rid of the rust. It will stop the corrosion from spreading further. The main thing is that such a procedure must be carried out according to certain rules. By pouring epoxy resin into your gas tank, you can extend the life of your gas tank for a long time. And you will change the fuel filter much less often.
Motorcycle fork repair
Motorcycle Front ForkWhat is the purpose of the front fork on a motorcycle? The fork has two shock absorbers. They absorb shocks to the front wheel. And thus ensures smooth running. When a shock arises from an obstacle, the shock absorber springs are compressed. And the front wheel begins to wobble. These vibrations are dampened by a shock absorber. A hydraulic device is used.
There are different types of plug malfunctions. Motorcycle front fork repairs will vary depending on the problem. During operation, the front fork “bites”, that is, arbitrary stopping occurs. Causes. Shock absorber fluid is dirty. You need to wash all the front fork feathers using kerosene. The fork tubes may be deformed. They are straightened or replaced with a new one.
The fork is knocking. Causes. There is not enough shock absorber fluid, large gaps that have formed between the bushing and the pipe. Liquid should not be added. You need to drain all the residue and fill in new fluid. For larger gaps, O-rings can be installed.
Motorcycle shock absorber repair
The rear shock absorber housing has a tip at the bottom, thanks to which it is connected to the swingarm. It has a cylinder at the bottom and a guide at the top. It is secured by the shock absorber cover.
Repairing the rear shock absorber of a motorcycle is necessary if a knocking noise appears in it. Causes. Worn cylinder, insufficient shock absorber fluid. What to do? It is better to replace the cylinder and piston. To eliminate knocking, you can install an O-ring on the piston. The fluid decreases if the seal lips are worn. Replacing the seals will help prevent leaks. During repair work, it is best to replace the shock absorber fluid.
Correcting minor faults of your motorcycle in a timely manner will allow you to enjoy rides with your iron friend for a long time without any problems.
Hot air soldering
To repair the plastic of a motorcycle with heated air, you will need a hair dryer, but not just any hair dryer, but one with a temperature regulator. You can use the cheapest device, but then there is a risk of overheating the plastic, which will lead to the loss of its basic properties. Overheated material will be brittle and may break due to vibrations from driving on normal roads. You will also need a special nozzle with a thin nozzle, approximately 5-8 mm.
In addition to the hair dryer, you will need a large piece of plastic identical to the one being welded. To do this, you should pay attention to the markings of the part; most likely, you will see a product of the PP, RA or ABS brands. Polypropylene PP, for example, melts at 300 degrees and begins to burn at 350, so it should be welded at a temperature of 300 - 340 degrees. Polyamide or RA should be welded at 410 - 460 degrees, ABS at 360 - 400. Soldering process:
- For greater convenience, remove the part from the motorcycle and wash it from dirt and oils.
- We clean the edges of the parts with medium-sized sandpaper, level the edges, and try to make a hollow in areas close to the surface.
- If we weld broken parts, then we lean the pieces against the base and use a heated hairdryer to grab them in several places (from the inside). Otherwise, if you weld the parts one by one, some areas may twist and it will be impossible to achieve a flat surface without leveling with additional materials.
Advice. If the plastic initially twists a lot, then to make it easier to work with, you can fasten it with staples.
- From a piece of plastic with a suitable composition, cut out a strip 0.8 - 1.5 cm thick; this will be our solder.
- From the edge of the crack (it’s better to start from the inside), we begin to heat the seam; as soon as it starts to melt, we lean against the solder and then direct the jet partly to the seam and partly to the solder. As the plastic melts, it will fill the seam; you can help this process by lightly pressing on the plate at the moment when the material has become sufficiently liquid.
- If the fracture shape has many turns, make solder plates with a margin of up to 5 mm, and connect several sections only by complete melting. When the seam is ready, you can begin work on the front part. If you did everything correctly, the internal seam will give the piece of plastic sufficient rigidity, so the external repair will be more of a cosmetic nature. The process itself looks identical, with the exception of the solder strip, which should be made thinner. After welding of the front part is completed, the plastic should be cleaned and, if necessary, a paint coat should be applied to it or the error should be hidden with a sticker that suits the style.
Motorcycle repair tools
Whether you use your motorcycle often or rarely, preventative and repair work is inevitable. Therefore, it is best to stock up on the necessary tools in advance. You will need the following tools to repair motorcycles.
- Spanners. The best option would be a combination set.
- Socket heads. They are also sold as a set and have different sizes. Make sure the kit includes a spark plug head. It is convenient to use it to remove the candle while holding it. To loosen and screw in fasteners, you need a wrench that has a ratcheting mechanism.
- A wrench used to tighten threaded connections as necessary. It's called dynamometer.
- Screwdriver Set.
- Hammers. The steel head on the hammers should have different weights, from one hundred to five hundred grams. It is convenient to have a hammer that has a plastic or rubber head.
- Wire cutters, pliers, pliers.
- Pliers used to remove circlips.
- To knock out axles or shafts, you will need drifts made of soft metal. And in order to knock out the pins, you need steel drifts.
- Several types of chisels with different blade widths.
- Puller.
- A pressure gauge will allow you to check your tire pressure.
- To measure the diameter of the cylinder, you need a bore gauge.
This is not a complete list of tools that you will need for repair work. The point is that some specific tools will be needed for some specific jobs. And you can purchase them if the need arises.
Motorcycle repair books
Books on motorcycle repair can be of great help to you. Although you can find other information you need in them. In the books you can learn the history of the development of your favorite motorcycle model, its design, and the principles of safe driving. In the books you will find a lot of useful and necessary information. Various exercises and practical tips that will help you drive a motorcycle competently and safely, and easily carry out minor repairs.
Good luck on your journey. Your iron friend will never let you down if you treat him accordingly.
Soldering with a soldering iron
This DIY motorcycle plastic repair is practically no different from the previous one. The main difference will be the tool used. You'll need a high-power soldering iron that you don't mind getting dirty. Here, too, the type of material being welded and the appropriate solder are important. The latter can be found in the form of special tapes in stores. Welding process:
- We dismantle the part, wash it from dirt, clean the edges with sandpaper and degrease it.
- We assemble a puzzle from broken pieces, spot welding them from the inside using a soldering iron. (further work is carried out exclusively on the inside of the product).
- Starting from the edges, we lean the soldering iron against the seam and, melting it almost right through, we form a deep hollow.
- Now the parts are holding, but not yet strong enough. The next step is the direction of the new layer; for this we melt the solder with a soldering iron near the hollow. While the plastic is still liquid, level it with a sting to get an even layer.
Advice. With proper skill, you can simultaneously make a hollow and fill it with solder.
This way the process will take much longer and require greater concentration, but the layers of plastic will stick better, which means the connection will be stronger. If you did everything correctly, then in the end you will get a strong seam, which looks rough on the inside, but with the outside turns out to be almost perfectly smooth. This can be achieved through deep melting of the mass when forming a recess.
Note! Some advise using reinforced metal mesh for strengthening. This option only makes sense if you are working with fragile, low-quality material that is not capable of bending.
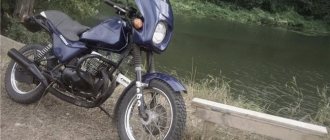
Repair of motorcycles of different models
Any motorcyclist, whether a beginner or one with sufficient experience, knows that motorcycles, despite their reliability, require periodic inspection and repair.
In order to eliminate minor faults in advance, it is best to carry out a technical inspection of your iron friend once every six to seven months. And then you will be insured against serious problems. To do this, many use the services of motorcycle services using diagnostic equipment. It is special equipment that will provide the necessary guarantee of high-quality inspection. But there are bikers who know absolutely everything about their motorcycle, and do all the necessary work themselves.
Heavy motorcycles of domestic production enjoy a good reputation among bikers. They are reliable, passable, and have high engine power. But heavy motorcycles will still have to be repaired, since various types of malfunctions also arise during their operation.
Motorcycle repair is necessary when malfunctions occur in the chassis, when wheel spokes break off, or rear suspension bushings wear out. It is best to replace them with new ones. Faulty brakes on heavy motorcycles may have scuffed brake drums or oily brake pads.
If the engine malfunctions, you need to check the gaskets in the cylinder head, as they most often burn out. Do not reduce the gap that forms between the pusher and the valve, this may lead to engine overheating.
In case of malfunctions in electrical equipment, it is best to contact specialists, since this work requires certain knowledge and skills. For more detailed information on repairing heavy motorcycles, you can refer to specialized literature, which provides detailed instructions for troubleshooting a particular problem.
Repairing motorcycles used in motorcycle racing also requires special knowledge. Repairing motocross motorcycles is not difficult for those who know this matter. However, such bikes rarely break down. Their main parts are made of very strong alloys and very light. The essence of this technique is aimed at the speed and power of the engine. Repairing them simply requires completely different parts. And the tools are the same as for repairing other motorcycles. But motocross motorcycles require frequent maintenance to avoid major breakdowns and the risk of an accident.
And if you have purchased a Japanese motorcycle, you need to know that it will serve you reliably and for a long time only if you take care of it constantly and carefully. A new motorcycle will require a mandatory break-in so that all parts are ground in. Do not drive the first thousand kilometers, change the operating mode of your engine more often. And if you give your engine a chance to rest every thirty to forty minutes, repairs of Japanese motorcycles will become less frequent.
For DIY repair work, be sure to purchase a set of sockets. You will also need a spark plug wrench. But if you don’t have time to do this, or you don’t feel like a mechanic and are not ready for such work, then it is better to choose a specialized service center so that real specialists can carry out all the necessary work efficiently and professionally.
Gluing plastic
Repairing the plastic of a motorcycle can be done by gluing parts together. For this we need:
- epoxy resin and hardener;
- fiberglass;
- gloves;
- Castor oil.
The gluing process: First of all, we remove the defective part, wash it thoroughly with hot water, then we clean the areas around the cracks and the ends of the chips, and finally we degrease the parts being processed. Next, we dilute the resin with the hardener; keep in mind that the material will remain in a plastic state for 2-4 hours, so it is better to prepare it in small parts. If you add a little castor oil to the mixture, it will become more flexible, which is especially important for flexible plastics. Apply the finished resin on the inside of the part with a brush in one layer. Next, we place a layer of fiberglass no more than 5 cm wide and cover it with another layer of glue. In total you should get 3-5 layers of mesh, and the final layer is glue. Remember! All work with epoxy resin should be carried out with gloves and safety glasses. Upon completion of the work, leave the part to dry for a day at room temperature. A sign of hardening of the material is the lack of adhesion and structural strength. You can apply light pressure to the seam to test its strength and make sure the material is curing. If everything is satisfactory, the repair is completed, otherwise we completely remove the layer and apply a new one. There is still an outer part left, but it should be treated with putty to prevent damage and then painted over. Gluing is needed to create a strong base, and final work is best done with materials that are more amenable to processing.
Manufacturing a replacement part
When talking about restoring motorcycle plastic, don’t forget about completely replacing missing or damaged parts. Here we divide the process into making the panel from scratch and making the missing piece. The hardest part is making the part yourself. The factory forms can only be completely replicated using fiberglass. The process is very long, not the cheapest and is only suitable for enthusiasts. Initially, you should make a matrix that repeats the shape of the future part. A layer of fiberglass and resin is gradually applied to the matrix, thereby forming the part. Then the product is sanded, primed and painted. Such a part will last until the next incident, because fiberglass is very fragile, and its repair does not make sense due to the loss of rigidity of the entire structure. Finally, plastic repair can be done using a piece of plastic of suitable composition and size. A shape should be cut from the workpiece that replicates the missing part. The method is suitable for straight sections and with a slight spherical bend. A bend can be obtained by heating the part, shaping it and fixing it until it cools.