Carburetor improvement
English and French tuning firms believe that even a 12mm carburetor is not a limiting element for a 50cc
, much less the typical 14mm Teikei, Mikuni or Dell'Orto carburetor installed on almost all modern
50cc
. However, after installing a cylinder with a volume of 70cc (and especially 80-85cc), increasing the size of the carburetor diffuser begins to significantly add power to the engine. Most 70cc and 85cc road cylinders will be fine with a 17mm or 18mm Dell'Orto carburetor, but a 70-85cc race cylinder may need a 22mm carburetor.
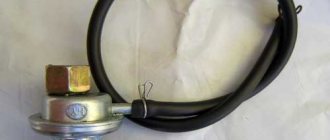
Typically, replacing a carburetor is accompanied by replacing the installation elements surrounding it - all sorts of holders, pipes, etc., and is also often accompanied by the installation of a new air filter with increased capacity. Actually, the sets of tuning carburetors Malossi and Polini consist of a carburetor with a set of similar installation parts.
Transmission: an unattainable compromise
I will not present now the details of the design of the variator and clutch, limiting myself to stating the main principle of operation of the automatic transmission of a scooter: the variator strives to keep the engine speed constant - at the optimal level for maximum engine power, changing the gear ratio in proportion to the load. Streamlining, in turn, allows the engine to reach rated speed before moving off, and disengages the engine from the wheel when the gas is abruptly released - to ensure coasting (at a moderate speed).
Disassembled diagram of a scooter transmission.
Since engine tuning changes its characteristics in terms of optimal speed, this requires reconfiguring the variator and clutch.
Even worse - a CVT designed to transmit the power of a standard 50cc
, when working with the increased torque of powerful tuning engines (70cc and especially 85cc), it begins to work with belt slipping, which reduces speed and leads to very rapid wear of the belt and variator discs. The variator is especially prone to slipping when starting from a stop and at low speed - in these modes, the belt runs along a small radius of the drive disk (that is, its contact patch with the disks is minimal) and at the same time is the weakest tensioned (due to the maximum convergence of the drive disks). The only way to counter this is to increase the tension of the variator return spring (or, which is better, install a special, harder tuning variator).
The clutch also needs to be reconfigured - especially if you used tuning that sharpens the characteristics of the engine, because for a dynamic start from a standstill, it is necessary that by the time the clutch pads engage, the engine has managed to gain speed close to optimal power. In addition, the clutch is also not always able to withstand the increased torque of the engine without slipping - therefore, on cars with engines of 70cc and above, you should think about replacing it with a tuning three-pad Polini or Malossi.
Professional tuning is a delicate thing, it does not come down to the stupid installation of tuning kits, this is only the first phase of work, and the second, which accounts for 80-90% of the labor intensity, is the adjustment of this entire economy to optimal parameters and just normal joint work, the more radical tuning - the more difficult the second part of the work, the more highly qualified it requires.
We increase the cubic capacity. 110 cubic meters per Delta
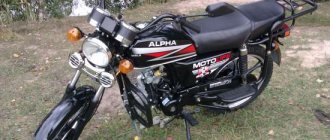
Probably every motorcyclist started using two-wheeled vehicles with a simple and light motorcycle, maybe even a moped. Under the USSR, these were mopeds from Karpaty, Riga, Verkhovyna, with a simple two-stroke engine with a volume of up to 50 cm3. However, after driving this type of technology for some time, I always wanted more speed, power, and dynamics. And so it began: boosting the engine, experimenting with sprockets, upgrading the carburetor, etc. In the end, it all came down to installing an engine from Minsk, if we say Verkhovyna, Carpathians. Or even buying a motorcycle. Modern owners of Chinese mopeds such as Delta and Alpha also want to increase the engine power of their moped.
The engines of these mopeds are four-stroke, with a volume of 50 cm3 they produce less power than two-stroke ones. Therefore, the speed of such mopeds is not often more than 60 km/h, and therefore many owners of such mopeds want to increase engine capacity. Fortunately, here, as they say, there is room for imagination. There are five displacement options for this engine: 50, 72, 90, 100 and 110 cm3. It is clear that 50 cm3 is not considered as an option, leaving only 72, 90, 100 and 110 cm3. In terms of costs, it is most advisable to install 72 or already 110 cm3. Why?
Because 72 cm3 can be installed without completely disassembling the engine, replacing only the cylinder-piston group with the same one, only with a larger diameter, namely 47 mm. The head and timing belt do not need to be changed. But if you’ve already taken it apart, then it makes sense to grind the valves and change the valve seals. As practice shows, most often they switch from 72 cm3 to 110 cm3. Such a transition significantly increases power and even resource when configured correctly, but more on that later. So, we make 110 cm3. Let us immediately note that such a modification requires complete disassembly of the engine, so many people decide to drive or “finish off” the engine so as not to simply throw away old spare parts. And when the engine needs repairs, start upgrading. To begin with, here is a list of necessary spare parts:
Crankshaft Active (long stroke)
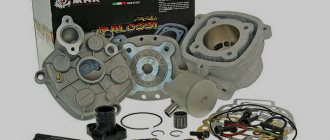
Cylinder assembly 110 cm3 (for Delta or Active)
110cc engine gasket set
Timing chain Active (it is advisable to change the rollers as well)
Active cylinder studs (they are 20 mm longer, you need at least 2, in the direction of travel - right)
A set of engine seals (any one will do, both Active and Delta) After starting the engine, it may be necessary to replace the main jet from the Active, or better yet, the entire carburetor from the Active or Delta/Alpha 110 cm3.
Oil 4t 1l
Now the tool:
Set of ratchet sockets
Rotor puller. If it hasn't been removed yet, don't even try to remove it with screwdrivers.
Special wrench for the clutch nut, you can use a blunt chisel
Oil drain container
Sealant
Rags
Gasoline, kerosene or diesel fuel with brushes to wash engine parts
So, having collected everything you need, we begin the process. Place the moped on the center stand. First you need to place the container and unscrew the oil drain bolt, it is better if the engine is warm. While it is draining, disconnect the clutch cable, unhook the brake foot springs and brake pads. We unscrew the two nuts securing the muffler and lower it down; there is no need to completely remove it. That's all on the right side for now. Let's move to the left. We unscrew the two bolts securing the carburetor pipe to the head, remove the hose from the gas tap and move the carburetor to the side along with the pipe and cable. Next, remove the left covers, the large one with the generator, and the small one. We lower the chain down. first unscrewing the two bolts of the locking ring on the drive sprocket and removing the sprocket. Now you can remove the container with oil and tighten the drain bolt. Unscrew the four bolts securing the footpegs and side stand from the engine from below and remove them.
Now nothing prevents you from removing the engine from the frame. We unscrew the two nuts on the mounting bolts and remove first the lower bolt, then the upper, holding the engine so that it does not fall. We remove the engine and place it on the floor or low table. Unscrew the bolts on the right cover and remove it. We make sure not to lose the bushing with the spring; it is located in the release bearing bushing. Let's disassemble the clutch. You need to unscrew the four bolts on the square cover. They are well clamped from the factory, so it is easy to tear off the edges; they are there for a Phillips screwdriver. If you feel that the force is too great, take a small chisel or screwdriver and tap on the end of the bolts, as if unscrewing them. Then it’s better to screw in new ones. Unscrewed it. The center clutch nut is now visible. It's like a puck, it has four slots. If you don't have such a key, use a dull chisel and hammer.
Change edges to avoid damaging them. Unscrew and remove the entire clutch, along with the drive gear. Put everything together so that you don’t mix it up later. For example, the thrust washer under the clutch is placed with the wide part facing out. Next, remove the retaining ring and the large driven gear from the shaft. Now remove the rotor from the crankshaft using a puller. To fix the crankshaft, look for top dead center (TDC) at the end of the compression stroke so that the valves are closed and insert a small wrench or a good screwdriver into the spark plug hole.
We screw the puller onto the rotor hub and tap it with a hammer and press the bolt until the rotor is removed. We remove the retaining ring of the starter sprocket and remove the entire mechanism: the starter sprocket, the starter chain and the bendix (overrunning clutch). Unscrew the two bolts and remove the disc with the oil seal. We unscrew the four nuts securing the head and one bolt that presses the head to the cylinder. On the right head cover, unscrew and remove the long bolt and remove the round mirror cover on the left. Behind it is the camshaft star. On the camshaft sprocket, unscrew the three bolts with a 9mm head and remove the chain together with the sprocket from the camshaft. We remove the head. If you do not plan to repair it, then put it aside.
Now the cylinder. On the left side of the cylinder we unscrew the 10 bolt with a wrench. The timing chain tensioner roller rotates on it. We take him out too. We also unscrew the last bolt on the left that secures the cylinder to the crankcase. We unscrew the cylinder studs, only the two left ones are possible. We will then tighten the studs from the Active there. Now you can unscrew the bolts securing the crankcase halves. We carefully make sure that all the bolts are unscrewed; they may not be visible under the dirt. Otherwise, if you apply force, you can break the crankcase. The halves can be disassembled without effort, the crankshaft sits in the sockets almost freely, there is no need to heat the crankcase, knock out the crankshaft, etc. We simply remove one crankshaft and install another. But before installation and assembly it would be good to wash everything in gasoline or something else.
Assembly is carried out in reverse order. But it is important to consider a few points. Be sure to replace the guide bushings in the crankcase halves, cylinder, head, clutch and generator covers if they have fallen out. It is not advisable to replace the gasket between the crankcases with sealant, but on the clutch cover you can coat the gasket with sealant on both sides. By the way, it would be useful to check the condition of the clutch discs. After installing an enlarged piston, the load on it increases, and if the discs are worn out, it will slip. It’s better to change the disks right away, they cost pennies. Before installing the head, it is better to immediately put the piston at TDC, so that you don’t have to look for it using the marks later.
When the engine is started and a test drive is made, it will be discovered that the gears are too short if the original sprockets are 14 - 41. Practice shows that the engine behaves quite well even with a higher ratio, for example 14 - 39, 16 - 41, 16 - 39 and even at 16 - 36 decent dynamics and fuel economy were maintained. The idle speed can also be set slightly lower. Some even set it to 800 rpm, and the engine runs stably. After break-in, lightly load the engine and drive at full throttle for several kilometers. Stop and unscrew the spark plug. Determine the composition of the mixture by color. If the spark plug is gray or light brown, then install a jet from an Active or a 110 cc Delta or Alpha engine. And if the candle is brick-colored or dark brown, then the mixture is excellent. That's it, the process is over, now you can enjoy good dynamics and pleasant sound. We wish everyone success.
motoart.kiev.ua
Scooter tuning – crankshaft tuning
| Once you have decided on the cylinder, the next question is whether to change the crankshaft. The answer to this largely depends on the class of cylinder that you have chosen for yourself. When using Midrace and Hi-End class cylinders, replacing the crankshaft is mandatory! Installing cylinders of the indicated classes in combination with a standard crankshaft is a gross violation and an indicator of the unprofessionalism of the people involved in installing parts on the scooter. In all the variety of tuning crankshafts, it is necessary to distinguish two groups. The first one is simply reinforced . They replicate the corresponding standard crankshafts in all respects, but have greater strength (and therefore a longer service life), as well as improved heat removal from the piston pin. Reinforced crankshafts are great for use with Sport class piston when there is a need to replace the standard one. The second group is racing crankshafts (the abbreviation HPC is often used - high primary compression). Such crankshafts significantly affect engine performance, as they provide an increase in the compression ratio in the engine crankcase. This significantly improves the efficiency of cylinder scavenging at high speeds, providing an increase in power. At the “lower” ranges, the efficiency of purging, on the contrary, suffers, but for forced engines this is not significant. Racing crankshafts are indispensable when it comes to tuning based on Racing class piston engines. When replacing the crankshaft, it is recommended to replace the main bearings with oil seals. |
Backlight
An excellent option for adding individuality to your scooter is to install additional lighting. The most common type of implementation of such an event is the installation of LEDs. The main positive point in this process is the minimum energy consumption that is necessary for the operation of the diodes. They can also be mounted on wheels. And on the dashboard, and even on the headlights. The LEDs under the bottom of the scooter look no less original. At night, they can be used to additionally illuminate the road. And it will be easier for other road users to see the scooter rider.
A good option for external tuning is to replace the front headlight with a more advanced and brighter one, which together with the installed LEDs will look very impressive. Many scooter owners immediately after purchasing a vehicle try to replace the factory mirrors with darkened or tinted counterparts.
To summarize, I would like to note that the option of making changes to the appearance of the scooter depends on the financial component and imagination of the owner of the scooter. In any case, this process can be turned around, since tuning a scooter is a field for implementing the most sparkling ideas and plans, which very often become the founders of new trends in styling.
There is no need to be afraid of experiments, especially now, when you can find any structural element or part on store shelves. But you shouldn’t forget about a sense of proportion.
Source
What is the carburetor of a Chinese scooter and its capabilities, disadvantages, tuning
The carburetor circuit of a Chinese scooter is, in principle, standard and suitable for both 2t and 4t engines. The design of the carburetor allows certain actions to be taken to improve its performance, however, if the engine is two-stroke, the efforts will not make sense.
The simplest approach is to replace the carburetor with a more advanced one, for example, with an accelerator motor, if you have a fairly old version without it. Most often, simple tuning is limited to replacing the main fuel jet, this is especially true for engines with low power. Replacing the nozzle helps to increase the fuel channel and, due to this, add a little power to the engine.
Quite often, more serious tuning involves the use of a 150 cc scooter carburetor. Interesting models with a diffuser diameter of 17.5 mm. It is great for 70cc piston. Less often you come across a large diameter of 19-24 mm, it is just ideal for a bored 150 cc piston engine. However, the diameter must be selected correctly, otherwise the motor will begin to choke.
Modification of a Chinese scooter, a little about spare parts
Many scooter owners already after the first season have a desire to start modifying their pet . Tuning in our country has long become almost a national pastime. Owners of Chinese cars are no exception to the general rule. They try to increase their power, reduce weight, and improve other performance indicators of their pets. To do this, they equip their equipment with various additional parts. In addition, tuning can also include replacing standard components and mechanisms with better ones.
Basically, spare parts and components for Chinese scooters and other motorcycles are currently produced in Taiwan. In this country, scooters are treated with special love. Surprisingly, almost every Taiwanese has a scooter. In the production of spare parts and accessories for tuning, the Taiwanese use the best American and European technologies. Therefore, they are distinguished by a high degree of reliability and quality.
Almost all Chinese-made scooters are equipped with a 139QMB engine, an analogue of the Japanese Honda engine. All modifications are quite similar. Therefore, when tuning, there are usually no problems with installing various standard parts.
Scooter tuning – reed valve tuning
As a rule, a reed valve is installed directly at the inlet of the crankcase, also known as a “house” for its traditionally angular shape. However, not all reed valves have the characteristic “house” shape. The following engines use single reed valves as standard:
It is these scooters that, first of all, require a tuning flapper valve, even when tuning the Sport class. In many other cases, you can easily use a standard valve, but with carbon petals. Of course, if we are talking about tuning of the Racing class and above, a tuning valve is required! |
Engine Features
The official manufacturer of the 139QMB scooter engine is Hongling Corporation, which equips motorcycles not only of its own brand, but also of other brands with this engine.
The corporation sells power units to other manufacturers. The motor itself is very recognizable: the design features of the 139QMB engine and its markings on the left side of the crankcase immediately make it clear what kind of heart beats the scooter.
The motor has no flaws, does not require special treatment and calmly tolerates minor negligence and negligence. The manufacturer provides a guarantee for its products that covers the first 5 thousand kilometers. This mileage is enough for the new 139QMB 4t scooter engine to fully run in and grind in all elements and components of the systems.
The total service life of the engine is about 20 thousand kilometers, with the exception of 5 thousand running-in at an average driving speed of 90 km/h. The technical characteristics of the 139QMB engine are not bad: its power is enough for a two-seater full-size scooter.
We adjust valves (4t engines).
As mentioned earlier, the engine must be serviced before boosting. Work that will help improve dynamics includes adjusting the valves. The procedure is suitable for tuning Chinese 4t scooters and other 4-stroke engines. For small-capacity equipment, it is recommended to carry out such adjustments at least once every 3, and preferably once every 2 thousand km. It is also necessary to carry out adjustments after manipulations with the CPG.
Before you begin, you need to make sure that the engine has completely cooled down and that you have a set of keys (8,9) and feelers of 0.05 for the intake valve and 0.07 mm for the exhaust valve at hand. You can get to the adjusting nuts by first removing the valve cover. When access to the valves opens, the piston is installed at top dead center. Next, a feeler gauge is installed in the intake valve gap and, depending on the current position, an adjustment is made.
To increase or decrease the clearance, you need to loosen the lock nut (while holding the adjusting bolt), turn the adjustment bolt and, while holding it, tighten the lock nut back. Thus, we achieve a gap when the probe passes into it with little effort. After adjustment, make a full revolution of the crankshaft and make sure that the adjustment is accurate.
Motor assembly 157QMJ
Installation of gaskets and rings
The most important part of the assembly was making sure the spacers and rings were aligned correctly. Pay attention to the channel in the cylinder - install the gasket without blocking this channel, as it allows oil to lubricate the cylinder head. The gaskets were treated with a special Hylomar sealant, which provides a good seal and prevents engine oil leaks.
compression rings have a designation (T1 - upper, T2 - lower), with which they need to be installed towards the top. The bottom three rings (not marked) form the oil scraper ring, a wavy ring sandwiched between two metal rings. All three rings must be placed so that the gaps between them are at a distance of 120º. This can be achieved by conditionally dividing the piston into three even parts (approximately like the letter Y). The main thing is to ensure that none of the ring spaces coincide with one another, to prevent compression and oil leakage.
Now you need to carefully install the piston along with the rings into the cylinder. I advise you to lubricate the inner surface of the cylinder with a small amount of oil.
Lubricate the paper gasket with sealant 30 minutes before installation, align it with the holes and channels and install the cylinder on the studs. Make sure the piston is installed with the IN designation facing the intake manifold.
After the hole in the piston for the pin and the hole in the connecting rod coincide, we install one cotter pin in the piston, and on the other side we advance the piston pin until it rests against the lock ring. Then install the second cotter pin. You need to carefully check that the retaining rings are securely seated in the grooves on the piston - there is no need to take risks here! I recommend initially lubricating the piston pin with engine oil.
After making sure that everything is installed in accordance with the requirements described above, we push the timing chain through the window in the cylinder. While holding the cylinder, make sure that the piston moves in the cylinder freely and without jamming (to do this, rotate the crankshaft by hand using the generator bell). I advise you to set the piston to top dead center and see if the T mark on the generator bell matches the projection on the engine. If it doesn’t match, draw a new mark with a marker and use it in the future. In this case, the mark does not coincide with TDC.
Installing a new timing chain
The camshaft chain needs to be replaced because the stock one is already shorted. As you remember, a long timing chain was included in the engine tuning kit. In order to replace the chain without completely disassembling the motor, you need to separate the links of the old and new chain, and then connect the two chains. Then carefully rotate the crankshaft until the new chain is on the surface. We disconnect the short chain and connect the links of the tuned chain.
We put the cylinder head on four studs (not forgetting about the metal gasket and 2 guide bushings), pushing the chain into the head window. Now we install the piston at TDC, and the camshaft so that the two small holes are parallel to the wall of the cylinder head, and the large hole is located on top, as in the figure. We put the chain on the timing sprocket and screw in the two bolts securing the cylinder head and cylinder.
It's time to put on the upper part of the camshaft bed and secure it all with four nuts and washers. The nuts on the stud must be tightened in a diagonal order.
Lubricate the tensioner gasket with sealant. Before installing the chain tensioner, you need to turn it fully clockwise (with a small flat-head screwdriver), in this form we install and screw in the two chain tensioner mounting bolts. Then carefully release the screwdriver. Don't forget to tighten the tensioner plug to avoid loss of compression and oil.
157QMJ Valve Adjustment
We install the generator flywheel and camshaft at top dead center, take a set of feeler gauges and adjust the valve clearance by 0.05 - 0.1 mm for each valve. We tighten the locknuts with a 9mm wrench and check the gaps again. If the valve clearances have decreased, we carry out the procedure again.
Spark plug GY 6
Before tuning the scooter, my GY 6 engine had an NGK C7HSA spark plug installed and I decided to replace it with an NGK IRIDIUM IV CR8EIX, which is ideal because it is “colder” and better suited for the gasoline with which I fill my moped (98 BP Premium Unleaded).
Oil catcher
After installing the new exhaust tract gasket, exhaust pipe, plastic engine cover and carburetor, it's time to think about oil catcher placement. Fortunately, there is somewhere to place it - we will not install an air filter now.
We connect one end of the oil trap using a 1/4″ fuel hose to the breather (cylinder head cover), and the other is connected instead of the dipstick, which allows oil vapor to return back to the engine crankcase . The entire oil trap assembly fits behind the front plastic and is accessible by lifting the scooter's seat.
Scooter carburetor and air filter
Sometimes irritating is poor-quality rubber in fuel hoses, which crack and cause leaks. To fit the new carburetor onto the intake manifold, I had to connect it using a 32 mm industrial hose and two clamps.
It’s the same story with the air intake: to install a unifilter, you can buy a 42 mm rubber hose and a clamp.
air filter with a length of 100 mm and a diameter of 38 mm. Before installing it, it is necessary to lubricate the filter with special impregnation or oil. Read more in the article Maintenance of foam air filter. This zero resistance filter is the ideal solution as it provides maximum air flow and minimal contamination (located just above the wheel fender).
A Full Free economizer was installed on the fuel line to minimize gasoline consumption while increasing power.
Cylinder volume
Many manufacturers of tuning kits - Malossi, Polini, DR, Eurocilindro - produce for scooters of the 50cc
piston group kits of increased volume (cylinder, piston with rings and pin, often a new cylinder head). The most popular volumes are 70cc and 85cc (this is about 68 and 84 cc), the most popular design is a steel cylinder with an aluminum head, although more advanced aluminum cylinders with Nicosil coating are sometimes available. Such kits are installed on a standard crankshaft with a connecting rod and provide a huge increase in power at nominal (or slightly above nominal) speed. Nicosil-coated cylinders can withstand higher rpm and provide more power and torque than steel cylinders, but their durability is highly dependent on the quality of their workmanship, and they are much more sensitive to overheating than steel ones.
Also available on the market are racing-type piston tuning kits (for example, Polini Kit Corsa), which provide very high engine power, but are practically unsuitable for use in normal road conditions due to capriciousness and the requirement for very frequent maintenance to maintain performance. In particular, standard piston rings, replaced on conventional cylinders after 10,000 km, on the Polini Kit Corsa 70cc cylinder become unusable after 2000-3000 km.
How to convert a 50cc scooter to a 70cc scooter what is required 4 stroke
Disconnecting the scooter carburetor from the pipes Next, using a 10mm wrench, loosen the bolts that secure the cylinder block cover. Removing the cover, you will see the gas distribution mechanism. Using the same key, you need to disconnect the timing belt mounting bolts and carefully remove the mounting bracket, while holding the timing mechanism and sprocket. Before removing the sprocket and chain from the scooter, it is necessary to use copper wire to mark the engagement point of the chain tooth in order to later put it on the same place, although in some cases it is necessary to change the position of the chain after installing the extended pistons. Next, you need to unscrew the two cylinder mounting bolts and carefully remove the cylinder head first, shaking the mechanism from side to side, and then the cylinder itself.
A correctly selected and installed system will not only increase power by 10-15%, but also increase the maximum crankshaft speed and shift the power peak towards higher speeds. 9 Install the sports version of the ECU. At the same time, pay attention to its settings. Racing ECUs are typically tuned to deliver maximum performance at high rpm. 10
Important
Expensive ECU models have the ability to change the programs recorded in it. This requires a computer, an interface cable, software and the proper skills.
Top rating of the best and inexpensive scooters up to 50cc in 2018
But the most effective way to really increase the power of a small-capacity scooter is to install a new cylinder-piston group of increased volume. It is important to remember that if you are tuning a scooter with the installation of an improved piston group, it is strongly recommended to check the degree of wear of the crankshaft and bearings, since if they are in poor condition, tuning will completely “kill” them after 1000-2000 kilometers with new parameters.
This is where many people who want to tune their scooter stop, especially when it comes to an engine like 139qmb. Further actions can be attributed to racing tuning, and in terms of costs and volume of work they are comparable to purchasing a new, more powerful and voluminous scooter with 150 or 225 cc with sports characteristics.
Cylinder-piston group of increased volume Another option for technical tuning is the installation of a carburetor enrichment.
Scooter tuning - accelerating the moped to full power
Am I afraid that something will happen to the crankshaft and bearings or will everything be fine? If you don't often drive at top speed. Pavel Change, don’t be afraid. Everything is like 72 and 80CC. Not suitable for 110 and 150 CC. Alexander Sorry. You can't make a bullet out of shit. If your hands itch, change them. Timon the racers suck... Before you, 100 Chinese developed the motorcycle for 3 months, can you really improve it in one go? power will increase, consumption, rpm and speed will drop. What kind of tractor do you want to get? Learn the materiel - large pistons move slower, but press harder, there is a possibility of imbalance of the counterweight of the crankshaft with the piston Vladimir if you have to change it thoroughly, consider the main bearings will quickly loosen, and even knee shaft too, nothing terrible will happen of course, but you’ll have to change the bearings more often, I don’t know how to do it on a scooter, well, a friend of mine increased the cubic capacity in Minsk, he says that he shouldn’t have started it.
Is it worth changing 50 to 72 cubes on a scooter?
If you do not have the knowledge and experience to select a suitable control program, do not attempt this in an experimental manner. Find an ECU with multiple operating modes. 11 ECUs with several control programs preinstalled at the factory have buttons on the unit body that switch programs on the fly.
The result of increasing power will be lower than on programmable models with careful computer selection of the program, but for city driving such a system is quite convenient. Helpful advice Tuning kits are the result of the work of many engineers and calculations using computer programs.
Don't try to "improve" them yourself.
Tuning of Chinese scooters 2t, 4t, 50cc, 150cc
Next, the valve clearances are checked using a 0.5–0.7 millimeter feeler gauge. The topmost intake valve is checked first; if adjusted correctly, the feeler gauge will fit into the hole between the valve and the adjusting bolt with little difficulty.
Feeler gauge for checking valve clearances on a scooter To change the clearance, you need to slightly loosen the position of the lock nut, after which you need to rotate the adjusting bolt counterclockwise and, without removing the force, tighten the fastening nut again. After this, the gap will change, and you can determine the degree of change using the same 0.5 millimeter feeler gauge.
The same steps must be repeated with the bottom valve and install the generator protection and the plastic main housing casing in the reverse order.
In the first case, the limiter is a plate that is screwed to the variator from the side of the weights. Due to the installation of this plate, the radiator belt cannot reach its maximum radius while driving.
To remove the plug, you need to partially disassemble the variator, remove the belt and gear, carefully remove the restrictor ring and assemble all the parts in the reverse order. IT IS IMPORTANT TO KNOW! Every motorist should have such a universal device for diagnosing his car. Nowadays you can’t live without a car scanner! You can read, reset, analyze all sensors and configure the car’s on-board computer yourself using a special scanner... Read more.. » Speed limiter in a scooter’s variator On some models, a ring may be missing, then it is advisable to disassemble the internal “cheek” of the variator and look for the plate there .
yurist123.ru
Dismantling the engine 157qmj 150 cc
As you remember, I set myself the goal of disassembling the 157qmj piston engine without removing the power unit itself from the scooter.
So, we remove the carpet, the seat, the trunk (toilet), the plastic near the seat, and then the exhaust pipe, leaving the muffler in place.
Now remove the air filter assembly and carburetor. By the way, we will also replace the filter, since its throughput will be insufficient for a 170cc cubic capacity. Instead we will install a red 38mm UniFilter.
Removing the 157 QMJ carburetor is easy, just release the fuel hoses from the clamps, disconnect the throttle cable and the starter enrichment wires. We are also replacing the stock carburetor with a 24mm intake pipe.
The QMJ 157 engine is covered with plastic casings - this allows additional circulation of the cooling air flow and protects the engine from dirt. By unscrewing a few screws we can easily remove the plastic. I advise you to throw old rags on the floor, which would absorb drops of oil from the engine and also prevent dust from rising. The workplace must be clean!
We remove the cover with the rubber gasket of the 157 qmj gy6 cylinder head by unscrewing four 8 mm bolts. The breather hose that was originally connected to the air filter will now be connected to the new oil trap (more on that later).
We unscrew the four nuts (12 mm) securing the camshaft bed, cylinder head and cylinder. Carefully remove the upper part of the camshaft bed, holding it.
Before removing the camshaft, unscrew the chain tensioner adjustment cap and loosen the tensioner itself (with a small flat-head screwdriver clockwise) and remove the timing chain from the camshaft sprocket.
Unscrew the two bolts and remove the tensioner.
In order to remove the cylinder head 157QMJ you need to unscrew two more 8 mm bolts
Carefully remove the cylinder head
Remove the cylinder from the studs. The metal gasket cannot be reused.
Using thin pliers, remove the piston pin retaining ring and separate the piston and connecting rod.
Due to the greater height of the 4-valve cylinder head, it is necessary to replace the 4 studs on which the CPG and cylinder head are twisted.
How to correctly install the studs of a 157qmj cylinder? The original studs are unscrewed using two nuts screwed onto the stud. You need to unscrew the bottom nut counterclockwise. When screwing in new studs, lubricate the threads with blue thread sealant. The two bolts on the right side of the engine that secure the cylinder do not need to be replaced.
What spare parts to buy for tuning 157QMJ
4 x valve cylinder head with sports camshaft, consisting of a new head, head cover, rubber seal, four long pins, metal spacer and large cam chain.
Sports carburetor 157QMJ CVK Racing 30mm complete with 30mm intake manifold and gasket.
Cylinder and piston , diameter 61 mm, complete with piston pin, two retaining rings, 2 compression rings and an oil scraper ring with retainers, as well as a paper gasket.
According to my calculations, the scooter’s engine volume before tuning (with a piston of 57.4 mm and a stroke length of 57.8 mm) is 149.63 cm3, and after replacing the piston with a 61 mm one with the same stroke - 169 cm3.
Scooter tuning – carburetor tuning
You can get more complete output from a larger-volume piston by appropriately improving the operation of the power system. First of all, we are talking about the carburetor. Scooters come standard with carburetors from a variety of manufacturers, but they all have a common feature by which they can be classified - the size of the diffuser.
On standard 50cc engines there are carburetors with diffusers from 12 to 17.5mm. Tuning carburetors are also diverse: there are cases of installing even 28mm carburetors on 70cc tuning engines, but all this is already in the realm of experimentation. Carburetors with a diffuser diameter of more than 17.5 mm (19, 21, 24, etc.) are impractical to operate and require regular attention and reconfiguration
Of course, all this is not important if you are going to make a street rocket out of a scooter, sacrificing convenience and reliability.
A standard and proven recommendation for 70cc cylinders is to install a 17.5 carburetor, if one is not included in the standard equipment (for example, on the latest Piaggio HiPer2 engines).
Electrical system tuning.
This may include changing the lighting of the scooter. For example, installing xenon, replacing standard filament light bulbs with LEDs, installing music, hand warmers for steering wheel grips, and additional lighting fixtures.
In part, this also applies to styling. And all these changes can put a lot of stress on a standard generator and it simply may not cope with its task; there may not be enough power for all the devices. Some manufacturers offer tuning generators with higher power. They cost much more than standard ones, but such a generator will be enough to power any modified electrical system and charge the battery.
However, theory is theory, but you need to pay attention to the practical side of this issue.
Let's consider tuning the technical part of a scooter from the Italian company Malossi, which owns its own scooter racing team and specializes in the manufacture of tuning kits.
As an example, we chose a Yamaha Aerox with an engine capacity of 50 cubic centimeters with maximum engine boost.
Technical characteristics of the scooter as standard:
To achieve maximum performance, you need to change the stock configuration of the scooter.
We remove the engine.
Specialists, experts or garage technicians begin tuning a scooter with their own hands by dismantling the factory limiters. They are necessary to, firstly, keep the equipment within the established speed limits (Japanese models), and also to increase the service life of the motor. The problem is that you can find this element only after studying your engine model on various forums. The reason for this is the different locations of these same limiters, it could be a blind fork in the exhaust, an electronic limiter installed on the variator or even in the carburetor.
- Plug in the variator. In this case, the part is a special plate mounted on the side of the weights. It prevents the belt from reaching its maximum radius, which means it is impossible to achieve the maximum possible speed. If you have such a part, then by removing it you can significantly increase the maximum speed.
- Limiter in the variator. Sometimes the limiter is the lip on the bushing itself; here you cannot do without the work of a turner. By loosening the limiting edge of the variator, you can increase the speed. Also for many models a ready-made, bored part is sold.
- Carburetor. In this assembly, the plug looks like a valve. With a significant increase in pressure, it opens, thereby preventing the full entry of the air-fuel mixture into the combustion chamber. This can all be treated as in previous options - by dismantling the element or replacing the entire part.
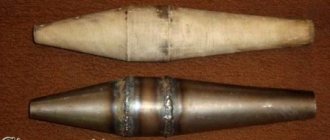
- Exhaust. An interesting restriction system is located in the exhaust. It represents a branch where one of the channels is a dead end. Thus, turbulence and internal pressure in the exhaust increase, which prevents high-quality purging of the combustion chamber. The problem can be solved by brewing dead-end branches.
- Electronic system. Finally, the switch limiter can be considered the most advanced by modern standards. Some Chinese and Italian models can be deceived by cutting the limiter wire, for this you will have to study a lot of literature on electrical engineering. Other models get rid of the problem by simply replacing the unit.
A powerful frame is one of the scooter styling options
In order to change the styling of the scooter, you can try to make a powerful frame. To do this, you will need to dismantle the wiring and trim, and weld metal spacers between the glove compartment and the steering column. They can be made from ordinary water pipes. In addition, you can remove the unnecessary plastic parts, in your opinion, and replace them with more suitable ones in style, which can give the scooter a breathtaking look. Some craftsmen manage to make a solid structure from the tail part of a scooter. This tuning allows the scooter to look like a real sports motorcycle.
AC switch
It differs from DC switches in the ability to do without a stable 12V current. It is designed a little differently, because, despite having a more conventional design, it has a more complex connection to the electrical circuit. Unlike DC switches, AC switches are mostly without a speed limiter due to their small size and fairly simple design; they can boast the ability to function perfectly in the absence of a number of nodes, without which a DC switch
will not be able to work in principle. Even if you remove the battery, relay-regulator, ignition switch, keep only the high-voltage generator coil and the Hall sensor, and the scooter will still start and drive. There are quite cleverly organized switches of the provided type that can compete with the DC type, but this is rare. Despite the lack of need for direct current, speakers are very dependent on alternating current and the relationship between the engine block and the frame, and if you burnt or damaged one coil in the generator, which produces high voltage, then the scooter will not start under any circumstances.
Setting the valve timing ch2 (in collective farm style - ignition)
Without knocking the piston off from TDC, we orient the camshaft so that the large hole and marks on its sprocket become as shown in the photo and, while putting on the chain, install the camshaft in bed.
Ideally, the marks on the sprocket should be strictly parallel to the plane of the valve cover connector. In practice, unfortunately, such accuracy is difficult to achieve. And this is mainly due to the stretching of the timing chain. And there’s nothing you can do about it - either change the timing chain to a new one or catch the phase by switching the teeth, but this method of setting the valve timing is not acceptable to me personally.
Cylinder-piston group.
Finally, the most effective improvement for any engine is replacing the CPG. But not just a replacement, but the installation of a new, larger piston. Fortunately, there are now many ready-made kits on the market; you don’t have to sharpen or adjust anything, as with Soviet equipment. Moreover, there is even a lot to choose from. For example, for various models with a volume of 50 cubic meters, they offer kits to increase to 63, 72, 82 and even 90+ cubic cm. In some cases, this is an almost double increase in power.
The situation is similar with larger engines, for example, for 125 cubic meters, sets of 150 or 170 cubic meters are sold. Some, in the process of tuning a scooter, manage to increase 150 cubic meters with their own hands to 225 cubic meters. Choosing the right part is not the most difficult thing, the most difficult thing is installing it. After all, this process involves almost complete disassembly of the engine. You will be faced with the need to have several special removable keys in your arsenal; you can ask them from friends or borrow them for the evening at auto repair shops. We strongly recommend studying the technical component in order to properly disassemble, replace the necessary elements and assemble the motor.
Alas, for some, increased power does not promise anything other than breakdowns or inadequate performance. This is because by significantly increasing power, you inevitably entail work on all other nodes. Let's imagine that we installed a new 92 cc CPG on an old 50 cc engine. The first thing to check is the condition of the connecting rod, crankshaft and bearings. Otherwise, they will fly first, followed by our new system of both cylinder and piston.
Great, we added new bearings to the CPG, an elbow with a connecting rod, now we can be sure of reliability. But the engine does not go faster, and we decide to purchase a new carburetor. Now the mixture is too rich, and we understand that the exhaust needs to be changed. After such modifications, the engine sounds loud, accelerates perfectly, but the maximum speed is slightly higher than before and the variator sounds strange. After installing a high-speed CVT, for example from the Italian manufacturer Polini, the engine will be able to fully realize its new power. The last stage is an inspection of the brake system; you don’t want to find out at a speed of 60 km/h that the brakes are now comparable to bicycle ones.
As a result, after replacing almost all the components, we got a very fast “flea” that can surprise your friends and experts in this technology. Over time, you can make changes to the chassis system, replace shock absorbers, and install more attractive wheels. Often, the modernization process does not stop there, and after tuning a scooter 50, 150 with your own hands, impressive improvements in appearance are made. The moped is repainted, panels are changed, new devices, lighting, and so on appear.
How to get the most out of a scooter with tuning?
Scooter tuning is a fairly extensive process, but consists mainly of styling (improving appearance), chassis tuning (modifying driving characteristics) and engine tuning. The last point consists of many different operations that are aimed at increasing engine power, its better implementation and increasing acceleration and maximum speed. Below we will consider modifications to the engine and transmission.
It’s worth noting right away that the scheme is general and suitable for Italian, Japanese and Chinese models. Those who doubt the quality of Chinese scooters should be reminded that the level of production of modern models from the Middle Kingdom has increased significantly over the past 10 years, and most of the spare parts on the market for all models are from Chinese manufacturers.
There are many ways to speed up your scooter and, first of all, they depend on the current technical condition of the unit. Let's take, for example, an old scooter with an incorrectly configured variator, a clogged air filter, a dirty carburetor and a number of other problems that arise when the equipment is not properly maintained. Such an engine has great potential, but it can only be realized after proper tuning. After thorough cleaning and adjustment of all systems, even standard engine performance will seem like a significant improvement.
It follows that any work aimed at improving driving performance must begin with a complete revision of the engine.
Removing factory limiters is a very popular type of tuning and quite simple. Most of the Japanese equipment and similar Chinese equipment comes from the factory with special limiters that do not allow the engine to operate at full power. Fortunately, you can get rid of restrictions in any garage, and any tuning of a scooter with your own hands begins with the elimination of such restrictions.
When childhood illnesses are over, it is worth paying attention to real tuning, namely, improving or modifying existing components and assemblies. We are talking, of course, about the cylinder-piston group, carburetor, muffler, variator, air filter and ignition system. At this stage, the degree of involvement in improving a particular element depends on the budget. If funds are limited, then we will make the most of the existing set by modifying the described units.
If you have a certain budget for tuning, you can go the route of replacing parts with special tuning ones. Special parts designed for such modifications automatically improve the basic characteristics of the engine, plus they are designed for higher loads. We have figured out the general scheme of improvements, and below we will look at how tuning occurs, using examples of specific components.
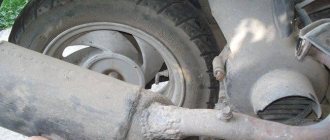
Rear gearbox
50cc scooters
with an automatic transmission is that even with a significant increase in the power of their engine (especially due to an increase in its volume), their maximum speed increases slightly, since the device is overly strangled by the rear gearbox (its gear ratio is too high for the increased engine power).
Therefore, the next step after increasing the cylinder volume should be the purchase of a tuning kit for the rear gearbox (the so-called Gear Kit). Typical Gear Kits reduce the rear gear ratio by 50-70%, increasing the maximum speed of your scooter by about the same amount (at the cost of slightly reducing throttle response) - of course, if you have enough engine power. With an 85cc road-class cylinder and Gear-Kit, a regular Yamaha Jog reaches speeds of 110-120 km/h, with a racing cylinder even higher.
Running in the engine
Incorrectly carried out running-in of the 139QMB engine in most cases leads to failure of the piston system. Friction occurs between the parts of the new CPG, which leads to an increase in engine temperature.
Running in the scooter motor is carried out as follows:
- The scooter is placed on the center stand.
- Within 5 minutes the engine starts at idle speed, the field of which cools down during the same time.
- Over the next 10 minutes, the engine also runs, after which it cools down for 15 minutes.
- The engine is restarted for 15 minutes, then turned off and left to cool for 15 minutes.
- The scooter is started again for 30 minutes, after which it is turned off and left for 20 minutes.
After carrying out such manipulations, you can run in the scooter itself. In the first 100 kilometers of the journey, you should not turn the throttle handle more than 1/3 of its full stroke. The maximum speed should not exceed 30 km/h. The speed can be increased by 15–20 km/h for the next 300 kilometers - during this time the engine should more or less reveal its potential.
After this break-in process, the oil must be changed.
Engine valves are adjusted every 500 kilometers.
Simple tips for tuning a scooter
For beginners, I would recommend buying a set of LeoVinci tuning muffler (SP3 is cheaper and less noisy, RS and ZX are more expensive and much louder), its kit includes weights for rebuilding the variator and springs for rebuilding the clutch - install all this, rebuild the standard carburetor and with that limit yourself. Of course, take the set exactly for your scooter model - otherwise the setup will not be optimal. In the future, you can buy a racing commutator (preferably a model with an adjustable rev limit). If you did this tuning on cheap models of scooters (such as Yamaha Jog, Honda Dio, Suzuki Sepia), then you should continue tuning the suspension and frame, since they have characteristics unsuitable for increased speeds.
For qualified highway enthusiasts, you should purchase a LeoVinci muffler (TOURING if you don't want to scare everyone around with the roar, and RS or ZX if you do), a standard 70cc cylinder (from Polini or Malossi) and a Gear Kit. The maximum speed will be high, the throttle response will be acceptable, the service life of the engine and rings will not decrease significantly. In the future you can buy a 17-18mm carburetor. Tuning suspensions and frames becomes essential, unless, of course, you are the owner of a Yamaha Aerox or BW's Bump.
For road maniacs, you should purchase a LeoVinci ZX muffler, a standard 70-85cc cylinder (from Polini or Malossi), a 22mm carburetor, a tuning CVT and a Gear Kit from Polini. If you do not replace the crankshaft with a tuning one, the standard one will crumble very quickly. Tuning the frame and suspension is required.
For athletes, you should purchase a LeoVinci ZX muffler, a 70-85cc sports cylinder (KitCorsa Polini or MHR Malossi), a 22mm carburetor, a tuning variator, a clutch and Gear Kit from Polini, a tuning crankshaft from Polini or Malossi, as well as a special racing switch. Deep tuning of the frame and suspension is required.
Of course, these are just the basic ideas. All this requires precise adjustment to each other in order to obtain truly high performance and an acceptable service life of the entire unit and individual parts.
Operation of power units of thermal power plants
****
Operating scooters is not at all similar to selling accounts from social networks - my friend opened a Freehost Store, if you know what it is, it will be useful to you.
Ducati again dispels rumors about scooters Speedometer machine
Scooter design
The main load-bearing structural element of the vehicle in question is the frame. This scooter part can be of several types: duplex (used in the production of maxi-scooters), stamped all-welded (currently extremely rare copies are equipped with such a frame), as well as open-type tubular, in most cases, made from light metal alloys.
The front part of the frame includes a suspension consisting of a linkage or telescopic fork, hydraulic shock absorbers, brakes, a steering column and a dashboard on which the controls are located. The middle part of the frame, located between the front shield and the seat, is equipped with a shelf for the feet of the person driving the scooter. A battery is often installed in this structural element, and in some models a fuel tank is also installed.
The rear of the frame houses the CVT engine module and suspension, and above the engine location is the luggage compartment, seat and fuel tank. In almost every modern scooter, the engine-variator-wheel unit is attached to the frame through an axle with silent blocks with one or more shock absorbers. Their number depends on the design features of the scooter.
The exception is maxi-scooters with large engine volumes. For example, in the T-Max model from the Yamaha concern, the engine is rigidly mounted on the frame, and the variator is a moving part of the rear suspension.
Read a review of chip tuning software here. See how much chip tuning costs at a car dealership here.
Medium and high speed tuning
The quality screw prepares the mixture ratio at idle. Failures in operation at high modes are eliminated in other ways.
After opening the throttle valve, the fuel nozzle comes into operation. Its task is to supply gasoline to the diffuser while the scooter accelerates.
An incorrectly selected nozzle leads to deviations in the composition of the fuel mixture. During power build-up, the scooter may “suffocate”, until the engine stops completely.
The correct algorithm for tuning the carburetor at high speeds:
- cleaning internal channels from debris;
- checking the fuel level in the float chamber;
- adjusting the shut-off valve (needle) stroke;
- checking the jet's nominal value.
A sign of proper operation of 2t and 4t engines is a sharp increase in speed when the gas is opened. Any deviations from the stability of engine acceleration indicate a violation of the settings.
Signs of deviation in mixture preparation
An important indicator of the quality of fuel combustion in the cylinders is the color of the spark plug. An experienced mechanic only needs to look at its condition to understand what adjustments need to be made.
There are two characteristic colors:
- A white (grey) spark plug means the mixture is lean, the moped overheats and does not produce optimal power.
- Black with soot – excess fuel, excessive consumption.
The behavior of a scooter with an incorrect fuel mixture is specific:
- abnormal reaction to the throttle;
- pops in the muffler;
- smoke content of exhaust gases;
- noticeable decrease in power characteristics;
- sudden engine stop.
A normal moped spark plug is brownish in color. There should be no carbon deposits on it, its electrodes should be clean, without traces of melting.
Piston installation
Insert a retaining ring into any boss of the piston pin. It is most convenient to insert the ring with small round nose pliers. After installation, check how well and tightly the retaining ring fits.
- If the retaining ring does not cover the entire surface, but only a small part of it, replace it with a new one.
- If the retaining ring does not lie tightly in the groove and dangles, straighten it a little
Lubricate the bearings of the lower and upper connecting rod heads and the piston pin bosses with clean engine oil. We put the piston on the connecting rod, orienting it with the “IN” mark to the inlet port; if there is an “arrow” on the piston instead of the “IN” mark, orient the arrow to the exhaust port. We insert the piston pin into the boss - orient the piston on the connecting rod so that the pin hits the connecting rod - install the pin all the way into the locking ring and secure it from falling out with the second locking ring.
We install the cylinder guide bushings on the studs and put on the gasket. It is advisable to place the gasket on the sealant, but without fanaticism.
Cleaning the cylinder, boring windows.
Improvement suitable for scooters with two-stroke engines. Their peculiarity is that very often the casting inside the drain and exhaust channels is defective, that is, it has roughness. These shortcomings lead to the fact that the piston is not blown through properly and, accordingly, loses power. Having removed the cylinder and armed with a rolling cutter, you can polish the channels, and then round off the sharp edges on the inside. When tuning scooters, in the photo you can see the differences between the motor before and after polishing. This action will help make the engine work easier at high speeds and potentially add a couple of kilometers to the top speed.
You can go further and increase the diameter of the inlet/outlet windows. For each 2T engine, this parameter is calculated individually. For example, it is enough to bore some 50 cc engines by 1 mm to obtain optimal intake/exhaust parameters. Do-it-yourself tuning of a 150cc scooter and other engine sizes is done in the same way.
Cleaning the cylinder from carbon deposits and filing down the cylinder window
Most production scooters offer enormous scope for tuning. And motor tuning is practically a national pastime: it’s rare that a scooter owner doesn’t want to show everyone who’s king on the road. And doing this is not at all as difficult as it seems - just work a little with a roller cutter.
After their first season of riding a scooter, many people have a desire to start upgrading the hardware. Some, having disassembled the engine and seeing that everything is in excellent condition, stop there. But if you look closely (especially in the case of a Chinese scooter), it is quite possible to detect casting defects in the exhaust channel and carbon deposits stuck to the rough surfaces (as happened in our case, see photo). In this case, it is simply necessary to polish and clean the cylinder (carbon deposits create resistance to the flow of exhaust gases, and therefore reduce power).
First you need to wash the cylinder of external dirt from the cylinder and free the exhaust window from carbon deposits . Please note: the round mark left by the gasket on the cylinder at its junction with the muffler shows the limit of the window expansion from the outside - otherwise (if you overdo it with the cutter) when you first start the engine you will hear the exhaust gases “siphoning” through the gap between the cylinder and the exhaust pipe.
Now we could proceed to the main thing - expanding the window. We grind off the cavities (see photo below) on the channel walls with a rolling cutter and cut off large casting defects - the window has expanded by 2 mm and added 1 mm “in height”. The outer part can be processed without much effort - it has little effect on the technical characteristics of the motor. But all irregularities inside the exhaust tract must be carefully “cut down”. The next step is to round the edges of the window with a file. You should be as careful as possible with them, otherwise the sharp edges will subsequently “chop” the piston rings.
Scooter tuning – intake pipe tuning
The gasoline-air mixture prepared by the carburetor then flows into the crankcase through the inlet pipe. This part is sometimes mistakenly called a manifold, which is incorrect, since this pipe does not collect anything, but only directs the mixture into the crankcase
It is important that the flow area of this part is no less than the size of the carburetor, otherwise there is no point in installing a carburetor!
The flow area of the standard pipes on most scooters is such that you can easily use a 17.5 mm carburetor instead of the standard one. The same cannot be said about 19 mm carburetors! What can we say about such scooters, subjected to grief tuning with the help of 21 or even more carburetors without replacing the intake pipe!? Through tears we call these “scooters named after the 19th carb”..
An anecdote comes to mind: Stirlitz gave the dog gasoline and let him go. The dog ran 5 meters and fell. “The gasoline has run out,” thought Stirlitz.
Features of setting up the carburetor of a 2-stroke scooter
Some mopeds have their own characteristics. Perhaps the simplest carburetors are made in China. And a 2t scooter has a simpler carburetor than a four-stroke. Adjusting such a model should not be a serious obstacle. However, there are some peculiarities here too.
It should be noted that the needle in the 2t carburetor determines the quality of the mixture only while the throttle valve is not raised all the way. Otherwise, the fuel jet has a much stronger effect
There is also a connection with the idle system, but not on all models.
In 2T carburetors, the fuel level is much more significant than in 4T carburetors. You can set up the float chamber according to the instructions above; there are no significant differences, although the jets are different.
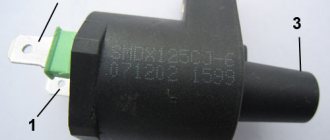
Scooter ignition switches
This type of switch often has an engine speed limiter, which allows you to increase its service life. From us you can buy standard scooter switches:
- CDI GY6 125/150СС 152QMI/157QMJ;
- CDI GY6 50CC 139QMB;
- CDI HondaDio AF18;
- CDI Honda Dio AF-27;
- CDI Honda Dio ZX AF-34;
- CDI Honda Dio ZX AF-35;
- CDI Honda Dio ZX AF-34 small. plug;
- CDI JH70 Delta;
- CDI Yamaha Jog 3KJ;
- CDI SuzukiLet's AS50;
- CDI switch Honda Dio AF-27;
- CDI JH110 Delta;
- CDI Honda Lead 90CC;
- CDI JH70 Delta;
- CDI GY6 with wire;
- CDI Yamaha Jog 3KJ;
- CDI GY6 139QMB/152QMI/157QMJ;
Also on sale are CDI switches combined with an ignition coil:
- CDI TB50 Suzuki Ran (BM Style/Joy) - suitable for Chinese scooter engines with chain drive;
- CDI E0120 Suzuki Address AD50 50CC.