As you know, there are many ways to develop homemade snowmobile skis. Strictly speaking, the ski includes a base, a shock-absorbing element, a fork, a shaft, link legs and a bipod for the fork. In some designs, for strength, the amplifier and, accordingly, the ridge are welded.
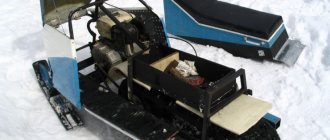
Homemade skis can be made from plastic pads. Therefore, expanders are bought in a specialized store, which are attached to the snowmobile chassis using a homemade fastening. For example, you can easily make a small homemade snowmobile with plastic skis. Why small sizes? – such a snowmobile will not weigh much, which means the load on the skis will be minimal. These miracle “machines” are an engine from Soviet mopeds on a frame where a seat is mounted.
Metal skis are much more difficult to manufacture, much less implement on a snowmobile. To develop metal skis you will need:
- Dye.
- Bolts and screws to secure all elements.
- Hydraulic pipe.
- Metal pipe with a diameter of 6 mm.
- Polyethylene pipe with a diameter of 85 mm.
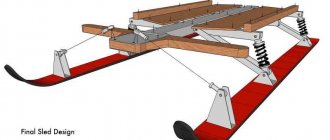
Parameters of the future ski track: length – 1000 mm; width - 25 mm. These skis are ideal for both small snowmobiles and large equipment such as utility snowmobiles. The weight of one ski will reach about 7 kg. Before starting the main work, it is extremely important to shape the skis. To do this, use a cardboard stencil. Cut out the shape directly and create a bend in front of the ski. The bend angle is at the discretion of the future owner of these skis. If you go too far with the bend, the ski track will not slide on the snow, but will collect it and thereby slow down the equipment. To prevent the skis from bending upon first contact with a stone or stump, a pipe is welded along the edges. The so-called stiffener will strengthen the structure. At the bend, the pipe must be welded strictly along the contour. Next, we create a platform for the shock-absorbing system. Its installation is carried out with bolts to the skis. The connection of the platform with the bow of the homemade skis is carried out thanks to a hydraulic pipe. Thus, the upper component of the ski track is completed.
The lower part will be created from the ridge. To do this, we fasten the hydraulic pipe at four points. Before final fastening, the pipe must be compressed. After this, we fasten the polyethylene pipe using self-tapping screws. In order for the pipe to fit perfectly on the metal base, it needs to be straightened. To do this, it will be enough to cut it. A good alternative to a polyethylene pipe is a polypropylene pipe. They are used when laying sewers. True, sewer pipes are afraid of low temperatures. The final stage is painting homemade skis.
Snowmobile sleds - types of structures and the principle of their operation
There are several main types of snowmobile sleds, and each has advantages and disadvantages. The sled is very versatile in its design. They easily attach to all types of snowmobiles. For example, for a Yamaha snowmobile, Russian Mechanics, Ermak, Viking 540, Dingo 150, BRP and Varyag 550.
In order to choose the type that suits you, you need to consider several factors:
- the routes and trails you need to navigate, features of snow cover and terrain;
- type of cargo transported;
- driving style.
Volokushi - description and dimensions of plastic snowmobile sleds
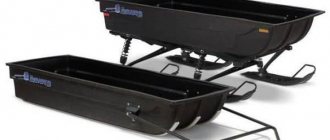
Sleigh drags are the easiest option.
They have several advantages:
- compactness and low weight;
- simplicity and speed of loading and unloading luggage;
- The drag body body does not freeze.
However, drags have a serious drawback - due to the design features, their front part is often damaged. This type of sled is inexpensive, and making it yourself is impractical.
Passenger
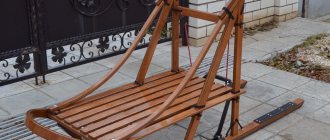
Passenger sleds are rarely seen. They usually consist of a housing made of plastic or plywood mounted on skids.
For greater passenger comfort, the design of the passenger sleigh can be sprung, and lighting and heating can be installed in the cabin.
They are not easy to find on sale, but such designs are sometimes made by winter fishermen and other outdoor recreation enthusiasts during the cold season.
A passenger sleigh can carry one or even several passengers, therefore, having only one snowmobile, the owner of this design can take a large company out into the snowy nature.
The main disadvantages are the large dimensions and weight of the structure. Because of this, passenger sleds can only be attached to powerful, high-powered snowmobiles.
Freight
Cargo sleds are the most versatile and practical option. They are designed more complexly than drags, but at the same time much simpler than passenger ones. These sleds have a large load capacity with small dimensions.
Due to the relatively small contact area with the surface, cargo sleds have a smoother ride than drag sleds - such structures easily slide on their runners, easily overcoming obstacles.
The luggage in them is protected much better. Below are photos of a homemade snowmobile sled.
Due to the fact that their skis are located at a great distance from each other, cargo sleds can also boast much greater stability than drag sleds.
A standard cargo sled consists of three main elements:
- frame;
- runners;
- flooring
The frame is the basis of the entire structure. The runners are attached to the bottom of the frame using racks. There is a flooring on top, on which the loads will be placed.
For greater convenience and functionality, the frame of the cargo trolley must be equipped with railings and a covered structure placed on it.
Preparation
Before we start creating our winter structure, we need to decide what material it should be made of. Wood is perfect as a starting material if you want to make a sled like a sled or entirely made of plastic or metal with plastic parts. There are a lot of homemade models you can assemble. Sleds, thanks to their design solutions, are a very universal item; they can be easily attached to all models of snowmobiles. To optimally select sled models, consider these factors.
Travel route and terrain features. The factor must be taken into account when using drag-type structures.
- Type of transportation. Taking into account the fact that not only heavy things are transported on sleds, but also people, this factor must be taken seriously.
- Your driving style. This factor must be taken into account, since the service life of all equipment, and not just sled runners, depends on the riding style.
- Amount of snow cover. This factor affects the maneuverability of equipment in difficult natural and weather conditions.
The best option would be to make a sled on a steel frame, as it will be more durable than plastic ones. The main disadvantage of such equipment is considered weight, however, this pays off with a significant margin of safety and a long service life.
In such devices, it will be necessary to change the plastic slides as they wear out, but at least once every three years.
Purpose of the sled
Conventional fishing sleds perform the most important function of moving winter fisherman's equipment.
on snow and ice. As a rule, this is a fishing box, an ice screw, a tent, etc. In addition, the sled provides good shelter from the piercing wind and, when turned upside down, often plays the simple role of a camping table. You can also throw caught fish into them.
A fishing sled must:
- be light;
- glide well;
- do not roll over;
- be roomy, but not so much that it doesn’t fit in the trunk;
- comfortable when moving;
- resistant to damage.
A couple of decades ago, when polymer materials were not so widespread in our country, “winter workers” used ordinary sleds or even homemade ones from skis and boxes for their needs.
At the same time, at the moment this practice has little justification, since standard plastic drag sleds made of durable polyethylene fully meet all the requirements placed on them. Not to mention the fact that they are quite affordable, durable and sold in literally every fishing store.
Dimensions and drawings
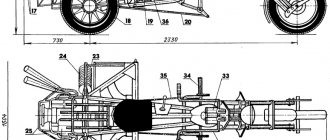
Before preparing your masterpiece, you need to make a design for it, in which you need to constructively decide what size the sled will be. We have prepared a rough drawing of the sled, which we will describe later. As you can see, the dimensions of the structure are a little more than two meters in length, the height of the product is 98.5 cm, the width in the front part is 75 cm, and in the back it narrows to 74 cm. The drawing is very detailed in the height of all parts. Drawings can be found on the Internet, but it is better to come up with your own based on your technical considerations and calculations.
Volume No. 2: Preparation for the main action
At this stage, I took care of having all the necessary tools and drawing up a drawing.
Preparation of accessories
In addition to the PVC pipes and fittings themselves, you will also need metal bolts and a certain set of tools, most of which a good owner will find in his workshop:
- Hacksaw or special scissors for cutting pipes ;
- Pipe soldering iron for joining PVC products;
Plastic pipe soldering machine
It is not rational to buy a soldering iron for a one-time job, so I recommend renting one. This will be much more economical, and you will not become the “lucky” owner of something that you may not need in the next ten years.
- Construction hair dryer . It will be needed so that the plastic can be heated, thereby making it more pliable for bending;
- Well sharpened knife ;
- Drill for creating holes for bolts;
- Sandpaper and a file , by the way, wouldn’t hurt to have on hand either;
- Pencil with tape measure for marking;
- Aluminum or at least steel corners ; it is better not to leave the sled completely without metal.
Drawing
If you want the dimensions of all sides and individual structural elements to match, then it is better to mark them on the drawing . In addition, it is not at all necessary to “invent a wheel.” You can easily find many detailed sled diagrams on the Internet, choose the one that suits you best, and make your own adjustments if necessary. Personally, that’s what I did.
An example of a sleigh drawing
Tools and materials
To make a snowmobile sled yourself, you need to stock up on the following materials:
- steel sheet;
- metal tubes with a cross section of 20 by 20 mm;
- PVC pipe;
- sheet of plywood 1.0-1.5 cm thick;
- welding machine;
- milling machine;
- hacksaw;
- grinding machine and other necessary tools.
Snowmobile sleds are made from any available materials, not just those purchased specifically for this purpose. Craftsmen can make a sled from a motorcycle carriage or a sled from wood, and some craftsmen even make sleds from barrels.
Homemade motorized dog: technology
Before starting work, you need to prepare all the necessary tools and equipment for the motorized dog. You can learn more about the progress of the work by watching the thematic video.
Preparing for work
To avoid problems with using a motorized dog, it is important to immediately determine its main technical parameters:
- load capacity;
- engine power;
- transmission type;
- engine starting system - manual or electric.
You should also think about additional accessories for the motorized dog - a winch, lighting, protective elements, seats. Then an accurate drawing is drawn up, which will reflect all the nuances. Next, you can order a set of parts for a motorized dog or select them yourself from those available from other equipment.
Required Tools
When working, you cannot do without a welding inverter, a drill and grinder, and a set of wrenches. Also, to install the motorized dog, you will need screwdrivers, a file, and other small tools. The craftsman must have access to lathes and milling machines.
Assembling a motorized dog
First, they make the frame of the motorized dog, which will help secure the engine, gearbox, and chassis. To do this, selected pipes (a beam or channel is also suitable) are welded into a rectangular frame. Then the fastenings for all the important components of the motorized dog are welded. Afterwards you can install the engine.
Manufacturing instructions
As we noted above, our sleds require plastic pipes. They are necessary for the runners, given that the runners must be flat and the pipes round, they must first be heated so that they straighten. They heat it either with a special heater or a hair dryer, but with the latter very carefully and carefully monitoring the heating. Otherwise, the pipe may be damaged.
- After heating, the future runners are placed on a flat place under pressure until they cool completely. And only after that they mark the front side and bend it at an angle of 30 degrees. A strong frame base is welded from a profile metal pipe, on which the runners are subsequently placed. A drawbar is installed in front of our sleds, reinforced with a steel sheet, and a bushing is placed in it. Then the plywood flooring is fixed, welded and the connection at the welding points is checked for strength.
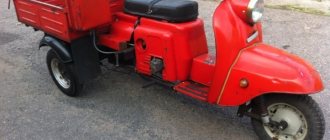
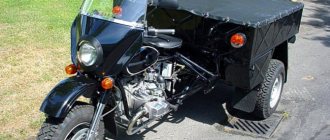
- Considering that we make snowmobile sleds with our own hands, many technical solutions cannot always be implemented. A motorized stroller will make an excellent sled, just put it on runners. True, this design is only suitable for powerful snowmobiles, since its weight is still significant.
- You can also use the sleigh principle to make a do-it-yourself cart with wheels for an all-terrain vehicle or ATV.
Volokushi
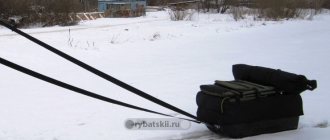
This device is a lightweight, often wooden structure, similar in type to a sled. Although sleds are typically used for dog or reindeer sleds, they can also be easily retrofitted for a snow machine. Drags are valued for their small weight and size, ease of operation and the speed with which the drags can be loaded and unloaded. Their body does not freeze.
However, this equipment has a big drawback - due to its design features, the front is subject to deformation. The purchased version is presented in the form of a plastic trough on skids.
Passenger
Passenger snowmobile sleds are not much different from cargo sleds. Only the basic design of cargo sleds is made of a strong base, skis and a low platform, and passenger models are designed for one or two people. In Russia, even in specialized stores it is very difficult to find them. To use such designs, the snowmobile must be very powerful, such as the Yamaha, Buran, Yarmak, Russian Mechanics, Viking, Stealth and other machines.
To increase passenger comfort, the design of the sled can be supplemented with shock absorbers.
The housing is made as a cabin, which also additionally contains lighting and heating elements. The booth itself is created from plywood sheet, plastic sheet or other similar materials. For skis, both sewer PVC pipes and thin HDPE pipes are used, but in this case, to create runners you need to use several pipes for each ski.
Bindings and poles
For making fasteners
Various materials are used for hunting skis. They can be metal, fabric, leather, canvas or plastic. Each hunter selects the most comfortable option for himself individually. The classification of fasteners depends on the method of their fixation.
There are 4 main types of ski bindings
- Simple
. They are a sock loop into which your foot can be easily threaded. They are chosen most often, since attaching the mount to hunting skis is not difficult, and the diameter of the ring can be changed at your discretion (so that the foot can enter up to the 2nd phalanx on the big toe). - Soft
. In addition to the toe, the heel is also securely fixed. The foot is in a comfortable position, and the person does not experience discomfort when climbing or walking on loose snow. - Semi-rigid
. Semi-rigid bindings for hunting skis are available in the form of a hard plastic base equipped with two straps. One is responsible for fixing the forefoot, and the second – the heel. - Tough
. Used only for snowshoes, since this type of ski binding prevents slipping.
Usually people go on hunting skis in the forest without poles.
As a last resort, they use an ordinary walking staff, which hunters make themselves from durable wood. It helps not only to maintain balance, but also to check the depth of the snow cover.
Recommendations
The optimal type of homemade sled for constant use will be cargo models, and to increase the rational use of the design of such a base, it is equipped with railings and a closed box is made. At the same time, the skeleton is reliably sheltered from any unfavorable conditions. The selection of materials for homemade sleds must be carefully approached; the service life of your product depends on them and components. It must be remembered that the sled is used in winter, therefore, it must be resistant to low temperatures.
It should also be taken into account that during operation the structure is subject to impacts from protruding tree roots or small stones, and therefore must have an impact-resistant surface.
If you dream of creating a passenger sled model, then safety should be a priority, and this applies not only to the selection of materials and components for them, but also to all welded assemblies and parts. Since the speed of transportation on a snowmobile can be significant, and obstacles can be invisible, it is necessary to equip the sled with additional elements for reliable transportation. Making your own sled is much cheaper than buying it.
There is no sled that is perfect for all situations, and we would recommend several different models that will be useful for different situations.
When modeling the design, you must first focus on the power of your snowmobile, and then on the weight characteristics of the sled, since with low power the snowmobile may not be able to carry a heavy sled. It is best to make runners with an additional rigidity system; the distance from the bottom of the sleigh to the runners themselves should be at least 10 cm.
Thus, your structure will not touch the bottom of the snow, and the wide runners will allow you to safely drive even through freshly fallen loose snow.
Don't forget about the guides for your runners, because they help maneuver while riding. A sled with flat runners at high speed without guides can tip over if it turns poorly. A self-made sleigh, with the proper approach to the selection of materials and the creative process, will become an excellent assistant and will last for many years.
Choosing between homemade and factory options
When it comes to this topic, the root of it lies in a financial problem or the inability to find a particular ski model. It is at this moment that a person thinks about whether he can make the necessary part with his own hands. Homemade options are also offered by craftsmen who easily make not only skis, but also snowmobiles themselves.
Of course, factory parts? this is the standard of quality. They are created for a specific model by experienced specialists, and snowmobiles on these skis are first tested in various conditions. If the car is an expensive sports car, then it is better to purchase components for it from the factory. How to proceed ? Buy a new model in a store or make everything yourself? The choice is up to the owner of the winter vehicle.
There are several manufacturing options: you can use tin, wood, plywood, old hunting skis and snowmobile extensions. [ads-pc-2]
Sleigh dragging with your own hands
Due to the simplicity of the design, the range of materials for the sled is enormous.
You can use everything that is lying around in the garage or at the dacha.
Below we will show you the simplest and most interesting homemade solutions collected by craftsmen from all over the world.
- Wood is a universal and inexpensive material for making sleds. Quite a heavy design, but universal and repairable in almost any conditions.
- Due to the simple design, there is no point in providing drawings, because It’s easier to make from what you have on hand. The size and model of the sled should also be taken into account according to your snowmobile. A snowball may not be able to handle a trailer that is too heavy.
- An interesting version of a sled with a flat bottom can be made using small-diameter sewer pipes as a basis. We fasten the pipes together and get a very strong bottom with guides. This version of the sled behaves well in motion and is not afraid of tree roots and stumps found under the snow cover.
Snowmobile sled with skis
This is a more complex option in terms of design. But it's worth it. Thanks to the use of skis, the sled becomes more stable and behaves more consistently at high speed. Also, when using skis, the body of the sled itself does not come into contact with the snow cover, which means it will last much longer.
Option 1 - steel frame and skis.
Durable and voluminous sleds for snowmobiles.
- A square pipe with a diameter of 20mm x 20mm is used for the frame.
- The pipe is cut with a grinder and connected by welding.
- Front sheet of metal 2mm thick. Serves to protect against snow and small obstacles. It is welded to the frame.
- The skis are made of sheet metal, with additional stiffening ribs along the edges (made using a sheet bender)
- The rigid hitch (drawbar) is welded from a 20x20mm profile, as is the main frame of the sled.
- The end uses a spring to provide shock absorption during acceleration and braking. Without a spring, you risk rapid wear and tear on the towbar and its attachment to the snowmobile.
Sleigh drawing:
This version of the sled has one flaw - there are not enough guides on the skis.
Guides are needed for normal controllability of the sled, because... on flat skis the sled skids a lot when turning.
If you do it yourself, you can weld a small corner or a steel rod of small cross-section to a metal ski (about 10mm for a 20cm wide ski).
Snowmobile sled made of plastic pipes
An interesting and affordable option for a snowman sled made of PP pipes. These pipes are used for water supply and sewerage.
- To make the frame, 25-30mm water pipes are suitable.
- For cutting, you can use special scissors, or a knife and a hammer (if you don’t have a lot of special tools)
- To connect the parts we use a soldering iron for PP pipes. By the way, you can also use homemade devices based on an iron or even simply by heating a tip from a piece of metal pipe on a gas stove. The main thing is not to overheat the tip, since the special soldering iron does not have a high temperature.
How to make skis for a sled
To make runners, it is convenient to use a sewer pipe with a diameter of 100 mm.
How to straighten a snowmobile ski tube:
Carefully cut lengthwise and heat with an industrial hair dryer or burner (you need to be very careful with an open fire so as not to melt the pipe).
- We straighten it using two boards (pieces of plywood) placed on the floor and pressed down with a foot or a heavy object. You can also use a vice or a press machine.
- It will not be possible to heat the entire length of the pipe at once, so we warm it up and bend it in small sections of 30-40 cm. This way you won't need much effort.
- There is one simple trick to secure the pipe to the runners.
- The mounting method is suitable for any type and material of skis.
- We push the heated pipe from above, thanks to this it fits tightly into place and immediately fasten it with self-tapping screws.
- This option is ideal if you need to sheathe metal skis with a plastic pipe.
PP tube skis
You can also make skis from several water pipes with a diameter of 25mm
We lay it parallel and fasten it with long bolts or studs:
This design is less strong, but has a significant advantage over a solid HDPE pipe.
The tubes act as guides, making the skis more stable when turning.
I also use a combined option, when a supporting frame is made from PP tubes, and only then a large pipe is hemmed:
Required tools and materials
- Plywood. FSF plywood is suitable for sleds that you often use, but at the same time store outside the apartment - in the country house or in the garage. This material has good resistance to moisture, but contains phenol that is harmful to health. For children's sleds, it is better to choose FC plywood - a less moisture-resistant, but environmentally friendly material. In addition, pay attention to the type of plywood: to ensure the product has a neat appearance, buy 2/4 sheets with a sanded face without visible defects.
- Metal tape. The frame and runners in a snowmobile sled are made from metal strips. It can be steel or aluminum alloy. The first option is more durable, but the second is easy to use.
- PVC pipes. A lightweight sled model can be made from plastic pipes. This is an elastic and frost-resistant material, which, however, is not very durable. To strengthen the connections of plastic parts, use metal corners.
- Tools. To make a sled yourself, you will need a circular saw, a drill-driver and self-tapping screws. For metal sleds, a welding inverter, a vice and a hammer will also be useful. For plastic sleds - a soldering iron and a hair dryer.
Preparation (taking into account various factors)
The choice of material and design of the sled depends on several important factors.
- Terrain. If you expect to navigate uneven terrain, add more cushioning to the drawbar and seat. This can be done using a damper, padding and an inflatable layer.
- Type of snow cover. It determines the ideal shape of the runners. Wide skis move better on loose snow, while narrow skis move better on ice. The greater the bend of the runners, the less they burrow into deep snow. On the fastest sleds, the ends of the skis rise to the frame and are attached to its front part.
- Load. The required strength of the material depends on this. Plastic sleds can support a child or adult weighing up to 70 kg. For full-fledged passenger sleds, an aluminum alloy is suitable, and for cargo sleds, steel or wood. The height of the sides is also important. Usually it is 30 cm, but you can make it larger to make the sled roomy and safe for passengers.
- Driving style. Remember that sleds with a low center of gravity are less likely to tip over. If you plan to do extreme racing with sharp turns, give preference to a squat design. In this case, the seat should be at a height of about 20 cm.
DIY snowmobile sled. Instructions
Find a suitable drawing. The design of the sled must meet your requirements for strength, capacity and maneuverability.
- A homemade snowmobile sled consists of a frame, runners and flooring. A metal pipe 20×20 mm with a wall thickness of about 2 mm is suitable for the frame. For runners - steel strips 20 mm wide. For flooring - plywood with a thickness of 15 mm.
- Using a welding inverter, make a frame by welding 4 metal pipes. To make the sled gain more speed, the front part of the frame can be rounded. The larger the width of the frame, the more stable the product: usually it is 70-80 cm. The length affects cross-country ability and maneuverability: long sleds overcome obstacles more smoothly, but are less controlled when cornering. The average length of the frame is 170 cm.
- To give the frame strength, weld several cross members to it.
- In the same way, attach vertical posts to the bottom of the structure to which the runners will be attached. The number of racks depends on the length of the sled: usually 2-5 on each side are enough. The length of the parts should not be too long: the lower the center of gravity, the more stable the structure. The optimal height is 20-30 cm.
- Take the metal strips that will serve as the runners and bend them. Use a pencil to draw a fold line on the part, place the strip in a vice so that the clamps are exactly along the line, and bend the strip with light blows of a hammer. To avoid leaving marks on the surface, use a copper or brass pad. The bending angle should be about 60° or more.
- Weld the skids to the posts.
- Attach a drawbar to the front of the structure. You can make it yourself from the same pipe that you used for the frame. However, it is better to take a finished product with a damper: it will dampen jerks during fast driving. To strengthen the fastening, weld a steel sheet into the place of the hitch, then cut a sleeve of a suitable diameter into it.
- Transfer the dimensions of the frame onto the plywood. Cut the sheet with a hacksaw or circular saw, then sand with sandpaper or a sander. Attach the decking with self-tapping screws.
- Calculate the height of the side. Weld posts of the required height to the top of the frame. The number of racks depends on the length of the sled. There can be at least 7 of them: 4 are installed in the corners, and the rest - between them. The fourth side in this case is not closed by the side.
- Weld the crossbars that form the side to the posts and check the quality of all welds.
Characteristics
As for the characteristics of the linings, the main one is width.
Some types are narrow - they are, in fact, ordinary dilators. If they are wider than the standard ones, it is not by much.
Wide overlays, which are expanders, are also produced. Their width is usually above 250 mm. Length and height are not such important parameters, although length affects the support area, which results in cross-country ability. As an example, let's look at extenders for snowmobiles from different manufacturers. Let's take domestic snowmobiles "Taiga" and foreign "Yamaha".
Models designed for both plastic and metal skis are produced for Taiga. But the products produced are more expanders, since their minimum width is 250 mm. Additionally, they are made quite long - from 1050 mm.
For Yamaha, the situation is approximately the same, but more plastic covers are produced. Their width and length are almost the same as products for “Taiga”.
That is, it’s quite easy to guess the linings based on the model - you just need to know the overall dimensions, and minor inconsistencies can be removed by heating and giving the desired shape. But when it comes to universal products or snowmobiles, which are rare and have a special design, the situation is more complicated.
Results
Since a homemade sled for a snowmobile with your own hands will be used in winter, you need to carefully select materials and components that should withstand the lowest temperatures well. In addition, it is necessary to take into account that the structure will be subject to shock quite often, therefore, they must also be very durable. If you choose materials and components not carefully enough, the sled may simply fall apart on the move after a few months of use, or even earlier.
If you decide to make a passenger sled rather than a cargo sled, you need to approach the issue very carefully. Safety must come first - this applies both to the choice of materials and to the care with which all parts must be connected.
Photo gallery
The range of accessories for snowmobiles also includes ski covers. Which can increase the cross-country ability of winter transport in deep snow. We invite you to familiarize yourself with this accessory in our photo selection.
