Replacing the gearbox shaft seal
This article will again be devoted to our favorite topic: “Hit the head with a sledgehammer, not the oil seal!”
In general, as you already understand, we will talk about the oil seal, now the gearbox shift shaft. This oil seal leaks very often, there are many reasons for this. Firstly, of course, we work with the gearbox shaft very often, especially on the pit, where the gears are meek and we have to constantly poke up and down. Well, this is, in principle, a normal occurrence on any enduro and cross motorcycle. Also, of course, the quality of the oil seal leaves much to be desired, and if you change it, it is advisable not to buy a Chinese one. Lubrication of the chain also does its inevitable job: one way or another, parts of it end up on the shafts, crankcase, etc., as a result, dust, dirt, sand settles, which leads to accelerated wear of the working edge of the oil seal. Well, and the most important operating condition: here, whatever one may say, if the pit drives as it should, then the ingress of all types of dirt and liquids cannot be avoided, and this again leads to rapid wear. An atypical, but also cause, is thoughtless pressure washing of pita pita. The one who, without a head or the presence of reason in it, with daily confidence, uses a Karcher to scatter the seals, otherwise “they are dusty.”
In short, there are many reasons, but the result is the same - the oil seal will leak.
Let's take the oil seal! We smear it both outside and inside, for sure! You can use any liquid oil, be it fork oil or motor oil, it’s not that important.
Well, of course, we coat the gearbox shaft itself well so that the oil seal does not get caught on anything, but moves smoothly, without snagging, so that the working edge does not tear in any case.
Note. The shaft has splines and a variable cross-section. Therefore, there is no need to fool around with the oil seal: carefully twist it clockwise and counterclockwise and put it on the shaft through the splines. You can put it on foolishly, but you risk, firstly, damaging the working edge on the splines, and secondly, the ferrule ring may come off at the moment of a sharp transition from a small shaft diameter to a large one in the place where the groove for the gear shift foot is.
And, of course, WE WARM. We heat the oil seal seat with a construction hair dryer or a gas torch. We do this so that the metal expands, and the oil seal by hand - by pressing your fingers - goes into place on its own! HEAR. MYSELF! WITHOUT THE HAMMER, SLEDGEHAMMER AND MANDARDS WITH WHICH YOU WILL HIT THEM IN MIRACLE SERVICES!
If you beat it, you can damage the metal base of the oil seal, it will become crooked, leak within a day, fly out, and so on. Is this what you need? Better save your time and money on a new oil seal.
Bottom line: of course, it’s up to you how you will bet, with what and whether you will listen to advice. We do not impose anything, but only write to you about methods that do not cause any subsequent problems and guarantee the operation of this or that part.
Source
Step-by-step instructions for replacing the rear crankshaft oil seal
Just when the rear crankshaft oil seal leaks, then all the troubles begin: the engine begins to get dirty in oil at a rapid pace, and all the dust from the road then very actively sticks to it. One has only to look at such a motor and already there is a desire to pull it out and throw it away. Moreover, the oil will also corrode rubber parts and drip onto the clutch disc, after which it risks losing its frictional properties. Everything starts to creak, slip, rub against each other... In general, because of the small seal, the whole car seems to have gone crazy.
All the oil, of course, most likely will not leak out (however, do not be sure of this), but such a nuisance can add serious problems to you. If there is a leak from the rear oil seal, it must be replaced. There is no other solution to the problems and there simply cannot be.
As we have already noted, this oil seal was invented to neutralize lubricant leaks from the engine through the hole from which the crankshaft emerges. The rear crankshaft oil seal for most car models measures approximately 99 millimeters.
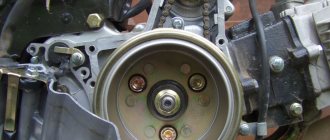
After dismantling the oil seal
Manufacturers apply special marks and inscriptions on the outside of the oil seal. They can be used to determine which direction the crankshaft rotates. Using this information, errors are eliminated during the process of replacing the rear crankshaft oil seals.
This sealing element is installed in the area of the cylinder block where the crankshaft comes out. In ordinary cars, where the engine is located longitudinally and the gas distribution process is carried out using a chain drive, the oil seal is installed in front of the support bearing in the crankshaft shield. In the case of front-wheel drive cars, where the engine is located transversely and a belt is used in the gas distribution mechanism, the element is located in the cylinder block, since there is no shield in the engine design.
Inside the engine crankcase, the lubricant is under a certain pressure. Due to this pressure, the seal is constantly pressed against the parts that it is supposed to seal. This way the engine is reliably protected from oil leaks.
Even with the slightest, slightest displacement of the part, the lubricant will flow. But how can you determine when it’s time to install a new seal? The first sign is oil leaks in the place where the power unit crankcase connects to the gearbox.
If lubricant leaks, it can get into the clutch housing, settle in a thick layer on the walls and stain the clutch disc. All this will lead to clutch slipping. Oil consumption will also increase significantly.
The most surprising thing is that even new oil seals can leak and the reason will not be due to poor installation. In stores you can buy a fake rear crankshaft oil seal for a VAZ. Its cost is low, and car enthusiasts do not notice that they are buying a fake. Poor quality of a part will definitely affect how it performs in the future.
An example of an incorrect oil seal installation
Another reason is a violation of installation rules. Often the seal is placed in a convenient position and carefully hammered into place with a hammer. But manufacturers do not recommend using a hammer or applying significant force when installing the part.
Leakage of poor-quality oil seal
If certain changes occur in the operation, as a result of which the gas pressure in the crankcase increases, then these gases are undoubtedly capable of squeezing out the oil seal. As a result, the contact with the crankshaft will not be tight enough, and the lubricant will leak out through the resulting gap.
Is it possible to confuse the oil seal with something else? Yes, you can. Very often, many experienced motorists confuse an oil filter leak with an oil seal leak. Sometimes a completely normal part is replaced with a new one, and it was just necessary to replace the oil filter.
You should not purchase these sealing parts in dubious stores or markets. There is no need to buy cheap products from unknown brands. This way, you can not only purchase an oil seal, the replacement of which will cause certain problems, but also get more serious malfunctions. Imagine that after buying a cheap oil seal and saving $5, oil will get on the timing belt and damage the entire cylinder block at a cost of $1000, if not more! Saving on oil seals is a real absurdity.
The most popular are the following manufacturers:
- Viuctor Reinz;
- Elring;
- Goetze.
They make quality products. Products of these brands are found not only in car stores, but also at numerous showdowns.
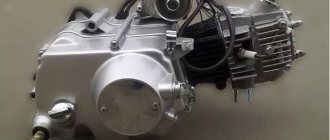
Replacing the drive sprocket shaft seal
The final article in the seal replacement cycle will be a description of replacing the drive sprocket seal. By the way, it, in turn, most often suffers in the same way as the fork seals, because they are the ones who do the most frequent work, and hence the wear.
But the wear of this particular oil seal is quite predictable and is not considered something out of the ordinary, just a normal operating moment.
Well, why it wears out is clear to many.
Firstly, the drive sprocket shaft is constantly rotating, and it doesn’t take a genius to understand that the friction force of the seal’s working edge on the shaft will sooner or later do its dirty work, and the seal will begin to leak oil.
The second is, of course, the quality of the original seals: now it was not very good and continues to be so.
Well, the third, most deadly reason for accelerated wear is the constant dirt that accumulates under the drive sprocket! These are generally mega extreme conditions for a stuffing box, when a mixture of grass, clay, sand and mud is packed under the star. The worst thing is that it doesn’t fly away anywhere, but is only pressed and pressed, and eventually, under the influence of centrifugal force, all this mess seeps into the oil seal. Naturally, the sand, which begins to rub either on the shaft or on the oil seal, eats up the working edge, and the oil seal begins to leak. If, with all this, you also have a closed sprocket cover, which does not leave a single chance for any amount of dirt to fly out, then that’s it: you have only one way - to the store for a new oil seal.
So, if you do not ride on asphalt or on dry paths in a holiday village, then purchase or modify the generator cover yourself! We need to make it as open as possible.
We take a new oil seal and coat the outer and inner edges of the oil seal with oil. No special oil is needed here: regular engine, transmission or fork oil... it doesn’t matter.
Apply liberally. We do this so that the oil seal fits into the seat without effort, any scuffs or snags, and, of course, so as not to damage the oil seal, otherwise why is all this needed at all?
Crankshaft main bearing - design
One of the main parts of the crankshaft, no matter how strange it may sound, is the bearing. It represents an assembly unit, and, accordingly, is the main part of the support. It also performs one of the main functions such as rotation. The bearings take on the entire load and transmit it further along the moving crankshaft assembly. They come in different types, it all depends on the specific use of the bearing. We are currently analyzing the car version, so they come in two types – rolling and sliding.
As a rule, the automobile version has the form of a ring, along the entire perimeter of which there are gutters, or, as they are popularly called, raceways. It is along them that the body rolls during operation. If we analyze the principle of operation of a sliding bearing, then friction occurs in it during sliding of surfaces. Externally, it looks like a smooth body with a cylindrical hole.
How to change the kick starter oil seal on an alpha moped?
If the starter seal is worn out on your moped, then you need to change it. The kick starter leg seal can be changed without removing the clutch cover; you can easily pull it out and install a new one. It is also not necessary to drain the oil, but simply roll the moped in the opposite direction so that the oil flows onto the other side. And then you can remove the old oil seal.
To replace, you will need a regular awl or something similar, or you can take aluminum wire and sharpen the hook on the end. First of all, unscrew the kick starter leg. Next, take an awl and carefully slide it under the shaft itself and carefully pull it out in a circle, it should come out without any problems. It is advisable to check the old oil seal with the new one, put them next to each other and look for the same holes or if they have holes. Then we take a clean cloth and wipe the seat for the new oil seal so that there is no debris there.
Next, take a syringe with any oil and begin to lubricate the middle of the oil seal. Then we insert the new oil seal into place, then take either a 14mm head or any tube the size of this oil seal and begin to gently press it down so that it fits well into the seat. After this, put on the kick starter leg and tighten the bolt.
Source
Replacing the crankshaft oil seal on a scooter
Replacing the oil seal on the variator side.
Often the crankshaft oil seal leaks from the variator side. To replace it, remove the variator cover, unscrew the mounting bolt, and remove the variator. On some models, the oil seal is covered with an additional metal cover, which is secured with three bolts.
- To remove the oil seal, you will need a rigid but thin wire, from which you should make something like a hook.
- Then push the wrapped side of the wire through sideways and turn it inside.
- Pull towards yourself with a sharp movement. He may not give in right away, then try making two hooks and pulling them alternately.
After removal, wipe the seat dry and install a new oil seal. Follow the markings and check the size with a caliper before installation.
Replacing the oil seal on the generator side.
To replace the oil seal on the generator side, you will need a special generator rotor puller. I don’t recommend trying to remove the generator without it. There have been cases of winding damage and generator failure.
You can also read other articles on the topic:
Source
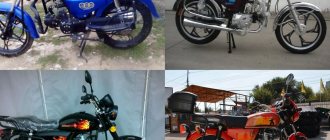
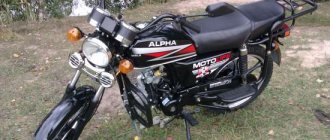
Engine Features
The engine of the Chinese Alpha moped has characteristic features, thanks to which fans of motorcycle technology prefer this particular model.
Engine capacity - 72 cc. With the right approach, it can be upgraded to 110 cc. Also, if desired, you can increase the speed by 10 kilometers.
The weak point of the engine is the gearbox, which requires close attention and a delicate approach . When repairing the “heart” of a moped, you need to know how to correctly disassemble and reassemble this part of the motorcycle “organism”.
Alpha is equipped with a powerful engine, the circuit of which is complex. If you can’t figure it out on your own, it is recommended to contact an experienced specialist. The price of repairs is quite affordable.
Replacing the crankshaft on a scooter
Any equipment fails. If we talk about scooters, problems can arise in various components and assemblies. In this article I would like to cover the topic of engine repair, or rather crankshaft replacement. This detail changes extremely rarely. If you replace the crankshaft properly, you won’t have to return to this issue for a long time. For example, replacing a piston can be done every two seasons. Looking ahead, we will immediately answer the question “how much does a crankshaft cost for a scooter?” On average, the price for this Taiwanese-made part fluctuates around 2000-2700 rubles. The exact price depends on the scooter model.
Causes of malfunction
The Chinese Alpha moped, whose price is affordable, does not cause owners many problems. Interruptions in a moped engine have several causes, and once you understand them, you can quickly fix the breakdown.
Disassembling the moped engine
So, if the engine starts with great difficulty, the muffler “shoots”, and smoke comes out of the chimney, it means that the moped is “capricious” due to problems with the carburetor. In order to solve this problem with the Alpha moped, you need to:
- clean the carburetor;
- thoroughly clean the moped's air filter;
- tighten the screws;
- adjust the moped carburetor.
If the Alpha slowly picks up speed, and its engine is not able to develop the declared power, then the reason is the incorrect operation of the moped valves. It can also “get sick” due to gaps and incorrect timing. In order to make the Alpha moped function normally, it is necessary to replace the used valves with new ones.
Main reasons for replacement
Each engine is equipped with a crankshaft. It moves the piston and also helps move the rear wheel. The crankshaft consists of two disks, the connection of which is ensured by a connecting rod journal. The role of the disks is similar to the tasks of flywheels: to provide uniform movement of this part in the required direction. In the center of the disks there are axle shafts with bearings. These bearings allow the crankshaft to rotate. Due to the ends of the shaft, rotational motion is transmitted directly to the scooter transmission and generator. And so, we list the main reasons for removing and replacing the crankshaft:
- Tuning. Speed lovers who want to get the most out of a scooter install tuning crankshafts.
- Removing the crankshaft is necessary to replace the scooter's crankshaft oil seals. Also, bearings rotating the shaft are often replaced;
- Engine noise, vibration, loss of dynamism.
If you have a garage and the necessary set of tools, then removing the crankshaft will not be a problem for you. First of all, you should have special pullers as tools. To remove the crankshaft, first remove the engine itself: disconnect all fasteners, hoses and wires, as well as the CPG.
Gearbox disassembly
It is necessary to disassemble the gearbox in order to replace used parts. This is done after the following parts have been dismantled:
Repair of this part of the engine is carried out as follows:
- Using a screwdriver or blade, remove the retaining ring and the drive gear;
- Carefully unscrew the gear fixing bolt and remove the gear shift mechanism;
- remove the gear shift fork and shaft;
- remove the crankshaft and drum (including the core);
- After replacing the worn part with a new one, reassemble (in reverse order).
Bearing Failure Determination
Some recommendations will help you make sure that you need to replace the wheel bearing on your VAZ 2107: The easiest way to find out whether you need to replace the wheel bearing is to grab the front wheel and shake it in different planes
If you feel the presence of play, then it’s time for a more detailed diagnosis and most likely replacing the bearings
The front wheels of the car should be hung on a jack, while being sure to take precautions: pull the handbrake, install shoes and additional stands under the car
Grasp the top and bottom of the front wheel with your hands and then make movements. It is important to wobble the wheel, not the car as a whole.
Thus, you can accurately determine whether the product in question needs to be replaced. Another way to determine the need for replacement is to listen for humming, knocking, and grinding noises in the wheel as it rotates.
Having decided that you really need to replace the VAZ 2107 wheel bearing, you need to purchase new products and begin the replacement workflow.
Replacement features
The front hub of the VAZ 2107 car has a pair of roller bearings, one of which is called internal, and the second external. The manufacturer recommends replacing these products in pairs, on both front wheels of the car. We will find out further what the replacement of the parts in question is.
Initially, it is necessary to tear off the nuts securing the front wheel of the VAZ 2107 car. After this, install the jack and jack up the front part of the car. At the same time, do not forget to install shoes under the wheels, as well as a special safety stop to prevent the jack from falling.
- Removing the caliper. Changing the front wheel bearing is much more difficult than replacing the rear one, but it can be done even with no experience. First of all, the 2 bolts that secure the caliper are uncoiled, after which they are unscrewed. It is not necessary to disconnect the brake hose; it is enough to tie up the removed caliper so that it does not interfere with further work.
- Removing the outer product. The cap is removed using a screwdriver, behind which there is a hub nut. The nut must be unscrewed, for which you will need to use a chisel and a hammer. Behind the nut there is a lock washer that must be removed. Now you can pull out the outer bearing.
- Removing the hub. To remove the hub, you need to pull it towards you. It is removed along with the brake disc. To disconnect the disk itself after removal, unscrew the two “12” bolts. The brake disc is removed to make replacement easier, but it is not necessary to disconnect it.
- Removing the inner bearing. Using a screwdriver, you need to pry off the oil seal located on the inside and covering the inner bearing, then pick it out and pull out the split spacer ring. The ring may not stand, so we focus on the situation. After this, the inner bearing can be removed.
- Next, the old clips are removed using a special puller or an ordinary steel tube of suitable diameter. The next stage of replacement involves cleaning the inside of the hub from old grease, after which you can begin assembly.
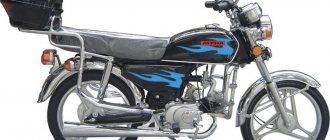
Engine Features
The engine of the Chinese Alpha moped has characteristic features that make motorcycle lovers prefer this model.
Engine on Alpha moped
Engine power 72 cc. See: With the right approach, it can be upgraded to 110 cP. Additionally, if you want, you can increase your speed by 10 kilometers.
The weak point of the engine is the gearbox, which requires close attention and a gentle approach . When repairing the “heart” of a moped, you need to know how to properly disassemble and reassemble this part of the motorcycle “body”.
Alpha is equipped with a powerful engine, the circuit of which is complex. If you cannot figure it out on your own, it is recommended that you consult an experienced professional. The price of repairs is quite affordable.
Causes of malfunction
Chinese moped Alpha
, the price of which is affordable, does not give the owners many problems. Interruptions in a moped engine have several causes; once you understand why, you can quickly eliminate the breakdown.
So, if the engine starts with great difficulty, the muffler “shoots” and smoke comes from the pipe, which means that the moped is “capricious” due to problems with the carburetor. To solve this problem with the Alpha moped, you need to:
- clean the carburetor;
- thoroughly clean the moped's air filter;
- tighten the screws;
- adjust the moped carburetor.
If the Alpha is slow to pick up speed and its engine is unable to produce the stated power, the reason is that the moped valves are not working properly. In addition, he can get sick due to gaps and poor timing. For proper operation of the Alfa moped, it is necessary to replace the exhaust valves with new ones.
How to properly assemble the gearbox of a Viper Activ alpha delta moped
moped gearbox
Viper Activ Alpha Delta hur man monterar vaxelladan
moped
In this video I will tell you.
If the Alpha moped is not able to reach the required speed, despite the roar of the engine and a solid speed, it is impossible to stop the rotating wheel, and gear changes occur intermittently, then the cause of the malfunction is a worn clutch.
To fix the problem, you need to do the following:
- remove the engine;
- remove the plastic cover;
- unscrew the clamping screw;
- unscrew the adjusting mechanism and tighten the screw tightly;
- have a moped ;
- turn on first gear and drive a few meters.
Another cause of moped malfunction may be wear on the drive sprockets. If they are very worn, they must be replaced with new ones.
You may have a problem with the engine overheating. You can correct the situation after refilling the oil. If there is an oil leak, you should urgently contact professional service .
Alpha moped engine overheating
Engine disassembly
It is very easy to disassemble the Alpha engine. To do this you need:
- "Hand" with a key;
- Unscrew the bolts on the intake manifold (10);
- unscrew the cylinder covers and bolts (4 pcs.);
- remove the cylinder head.
After completing the necessary manipulations, it is necessary to correctly assemble the engine and install all the parts in place.
It may help to figure out the nuances of the scheme. The training video also contains many useful tips for repairing the most important “body” of the Alpha moped.
Removing the gearbox
Disassemble the transmission to replace the waste. This is done after dismantling the following parts:
Repair of this part of the engine is as follows:
- Using a screwdriver or knife, remove the retaining ring and drive gear;
- carefully unscrew the clamp bolt and remove the gear shift mechanism;
- Remove the shift fork and shaft;
- Remove the crankshaft and drum (including the core);
- After replacing the worn part with a new one, reassemble (in reverse order).
The process of replacing the oil seal on a VAZ
To replace it you will have to work hard, since the required part is hidden behind the clutch mechanism. And it is in such a famous vehicle as the VAZ 2107 that this nuance is most clearly observed. To carry out this event, it is better to ask someone to help. Seriously, you can do it alone, but you will waste more nerves than you can imagine. It is better if the assistant has experience in such work.
We begin to unscrew the flywheel
First of all, unscrew the engine flywheel and remove the clutch. The rear oil seal is located in a bolted housing. There are eight of them. Unscrew the bolts and the body will be in your hands. The oil seal can be removed and a new part pressed into the body instead.
The size of the rear crankshaft oil seal is quite large, and the shape is simple, so there should be no problems when pressing in and out.
Replacement using the example of Renault Logan
Using the Renault Logan car as an example, let's see how to change the rear oil seal. The first step is to remove the transmission or gearbox mechanism. The car is hung on a lift. Next, you should remove the battery. Then unscrew the bolt holding the gearbox rocker. After this, remove the bolt holding the clutch cylinder. Then remove all the bolts holding the gearbox.
Next, remove the wheels, unscrew the CV joint nuts, disconnect the ball joints from the steering knuckles, drain the oil from the gearbox and dismantle the axle shafts. A support is placed under the engine pan and the upper transmission mounts are removed, and then the entire gearbox housing.
Yes, to replace the oil seal you need to disassemble the floor of the car. But, alas, there is no other way to cope.
Flywheel removed
Remove the flywheel, basket and driven disk. In this case, it is necessary to remember the position of the flywheel relative to the crankshaft. After this, unscrew the flywheel bolts and remove the Renault Logan crankshaft rear oil seal. The oil seal is replaced with a new one in the reverse order. This completes the procedure. After a successful replacement, you can put everything back together.
Rear drive
All of the above instructions are relevant for front-wheel drive car models. As for rear-wheel drive vehicles, not only the gearbox is removed here. The first step is to remove the driveshaft, then the clutch slave cylinder. Next, unscrew the bolts holding the gearbox. They also unscrew the drawstring. After this, you can safely remove the box and change the rear crankshaft oil seal of a Ford or other rear-wheel drive vehicles.
Attention! Oil seals are made from materials of varying degrees of density. This is done so that they are selected according to the type of oil.
If you install oil seals for mineral oils, and the engine is filled with synthetic oil, the seals may dissolve.
Installation of the oil seal (try it on the crankshaft)
Before installation, the oil seal is tried on the crankshaft. The surfaces of the seal housing and the crankshaft are lubricated with oil. After installation, check the status. If no leaks are observed, then everything turned out well. Experts also advise changing both engine seals at once - both the rear and the front.
Here's how to replace crankshaft seals. On front-wheel drive cars, this task can be accomplished even by beginners. As for rear-wheel drive with a longitudinal engine, the procedure requires enormous costs and time. The price for replacing crankshaft oil seals at a service station is affordable (from two thousand rubles), so you can entrust the car to specialists.