Photo report: Replacing scooter front fork bearings
Repairing the front fork of a scooter or motorcycle
The front fork of both a motorcycle and a scooter consists of literally the same parts, they just differ from each other in size, and, in some cases, in design and principle of operation. If a front fork breakdown occurs, you must not let the situation get worse and fix it as soon as possible.
In order to carry out any work with it, it is necessary to naturally remove and disassemble it.
So, disassembly and assembly are carried out in a certain order in the following way:
- First, remove the wheel and front fender from the motorcycle, then unscrew the nut securing the stay and remove the spring. During this, if the need or any inconvenience arises, the steering wheel can also be removed. Next, you need to unscrew the coupling bolts of the lower bridge and grasp the sliding pipe with your hands, and only then remove the feather with the bridge. If you are unable to remove the feather, then you can wrap the feather bunny back a little and hit it several times with a wooden hammer or a block, then the process will go faster.
- If it is convenient for you, you can remove the headlight along with the cap and the gasket with the cover. If something prevents the cover from being removed, then you can loosen the locknut and coupling bolt, the so-called upper bridge.
- Then you need to unscrew the oil seal housing with a spanner wrench and remove it, unscrew the oil seal housing nut so that it becomes possible to remove the boot and oil seal. After this, you will be able to unscrew the rod axis and drain the oil. And then you need to remove the sliding and supporting pipes.
- Next, you should remove the upper bushing with the sealing ring and, turning the supporting pipe over, remove the piston with the rod and spring. By the way, it is worth remembering that in order to remove the lower piston or lower bushing you need to remove the corresponding retaining rings.
- Well, that's all, the disassembly of the front fork is completed, now you can start servicing or repairing it. After work, it is reassembled in the reverse order, paying attention to the wear of the rubber O-rings. Even with minor damage, they should not be installed on the fork, because they are the ones that hold the oil inside and do not allow it to leak out. And after you have assembled everything, you need to slightly loosen the coupling bolts of the lower bridge and lightly tap it with a hammer, and only then tighten the bolts. In this way, you can avoid distortions that could appear during assembly.
- If you want to simply disconnect the front fork from the frame assembly, then you also need to follow a certain procedure. First, unscrew the fork leg nuts and remove them. Afterwards, you need to unscrew the coupling bolt of the upper bridge together with the steering wheel, and only then unscrew the steering column rod nut. Next, you need to remove the protective cap and the upper cone so that you can carefully remove the balls of the upper bearing. Well, in the end, you need to carefully disconnect your fork from the motorcycle frame, just be careful not to lose the balls of the lower bearing. Naturally, assembly is done in reverse order.
And what is worth paying attention to is the abundant lubrication of the running tracks of the cones with lithol, on which the balls are actually placed, twenty pieces per bearing.
- If you have problems adjusting the column bearings, then there is a certain procedure for this case. It is necessary to unscrew the coupling bolts of the lower and upper bridge and loosen the locknut of the column rod.
- In this case, the rod nut is tightened so that the front fork can rotate quite freely relative to the motorcycle frame, but also so that there is no large play. Only then can the coupling bolts and locknut be tightened.
- If you just want to pour oil into the hydraulic shock absorber, then to do this you just need to unscrew the nut securing the stay, but, on the contrary, to drain it, unscrew the fixing axis of the rod and begin to slowly rock the fork.
- Malfunctions can also include knocking, rough operation and small oil leaks. In general, all faults must be eliminated in a timely manner.
- The repair itself comes in two types: planned and restorative. The first involves replacing oil seals, anthers and the so-called glass. Sometimes it may be necessary to change the oil. During the restoration of a motorcycle or scooter fork, as a rule, straightening or even replacement of the non-moving pipe of the fork itself is required.
- The fork is straightened if there are small bends in the feathers, and if such bends are too large, then you will have to change it completely. Traverses can also be repaired only when using special equipment. If you have difficulty turning the steering column, then most likely the cause will be worn bearings.
- Dismantling the front fork stays, for example, a scooter, is carried out with the front part facing removed. And for the convenience of this dismantling, it is recommended to remove the plug completely.
So, let's take a closer look at dismantling the feathers. First, you should remove the upper boot of the pen by prying it off with a regular screwdriver. Then remove the retaining ring using pliers and a screwdriver. Afterwards, you can loosen the bolt that secures the fork in the yoke, and only then remove the feather from the yoke.
Afterwards, you need to loosen the bolt that secures the shock absorber rod at the bottom of the feather and remove the feather boot along with the retaining ring of the feather plug, which is located under the boot.
Before draining the oil from the fork, you need to press the rod inward and remove the top plug from it, after which you can remove the spring. And by unscrewing the shock absorber rod fixing bolt, you can separate the guide and the lower parts of the scooter fork leg. All that remains is to remove the shock absorber rod and oil seal, which is pryed off with a regular slotted screwdriver.
After the above sequence of actions, you should wash all parts in gasoline or kerosene and inspect them thoroughly. If wear or damage is noticeable anywhere, it has been done and should be repaired or replaced.
Now, after correcting the problem, you can put the plug back together. Such actions are performed in the following sequence. Press in the fork seal using mandrels or a socket of suitable diameter. The remaining steps are performed in the reverse order of those described above, adding the oil recommended by the manufacturer.
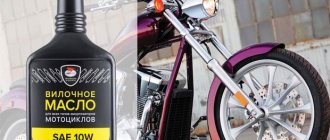
By the way, as a tip, an alternative to the recommended oil for fork shock absorbers could be power steering fluid or automatic transmission fluid (ATF).
The video story will tell you how to repair an oil telescopic fork
Since I have problems with the “patient”, and the waiting time for spare parts exceeded all reasonable limits, I “opened” with a leaking fork. I covered more than 1k km in less than a week. (for some it’s a small matter, this is the first time I’ve achieved such mileage in a week on a moto). Fortunately, the spare parts arrived, I immediately went and received them, I was afraid to wait for delivery from this store, they might drag it out for another month.
The spare parts sat for a couple of days, and on the third day I decided to go and rebuild the fork. No sooner said than done. In the evening after work I went to the dacha; naturally, I didn’t do anything at night, but in the morning my quest began.
As a preface, I would like to say that I am a beginner in the repair and maintenance of motorcycles, but with cars, my experience in “homemade” repairs has already exceeded 20 years. Well, okay, let's go...
A hot June post-apocalyptic post-quarantine morning has arrived. Such familiar summer sounds could be heard from all sides: the buzzing of flies and horseflies, the chirping of grasshoppers, the chirping of birds... Oh, what am I talking about, I’m lost)))
So: I woke up, got dressed, and drank coffee.
The next step is to disassemble the Babayka. I went out into the yard, put the bike on the center stand, and jacked up the front part to hang the front wheel.
(small note: I’m describing how I did it, but I’ll try not to forget to indicate a more optimal procedure)
First, I disconnected the speedometer cable, unscrewed and hung the brake caliper on the arch. So far everything is simple.
Next I removed the wheel. The process is not complicated, it’s not worth describing, I don’t remember the keys, 17 and 22, I think. I loosened the lower bolts in the stays (a very funny procedure, since the glass constantly tends to spin along with the bolt; I fixed it with the partially inserted axle of the front wheel).
After the wheel came the turn of the “under-clipons”, everything there is hexagonal, again, I won’t tell you the size. And then I saw something that did not make me happy at all, namely, holes for a huge hexagon (14 mm, as it turned out after measuring). There was no such thing in my household at that time.
All the numerous attempts to “invent” a hexagon from improvised means were not crowned with success: bolts turned to size were rolled up, hexagons wrapped in foil were twisted... In a word - trouble.
I really didn’t want to have to walk in the heat to the “auto parts” because... The nearest auto parts store is about one and a half kilometers from the house. But there is no choice, I decided to fry. I won’t describe this hike either, but the result was the acquisition of a 14mm hexagon and the same head. Naturally, I have a head for 14, but it is in a suitcase, it is in the car, and the car is near the house in Moscow)) But at the dacha there are plenty of torque ratchets stored.
I trudged home, took the grinder and tore apart the newly acquired hexagon. You ask - “What for?”, I will answer - if you take a piece of a hexagon, fix it in the head, you will get an excellent hexagonal head that can be safely used with ratchets.
The tool is ready. I loosened the upper fastenings of the feathers, pulled off the plugs and unscrewed them slightly. Then I thoroughly loosened the upper and lower fastenings of the feathers, and finally pulled out the “patients”.
Then everything went much easier. I unscrewed the top plug on one of the feathers (here you should be careful, hold the plug, because the spring is in a slightly compressed state), turned it over, drained the oil while pulling out the spring. Then I removed the boot and unscrewed the bottom bolt. After this action, the “crowbar” came out of the glass without any effort; the retaining ring and the seal remained in the glass. I pulled this out too, no difficulties arose. There was also some kind of washer under the oil seal, I don’t know what it’s called correctly.
I repeated all the actions performed with the left pen on the right one, and ended up with a completely disassembled fork.
I washed everything with kerosene, cleaned it, dried it, dried it and started putting it back together. Again, the process is not difficult, just don't rush it.
I pressed the new oil seals using old oil seals, boots, a rag and a sewer pipe of a suitable diameter. After the seals there are retaining rings; I simply installed them by hand and adjusted them a little with a thin flat-head screwdriver.
I poured in some oil, pumped it, and started adding it to the required level. The manual says that after a complete overhaul you need to fill in 285 ml. oil, but there was nothing to measure the volume, so I used the second option indicated in the same manual: in a fully compressed state with an uninstalled spring, there should be 195 mm from the top of the crowbar to the oil level. Using available materials, I made a probe of the required length, and then “added and measured” several iterations. Then I baited and tightened the plug as far as possible without installing it on the motorcycle.
The process of installing the feathers, wheels, clip-ons, calipers and the rest of the tripe is not very interesting, everything is the same as during disassembly, only in reverse order.
As a result, I got a working fork, a good mood and a new experience that will come in handy someday.
Disassembling the Honda Dio AF fork shock absorber
Understanding is not difficult. First, the fork shock absorbers need to be removed; to do this, you need to unscrew 2 bolts from the yoke, on each stay, and pull the shock absorber out of the yoke.
The shock absorber is made up of a glass (10), two bushings: the top (through (5)) and the bottom (blind (8)) made of fluoroplastic (coprolon), a rubber bumper (9), a retaining ring (4), anther (3) , a plug (1), 2 springs (6), a spring stopper welded onto the feather (7) and the feather itself (2). To disassemble the removed shock absorber, you need to pull out the boot and retaining ring, and if there are no problems with the first, then you may need to rummage around with the other. There are 2 lugs at the ends of the locking ring; you need to insert two awls into them, squeeze and then remove the ring.
After this, the feather should quietly crawl out of the glass, but it happens that the upper sleeve sticks to the glass and does not allow the feather to be pulled out. All methods are good here - WD-40 and a little warming up. You may have to crush it and pull it out in pieces.
Replacing scooter front fork seals
29.07.2019
8774
Moto, Repair
The fork on my Viper wind scooter was leaking. And it started leaking - all the feathers were covered in oil, and there was also a puddle of oil on the floor overnight. Naturally, this is no good and the seals had to be changed.
To replace the seals on the scooter fork, first you still need to get to them. I had to remove the front fender and wheel. Now I have access to the mounting bolts.
The fork stays are attached to it with 2 bolts each. We unscrew these 2 bolts and take out the pen itself. It consists, roughly speaking, of 2 parts - the lower one, to which the wheel is attached, and the upper one, which is attached to the fork. To separate them, you need to unscrew one bolt, which is located at the very bottom.
To do this you will need a 7mm hex socket, which, to my surprise and disappointment, is not available in every hex socket set. I didn’t have one like that either, so I took what I had - a T-40 star-shaped bat. It fit perfectly. To make it easier to unscrew, the upper part of the feather can be clamped in a vice, having previously been wrapped in fabric.
After unscrewing this bolt, do not rush to pull the upper part out of the lower one. Be careful, a lot of oil will flow out of them (even though most of the oil has leaked out through the oil seal), so it’s better to place some kind of container first.
After disconnecting, pay attention to the upper part of the pen to see if there is any damage, severe abrasions, grooves, etc. I had damage that resembled a chip. It was because of this that the oil seal leaked. Such a part cannot be installed backwards, otherwise the new oil seal will suffer the same fate. Therefore, instead of the seal, I had to buy the upper part of the pen. I couldn't find a new one, so I had to settle for disassembly.
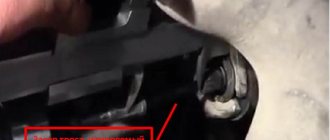
Now let's move on to replacing the front fork oil seal. Now we will only need the lower part of the fork leg. This is where the oil seal is located. In addition to the oil seal, there will also be a boot and a retaining ring.
First, pull out the boot using a screwdriver. Next, a retaining ring is installed so that the oil seal is not squeezed out by pressure. We also remove it, pry it out with a screwdriver. Well, now we get to the scooter fork seal. It will also be most convenient to pull it out with a screwdriver.
The oil seal has dimensions 27x39x10.5 . Finding it on the market will not be difficult.
We wipe the seat from dirt and old oil and hammer in a new oil seal. I used a 27 socket as an attachment. Next we install the retaining ring and boot, although the boot can be tightened at the very end.
It is advisable to wash all fork parts from dirt before assembly. After which you can assemble the pen in reverse order.
Now the most interesting thing is how much oil to pour into the fork and how to do it? For filling, I bought special Elf fork oil, it suited me for the price. You can fill in two ways:
- Through the bottom of the pen
- Through the top of the pen
In the first option, pour oil through the 7 hex bolt that secures the two parts of the pen. In the second - through the top bolt. I chose the second option.
Once the nib was fully assembled, I unscrewed the top bolt, lowered the top of the nib about halfway, and used a syringe to pump oil into the fork until it flowed out of the top. I got about 50 ml. If you want the fork to be softer, then you can pour in even less - 45 ml, or even 40 ml.
We lower and raise the upper part of the feather several times so that the oil disperses and tighten the upper bolt. All that remains is to install the finished feathers back onto the scooter fork. At this point, the work of replacing the scooter's front fork oil seal can be considered completed.
Checking work
The most adequate assessment of the work done after reassembly is a ride on the updated motorcycle. It’s not for nothing that they say that after changing the oil, a motorcyclist ends up with a completely different piece of equipment in his hands. The fork should be elastic, stable, not sag or be too stiff.
Changing the oil in the fork of Alpha and Delta mopeds
Repair of fork for moped Alpha, Delta. Change of oil. Replacing oil seals
A vehicle such as a scooter is increasingly gaining popularity. Its suspension includes such a part as the front shock absorbers of the scooter. They are simply irreplaceable on our roads. It is the shock absorbers that soften the ride over all irregularities, potholes and bumps. If they were not there, then other parts that are not designed for such a load would suffer. Thanks to its suspension, the scooter can ride not only on a flat road, but also on moderately broken ones and withstand falling into potholes. Although the scooter is intended for smooth roads and the city. I once fell into a 10 cm deep hole on a Honda Dio scooter. The same thing happened with a passenger. I think if it weren’t for the scooter’s shock absorbers, not only would it have broken, but I and my passenger would have been sent on a short flight with a hard landing.
Over time, the front shock absorbers of the scooter lose their properties and require repair or replacement. How long it will take for this to happen depends on the quality of the roads, your riding style on them and, of course, on the shock absorbers for the scooter themselves. You will feel it yourself when replacement is required, since every hole and unevenness will be more and more noticeable. There will be a characteristic knocking sound in the front fork of the scooter. If you turn a blind eye to this for a long time, the shock absorbers will completely lose their shock-absorbing properties and, over time, more expensive parts may be damaged. Therefore, as soon as you feel that every unevenness in the road is transmitted to you, that is, you feel the road with your body, then the shock-absorbing properties have become unusable.
The rear shock absorber of the scooter suffers the most. Therefore, replacing them in a scooter is often more urgent than replacing the front ones. One of the signs that the front shock absorbers of a scooter have become unusable is the following: if the scooter is rocked in place, the front fork shock absorber may jam or not return to its standard position on its own. If it sags, you will feel it because the scooter has become a little lower. If you lift the scooter's handlebars up a little, you will see that it has risen and returned to its previous position. But this is before the first load. This front shock absorber needs to be urgently replaced or repaired.
How to remove the front fork on an alpha moped
I was thinking about changing the oil in the front fork on an Alfa, I looked on the Internet and found how much to pour (in the Alfa 120 ml, in the Delta 160 ml (in each leg)), but I couldn’t find any exact criteria about what kind of oil to pour there.
Questions: Have you changed the oil in the fork? Which one did you fill and how many ml? At what mileage did you decide to change the oil?
Added after 5 minutes
I’m also thinking about replacing the front drum brake with a disc brake, but since there is no mount for a caliper on the fork legs, I’m thinking of installing a complete fork or just the legs from Parton King 50. But I don’t know the size of the fork from King and whether it will fit into the Alpha yokes
There, as far as I know, the oil is not changed but topped up as needed. They suggested oil to me and 20. spindle in common parlance.
Added after 2 minutes
I’m also thinking about replacing the front drum brake with a disc brake, but since there is no fastening for a caliper on the fork legs, I’m thinking of installing a complete fork or just the legs from Parton King 50. But I don’t know the size of the King fork and whether it will fit into the Alpha crossbars [/ quote]
Take and measure the diameters of the pipes with a rod of both. And compare. But there is no reason to install a disk drive on 50 cubic meters. And then decide for yourself.
I changed it and barely opened the feathers. Clamped in a vice in a barbaric manner, removed the decor on the fork and clamped it in it. So I opened it. I temporarily filled it with 10w40, at least better than the original oil. I poured it to the edge in clamped fork. (This might be correct, but it’s temporary)
They also pour a transmission (a wide variety), there is a special one. oils for this, for example Motul fork oil expert of different hardness 7.5W 10W 15W. (Light, medium, hard)
Hydraulic oil MGP-10 TU U 00152365.111-99
Hydraulic oil MGP-10 is a composition of low-viscosity, low-solidifying petroleum oil, depressant, dispersant, anti-wear, antioxidant and anti-foam additives.
Intended for use as a working fluid in hydraulic shock absorbers of automobiles
Ensures shock absorbers operate over a wide temperature range.
Good anti-wear characteristics. Physico-chemical indicators: No. Name of indicator Indicator value 1. Color, CNT units, no more than 5 2. Kinematic viscosity, mm2/s at minus 20°C, no more than 1000 at plus 20°C, not less than 35, 0 at plus 50°С, not lower than 10 3. Pour point, °С, not higher than minus 40 4. Flash point, determined in an open crucible, °С, not lower than 145 5. Acid number, mg KOH/g oil, not more than 0.15 6. Corrosion effect on metal withstands 7. Mass fraction of water, %, no more than none 8. Mass fraction of mechanical impurities, %, no more than none 9. Change in rubber volume after aging, %, ranging from minus 6 to plus 6 10. Tribological characteristics on a four-wheel drive: welding load (Рз), N, not less than 2820 critical load (Рк), N, not less than 710 scuffing index (Iz), N, not less than 324 Added after 6 minutes
Honda Dio AF fork repair
After disassembly, all that remains is to assess the degree of wear of the elements (replace if necessary), clean the shock absorber from dirt, fill it with grease and reassemble it in return order.
To repair a Honda Dio fork, you may need fresh boots, plugs and bushings, as well as other parts.
The bushings can be turned by a turner. Material: coprolon, as a more wear-resistant material.
After repair, the fork will become simply unrecognizable and is in no way inferior in softness to the Honda Tact. The result of the repair will gradually begin to be lost after 3.5 thousand. km driven on our roads.
Dirt is a terrible enemy of these (and not only) shock absorbers; pay attention to the condition of the dust plugs and boots.
Dimensions of coprolon (fluoroplastic) bushings for Honda Dio AF-25
| Parameter | Size (mm) |
| Inner diameter of glass | 35,4 |
| Upper bushing outer diameter | 35,3 |
| Upper bushing inner diameter | 27,5 |
| Top bushing height | 30 |
| Bottom bushing outer diameter | 34,8 |
| Bottom Bushing Inner Diameter | 27,2 |
| Bottom bushing height | 30 |
| Thickness of the bottom of the lower bushing | 5 |
| Holes in the lower bushing | 2,5 — 3,2 |