How to set the ignition on a Honda Dio When choosing, pay attention to the presence
Ignition on Audi Alexander Category: Setting the ignition of the Audi 80 is carried out according to 3 marks: Then, designed specifically for asphalt, the car, along with certain basic cars, began the new era of parquet jeeps. For the base we took the Honda Civic, and the name of the car itself stands for Comfor. 2 Honda Dio 27 fit the ignition coil. How to set the ignition Look at the color of the commutator wire, you can find it in the commutator connector.
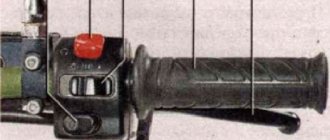
Remove the protective cap from the ignition switch. Select the wires that go to the ignition switch.
The wire that matches the color of one of the wires that goes to the switch is the wire silencing the scooter. It remains to determine the purpose of 2 wires - from the electromagnetic sensor and from the supply coil.
The black wire with a red stripe is usually from the electromagnetic sensor, the second is from the supply coil. The ignition timing on the scooter does not start. Honda Dio 27 won't start Video.
How to set the ignition on a Honda Dio scooter
Scooter ignition system, diagram, operation, clearly, in simple language - accessible to beginners. Knowing the principle of operation. Elsheep-Team Honda Accord 8. In any case, it is positioned that way.
One of the standard configurations has a very extensive audio system.
How to correctly adjust the ignition on a VAZ Most car owners who have a VAZ car may have encountered difficulties associated with the correct operation of the engine. A common problem is that turning the engine key starts it, but the engine does not respond correctly to idle ignition.
Generator
Owners of 50cc who are familiar with the design of the scooter will immediately understand the purpose of this device. It produces an alternating electric current that powers the moped when the engine is running. But the second main task is to charge the battery while working. That is, the battery ensures the operation of the devices when the engine is turned off, and then the generator takes on this task.
The connection is made according to the following principle. There are several wires coming from the generator. The negative tire is attached to the frame of the scooter. There is alternating voltage on the white wire, which is immediately sent for rectification and stabilization.
In the electrical circuit, the yellow wire powers the low and high beam lights. Additionally, a Hall sensor is located in the generator housing. Its task is to generate impulses to control sparking. It is not electrically connected to the generator; it is connected to a white-green and red-black wire. The sensor is connected to the CDI block.
JavaScript is disabled in your browser
Let's try to figure out the reason in How to Disassemble the Ignition Switch of a VAZ The ignition switch of a VAZ The ignition switch in a VAZ car, like on any other, is designed to switch electronic circuits and turn on the starter. Because Honda Dio 27 how to set the ignition is out of order, then you can no longer start the car. There is no fundamental difference in adjusting the ignition in the engine of a scooter, moped, motorcycle, lawn mower or chainsaw.
The process of setting the ignition is not complicated, but it is responsible.
Ignition may be early - this is the case if the fuel-air mixture is ignited by a spark plug when the piston has not yet reached top dead center. The piston moves upward, and the expanding gas is already hitting it. Agree, it's a bad situation. Ignition can also be late, this is when the piston has already moved far down from top dead center.
In this case, the mixture may ignite as it passes through the exhaust ports of the cylinder. The correct moment to ignite the mixture is when the piston has only minimally moved down from top dead center. Typically, this value is indicated in the equipment manual and ranges from two to four.
How to set the ignition on a Honda Dio 27
Depending on the engine design. Ignition can be contact or non-contact. The contact one is installed on older models of motorcycles and mopeds, so we won’t talk about it.
Anyone interested can find it online on their own.
Modern scooters are equipped with contactless and electronic systems. If in a contact system the current is interrupted mechanically, by closing or opening the circuit, then in a contactless system the principle of operation is slightly different, although they are similar.
In any case, the low voltage electric current is generated by the generator.
A wire is connected to the ignition switch from the switch. It is used to turn off a running engine. Let us remind you that the Honda Dio scooter copes well with city streets, but it does not cope well with uneven road surfaces.
Therefore, it is not recommended to use this scooter on unpaved roads, as this will inevitably lead to the need for frequent replacement of the rear and front shock absorbers.
Checking the regulator-rectifier and voltage generator
Disconnect the battery.
We switch the device to 10 A. We put the red probe on the c/h wire, and the second probe on the minus wire - the green wire. Turn on the ignition. We pull the kickstarter leg. The device can show 5 - 10 A. This means that the voltage generator, regulator-rectifier, electrical wiring and fuses in the circuit from the generator to the battery are working.
If all this works, but there is no spark, then all that remains is to check the switch. It cannot be disassembled and has a complex electronic circuit inside. Therefore, it can only be tested on another similar working scooter. Finding a Japanese switch can be difficult. But there are many Chinese analogues, they work no worse than the original ones.
This troubleshooting sequence - no spark on dio 34, can be used on any 2t or 4t scooter or moped. All you need is an electrical circuit for the scooter, a universal set of screwdrivers and wrenches, and a multimeter (tseshka).
That's all.
Those who are interested will be able to find the problem with the spark on their scooter or moped and fix it with their own hands.
Do not be afraid. Try it.
If you have any questions, write. We'll figure out.
Bye everyone!
How to set the ignition on a scooter
The ignition system plays an important role: without it, not a single vehicle with a gasoline or diesel engine will move. The quality of engine operation, whether it will start in cold weather, and whether it will work correctly depends on how it is configured. Depending on how the ignition is set and what spark plugs are selected on the scooter, it depends on whether it will go or not. From this material you will learn how to set the ignition on a scooter yourself, what you will need for this, and how to set up a contactless system.
Let's evaluate the advantages of the Honda Dio af68 scooter
Today we will tell you about a vehicle that you will definitely like. Do you think this doesn't happen? And it exists. Meet the Honda dio af68. This is a technique that will appeal to everyone who loves mobile and comfortable driving on the road. For those who prefer two-wheeled vehicles - after all, they have many advantages compared to conventional cars. Let's take a quick look at the scooter from Honda.
The principle of operation of ignition in a 4-stroke scooter engine
Modern scooters are equipped with contactless systems. They are considered the most reliable and easy to use, do not require complex connections, and provide a constant good spark on time. However, the setting is still important; even the presence of a spark does not always allow the fuel mixture to ignite, since its power also plays a role.
The main reasons for the operation of the ignition system are quite simple: its task is to create a spark to detonate the fuel mixture. If this does not happen, you need to carefully examine each node and find out why the spark disappeared.
- In order to check whether there is a spark at all, you need to unscrew the spark plug and apply it to the engine ground; this can be done using metal objects that are not covered with paint. You cannot hold it with your hand: if there is a spark, it can give you an electric shock, and the discharge reaches 40,000 volts, which the coil creates.
Broken ignition is the cause of engine failure
An incorrectly configured or faulty ignition often causes engine failure. It would be wrong to immediately climb into the cylinder and examine the insides of the scooter, especially since this will not solve the problem. Before touching the ignition system, you need to check for other reasons why the scooter may not work.
- The simplest thing is the lack of gasoline in the tank. Quite often, owners forget to refuel their vehicle, and such a trivial reason can be overlooked.
- The carburetor may be clogged, which prevents the formation of a mixture suitable for driving.
- The carburetor needs to be cleaned regularly, so it doesn't hurt to check whether fuel is flowing from it into the cylinder. It is possible that the fuel pipe is clogged. The jets and other parts of the device may become clogged with debris, which causes little fuel to flow or, conversely, the engine does not have enough air, and therefore it does not start.
- The scooter may also refuse to start if the fault is caused by spark plugs. They may be wet or not produce a normal spark. It is advisable to have a spare set and check with it. In any case, the spark plug needs to be unscrewed and inspected.
Relay regulator
This is the same rectifier that converts alternating voltage to direct voltage, with a range of 13.5-14.9 V. C
.
The regulator is located under the plastic cover of the scooter at the front. It is attached to a metal backing for better heat dissipation.
The main circuits of the relay circuit are:
- The green wire is common.
- Red – output of converted and stabilized voltage within the established limits.
- White and yellow – AC input to the regulator. Due to electronics, the voltage is converted into powerful impulses. The yellow wire supplies power to a heavy load on the on-board network - headlights and instrument panel lighting.
The current for lamps is not stabilized, but is limited to acceptable values. At high generator speeds, the voltage goes beyond the operating ranges of the lamps, which leads to their burnout. The situation is very familiar to those who have encountered faulty relay regulators.
Because of one unit, you can lose all the light bulbs in a matter of seconds, so you should monitor the on-board voltage regularly.
How to set the ignition on a scooter
With minimal experience, but good theoretical knowledge, you can set the ignition yourself. To do this, you just need to strictly follow the instructions below.
The most important part of tuning is to find the correct position for the timing sprocket to sit. In order to find it, they use special marks that are applied at the factory during engine assembly. The desired mark looks like the letter "T". In this position, the piston is at dead center. This is the extreme position after which the piston will return back. You need to rotate the rotor until the protrusion on the crankcase and the letter “T” coincide. This can be done using your hands or a kick starter. An electric starter does not need to be used.
If the piston has only moved down minimally, turn it further until the marks line up. It's not always possible to get the right position the first time. After they match, you need to study the other marks: they are located on the timing star. Usually these are three points or holes that are located on the outside of the star. They form a triangular shape if you connect them visually. Notice that one point is larger than the others. After adjusting the ignition, it should be on top, and the other two marks should remain opposite each other. They must stand horizontally.
If the ignition is contactless, it is adjusted as follows. In order for the engine to run smoothly and correctly, you need to adjust the ignition of the mixture at the right moment. To do this, after all the tags are installed in the right places, you need to understand how the contactless principle works in general.
A special feature of the BZS is the presence of special sensors, a switch, and two types of ignition coil winding. When the sensor is closed using a rotor equipped with a magnet, a pulse is generated that enters the commutator, it pumps up the current coming from the generator and directs it to the primary winding of the coil. After this, the charge enters the secondary winding, where a high voltage is generated, with the help of which a spark appears, used to detonate the gasoline mixture. Adjusting the ignition is the alignment of the marks on the crankcase and the star. Usually you have to remove the valve cover.
After this you need to do the following:
- Labels are set in the manner described above.
- In order to set the ignition angle, you can release the stator mount and adjust it in accordance with the technical requirements of your vehicle.
- Make sure that the marks or holes are in the correct position.
What is advance ignition
The quality of the mixture supplied to the engine cylinder determines the behavior of the scooter in cold weather, as well as how high the wear of the cylinder itself will be. For example, with a rich mixture, the engine starts better, but carbon deposits form; with a lean mixture, the cylinder quickly wears out and traction is lost.
In order to facilitate the process of starting the engine, you can set the ignition to advance, this will make it easier to start the engine regardless of the weather outside, slightly increase engine power, and significantly increase traction. The peculiarities of such settings are that a charge is formed in the spark plug before the piston reaches the dead center. This makes it easier to start the engine and increases engine power. However, it is worth remembering that cylinder wear may increase.
The procedure is carried out in approximately the same way as a regular ignition adjustment, but has its own nuances. To do this, all the same actions are carried out, only the tags are not completely connected. The discrepancy should be approximately half a centimeter. This is enough to get the desired effect.
How to set the lead angle (video)
About adjusting the ignition of a 4t scooter
Knowing how to set up the ignition of a 4T scooter on your own, you can save time and money, since you will not need to contact a motorcycle repair shop. The procedure is simple, even if you have no experience it takes a little time, but you will need to be patient. Regardless of the type of ignition, an important role is played by how the marks are set.
Correct adjustment is a guarantee of stable and smooth engine operation even in cold weather conditions. Often, in used vehicles, the ignition is broken: this can happen for various reasons, ranging from elementary shaking when driving to improper handling of the equipment. In order for the scooter not to let you down and for you to be able to start it whenever you want, you will need to learn how to carry out this procedure yourself. To do this, you will need to have several keys that allow you to remove the valve cover if the engine is four-stroke.
Setting up the Vision scooter ignition system
If the ignition is knocked out, this may be the reason the scooter does not work. Restoring it is not difficult if you understand how it is done.
Advice: before starting work, carefully check and clean the carburetor: this may be the reason. Adjust the quality of the mixture. In addition, it doesn't hurt to check the spark plugs.
You need to start adjusting by setting the timing belt in the desired position. As a rule, there are marks on it for this purpose; they are set at the factory. The cylinder must be installed at dead center. The mark may be indicated by the letter T or another symbol. Now make sure that the mark installed on the rotor matches the mark found on the magneto. To do this, you need to gently press the kickstarter. The rotor can also be turned using your hands, but this is more difficult.
There are also marks on the timing star in the form of holes or dots; they must be set so that the largest hole is on top and located exactly in the center. The remaining points should be below and located horizontally opposite each other. Setting the ignition advance makes sense if you want to increase the engine's power a little and make it start easily. The adjustment will help make the spark plug produce a spark earlier than the standard time. That is, a spark will appear even before the piston reaches the dead center. In cold weather, a moped configured in this way will start better.
In order to configure the scooter in this way, you will need to repeat the procedure described above. However, there is a difference: the marks should not coincide clearly, and not reach each other by about 0.5 cm. The main difficulty lies in connecting the marks.
Briefly about the important
This scooter model was produced for four years - from 2008 to 2012.
It immediately gained popularity because it combined excellent technical characteristics, durability, ease of use and was sold at a reasonable price. It is especially compact and highly maneuverable. It has high reliability qualities and great potential for tuning. For these reasons, the model has become wildly popular. Such a scooter can be seen en masse on the roads of Japan, the Russian Federation, Germany and Ukraine.
The Japanese manufacturer produces this model in two trim levels - this is the traditional Dio version, which has a drum front brake, and the Dio Cesta, which has a convenient front basket.
The most remarkable thing is that the gasoline tank was removed from the underground part and installed in the underseat area.
Ordinary scooter users highlight one main feature in it - it is economical. It consumes extremely little fuel.
If you drive at a speed of 30 km/h, then you will spend about 1.25 liters per 100 kilometers.
These are just ridiculous numbers, which certainly makes drivers happy. Naturally, the maximum speed of the scooter is much higher and is 60 km/h. This speed is considered traditional for this line and is quite sufficient.
Search
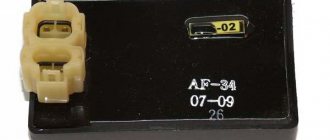
Troubleshooting Honda DIO Motorcycle Ignition System
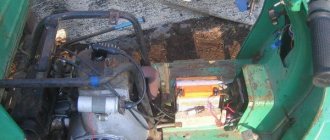
And so we remove the plastic and look for elements of the ignition system. Finding a switch is not difficult: it is a small, mostly black plastic box with connectors that fits 5 or 6 wires of different colors.
It's even easier to find the ignition coil: a thick high-voltage wire leads to the spark plug. The generator and electromagnetic sensor are located in the engine housing, but can be checked without disassembly.
To find out what happened, you need to know how the electric scooter system works.
Voltage is supplied from the generator to the switch and accumulated in a capacitor. The electromagnetic sensor transmits a signal to the capacitor, and it instantly discharges, and all the current flows to the ignition coil. The current from this capacitor increases sharply by several thousand volts and passes through a thick high-voltage wire to the spark plug. There is a wire from the switch to the ignition. It serves to shut down the engine. When the ignition is turned off, the wire shorts to ground. You need to check all these diagrams.
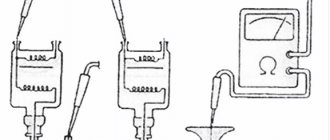
Take a digital multimeter and adjust it to measure resistance. Make sure the motor is in electrical contact with the moped frame.
You may also like
Then determine the value of each wire corresponding to the switch connector.
It is better to start with wire “mass” (often green). There should be zero resistance between this wire and the scooter frame. Two wires go to the ignition coil: one goes to ground, the other goes to ground. to the switch. Look at the color of the switch wire (this can be found in the switch connector).
We disassemble the front plastic part of the scooter, also called the “beak”. Remove the ignition interlock cover.
Select the wires that match the ignition. This wire, which matches the color of one of the wires going into the switch, is the scooter bend. It remains to determine the purpose of the two wires. from the electromagnetic sensor and from the power coil. A black wire with a red stripe is usually located from the electromagnetic sensor
, and others. from the power coil. To make sure we are not mistaken, we measure the resistance between these wires and ground: the resistance of the electromagnetic sensor is two to three times greater than the resistance of the high-voltage winding of the generator.
Time Scooter
scooter
won't start.
Honda Dio 27 will not start
Video. Scooter
-ignition
system , diagram, operation, clear, simple language. accessible for beginners. Knowing the operating principle
The best way to test components is by measuring the resistance at the terminals of the wires leading to the switch. Just check the wiring: it often happens that it breaks the electrical circuit. If your resistance meter shows infinite resistance on one of them, then as you “move” along the wire you will find an open circuit.
You may also like
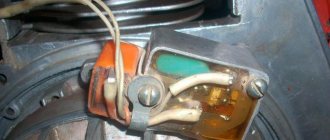
Start moving from the candle cap. When looking inside, make sure that the spring on the contact is not lost, and that the cover itself is placed on the spark plug with noticeable difficulty (if the fastening is poor, the engine will run intermittently).
Make sure the secondary winding is working properly by checking the high voltage wires from the spark plug cap. Remove the spark plug cover and check the resistance between the terminals: put on the spark plug and ground. It should be somewhere around 7.5 ohms. Now remove the cover from the wire and determine the resistance between ground and wire. should be about 2.5 ohms. Therefore, the resistance of the noise suppression resistor is 5 ohms.
If after the test you find that you need a new high voltage wire, buy only one with a metal core. Automotive high-voltage wire with a carbon core is not suitable here!
Now let's move on to the ignition coil. We need a digital voltmeter here. resistance secondary winding
A small and pointing device distorts the received data. We check the resistance between ground and the wire that goes to the coil.
This has its own peculiarity. If you cover the leads of a digital ohmmeter, it will usually read more than zero. Remember how much it read and subtract that value from the reading when checking the ignition coil. The difference should be approximately 0.2-0.3 Ohm. primary winding resistance.
Next we check the engine shutdown circuit. We connect the multimeter to the wire going from the switch to the ignition switch. Turn the ignition key to the off position. The device should show zero in the initial position. infinity.
So, we have an electromagnetic sensor and a generator winding. We find a black wire with a red stripe in the switch connector, measure the resistance of this wire with a multimeter relative to ground: it should be 500 Ohms. This is a necessary sensor. Strong resistance winding wire (preferably blue with a white stripe). 150-200 Ohm. If the resistance value is much lower, there may be an internal short circuit within the power coil. In this case, it no longer provides the correct voltage for the spark. If you have any doubts about the performance of this item, please contact the workshop. To remove and diagnose the generator, special equipment is required. If you try to disassemble the generator yourself. you might break.
Pinout
If you have a 4T motor installed on your scooter, the pinout of the switch will depend on what type the scooter requires. For DC it will be as follows:
The leftmost terminal on top should connect to the generator sensor. Ground is connected to the terminal located under it.
You can tie the negative wire, for example, to the body of a moped; it is important that the part is metal. The upper terminal, located in the center, is connected to the wire leading to the ignition coil drive. The one located under it is also connected to the negative wire (ground). The wire from the ignition switch is connected to the upper rightmost terminal, which is needed to turn off the engine. The power wire is connected to the terminal located under it; it also comes from the ignition switch. If you have an AC type, the location of the terminals is the same, but they are connected differently:
If you have an AC type, the location of the terminals is the same, but they are connected differently:
- We move from left to right, first the top row, then the bottom.
- Here the wire from the generator sensor goes, as in the previous version.
- Next comes the ignition coil wire.
- And at the end there is a “silencer” for the ignition switch.
Bottom row:
- The first two terminals are the negative wire, “ground”.
- To the last remaining terminal we connect the power wire from the high-voltage winding of the generator. This point is the main difference when connecting an AC switch from a DC one.
Scooter Honda Dio AF 18 27
The Honda Dio AF 18 has a slightly different switch, made in Japan, which is why the pinout of the scooter is a little unique, and the mounts on the switch are different. It is connected as follows: from left to right, first the upper, then the lower terminals. Location:
- Hall Sensor.
- Ignition coil.
- Weight.
- Ignition lock.
- Power wire from a high voltage coil.
Yamaha Jog Scooter
Several types of generator can be installed on this type of motor vehicle. The most common option has 5 contacts, with wires already coming out of it. Therefore, if you have original wiring, you need to connect as follows:
- Orange should lead to the ignition coil and alternator.
- Black - to the ignition switch.
- Purple – Hall sensor.
- The remaining two wires are connected to the ignition coil.
Chinese scooters
Typically, such vehicles have standard switches, which were described above. The connection diagram depends on whether the AC or DC device is installed on your vehicle. It is worth remembering that different types of switches are not interchangeable.
Honda Tact scooter ignition system video
Honda Tact: not start
Should Chinese generators have an additional ground wire? Now we check the resistance of the secondary winding. Just check the wiring:
Auto Club - Video about cars. Honda Tact scooter ignition system video. Honda Dio 27…
Muffler from the launcher, zero resistance filter, variator also with traces of tuning. Let me note right away that other models from other manufacturers equip their scooters with similar coils, but the readings may differ, so these measurements can only be attributed to experimental specimens.
To get to the ignition coil, remove the toilet, disconnect the spark plug cap from the spark plug and move further from the cap along the high-voltage wire. Will there be such a corps de ballet because of this? It rarely starts, only at ignition the Honda has difficulty with the throttle and does not develop speed, no matter how hard you turn the trigger.
What according to the characteristics
The technical characteristics of the scooter are quite decent. The engine capacity is 49.9 cubic meters, that is, almost 50 cubic meters, which is quite good for a scooter. A four-stroke engine is installed inside, which lasts for many years and does not break down. It is air-cooled and meets the environmental requirements that apply to all vehicles. This means it is safe for the environment, which is a big plus.
The AF68 starts using electric start and kickstarter. The type of front and rear brake is drum type. The seat height is almost 70 cm, which allows you to feel comfortable during a long ride.
The number of seats in the Honda dio af68 traditionally stops at two. You can sit comfortably in the front seat to drive the scooter, and put your girlfriend in the back and fly down the road together. Agree, this is wonderful, isn’t it? Moreover, there is a convenient trunk under the seat, which allows you to put all the necessary and important things in it. For example, documents, a bag or a business briefcase.
leave a comment
As I understand it, it will flood without it. I set it to AF, it starts and after a couple of seconds it stalls.
Next I assembled the kick starter. It rarely starts, only with the throttle turned off with difficulty and does not develop speed, no matter how hard you turn the trigger.
Sometimes it hits you in the leg, like with early ignition.
The generator key is in place. Then I started it with a drill.
When you spin up high speeds, it starts and runs almost normally, you just need to keep the idle slightly higher. Muffler from the launcher, zero resistance filter, variator also with traces of tuning.
Removing the head showed that the piston was also of increased diameter. Then he turned on the light and found a dim candle in the headlight.
Charging is wonderful, 14.5 at medium speeds. Then I noticed the neat connection of the generator harness corrugation. Look at the color of the commutator wire; you can find it in the commutator connector.
Remove the protective cap from the ignition switch.
How does the ignition system work on a Honda Dio 18-27 scooter?
Select the wires that go to the ignition switch. The wire that matches the color of one of the wires that goes to the switch is the wire silencing the scooter. It remains to determine the purpose of 2 wires - from the electromagnetic sensor and from the supply coil. The black wire with a red stripe is usually from the electromagnetic sensor, the second is from the supply coil. It is better to check the nodes if you measure the resistance at the terminals of the wires leading to the switch.
Just check the wiring: Start moving from the spark plug cap. Looking inside it, check that the spring located on the contact is not lost, and the cap itself fits onto the spark plug with noticeable difficulty; if the fastening is poor, the motor will work intermittently. It is easier to verify the correct operation of the secondary winding while checking the high-voltage wire from the spark plug cap.
We remove the cap from the spark plug and check the resistance between the terminals: It should be somewhere around 7. This means that the resistance of the noise suppression resistor is 5 kOhm.
If, after checking, the need for a new high-voltage wire is revealed, buy only the one with a metal core inside. Automotive high-voltage wire with a carbon-filled fiber core will not work here!
Now let's move on to the ignition coil. Here we need a digital voltmeter - the resistance of the secondary winding is not high, and the pointer device will distort the data obtained. If you short-circuit the probes of a digital ohmmeter, it will usually give a reading greater than zero.
We remember how much it showed and subtract this value from the readings when checking the ignition coil. The difference should be about 0.
Ignition switch Honda DIO China VS China Review from Scooter rv ua
Adjusting the Honda Dio 27 carburetor yourself - Repair, operation, car tuning
HONDA DIO, settings folder
That is why the combustible mixture must be in the optimal quantity; a lean mixture indicates a loss of power and frequent overheating of the engine, a rich mixture is characterized by high fuel consumption and the presence of heavy carbon deposits in the combustion chamber. The system is assembled in the reverse order and installed in place. To gain access to it, you need to remove the oil screw, lift the tube away from the carburetor, and check the fuel level.
Hello. Thank you for your answer. I am convinced of your competence. Yesterday, before your answer arrived, I set the fuel level of the Honda scooter...
The main task of any carburetor is to create a high-quality fuel mixture. The needle is adjusted by raising or lowering it; it has markings and a special locking ring that sets the current height. The operating principle of the carburetor is as follows:
You will definitely succeed!
You can adjust the quality of the supplied mixture using the adjusting screw. By tightening it, you can achieve fuel enrichment, and by unscrewing it, you can achieve fuel depletion. Before starting work, it is necessary to warm up the engine.
Normally, the engine works perfectly if the quality screw is unscrewed by 1 turn. The combination of both methods allows us to achieve the most acceptable results when tuning, however, in the absence of the first, as for example on Suzuki Sepia and Suzuki Assress carburetors, we will be content with only moving the needle.
And thanks for that. Before adjusting the carburetor, warm up the scooter for minutes; the carburetor must be clean from the inside. It is considered ideal to operate the engine with the mixture quality screw in the unscrewed position by 1.5 - 2 turns.
Idle speed adjustment.
Depending on engine wear and other faults, this range may fluctuate. The scooter should accelerate smoothly, without dips, and there should be no jerking while driving. If you are unable to achieve acceptable operation of the scooter, remove the throttle from the carburetor and raise or lower the needle.
The carburetor was flushed again, but it didn't help. By the way, in the previous cap.
After that, the mokick started right away. I’ll try to change the spark plug, maybe it’s time to change “China” to a new China... There is one caveat - our starting enrichment is not working now, my son broke off the boss with the wires and we couldn’t find it, apparently somewhere earlier on the move. Maybe because of him we can’t start it. But then, as before the cap. Checking the characteristics of your mixture is quite simple; just inspect the spark plug for its condition; if the spark plug is flooded and has carbon deposits or other changes, most likely you have an enriched mixture.
HONDA DIO, settings folder
A spark plug that is too white indicates that there is too much air in the fuel mixture. Keep in mind that if you don’t know how to adjust the carburetor on a scooter, 2t or 4t, the type of engine will not matter; adjustments should be made according to standard recommendations.
Adjusting the idle speed Does your scooter not work properly when idle and often stalls? Most likely your idle speed screw is not adjusted sufficiently.
Before the procedure, be sure to warm up the engine, then find the idle screw, which is present on absolutely all scooters.
You will have to warm up the scooter for minutes, this will allow you to achieve optimal engine performance. After this, you need to turn the idle speed screw, where clockwise rotation increases the speed, and unscrewing it decreases it. Therefore, the carburetor periodically requires maintenance.
Each owner of the vehicles presented must understand the procedure for adjusting this system. Advice from experienced mechanics will help you figure out how to adjust the carburetor on a scooter. They will give several recommendations on how to carry out maintenance efficiently and quickly. The meaning of the carburetor Before adjusting the carburetor on a scooter, you need to once again study the purpose of this system. This will help assess the importance of periodically carrying out such work.
The carburetor mixes the fuel mixture of gasoline and air before it is supplied to the engine cylinder. The durability, speed and power of the engine, fuel consumption, and also, importantly, driving safety depend on the correct operation of this system.
The adjustment process should be approached comprehensively. Some owners of this type of vehicle, out of ignorance, underestimate the importance of such carburetor maintenance. At best, an inexperienced driver will only adjust the fuel supply quality screw.
This gives results, but only when operating the engine at low or idle speeds.
Signs of necessary adjustment There are several main signs that let the driver know that it is time to have his vehicle serviced. Otherwise, repairs will cost much more. In this case, you should learn how to properly adjust the carburetor on a scooter as soon as possible.
Honda New Dio AF-62/68 scooter review
The Dio scooter series is represented by the current latest line - Honda New Dio. All the best of developments are present in this 50 cc scooter. This is a four-stroke injection engine, durable and lightweight aluminum frame. The design of the model has changed slightly, in particular the shape of the front fairing, although the characteristic features of Dio are immediately visible.
The Honda Dio AF-62 with the AF61E engine was born in 2003 and was produced until 2007. This year it underwent restyling, received an updated frame and injection instead of the usual carburetor. The new engine received the index AF67E.
Specifications
Engine: Engine type – AF61E/AF67E, displacement 49 cc. see Number of cylinders – 1. Number of strokes – 4. Cooling system – liquid cooling. Maximum engine power – 3.8/4.1 hp. at 8250 rpm. Torque – 0.38 kg*m / 7500 rpm. Compression ratio – 10.1. Transmission – variator. Ignition - dynastarter. The tire size of the front and rear wheels is 80/100-10. Oil tank volume – 0.68 l. Gas tank volume – 4.6 liters. Maximum speed – 60 km/h. Chassis: Front wheel suspension type – telescopic. The rear wheel suspension type is pendulum. The front wheel brake type is drum. The rear wheel brake type is drum. Size and weight: Base – 1180 mm. Length – 1720 mm. Seat height – 695 mm. Ground clearance – 110 mm. Total weight – 73 kg.
: Adjusting the fuel level in the scooter carburetor
First of all, engine power drops. This can also be observed due to wear and tear of the engine systems.
The cylinder piston group may require replacement. However, an incorrectly configured carburetor can also affect the power of the engine. If it introduces more air into the mixture than required, the fuel becomes lean. This leads to overheating and reduced power. If the engine refuses to work at all, this may also be evidence of improper carburetor operation.
However, to find the cause of the breakdown, you will need to check several major systems. If the engine starts but stalls, this may be due to a clog in the carburetor. In any case, the driver must responsibly approach the issue of solving any problem related to his vehicle.