The fuel supply system to the engine, which is the carburetor, is one of the important components of a vehicle such as a scooter. The functioning of almost all mechanisms depends on the correctness of its operation. Therefore, the carburetor periodically requires maintenance.
Each owner of the vehicles presented must understand the procedure for adjusting this system. Advice from experienced mechanics will help you figure out how to adjust the carburetor on a scooter. They will give several recommendations on how to carry out maintenance efficiently and quickly.
Carburetor value
Before adjusting the carburetor on a scooter, you need to once again study the purpose of this system. This will help assess the importance of periodically carrying out such work.
The carburetor mixes the fuel mixture (gasoline and air) before it is supplied to the engine cylinder. The durability, speed and power of the engine, fuel consumption, and also, importantly, driving safety depend on the correct operation of this system.
The adjustment process should be approached comprehensively. Some owners of this type of vehicle, out of ignorance, underestimate the importance of such carburetor maintenance. At best, an inexperienced driver will only adjust the fuel supply quality screw. This gives results, but only when operating the engine at low or idle speeds.
Purpose and principle of operation of the carburetor
The carburetor is an important component of an internal combustion engine, responsible for preparing the air-fuel mixture and supplying it to the working cylinder in the required ratio. A scooter engine with an unadjusted carburetor cannot function properly. The stability of speed, the power developed by the engine, gasoline consumption, response to turning the throttle, as well as ease of starting in the cold season depend on the correct settings of the engine power supply.
An important component of an internal combustion engine is the carburetor.
This unit is responsible for preparing the air-gasoline mixture, the concentration of the components of which affects the nature of the operation of the power plant. The standard ratio is 1:15. Leaning the mixture to a ratio of 1:13 ensures stable engine operation at idle. Sometimes it also becomes necessary to enrich the mixture by maintaining a ratio of 1:17.
Knowing the structure of the carburetor and knowing how to adjust it, you can ensure stable operation of the engine on two-stroke and four-stroke scooters.
Thanks to a properly configured carburetor, easy and quick starting of the vehicle engine is ensured, as well as stable operation of the engine, regardless of the ambient temperature. Any carburetor is equipped with jets with calibrated holes, a float chamber, a needle that regulates the cross-section of the fuel channel, as well as special adjusting screws.
The adjustment process involves specially rotating the screw in a clockwise direction or in the opposite direction, which causes, respectively, the enrichment or depletion of the working mixture. Adjustment measures are carried out on a warmed-up engine. In this case, the carburetor unit must first be thoroughly washed and cleared of blockages.
Signs of necessary adjustment
There are several main signs that let the driver know that it is time to have their vehicle serviced. They cannot be ignored. Otherwise, repairs will cost much more. In this case, you should learn how to properly adjust the carburetor on a scooter as soon as possible.
First of all, engine power drops. This can also be observed due to wear and tear of the engine systems. The cylinder piston group may require replacement. However, an incorrectly configured carburetor can also affect the power of the engine. If it introduces more air into the mixture than required, the fuel becomes lean. This leads to overheating and reduced power.
If the engine refuses to work at all, this may also be evidence of improper carburetor operation. However, to find the cause of the breakdown, you will need to check several major systems.
If the engine starts but stalls, this may be due to a clog in the carburetor. In any case, the driver must responsibly approach the issue of solving any problem related to his vehicle.
Maintenance Procedure
Carburetor failure is the most common problem with a vehicle such as a scooter. Four-stroke (4t) and two-stroke (2t) engines are available for sale. Engines are produced in volumes of 50 and 150 cubic meters. The differences in them are insignificant, so the adjustment in all systems is almost identical.
It is much easier to adjust the carburetor of a Honda Dio scooter. Therefore, many auto mechanics use this technique as an example when training inexperienced drivers. During the setup process, you need to perform a number of manipulations.
First of all, the carburetor is adjusted at idle speed. Next, using a special screw, the ratio of air and gasoline in the fuel mixture is equalized. It is possible to perform this operation by moving the needle. The final stage is to control the fuel level in the float chamber.
Before tuning, the carburetor must be removed and washed. Only after this can the settings be made.
Removal and cleaning
Before adjusting the carburetor on the Honda Dio scooter, taken as a simple example, it is necessary to remove and clean this system. To do this, all plastic elements that impede this process (the seat and the plastic underneath it) are dismantled.
If the engine is 2t, then the fuel and oil hoses will be disconnected (there are no oil outlets on 4t engines). The enrichment contacts are dismantled. Then simply unscrew the carburetor mounting bolts and pull it out. Its external elements are cleaned of dirt.
Next, you need to partially disassemble the fuel supply system. The bolts securing the float chamber cover are unscrewed (it is thoroughly washed), and the float is removed. Next, the carburetor is flushed. The system is assembled in the reverse order and installed in place.
Carburetor cleaning
Before adjusting the carburetor on a 2t or 4t scooter, you should thoroughly clean the system mechanisms. To do this, you can use one of two methods. In the first case, the carburetor is washed with gasoline and purged with a compressor. The equipment must have a nozzle in the form of a pointed tip.
If you don’t have suitable equipment at hand, you can purchase a special liquid for flushing the carburetor. With its help, all channels, parts and elements can be easily cleaned. The liquid is in a can. Therefore, it is supplied inside under pressure. This principle facilitates thorough purging of even narrow channels.
There is no need to dry internal systems after flushing. They simply reassemble the systems in reverse order. Next you can make settings.
Idle speed adjustment
When learning how to set up a carburetor on a 4t or 2t scooter, you need to take into account that there are no fundamental differences between these engine types. Some engine models may not have a fuel mixture adjustment screw. It is corrected only by adjusting the needle and float.
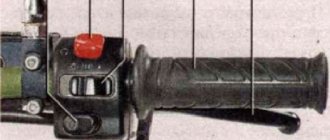
Before starting work, it is necessary to warm up the engine for 10-15 minutes. Every scooter has an idle screw. To find its location, you must refer to the manufacturer's instructions. With its help, it is possible to adjust the stability of the idle speed.
If the screw is turned clockwise, the speed increases and vice versa. The adjustment is carried out until the motor operates stably.
The scooter rides poorly, see carburetor.Scooter is not gaining speed.
Hello, I recently lost idle speed on a Chinese 4T scooter, all attempts to adjust it with the adjusting bolts were unsuccessful, but clicks appeared, it seemed as if a needle was knocking in the carb.
Video. The scooter does not pick up speed. H.H-floats. One of the common causes is the scooter's carburetor. Video content: overview of the designs and design of carburetors from 50 cm/cube and above, the principle of their operation, repair, adjustment, connection of hoses. Carburetor repair using the example of a 150cc/4-stroke scooter, China. The considered malfunction is one of the main reasons but not an isolated one, there may well be other reasons in the engine - compression, valves, but you always need to start with the most accessible, easy-to-disassemble one. Ask questions, I will answer everyone. As an example, a comment from one of the subscribers, communicating with whom we together found the reason - Fedaj Kop ———————— Thanks for the instructions, everything worked out!! There were two reasons; high level in the carburetor, and the electrovalve rod was bent and did not fit into the seat at all (apparently the previous owner did not understand repairs at all, since he found a lot of such miracles on the scooter). Many thanks for the help!!!! Good luck to you!
Mix quality
When considering how to set up a carburetor on a scooter (150 cc or 50 cc), you need to pay special attention to the quality of the fuel mixture. If the amount of air in it exceeds the permissible concentration, the engine will overheat and its power will decrease. If, on the contrary, there is less air than set by the equipment manufacturer, soot settles on the combustion chamber. Over time, this causes engine failure.
Adjustment should be made using a screw. It is best to find it using the manufacturer's instructions. To adjust the carburetor of a scooter (50 cc, 150 cc), you need to turn the screw. Rotation clockwise will make the fuel richer, and counterclockwise will make it leaner.
If there is no screw, you will have to use the opportunity to adjust the carburetor needle. When it is raised, the mixture becomes rich, and when lowered, it becomes lean.
Repair of Chinese scooters
The scooter or scooter first appeared in post-war Italy and gained popularity as a convenient and efficient means of transportation. Scooters are in demand in our country, and a huge number of both new and used models are purchased every year. A scooter doesn’t take up much space, you don’t have to sit in a traffic jam, and maintenance costs are cheaper than a car. Chinese scooters sell out on the market much faster than expensive branded models. European and Japanese scooters occupy only 8%, and Chinese - 92% of the market.
The quality of roads, natural wear and tear of parts, improper maintenance and other factors lead to equipment breakdowns. Let us consider below what problems owners face, the main breakdowns and repairs of Chinese scooters with their own hands or in a workshop.
Chinese scooter 150cc: repair
Drivers who prefer fast speeds with high levels of power and torque buy models with a 150cc engine. However, achieving maximum speed has certain disadvantages. The engine and spare parts for it will cost more than for weaker models, fuel consumption and weight increase, a new license category is needed.
High speed driving on bad roads or off-road has a negative impact and accelerates wear of parts. The owner needs to regularly carry out timely diagnostics and additional maintenance. It happens that a breakdown occurs right on the road, which you can fix on the spot with your own hands, and sometimes you need to take the vehicle to a workshop so that professional technicians can puzzle over it.
Chinese scooter 50cc 4-stroke: repair
Initially, mopeds with a 50 cc engine were equipped with a two-stroke engine to increase power and maintain a constant high speed that affected the gearbox. Manufacturers began to switch to a four-stroke engine, trying to make models more economical, reduce operating noise and increase reliability and service life. If you decide to repair a Chinese scooter with your own hands, with a 4t engine, please note: the muffler is designed differently from the 2t. It does not have a resonator function, only damping sound waves, and certain models have filters to protect the environment. They are not interchangeable: if you change the engine to another model, make sure that the muffler will fit it. Our specialists are always ready to help you select spare parts for a Chinese 50cc scooter.
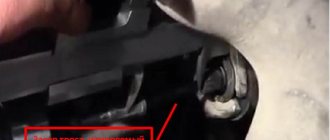
Another problem that owners face when carrying out repairs on a Chinese 50cc scooter is the wrong oil poured inside and staining the internal mechanisms. As a result, the vehicle refuses to start and requires chassis repairs. First, you need to completely drain the oil and properly remove the carburetor and muffler. By rushing and removing the carburetor too quickly, you damage the special pipe. If problems or questions arise during the repair or replacement of Chinese-made parts, contact the service center to obtain the necessary information.
Chinese scooter repair: engine
A working mechanism, including any engine, produces noise of varying degrees of volume. A change or increase in the noise level indicates wear of one of the parts inside the structure. All parts have a service life and, depending on the mileage, the quality of gasoline or lubricants, sooner or later they become unusable. If the owner listens to the running engine during idle, acceleration and at maximum speed, he will remember the correct noise, and will immediately recognize if foreign elements are added to it. If there is no experience, when starting to repair a scooter in China with your own hands, a phonendoscope is used to determine the cause of the malfunction. Let's consider the nature of extraneous noise, the reason for its appearance and the place where the part was worn out:
- A knocking sound is heard in the engine when fuel detonates. When the fuel detonates as it burns, this is expressed by the occurrence of a metallic knock due to the heavy load on the cylinder parts. They occur when using low-quality fuel or gasoline with a low octane number, in case of heavy accumulation of carbon deposits inside the combustion chamber and when the engine overheats. It is necessary to carry out diagnostics using available methods, reduce the engine load and replace the fuel with another one with a higher octane number. If the knocking continues, clean the combustion chamber or replace the spark plug. Do not operate the scooter with signs of detonation, this will lead to increased wear and malfunction of the loaded parts.
- The howl of worn main crankshaft bearings. It is difficult to confuse with other noise; the howling appears when you add gas and increases the volume as you continue to use the scooter. If the bearing is not replaced promptly, the balls will spill out of the main part and, mixed with the broken race, enter the crankcase, causing serious damage. Negligence in operation leads to serious damage and the need to carry out expensive repairs of Chinese scooters at a service center.
- Piston pin knock. The knocking sound is heard when the engine warms up at idle speed, and becomes noticeably louder if you turn the throttle sharply. Appears when the surface of the piston pin is worn out, the size of the piston boss holes is increased and the bushing located in the upper part of the connecting rod is worn out. A specialist in the workshop will restore the Chinese scooter (engine repair, identification and replacement of worn parts) as quickly as possible.
Chinese scooter: carburetor repair
The carburetor is the part of the vehicle that accounts for most of the malfunctions and damage. There are small problems with the jet - and riding comfort disappears, but a minimal problem - and the scooter will not budge until it is corrected.
Specialists who repair and service Chinese scooters insist on periodically inspecting the carburetor and subsequent cleaning of small dust or dirt particles. Problems when starting the engine, sneezing and jerking when increasing speed, most often occur due to dirt clogging the carburetor. To clean it, it must be properly removed by disconnecting the starting contacts, gasoline and 4-stroke oil supply pipes. After this, the mounting bolts are unscrewed and the device goes through several cleaning stages:
- washing the outside in gasoline;
- blowing the inside with a compressor, or a special can for carburetors.
Chinese scooter: gearbox repair
Symptoms indicating a problem:
- extraneous noise has appeared in the gearbox;
- rear wheel torque is absent or severely impaired;
- oil leakage from the transmission is noticed when the silent block wears out;
- the device makes a grinding noise;
- There was a runout between the driven shaft and the drive shaft.
Do-it-yourself repairs of Chinese scooters with a malfunctioning gearbox can be carried out knowing exactly which gears or shaft to replace to avoid the cost of a new part.
Chinese scooter: starter repair
The starter is designed in such a way that all malfunctions depend on wear of the brushes and a dirty commutator. These defects prevent the passage of electrical current and the device stops functioning. To set up the previous operation, you do not need to buy a new starter and just clean the commutator and replace the brushes. If, after the work has been carried out, the starter continues to spin poorly, hums or gets hot, the repair of the Chinese 4t scooter continues in the service center, where a technician examines the rotor windings. They can short circuit with each other, break through to ground, or burn out completely.
Chinese scooter: ignition repair
Before you start troubleshooting the ignition system, you need to install a 100% working spark plug. Even if the installed spark plug produces a spark, it may not be enough to ignite the fuel mixture. We continue repairing the Chinese scooter and, using a multimeter, check:
- engine contact with the scooter frame;
- measure the circuit resistance on the generator coil;
- We examine the integrity of the wires and short circuits between them;
- if the wiring is intact, check the resistance at the inputs to the ignition unit;
- if the circuit between the generator and the ignition unit is intact, the unit is faulty and must be replaced.
Proper repair and operation of Chinese scooters will extend the life cycle of parts and give the driver high-quality performance and a comfortable ride.
Mixture control diagram
When considering how to adjust the carburetor on a 4t or 2t scooter, it is necessary to study the sequence of actions for such adjustment. First of all, the engine must be warmed up for 15 minutes. Then it needs to be silenced.
The screw is tightened clockwise until it stops. Next, you need to release it again by 1.5 turns (no more). The engine starts. At this time, the screw is tightened 1/3 of a turn. The motor runs for 2 minutes. If the speed increases, the screw is unscrewed a quarter turn counterclockwise. Again you need to wait 2 minutes. This is done until the revolutions begin to drop.
If the speed drops within 2 minutes, the screw is tightened in the opposite direction, also by a quarter turn.
Medium and high speed tuning
If there are deviations in the preparation of the fuel mixture at medium speeds, the adjustment screw will not help eliminate the problem. Therefore, in this setting mode it is necessary to resort to the throttle needle. Most often it can be in 5 positions.
When learning how to adjust the carburetor on a Chinese scooter, you cannot ignore adjustments at high engine speeds. This procedure occurs with the throttle valve fully open. The quality of the mixture can only be determined by selecting the size of the main jet.
When the engine needs fuel enrichment, the part provided must be larger and vice versa. The size of the jet itself can be found on the body of the part. Replacement is made only in case of urgent need. Doing this kind of work on your own is quite problematic.
Technical characteristics and operating features of the Honda Dio scooter
As you can see, this scooter model is ideal for the Russian consumer. Because it has decent quality and a reasonable price. Well, everyone has drawbacks, even the most expensive models.
The second generation scooters - Honda Super Dio (AF-27) - began to be produced in 1990. They differed little from the previous model, except in design. Even the AF18E engine remained almost unchanged.
Three main variants of the Super Dio were produced: the basic AF-27 model with drum brakes and an AF18E engine, the AF-28 SR model with a front disc brake and an uprated AF18E engine, and the AF-28 ZX model - all the same, plus instead of a trunk she had a spoiler with a brake light.
Honda scooters of the Super Dio series continued to be produced until 1999. At a certain period, this design was produced under the name Dio Fit, with a new design of plastic body kit and headlights.
Specifications
Engine:
Engine type – AF18E, displacement 49 cc. see Number of cylinders – 1. Number of strokes – 2. Cooling system – forced air cooling. Maximum engine power – 6.8 hp. (7.0 hp for AF-28) at 7000 rpm. Torque – 0.73 kg*m / 6000 rpm. Compression ratio – 7.3. Transmission – variator. Ignition - electric starter. The tire size of the front and rear wheels is 3.00-10. Oil tank volume – 1.2 l. Gas tank volume – 5.0 l. Maximum speed – 60 km/h (electronically limited on AF-28). Chassis:
The front wheel suspension type is telescopic.
The rear wheel suspension type is pendulum. Front wheel brake type – drum (AF-27), disc (AF-28 SR/ZX). The rear wheel brake type is drum. Size and weight:
Base – 1145 mm.
Length – 1640 mm. Seat height – 700 mm. Ground clearance – 100 mm. Total weight – 66 kg.
Signs of deviation in mixture preparation
When studying the technology of how to adjust the carburetor on a 2t, 4t scooter, the driver must know what factors indicate deviations in the process of preparing the fuel mixture. If it is lean, a popping noise will be heard from the system when the vehicle reaches high speed. In this case, the carburetor spark plug will be white. Electrodes may in some cases melt due to operating at too high temperatures. Also, the scooter will react poorly to turning the throttle when reaching the upper limit.
If the mixture is rich, a large excess of fuel will be detected. There will be black carbon deposits on the spark plugs. Black smoke and popping noises will come out of the muffler.
But if configured correctly, such phenomena will not appear. The engine will operate evenly at all speeds. There is no excessive consumption of gasoline. At any speed, the throttle will be informative, and when examining the spark plug, soot and soot will not be detected. Its color is slightly brownish (not white).
How to adjust carburetor stroke
This carburetor setting gives the correct mixture during the power stroke. This setting needs to be done when:
- If you have ridden or ridden your moped and have black carbon deposits on the unscrewed spark plug;
- If you set off and the moped doesn’t pick up speed well, and when the spark plug is unscrewed, you have white carbon deposits.
The working stroke is regulated by a needle installed in the carburetor throttle valve. To do this, we need to unscrew the throttle valve nut and remove the throttle with the needle from the carburetor.
The needle has 5 grooves. When purchasing a new Alpha moped. The fixing plate is located on the middle groove.
If you have a lean mixture, white carbon deposits on the spark plug, then you need to fix the plate down one notch. Thus, we raise the needle by one notch and increase the amount of fuel entering the combustion chamber.
And vice versa. If you have an enriched mixture and black carbon deposits on the candle, then the needle needs to be lowered down.
After this procedure, we install the needle in place, assemble the carburetor and try to ride it. We look at the behavior of the moped engine after adjustment, and go for a ride.
The end result of correctly adjusting the carburetor stroke should be brown carbon deposits on the spark plug.
Adjusting the fuel level
The final step in considering the topic of how to adjust the carburetor on a scooter is adjusting the fuel in the float chamber. This is a simple but important procedure. You can check the fuel level using a transparent tube. It is located at the bottom of the carburetor.
The drain screw must be unscrewed. The tube rises up. It allows you to estimate the fuel level in the tank. The engine must be running. The tube should be higher than the carburetor. The gasoline level should be detected slightly lower than the cap curb.
If there is little or much fuel, you need to remove the cap and adjust the timing of the needle. In this case, the holder's tendril needs to be bent, but in very small ranges. Such adjustment should be carried out in stages, otherwise the result will be temporary and the adjustment will not have the desired effect.
Having considered the technology of how to adjust the carburetor on a scooter, each owner of such a vehicle can carry out the procedure independently. By following the recommendations of professional auto mechanics, as well as carrying out maintenance on time, you can significantly extend the life of the carburetor and engine. Therefore, due attention must be paid to regulation issues.
Adjusting the carburetor of a 2T scooter
In terms of complexity and abundance of systems, this carburetor can compete with the most sophisticated automobile ones (only those with electronic control are more complex). Hence the advice: if your experience with the motorcycle power system is limited to two or three successful repairs of devices like K-65, do not take risks - contact specialists. And second: work on a table covered with a sheet of clean white paper under the light of a bright lamp - this makes it easier to see the details and harder to lose them. And it is extremely difficult to examine the holes of the jets: they are so small that they can be clogged by the smallest speck of dust. Some channels are comparable in size to them. The outside of the carburetor must be clean before disassembling. The hands are the same as those of a surgeon before an operation. To work, you will need screwdrivers with unworn working surfaces. Most of the screws here are not only tightly tightened, but also secured with thread sealant, so that a screwdriver with a bad tip will only break their slots. Stock up on tweezers to make it easier to “catch” little things. Well, are you scared? If not, let's get started.
You can remove the carburetor through the hatch under the seat, but it will be easier if you first remove the entire trunk.
You can get to it through a hatch in the trunk, under the saddle. But it’s easier to do this if you unscrew five bolts and dismantle the entire trunk along with the saddle, loosening the clamps. Loosen the one on the engine side more firmly so that the flange on the rubber pipe can come out of the deep groove on the carburetor outlet pipe. Usually, when the engine is not running, the gas valve with a pneumatic drive is securely closed, but it is better to be on the safe side - secure the end of the hose removed from the carburetor above the gas tank. Then disconnect the throttle cable and the connector of the wires A going to the carburetor starter. Clean the carburetor from dust with a soft brush, wash your hands and begin disassembling.
Unscrew the three bolts and remove the float chamber cover. The float axis is held in place by a bolt. Unscrew it and remove the float block with the shut-off needle. The needle of this carburetor has a rubber conical part, and a spring-loaded rod rests against the float tongue. This design makes the unit sealed, very durable and resistant to abrasive wear.
Back view
: 1 — starting device; 2 - channel leading into the cavity under the spool membrane; 3 — air channel of the starting device; 4 — air jet of the main dosing system; 5 — accelerator pump nozzle; 6 - channel in which the air jet of the idle system is located; 7 - accelerator pump.
Possible malfunctions. The tide on the side walls of the floats should be parallel to the plane of the upper carburetor connector. If this is not the case, bend the metal tongue to achieve the correct position. Check it by placing the carburetor on its side - the tongue should just touch the needle rod, but not recess it.
Front view
: 1 - channel for the exit of the fuel-air mixture from the starting device; 2 — tube through which excess gasoline is drained if the float mechanism malfunctions; 3 - channel through which vacuum from the intake manifold is supplied to the idle air system shut-off mechanism.
Main dosing system
Its jet is located in the center of the float chamber. Through it, the fuel enters the emulsion tube, where it mixes with air and forms an emulsion. Air enters through a jet located at the carburetor inlet. The emulsion is dosed with a needle, which is fixed in the spool. A constant vacuum in the sprayer area is ensured by the spool. Next to the metering needle there is a hole through which the vacuum is transmitted to the cavity above the membrane, while the spring is compressed and the spool rises to the desired height.
Right view
: 1 — accelerator pump drive lever; 2 - throttle valve drive sector; 3 — screw for adjusting the amount of fuel-air mixture at idle.
To lean or enrich the combustible mixture, unscrew the screws securing the membrane cover and remove the spool with the membrane. Be very careful - the lid is made of fragile plastic. Remove the needle plug and the needle itself.
The range of adjustments is small - there are only three grooves on the needle; with the factory adjustment, the stopper is in the middle. During engine operation, spool oscillations occur due to air fluctuations in the intake tract. To prevent the stopper from breaking the needle groove, a rubber ring is installed under it. If you damage or lose it, you will not only shorten the service life of the unit, but also impoverish the mixture - the needle will drop lower without this part.
Left view
: 1 — idle quality adjustment screw; 2 — fuel inlet fitting; 3 - fitting through which you can drink fuel from the float chamber; 4 — screw-plug of the float chamber.
When you install the membrane in place, make sure that the protrusion on it fits into the recess on the body.
Possible malfunctions.
There may be two of them. The first is that the fuel nozzle is clogged. Blow it out. Second, the spool membrane is damaged. In this case, you cannot do without replacing the membrane with the spool.
Parts in the float chamber
: 1 — fuel tube of the starting device; 2 — block of floats; 3 - lock bolt; 4 — needle with a rubber tip and a spring-loaded rod; 5 - axis; 6 - tongue; 7 - main fuel jet. 8 - . and its emulsion tube; 9 — idle fuel jet.
The idle speed (XX), as in most carburetors, is adjusted with two screws: mixture quality and quantity. The quality screw is located under the throttle valve axis on the left side of the carburetor, and the quantity screw is located on the axis sector stop. At the factory, quality adjustment is carried out as follows: the screw is tightened until it stops, and then unscrewed 2.5 turns. The XX system fuel nozzle is located next to the main fuel system nozzle; it and the emulsion tube form a single unit. The air jet is pressed into a tube-like boss to the right of the air jet of the main fuel system. The emulsion is supplied to three holes under the throttle valve. Why - by three? As the damper opens, its cut moves from one to the other, and they alternately find themselves in the zone of the highest air flow speed, and therefore in the zone of greatest vacuum. Thanks to this, the operation of the carburetor at the beginning of the throttle valve is improved and “dips” are eliminated.
When installing the spool, make sure that the protrusion on the diaphragm is in the recess of the housing (highlighted in red). The arrow indicates the hole through which additional air enters the idle system to turn it off.
When the damper is open to a large angle, the XX system is turned off by a special device. If the damper is closed, vacuum from the intake manifold enters the cavity above the device membrane and attracts it to the cover, compressing the spring. In this case, the XX system operates normally. When the throttle is open sufficiently, the vacuum in the manifold is too low to compress the spring, and it opens the valve with the diaphragm protrusion. Air from under the main fuel system valve diaphragm enters system XX. The vacuum in the XX system decreases - it becomes insufficient to supply gasoline. Possible malfunctions.
The XX system is one of the most vulnerable in any carburetor. First of all, due to the fact that the flow sections of the jets here are the smallest, which means they easily become clogged. If the diaphragm of the system that turns off XX becomes leaky due to age or for any other reason, the vacuum of the intake manifold will not be able to keep its valve closed, the fuel supply will be disrupted and the engine will stop running on XX. The same will happen if the valve loses its seal. The connector area between the membrane cover and the carburetor body (it contains the channel through which vacuum is supplied) is sealed with a rubber ring. The tightness of the seal will deteriorate - the operation of the membrane mechanism will be disrupted, and in addition, air will be sucked into the intake manifold, thereby making the mixture leaner. And it will become impossible to adjust the engine operation at XX.
When the throttle valve is opened sharply, the vacuum near the nozzle decreases, there is not enough of it to suck in a sufficient amount of gasoline - and a “failure” occurs in the engine’s operation. The purpose of the accelerator pump, as its name suggests, is to help the engine accelerate the scooter during this carburetor confusion.