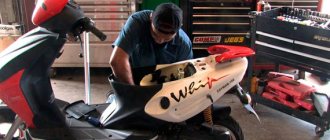
Repairing, adjusting and cleaning the carburetor is a rather complicated procedure. However, having delved into the technology of its implementation, each owner of a motorcycle or scooter will be able to perform all the actions independently. To do this, you need to familiarize yourself with the details of this process, as well as allocate a sufficient amount of free time.
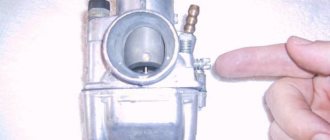
The Japanese-made Keihin carburetor has the same design in all models. For other manufacturers, the principle of cleaning and adjustment is similar. Therefore, this brand of carburetor is ideal as an example. The operation of the motorcycle depends on the correctness and responsible approach to cleaning and adjustment.
The need for carburetor maintenance
If you have a Honda, Kwasaki, Navigator or other two-wheeled motor vehicle, you should understand the importance of periodic carburetor maintenance. The power, ease of starting, speed and control of the motorcycle depend on this system.
To ensure that the same quality fuel mixture is supplied to the cylinder block, it is necessary to correctly regulate the operation of the carburetor. Synchronization allows you to adjust the amount of gasoline and air that mix and flow to the engine.
Experienced drivers know that the carburetor on a scooter must not only be adjusted, but also cleaned during maintenance. Gasoline contains a certain amount of additives and impurities. When the engine operates, they settle on the walls of the system, forming contamination in the jets. To ensure that the carburetor can perform its functions fully, it is necessary to periodically clean it from dirt and carbon deposits accumulated inside.
Carburetor needle adjustment
When adjusting the operation of the carburetor, situations are possible when the adjustment is not limited to optimizing the combustible mixture. In this case, it is necessary to adjust the carburetor needle.
To do this, we perform the following set of actions:
- move the needle one notch in one action;
- We release the gas sharply, if the engine stalls, then raise the needle;
- give full throttle, if there is no increase in speed, lower the needle.
Checking the result in action. Inspection of the combustion chamber spark plug.
Upon completion of the adjustment, you need to ride the scooter for 2-3 km. While stopping, inspect the part of the spark plug located in the combustion chamber. If the insulator has become dark in color (possibly blackened), then the combustible mixture is very rich, the carburetor needle must be lowered. If the indicated part of the candle is white, then the mixture is lean, the needle should be raised.
An indicator of the optimal combustible mixture and correct adjustment of the carburetor is the sandy or brick color of the combustion chamber spark plug insulator.
When is maintenance required?
The carburetor (Keihin PZ30, CVK - it doesn’t matter) of all popular models has a similar maintenance principle. Therefore, the signs of the need for this procedure in all cases will be similar symptoms.
The main reason requiring carburetor adjustment is uneven engine operation. It appears at idle. Popping noises coming from the muffler and increased gas consumption may also appear. The driver should periodically pay attention to the appearance of the spark plugs. Significant changes in their color indicate violations in the preparation of the fuel mixture.
Candles can be considered the main indicator of carburetor performance. If they are white, the mixture is considered poor. Too much carbon deposits on the candles indicate that a rich mixture is being prepared. This is a deviation from the norm. The cause may be a carburetor clogged with dirt or a malfunction in its settings. In this case, maintenance is carried out as soon as possible. The system should also be cleaned periodically. It depends on how often the motorcycle is used.
Removing the carburetor
To clean the Keihin carburetor, it will need to be removed. To get to it, you will need to remove the airbox and gas tank. Then the clamps of the manifold pipes are loosened. The suction (enrichment) cable is dismantled.
The Honda scooter and other models of similar vehicles have a system of carburetors that are in the same row. They do not need to be separated from each other for cleaning. However, to replace the seals you will have to disassemble the ruler.
During dismantling, the carburetor block is removed, as well as the throttle cables. Now you can easily perform system maintenance. The top covers must be removed (the screws are unscrewed). Next, you need to inspect the condition of the gaskets, needles and rubber bands.
The insides of the carburetor itself, as well as the parts around it, must be thoroughly cleaned. A bath of gasoline and a regular paint brush are suitable for this.
How to set up a carburetor on a scooter - features for the 2t model
Adjusting the carburetor of a two-stroke scooter differs from adjusting the power system of four-stroke engines. Most two-stroke engines are equipped with a simple carburetor with a mechanical enricher, the trigger of which is pulled before starting the device. Scooter owners call the starting enrichment a choke; it is closed after the engine warms up. To adjust, the power system is disassembled, the needle is pulled out and mechanical intervention is carried out in the fuel chamber. Further adjustment is carried out in the same way as for four-stroke engines.
Disassembling the block
If you need to disassemble the carburetor assembly, the next step is to remove the intermediate plate between them and the air filter. Next, you need to unscrew the bolts on the bar that holds the block together. A Keihin CVK or other model usually requires a lot of physical effort here. You will most likely need to use a T-handled screwdriver.
Next you need to disconnect the return spring. To do this, the bolts are also unscrewed in the appropriate places. The plank will easily slide off and become detached from the structure.
The carburetors are held together by a long bolt. It must also be dismantled. The block can be disassembled. The first carburetor is removed and the spring is set aside. They should not be confused in places (they differ in size). Then the outside of the housing is cleaned.
Carburetor block maintenance
The carburetor on a scooter may need to replace the diaphragm. In some cases, it is also necessary to completely replace one of the elements of the block. The internal metal surface of the device may oxidize over time. Therefore, the diaphragm will need to be replaced. It is removed very carefully using a screwdriver.
This element can be obtained with a dosing needle and a flap. Then, if necessary, the old components can be replaced.
After this, you need to unscrew the screws of the float chamber. Its cover is removed. You can evaluate the operation of the float by lightly pressing it. If this element springs, then its operation is correct. No replacement required. When disassembling, it is very important to use the correct size screwdrivers. All work must be carried out very carefully.
Setting up the carburetor on a 4t scooter - important points
Setting up the carburetor on a four-stroke scooter is easy to do on your own and is not difficult for motorcyclists. Setting up the carburetor of a 4t 50cc scooter (China) requires certain skills and patience and is performed according to the above algorithm. It is possible that the manipulations will have to be repeated many times until the desired result is achieved. If the carburetor setting on a 4t 139 qmb scooter or a similar model with a different engine is done correctly, the engine will operate stably.
It will be able to start regardless of the ambient temperature and the piston group in the engine will wear out less.
Cleaning
The Keihin carburetor requires careful cleaning after dismantling. To do this, you need to purchase a special tool. It should not destroy the rubber seals. There are many similar cleaners on the market. It is convenient if the product is in a bottle. Using a special tube, it will be easy to spray it throughout the entire mechanism.
Work must be carried out outdoors. Solvents contain many hazardous components. Therefore, it is highly not recommended to carry out such work indoors.
The carburetor is purged with air under pressure. If necessary, some areas can be cleaned manually using cotton swabs. If the length of the springs differs significantly (by 1.5 mm), they must be replaced.
Carburetor assembly
After proper cleaning and replacement of all obsolete parts, the carburetor is installed in its previous position. Assembly is performed in reverse order. When installing diaphragms, the return spring must be installed correctly in the seat. If you can’t easily install it in place, you just need to turn the part.
When installing the damper, you must monitor the position of the needle. It should not move to the side. If necessary, parts must be lubricated with grease.
The cylinder block is then assembled in reverse order. To do this you will need to prepare the appropriate tool. All carburetors are different. Therefore, when disassembling it is necessary to number them. Installing a carburetor requires careful attention. All bolts and springs must be assembled very carefully. It is better to write down the sequence during disassembly so as not to lose a single structural element.
Removing and cleaning the carburetor
In order to remove the carburetor from the scooter, the first step is to remove all the plastic that prevents access to the carburetor (usually you have to remove the seat and plastic under the seat). Then we disconnect the fuel and oil hoses (oil hoses are only available on a 2-stroke scooter), and the contacts of the starting enrichment. After this, unscrew the bolts securing the carburetor to the engine.
Now that the carburetor has been removed, it is necessary to clean its outer surface from dirt and dust. You can wash it in gasoline and wipe it with a dry cloth.
The next step is to partially disassemble the carburetor, namely: unscrew the bolts securing the float chamber cover (2 bolts), then carefully remove the float so as not to bend the plate. We wash the float chamber cover itself very thoroughly from the inside. Now you can start cleaning the inside of the scooter carburetor.
2 easy ways to clean your carburetor:
1) Wash it in gasoline, then blow it out using a compressor with a nozzle in the form of a pointed tip (this will allow you to effectively blow through all channels).
2) Buy a can of liquid to clean the carburetor. We thoroughly clean all the channels and jets of the carburetor. The can also replaces the compressor, since the liquid from it is supplied under high pressure, which allows you to effectively clean small channels.
When cleaning, special attention must be paid to all channels and jets (we unscrew the jets when cleaning). We also remove the starting enrichment and clean its channels. There is no need to dry the internal parts of the carburetor. Now we can put on the float and assemble the carburetor in the reverse order.
Synchronization
After cleaning, the Keihin carburetor needs to be adjusted. You can start with synchronization. This is a simple procedure. But it will require a synchronizer. This device checks rarefaction.
The motorcycle must be warmed up to engine operating temperature. Next, remove the tank and filter. The synchronizer will help establish the same vacuum in the collector. The device connects to it. The engine starts.
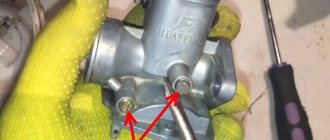
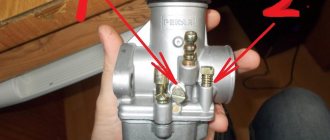
According to the sensor readings, the valves need to be adjusted. They should respond (but not strongly) to changes in sparseness. If the synchronizer arrow does not perceive changes, the valve must be released. The process is carried out using the corresponding screws on the carburetor. First, adjust the right and left screws. Only after this can the central lever be adjusted.
Problems with two-stroke carbs in winter.
Problems usually boil down to the following symptoms. All of them appear at near-zero temperatures, when humidity is high. At -10 and below, I did not observe any of these symptoms.
1. The spark plug is flooded due to icing of the jets and the formation of an ice crust on the air filter. I have to change the spark plug, but it doesn’t help for long. Treated with optimal carburetor settings.
2. The throttle valve freezes. It happens that you drive and drive, you fly into deep snow, you open up the stink all the way, you drive through this section, throw off the throttle - and the motorcycle, as it was driving at all speeds, continues to drive, and even doesn’t really want to stall when you press the button. Essentially, the symptom is similar to the throttle cable being bitten. It can be dangerous.
Idle speed adjustment
After proper cleaning, the idle speed is adjusted. To do this, the engine must be warmed up well. To do this, you will need to start the vehicle and wait 10-15 minutes.
Next, you should refer to the manufacturer's instructions. It shows where the adjustment screws are located. Guided by this knowledge, you can begin the process. It is better to mark the screwdriver with which all settings will be made. You need to stick a marker on one side of it. This will allow you to understand how many revolutions were made.
At idle speed it is necessary to tighten the corresponding screw. If you clamp it, the speed will increase, and vice versa. The adjustment is performed until stable engine idle operation is achieved.
Medium and high speed tuning
Using the quality adjustment screw, the fuel proportions at idle speed are ensured. For medium and high rotation speeds, the engine operating mode is adjusted using a different method. After turning the gas handle, the fuel nozzle starts working, supplying gasoline to the diffuser. An incorrectly selected jet cross-section causes a deviation in the fuel composition, and the engine may stall when gaining power.
To ensure uninterrupted operation of the motor at a higher frequency, it is necessary to perform a number of operations:
- remove debris from internal cavities;
- set the gasoline level in the carburetor;
- adjust the operation of the fuel valve;
- check the cross-section of the jet.
The correct operation of the engine is indicated by its quick response when turning the throttle.
A quick response when turning the throttle indicates proper engine operation.
Adjusting the mixture quality
If the idle speed adjustment was successful, you can begin adjusting the quality of the fuel mixture. She shouldn't be too poor or rich. The adjustment is made using the adjusting screw or by moving the needle in the throttle valve.
The engine should be warmed up before tuning. This procedure is carried out only for a clean carburetor. Most often, for normal operation of the system, it is necessary to unscrew the screw from the extreme position by 1.5-2 turns. But many reasons influence this indicator.
If the screw is turned clockwise, the mixture becomes richer, and vice versa. If the needle is lowered, the mixture becomes lean. By combining both settings, it is possible to achieve accurate operation of the fuel supply system to the engine. If the procedure is performed correctly, the motorcycle will accelerate smoothly. There will be no jerks when moving
Tips and tricks
Setting up the carburetor on a 4t 50cc scooter is an important and responsible procedure for servicing motorcycle equipment.
When performing adjustment operations, it is important to follow a number of rules:
- perform adjustments only after the engine reaches operating temperature;
- rotate the adjusting elements smoothly, observing the operation of the engine;
- Make sure there is no debris inside the fuel chamber and the jets are clean.
Before starting work on setting up the carburetor, you must study the operating instructions and clearly determine the location of the quality and idle screws. If you have a 150cc scooter, the carburetor adjustment is done in a similar way. After all, the process of regulating the fuel system is the same for engines of different powers.
The carburetor that we will consider today is installed on most Chinese two-stroke scooters with a chain transmission, which are popularly called “chain Chinese”. This carburetor has a very simple device, the enricher is driven mechanically, that is, simply by hand, this is of course not very convenient, but on the other hand, there is nothing complicated - pull the trigger and start it.
Unscrew the top cover of the damper and take out all the contents.
The needle in the valve is fixed with a special bracket, remove the bracket and take out the needle.
As you can see in the photo, there are adjustment grooves on the needle, by moving the lock washer along which you can adjust the quality of the working mixture within certain limits. To enrich the mixture, raise the needle; to lean the mixture, lower the needle. As you can see, there is nothing complicated about this.
With this adjustment, unfortunately, you can adjust the composition of the mixture only in a certain position of the needle in the carburetor, since the main metering system comes into operation only after the damper is raised by 1/4 of its stroke and turns off after the damper is raised by more than 3/4 of its stroke. When the throttle valve is fully raised, the quality of mixture preparation is affected only by the main fuel jet and partially by the idle system (on this carburetor model).
This carburetor model has a mechanical starting enricher; here it is presented as a separate module.
The starting enricher is essentially the same carburetor that turns on during a cold start of the engine when a rich mixture is needed; turning on and off the enricher can be manual, as on this carburetor, or fully automatic, as here.
Remove the cover of the enrichment unit and take all the elements out.
To ensure the operation of the enricher, the carburetor has two channels and a nozzle with a fuel pipe.
Starting enrichment jet.
Air channel of the starting enrichment.
Emulsion channel of the starting concentrator.
We continue to further study the structure of the carburetor with a float mechanism.
To remove the float mechanism you need to remove the axle.
If for some reason you are not satisfied with the operation of the carburetor, try adjusting the fuel level in the float chamber using a tongue that can be slightly bent within reasonable limits.
Main dosing system.
The main metering system ensures engine operation in the mid-speed range and consists of a sprayer (emulsion tube), a jet, a needle, and to ensure its operation, there is a special air channel in the carburetor into which an air jet is additionally integrated.
To remove the nozzle, you need to unscrew the fuel nozzle and remove (carefully) the O-ring.
Unfortunately, fuel jets on Chinese carburetors are not marked, which complicates the search for their analogues.
The sealing ring is located inside which is very convenient to remove with a large sewing needle.
After you have removed the ring, you can remove the sprayer; use a stick or pencil from the side of the valve to simply squeeze it out.
Adjusting the fuel level
Keihin carburetor adjustment is completed by checking the fuel in the float chamber. To do this, you need to prepare a transparent tube. It is located at the bottom of the system. The drain screw must be unscrewed. Next, the tube rises up, in the direction opposite to the carburetor. The fuel level is checked.
The check is carried out with the motorcycle engine running. The tube should always be higher than the carburetor. The fuel should be at a level slightly lower than the cap curb.
Having examined the Keihin carburetor, as well as its design and maintenance, each vehicle owner will be able to clean and adjust it independently. This will extend the life of the vehicle, making movement on it safe and comfortable. The driver can perform almost all actions independently, without contacting a car service.
CARBURETOR
The most important part of the carburetor is the Venturi tube . Its characteristic feature is that its diameter gradually decreases from the edge to the center and then increases again. When the engine is running, air flows through this carburetor tube. As the air flow moves towards the center, where the diameter is minimal, a reduced pressure is created. As soon as the carburetor tube diameter begins to increase again, the pressure equalizes.
If you now place a small tube filled with gasoline in the center, then, tending to the low pressure zone, the gasoline will leave the tube and, spraying, fly away, mixing with the air flow in the carburetor tube.
In order for the engine to work, this is enough, but you also need to regulate the speed of supply of the mixture from the carburetor to the combustion chamber (this is what you do with the throttle). a damper is installed in the center of the carburetor Venturi tube , which regulates the amount of air passing through the center. A needle is also placed on the carburetor flap , which regulates the amount of gasoline entering the tube through a small channel. When you “press” the gas, the valve opens and, at the same time, the needle rises evenly - this is how the carburetor provides a uniform and proportional amount of the combustible mixture.
In order to maintain a constant level of gasoline in a small tube, there is a float chamber . This is a carburetor cavity filled with gasoline, which has a device for maintaining a constant gasoline level. As soon as the level begins to drop, the float (blue in the figure) moves down, opening the valve. Gasoline flows through this valve and fills the carburetor float chamber. As soon as the gasoline level reaches the established norm, the float rises and closes the valve, stopping the access of gasoline to the chamber. In general, the principle is the same as in a toilet cistern.
In addition to the fuel dosing system, the scooter carburetor also has an idle speed stabilization system (IAS) . As the name suggests, this system operates at idle and low speeds, where a different composition of the fuel mixture is required - leaner. Idle fuel (ISF) is supplied through another carburetor channel, which is located behind the air damper. The structure of this carburetor system is shown in the figure (following the example of a CVK carburetor)
1. Mixture into the cylinder 2. Mixture quality screw - regulates the volume of air passing through the CCXX 3. When the carburetor throttle valve is opened, this channel is closed by a valve 4. XX jet By tightening the mixture quality screw, we reduce the amount of air entering the CCXX, thus the mixture for XX it becomes richer (more gasoline - less air); When this screw is unscrewed, the amount of air increases - the mixture becomes leaner (less gasoline - more air).
To prevent ССХХ from affecting engine operation at high speeds, there is a valve (side view, from the side of the throttle mechanism, the mechanism is removed)
1. Spring 2. Cover 3. Diaphragm with a protrusion that closes the valve 4. Valve 5. Channel transmitting vacuum to the inlet valve 6. O-ring
The idle stabilization system is one of the most vulnerable in any carburetor. First of all, due to the fact that the flow sections of the jets here are the smallest, which means they easily become clogged. If the diaphragm of the system that turns off XX becomes leaky due to age or for any other reason, the vacuum of the intake manifold will not be able to keep its valve closed, the fuel supply will be disrupted and the engine will stop running on XX. The same will happen if the valve loses its seal. The connector area between the membrane cover and the carburetor body (it contains the channel through which vacuum is supplied) is sealed with a rubber ring. The tightness of the seal will deteriorate - the operation of the membrane mechanism will be disrupted, and in addition, air will be sucked into the intake manifold, thereby making the mixture leaner. And it will become impossible to adjust the engine operation at XX.
a starting enricher is installed on the carburetor . Its device also has a needle, as well as an additional shutter. This is essentially an additional small carburetor, standing parallel to the main one. It is connected to the main carburetor by three channels - air, emulsion and fuel, drilled in its body. The air is taken in before the throttle valve, the emulsion (mixture) is supplied after it, directly into the carburetor outlet pipe. Gasoline is taken from a common float chamber. Thus, with some stretch, the enrichment can be considered an independent device. It’s a stretch, because it is, nevertheless, structurally inseparable from the carburetor. Often this is an automatic starting enrichment. When starting a cold engine, the throttle is raised (open). At the first engine revolutions, a vacuum is created in the emulsion channel and gasoline located in chamber 7 is sucked into the engine, causing a strong enrichment of the mixture and facilitating the first flashes in the engine. After the engine has started, but has not yet warmed up, it needs a rich mixture. The enricher works like a parallel carburetor; gasoline enters it through jet 9, mixes with air and enters the engine. When the engine is running, alternating current from its generator is always supplied to the contacts of the ceramic heater 2 of the thermoelectric valve of the starting system. The heater warms up the drive 3. Inside it, obviously, there is a gas or liquid boiling at a low temperature and a piston connected to the rod 4. When the drive is heated, the rod gradually extends by 3-4 mm and through the pusher 5 sets the damper in motion. Valve body 1 is wrapped in thermal insulation (polyethylene foam) and covered with a rubber boot. Thus, the engine warms up along with the thermoelectric valve and the mixture gradually becomes leaner. After 3-5 minutes, the damper closes completely and the degree of enrichment of the mixture on a hot engine is set only by the carburetor idle system. When the engine stops, heating of the valve stops, the damper drive cools down and under the action of spring 10, pusher 5, rod 4 and damper 6 return to their original position, opening the channels for subsequent start-up. Cooling down and returning to its original position also occurs within a few minutes.
A manual starting enrichment is also sometimes found. The principle is the same, only the control is not done by heating, but by a lever mounted on the steering wheel. In this case, the scooter driver himself enriches the mixture when starting the engine by turning the lever. And when warmed up, accordingly, it becomes leaner, turning back.
Older models may use a design without an electric heater; heat is transferred to the drive through a copper heat-conducting cylinder directly from the engine cylinder. It must be said that this design is more practical from a control point of view - the scooter does not always start with a cold engine - this system takes this into account, which cannot be said about electric control.
Maintaining a constant vacuum in the carburetor diffuser at various engine speeds and loads is the task of the spool .
1. Spool with diaphragm 2. Spool spring 3. Metering needle 4. Thrust insert 5. Spool cover
The membrane divides the space under the spool cover into two parts - the upper one, connected by a special channel to the diffuser, and the lower one, at the carburetor inlet. During engine operation, a vacuum forms in the diffuser. As soon as it reaches a threshold value, the spool goes up, opening up more space for incoming air - this reduces the vacuum in the diffuser. Thus, the vacuum balances, the spool moves up and down. The dosing needle with its sharp end is directed into the emulsion tube of the main dosing system, partially blocking it. The higher the needle, the less overlap, more gasoline flows and the richer the mixture - and the higher the spool, the higher the needle. The composition of the mixture can be slightly adjusted by moving the needle retaining ring along the grooves.
When the throttle valve (i.e., the throttle grip) is sharply opened, the vacuum near the nozzle decreases, it is not enough to suck in a sufficient amount of gasoline - and a “failure” occurs in the engine’s operation. the accelerator pump starts working . The purpose of the accelerator pump, as its name suggests, is to help the engine accelerate the scooter during this carburetor confusion. Its mechanism is located in the cover of the carburetor float chamber.
A thin metal plate with a spring is installed on the throttle cable mounting plate. When the damper is opened sharply, its lever presses on this plate (using a plastic roller). This plate presses on the accelerator pump rod, to the other end of which a diaphragm is attached. Using this membrane, additional gasoline is injected into the carburetor.
To prevent gasoline from coming back out of the tube when the membrane reverses, a ball valve is installed in its path. Under the pressure of the membrane, it opens, and when it returns back, it closes - and gasoline is sucked out of the float chamber through a very small hole in its cover.
It is made much smaller than the hole in the ball valve plug. For what? The fact is that you only need to inject gasoline when you sharply open the throttle. In this design, gasoline has two paths: either through a small hole back into the float chamber, or, overcoming the force of the ball valve spring, into the carburetor diffuser. When the rod moves slowly, there is not enough pressure to open the valve, and gasoline has time to return to the chamber. But with fast, most of it ends up in the diffuser.
If the valve itself or its actuator is faulty, then the motor does not receive support and runs unstable when you suddenly add gas. Clean the valve by unscrewing its cap and blow out the channels. 1. Pump housing 2. Communication channels with the float chamber 3. O-ring
1. Pump rod with membrane 2. Spring 3. Cover 4. Sealing bellows
Carburetor diffuser (hole) size
A piston of increased volume also requires increased power supply, so one of the questions that arises when tuning a power unit is what size carburetor to prefer. This depends, first of all, on the volume of the engine and the characteristics of the valve timing, or, in other words, the nature of the engine (torque or high-torque). The volume of tuning piston scooters ranges from 65-70 cubic meters, the most common volume being 68. Therefore, the main criterion when choosing a carburetor is the character of the future engine.
A carburetor with a large (19-21-...mm) diffuser improves filling of the cylinder with mixture at high speeds, as it has less resistance to air intake. This allows you to gain maximum power, and therefore maximum speed. However, in return you get deterioration in performance at the “low” and “middle”, as well as the need to raise the idle speed higher, otherwise the engine will simply stall. Don't forget that larger carburetors also require other modifications to the intake tract. The intake manifold and reed valve must be replaced. For example, using a 21mm carburetor in combination with the original manifold and valve is a very illiterate decision; here you do not get any increase at the top, but you completely ruin the “bottoms” and “middle” (I have to write about this, since similar cases still exist meet).
The smaller diffuser (17.5mm) loses a little in maximum power, but prepares the mixture better at low and medium speeds, this provides better “pickup” - a response to unscrewing the gas at low and medium speeds. Therefore, a smaller diffuser always means greater flexibility and ease of use. When choosing a carburetor diffuser size from the appropriate range for your piston, you always need to weigh convenience and practicality on one side of the scale, and maximum power on the other. We often repeat the phrase that it is one thing to have great power, and another thing to implement it. This phrase comes in very handy here. Even in MotoGP racing, manufacturers deliberately reduce the peak power of engines to achieve a more elastic performance. You should keep this in mind when chasing a larger carburetor diffuser.
Translating these considerations into practical terms, we make the following recommendations. The most successful carburetor in all respects is 17.5. It is recommended to use this dimension both when tuning Sport and Racing (of course, the carburetor settings are different in these cases). Next come what are called “individual cases.”
1. Quality screw 2. Inlet fitting 3. Starting concentrator 4. Spool 5. Dosing needle 6. Accelerator pump 7. Float chamber 8. Throttle mechanism 9. Quantity screw
1. Float 2. Stop needle 3. Main jet 4. Idle jet
Not all Sport piston owners require maximum dynamics, so sometimes owners prefer to leave the original carburetor. This is quite acceptable, the main thing is to promptly replace the standard fuel nozzle with a larger one, otherwise you risk overheating the piston. But we strongly do not recommend moving upward from 17.5 when tuning Sport, since this does not give any positive effect. Tested not only by ours, but also by the rich experience of European companies. Nevertheless, unenlightened owners often install 19 carb together with the Sport piston, aggravating their misfortune with a low-resistance sports filter. Most often, the cause is someone’s illiterate advice.
But fans of Racing tuning, on the contrary, tend to use a larger carb in pursuit of maximum power. In this case, it is indeed possible to gain additional power at the “top”, but at the expense of the elasticity of the device. Therefore, for those who plan to use a 19 mm or larger carburetor, we advise you to take the following things into account before making your decision:
- as the diffuser grows, fuel consumption also increases;
- 19 and 21 carburetors require the use of a low resistance filter, which is more difficult to maintain;
- large carburetors significantly tighten the requirements for tuning accuracy;
- in Europe, about 70% of scooters prepared on the basis of piston Racing have a 17.5 mm carburetor.
If these arguments do not bother you, then feel free to put 19-21, the main thing is that your decision should be conscious.
