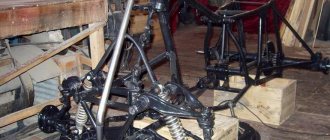
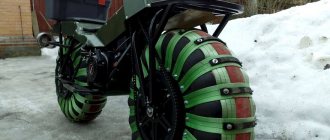
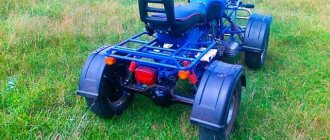
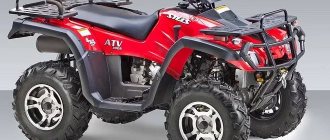
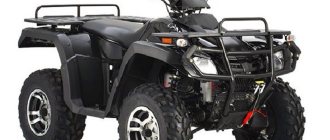
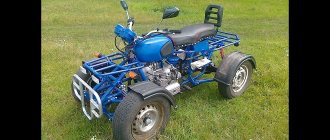
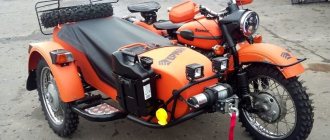
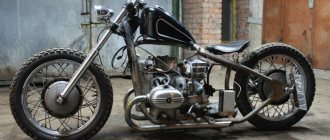
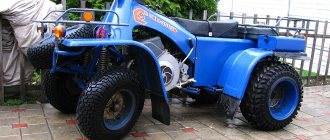
It may seem that making an ATV from the Ural is quite difficult, but it is not so. You will need to prepare the necessary parts and tools, and also review the assembly instructions. From one old but working motorcycle you can make a universal four-wheeler, which will be used both for off-road driving and on the farm.
It is worth noting that it is quite difficult to assemble a 4x4 Ural ATV with your own hands. To work it out efficiently, you will need to seek help from a team of professionals: you will need a turner, an electrician and a welder. Making the front suspension independent is more expedient than assembling a homemade 4x4 ATV from a Ural. Otherwise, control may be difficult. The fact is that to provide all-wheel drive, it will be necessary to supplement the system with a gearbox, which will lead to an increase in the weight of the ATV. To assemble a rear-wheel drive structure, you need to prepare the following:
- Work motorcycle "Ural".
- Steering rod of transverse type.
- One pair of front hubs from a rear wheel drive vehicle.
- Front suspension arms.
- Axle shaft or driveshaft.
- Thick-walled light alloy pipe.
- Rear axle.
It is worth noting that the rear axle and front hubs must be taken from the same car. This will avoid the procedure of adjusting the disks to the fixing holes. It is recommended to take these parts from Moskvich or VAZ. The work will require a set of hand tools, as well as an angle grinder and a welding machine.
How to make an ATV from a Ural motorcycle?
At the first stage of creating an all-terrain vehicle, you need to make a suspension. First, the old vehicle will need to be disassembled. The frame of the device must be freed from all elements; the technician needs to remove the shock absorbers and steering wheel. It is advisable to determine in advance what type of suspension will be installed for an all-terrain vehicle from the Urals, for example:
- Suspension on springs.
- Rigid design without shock absorber.
- Suspension with shock absorbers on springs.
Of course, it is best to go with a suspension with spring shock absorbers. They can be taken from an old motorcycle. Since the device will have 4 wheels, the missing mechanisms will have to be purchased. The pendant in this case will have the shape of the letter “A”. You need to correctly calculate the weight of the future ATV. In this case, shock absorbers will ensure a smooth ride when driving on hard off-road.
Front suspension of a homemade ATV from the Urals
With the front suspension everything is much simpler. As a rule, it is the same on all homemade ATVs, so finding drawings on the Internet will not be difficult. In general, you can make an ATV from the Urals much faster if you have the necessary drawings at hand, so we recommend printing out several at once.
So, to make the front suspension, you need to lengthen the motorcycle frame again, but this time at the front. This is done not only to increase the dimensions of the ATV, but also to ensure that the front wheels do not rub against the engine and its cylinders. When extending the frame, it is necessary to calculate everything correctly and install the pendulum arms in the most suitable place.
Also, to increase cross-country ability, you can independently lengthen the suspension arms, which will increase the ground clearance. Then you need to make a steering column, for the production of which you can use a cardan from the Urals. A pair of steering bipods need to be welded to it from below, each of which will belong to its own steering rod. The last step is to attach the hubs using factory balls from the Ural motorcycle.
We have examined all types of suspension that can be used for a homemade ATV from a Ural motorcycle. All that remains is to place the power unit on the frame and connect it to the selected suspension. Since the process of finalizing the appearance is a purely individual matter, we did not talk about this process. It should only be said that for an ATV you will definitely have to weld the fenders, since a lot of dirt and dust will fly from under the car wheels. Now you know how to make an ATV from the Urals .
Frame
The frame for the all-terrain vehicle will have to be made from scratch. It is assembled from metal pipes, which must be both strong and lightweight. Some blanks can be taken from the Ural. Its frame is suitable for such purposes, since the weight of the structure is low. At the same time, the pipes taken from the motorcycle are characterized by good flexibility and strength.
But to assemble the frame, it is still recommended to take some more material. Such pipes should not be too thick. Otherwise, the motorcycle will turn out to be heavy, devoid of maneuverability and dynamism.
DIY ATV: 6 assembly options, detailed instructions + video
How to make an ATV with your own hands is a difficult and responsible task, but feasible for a master who has mastered welding and turning. The effort and time spent are paid off not only by large savings, but also by the result obtained - an exclusive, original model of a quadric that no one else has.
Features of assembling a homemade vehicle highly depend on the chosen base - the engine and other elements that are used by the craftsman.
6 best options for a base (“donor”) for those who have set the goal of how to make an ATV.
- Motorcycle "Ural".
- Motorcycle "Izh".
- Motor scooter "Ant".
- Another motor scooter (scooter).
- Car "Niva".
- Oka car.
Most often, some structural elements are taken from a motorcycle, others from a car.
In addition to the parts (components) for the quadric, its creator will need:
- assembly “shop” - a fairly spacious garage equipped with good heating and lighting will be useful in this capacity;
- a set of equipment and tools;
- blueprints.
Preparation for work, tools and equipment
First of all, you need to carefully consider when, where and for what purposes the future ATV will be used - hunting and fishing, motorcycling in nature, transporting goods, etc. It is on this basis that you need to make a choice of a “donor” vehicle, deciding how powerful the engine is needed, what kind of suspension is suitable, what kind of trunk, etc.
- You can take ready-made drawings from the Internet, create them from scratch yourself, or combine both options and ready to remake them at your own discretion.
- List of required tools:
- welding machine;
- Bulgarian;
- drill;
- a set of keys;
- various small tools - calipers, hammer, knife, screwdrivers, pliers, etc.
To make your own frame, you will also need equipment for bending pipes. If you don’t have one, you can rent it or outsource the necessary work to another craftsman. Only with remarkable skill can you bend the pipes manually by heating the bend with a gas cutter or torch.
Quad components:
- engine;
- frame;
- rear and front suspension;
- steering;
- brake system;
- cooling system;
- muffler;
- electrical equipment - battery, headlights;
- body, body kit
It is strongly recommended to purchase a brake system either completely new or from a vehicle with the shortest mileage. Using old brakes is too dangerous.
It is quite possible to make a muffler yourself. Everything else is to purchase used parts on the shadow market.
Parts selection
ATV frame
Depending on the “donor” and the design of the quad, you either have to make the frame yourself, or you can reconstruct a finished, used one.
The most important thing is that the engine is securely bolted to the bottom along the frame, which can be located either front or rear. The transmission and drive should also be firmly attached to the frame to avoid play.
Homemade frame
The material used is ordinary water and gas pipes with a wall thickness of no more than 3 mm:
- for spars - 25 mm;
- for crossbars and struts - 20 mm.
The pipes are connected using spot welding, followed by solid welding. Ears for attaching shock absorbers and levers are welded to the frame immediately. Brackets - during installation of units and components.
Reconstruction of an existing frame
To reconstruct a finished frame, you should remove everything, leaving the frame, dismantle the back part and build up the front. Then weld elements for fastening a complete set of components and assemblies of the ATV. When reconstructing a motorcycle frame, the seatposts should be moved back by 40 - 45 cm.
The front and rear luggage racks are cut out of a metal sheet and welded to the frame. Finally, the finished frame is painted; there is no need to varnish it.
Engine
The engine is suitable for a car, motorcycle or scooter. Some “Lefties” even construct an ATV from a walk-behind tractor with their own hands, since newer models are equipped with four-stroke engines, the power of which in heavy devices reaches 15 “horses” - versus 11 hp. "Ant."
The engine of a scooter has the advantage of low fuel consumption; in addition, the scooter-based quad is the lightest, which makes it easy to pull it out when stuck in mud and sand. But a quad to transport cargo and/or drive off-road requires a more powerful engine.
The engine power of the Izh-1, Izh-2 and Izh Jupiter is 24 hp, the old Ural is 32 or 36 hp, the two-cylinder engine of the old Oka is 35 hp. , a three-cylinder car of a later release - 53.
To travel in hot weather, the ATV needs a cooled engine. Cooling was not installed on older motorcycles, so you will have to pick it up (for example, from a VAZ 2108 will do) and install it.
The suspension can be used both rear and front. The easiest way is to take the front one from a motorcycle.
2 rear suspension options:
- The rear axle of the car, shortened to fit the dimensions of a quad. The advantage is the presence of a differential. Disadvantage - the design will be heavier.
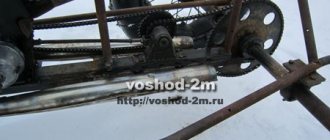
- Cardan-gear design - with a gearbox mounted on the rear axle.
- Please note: the quad all-terrain vehicle requires an independent suspension with high ground clearance.
- The suspension arms are bolted to the frame through rubber-metal hinges - silent blocks.
- The front suspension strut must be tilted, otherwise the ATV may roll over.
- The shock absorbers are suitable from Izha, but if the budget allows you to purchase gas-oil shock absorbers with pumping, the driver will be able to adjust the suspension according to road conditions.
Steering and chassis
The steering system of an ATV can be based on a car - with a steering wheel, or with a motorcycle steering wheel. Some craftsmen combine both types: motorcycle handlebars, levers and shafts at the top, car tie rods at the bottom. It is advisable to take the fuel tank along with the motorcycle handlebars.
Engines and transmission
The Ural motor is most often used to create homemade ATVs. This engine is quite powerful and durable, which provides the motorcycle with high functionality. Such an ATV can be used both for off-road driving and for economic purposes.
It is worth noting that the Ural engine is quite powerful. This is a four-stroke two-cylinder engine with a volume of 750 cm³ and a power of 41 hp. With.
During assembly, it is recommended to use not only the engine from the Ural motorcycle, but also its transmission. In this case, the system will work smoothly. The presented motorcycle has a 4-speed gearbox and reverse gear. The standard equipment also includes a cardan drive for the rear wheel.
Required parts and tools
In today's article we will analyze the process of manufacturing a rear-wheel drive ATV, since this option is the simplest. For work we will need:
- Motorcycle Ural in working condition
- A pair of front hubs, exclusively from a rear-wheel drive vehicle
- Steering tie rod
- Front suspension arms
- Cardan shaft or axle shaft
- Rear axle
- Thick wall pipe
It’s worth saying right away that the front hubs and rear axle are best taken from the same car. In this case, you do not have to adjust the disks to the mounting holes. For an ATV from the Urals, hubs and axles from classic Zhiguli or Moskvich are perfect.
Also, in the process of making a homemade ATV from the Urals , you will need a lot of tools. Therefore, in addition to screwdrivers, wrenches and hammers, it is necessary to prepare a welding machine and an angle grinder.
Body and wiring
Attachments, a gas tank and other structural elements are attached to the assembled frame. Each node must be firmly fixed on the prepared platform. It is important that the vehicle remains stable after assembly.
For many motorcycle owners, it is important that the appearance of the ATV is spectacular. Therefore, the design must be thought out in advance, before assembly begins. You will need to install a driver's seat and lighting fixtures. Turn signals and headlights are also removed from the donor motorcycle.
