Today, motor-wheels for electric bicycles are very popular among users, so every self-respecting user wants to know as much as possible about this device. In this topic I want to talk about spoketing a motorized wheel and give an example of doing it yourself. This information will be useful to any cyclist who decides to engage in MC spokes with his own hands - this will allow him to turn his plans into reality as correctly as possible.
Why are knitting needles needed?
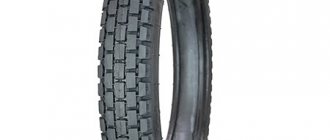
The quality of the wheels of any bicycle is directly dependent on the level at which their components are made. A traditional bicycle wheel consists of a rim, spokes and a hub. The spokes are responsible for connecting the hub to the rim; they provide the wheel with not weak strength at a modest weight. In addition, the spokes are a kind of shock absorbers; their flexibility allows you to distribute the load over the entire rim. These elements center the rim, hold the shape of the wheel and give it rigidity.
The design of the spoke is not complicated: one end is riveted and bent, and on the other there is a thread for a mushroom-shaped nut (nipple) that attaches the spoke to the rim. The thread can be threaded or rolled. The latter is considered more reliable.
How to determine how curved a wheel is
The bike should be placed upright. Then rotate the problematic structural element. With a strong eight, defects will be visible to the naked eye. If there is minor damage, a characteristic clicking sound will appear.
There are three ways to determine the number eight on the wheel.
- Visual. Allows you to find large and medium defects. It is enough to spin the wheel strongly and carefully inspect its movement. The curvatures will go to the side. Once detected, it is recommended to quickly record them.
- Contact. Involves marking damaged areas. Here you need to prepare a light marker or chalk. Spin the wheel, then place the indicator against the rim. The first mark is the convex edge of the figure eight. Next, unwind the element even more, continue to bring the chalk or marker closer. This will create a second one—the general area of curvature. The source of deformation will be clearly displayed as a thick line around the entire circumference.
- Using available tools. You need to prepare cotton swabs, tape and a marker. Secure the sticks with tape to the front fork stays. Spin the wheel, determine where the sticks touch the rim. Mark the areas with a marker.
Selection of knitting needles for MK
Motorized wheels for electric bikes designed for 36 spokes are the most common, but there are also 32- and 28-spoke modifications. There are also more exotic, 16- and 14-spoke variations. However, attention should be paid not only to the knitting needles. So, it is better to install a double rim, because the electric motor increases the load on the wheel.
Here’s another nuance: rims that are identical in outer diameter may differ in inner size, so not all spokes will be the right length. In this regard, first of all we pay attention to their length, and then to their thickness.
The motor flange diameter is often much larger than the flange diameter of a traditional hub. And from this the conclusion follows: standard knitting needles cannot be fitted one hundred percent; shorter ones are needed.
Wheel deformation or why did the wheel become a figure eight on a bicycle?
Deformation is the loss of the derivative shape of the wheel. Deformation can be reversed and irreversible. The main types of deformation are the so-called figure eight (transverse deviation of a rim segment), egg (ovality of the rim), offset umbrellas (when the wheel becomes off-center of the fork), transverse and longitudinal dent of the rim, and the like. The figure eight, egg, and offset umbrellas refer to reverse deformation, and the last one is almost always a mechanic's error. All others are examples of a catastrophic failure that requires replacement of one of the main components or the entire wheel as a whole. They are caused by impacts, the force of which exceeds the threshold of elastic deformation of the materials from which the wheel is made, bursting of the spoke and nipple, uncoupling of the seam, concentric, longitudinal or transverse bursting of the rim, bursting of the hub flange caused by static and / or dynamic loads, and the like.
Sometimes wheel deformation is caused by permanent spoke stretching (poor quality). Also, due to prolonged exposure to a large static load, the spoke can tear out the surrounding area around the hole, visually similar to the caldera of an active stratovolcano. This type of deformation is caused by the mechanic not following the spoke tension recommendations and/or by overloading the bike with touring equipment (user error).
In this article, we will not consider catastrophic (irreversible) deformations of the wheel and its components and will focus on what can be fixed without replacing components.
Motorized wheel spoke patterns
Radial (“sun”)
This method is used for front brake discs, on which rim-type brake mechanisms can be installed. The radial system has one significant drawback - a serious vertical load on the spokes. But the advantages of this technique include beauty!
"Crosses"
The scheme is practical and versatile. Of course, from the outside, such intricacies do not look very attractive, such as a radial installation, but with a cross pattern, even serious loads generated by braking and pedaling are neutralized by the stretching of the spokes.
Combined scheme
It combines the features of the two schemes above, but this knitting technique is used much less frequently.
❗Nuances
The spokes enter the rim at an angle (except for the radial pattern) and this is what allows them to form a cross. This approach increases strength and evenly distributes the load. The more crosses, the more evenly the force is distributed, and the smoother its distribution, the less chance of an “egg” or “figure eight” forming after a hard collision of a wheel with an obstacle. But at the same time, if there are too many crosses, then the risk of deformation of the spokes increases.
In general, MK spokes can be 1 cross, 2, 3, or even 4. The latter pattern is suitable for large diameter wheels equipped with a small hub.
However, if you take a large bushing as an example, then most likely you will be able to knit the MK into one cross, well, at most, into two. If you try to introduce too long spokes into the design, be aware that they will fit into the nipple with a bend. In this state of affairs, unfortunately, you will not achieve an improvement in load distribution, but an unpleasant decrease in strength awaits you.
The optimal spoke pattern is selected taking into account the diameter of the rim and the hub motor:
✅ Small rims, combined with a relatively large electric motor, are knitted using the radial method. Other schemes with such a combination are simply not applicable.
✅ Rims with a medium diameter, knitting according to a single-cross pattern.
✅ Rims of solid diameter combined with small geared electric motors are knitted into a pair of crosses.
Some users who order a spoked hub motor with an outer diameter of 240 millimeters into a 20-inch rim express their negative attitude towards its radial spokes. In their opinion, the only correct pattern in this case may be a double-cross knitting pattern.
In connection with this misunderstanding, experts have the following question: how can a user even imagine such a variation of the spokes when a gap of 100-150 mm on each side is formed between the engine and the rim. Electric motors of impressive diameter can only be connected to a small rim using a radial design.
Are you suspiciously contemplating your sixteen-inch wheel, into which it is planned to accommodate a 13-centimeter electric motor, fixing it with standard spokes? You are doing the right thing by doubting! An increase in load requires replacing the spokes with reinforced ones and the rims in addition.
Stock spokes can actually work as part of a motorized wheel, but, unfortunately, not for a long time. Radial and single-cross spokes will suffer the most when the wheel is heavily loaded overall.
How defects can form and why
There is a widespread belief that the wheel can change its shape if you do not drive carefully, when driving over bumps or during unsuccessful jumps. All this is true. That is, all this, of course, affects rapid wear. But this is not the only reason why a wheel can break. When a cyclist sits on a bicycle, the wheels are already subject to load in the vertical direction. Further, when braking at high speeds, the wheels can become deformed, forming figure eights. During maneuvering (on turns) in any direction and sudden braking. In general, I don’t think there’s any need to explain what sloppy driving is; you yourself understand everything perfectly well. So taking good care of your bike may delay the problem, but over time you will still get back to it. Even if you ride very carefully on a good road, that’s the nature of the bike.
Everything, of course, depends to a large extent on the wheel rim itself, on its physical characteristics
Therefore, when buying a bicycle, you need to pay the seller’s attention to such things, wondering how long the wheels can last, how they react to the deformations described above. So on cheap bicycles the rims are correspondingly less strong
And various bends (egg and figure eight) of wheels can form much earlier than on their more expensive and high-quality counterparts.
In general, I think you already understand how a problem can arise. So let's get straight to how to solve the problem and straighten your wheel.
Calculation of knitting needles for MK
Below is a list that displays the values of calibers accepted in the States (Gauge, G), translated into mm familiar to the Russian-speaking user:
We discard the 16th and 17th gauges right away - they are used in racing modifications, for which low wheel weight is of great importance. And 4th and 8th gauges are used on the wheels of motorcycles and cars.
The list does not include outlandish variations: knitting needles of variable thickness, oval, flat, and teardrop-shaped cross-sections. Such parts are specially adapted for racing bicycles, where weight and aerodynamic characteristics are a higher priority than long service life. In addition, not all knitting needle manufacturers focus on the overseas system, and therefore you may come across good quality knitting needles with a cross-section of, for example, 3.05 millimeters.
The wheels of the average bike are most often equipped with spokes with a cross-section of 1.8 and 2.0 millimeters, but 2.3 mm are also found. Such indicators will be quite sufficient for long-term operation under standard conditions. When electrifying a bicycle, you need to take into account that its total weight will increase, so you will have to deal with the spokes in any case.
Figure 8 on a bicycle wheel - fix it yourself
The spoked wheel can easily be called one of the most classic elements of your bike, as it is installed on most modern bicycles. The configuration of such a wheel includes:
During long-term use, the wheel is subjected to significant load and may become deformed over time. Therefore, every cycling enthusiast should be able to independently fix simple problems.
What is an eight?
Wheel deformation is called a “figure of eight” when part of the rim deviates from the plane of rotation. With such a malfunction, you can ride a bicycle, but you will not enjoy such a walk at all. Moreover, over time, the figure eight will cause the rim to become completely unusable and will need to be replaced with a new one. Therefore, it is better not to delay and fix the problem immediately after identifying it.
How to correctly identify the presence of an eight?
If you begin to suspect that the wheel is warped, the first step is to find where the rim is bent. This can be done in two ways:
In the first case, you simply spin the wheel intensively and determine the curved area. It will constantly move away from the plane of rotation. At this moment, you need to grab the wheel with your hand and mark the deformed area with a marker. Preferring the contact method, you take a marker and, rotating the wheel, run it along the rim. The marker should make a full circle and after that you will clearly see the place of deformation.
How to eliminate the eight correctly?
Once you have identified the area of deformation, all that remains is to eliminate the figure eight. You can easily do this yourself without turning to specialists for help. There are two main ways to eliminate the figure eight:
Correcting the figure eight by force
Experienced cyclists do not really trust this method and resort to it if a wheel deformation suddenly catches them on the road and they need to fix the problem in order to get to their destination. In order to correct the figure eight by force, you need to remove the wheel from the frame, turn the deformed section towards you and firmly grasp the rim and tire on both sides. We press the area of deformation with our knee and push away from ourselves with maximum force. It is difficult to call this method effective due to the following reasons:
- You may not be able to remove small bulges
- There is a risk of bending the rim in the other direction
- Eliminating the figure eight using this method is very inconvenient
- Some rims are simply not subject to human force
Elimination of adjustment by tightening the spokes
This method is more popular among cycling enthusiasts, because it allows you to achieve an excellent result in the form of perfectly straight wheels. To work, you will definitely need a special spoke wrench, which can be freely purchased at any bicycle store. In most cases, rim bending occurs due to a general weakening of the spokes. In this case, we tighten them one by one by about one turn. If the knitting needles have weakened specifically at the point of deformation, carefully tighten those that are in the immediate vicinity of the curvature. Let's start from the center. It is necessary to twist the knitting needles in the direction opposite to the convexity. Having mastered this simple method once, you can quickly and accurately fix the problem and calmly enjoy fast riding on your favorite bike!
Rules for choosing spoke caliber
A motorized wheel must have stronger spokes than a standard bicycle wheel. For example, if before the introduction of the electric motor, 2 mm products were used on your bike using a double-cross pattern, then to knit the motor into one cross, you will need spokes with a cross section of at least 2.6 mm or even thicker. In addition, the choice also depends on the power potential of the electric motor used.
The table below shows the approximate spoke sizes for mounting MKs with different power ratings in rims of different sizes:
Eliminating bicycle wheel defects
Once the area where the wheel is bent is found, it’s time to start straightening it. Every owner of a two-wheeled vehicle can do this with his own hands, especially since such problems can arise with enviable regularity. There are two ways to eliminate the figure eight yourself:
- Power straightening, or “kneeling” as cyclists say.
- Method of tightening and loosening wheel spokes.
Power straightening
To remove the bend in this way, you will need to remove the wheel from the frame. In this case, you do not need to remove the tire with the tube. We turn the bulge towards us and grab the rim and tire on both sides. For moderate deformations, the optimal wheel grip is position “10” and “2”, that is, 60 degrees in both directions from the source of the figure eight. We place our knee on the most convex area and push with force away from ourselves.
What wheel position will best align the rim? If there is enough strength in the leg, then you can press on weight. An alternative option is to place the wheel vertically with the defective section facing up. Here you will need the help of a partner. He should press the wheel firmly to the floor. After straightening, the wheel is put on the frame and checked again by rotation.
This method cannot be called effective for several reasons:
- It is impossible to bend small bends.
- The rim may bend in the other direction.
- Inconvenient.
- Low accuracy.
- Not every rim can be subjected to simple force so easily.
This method works relatively well somewhere on the road, when a figure eight has suddenly formed due to a collision with a large obstacle and it urgently needs to be straightened out in order to get to its destination.
Adjusting the wheel spokes
Let's move on to the second option for eliminating the curvature of the rim. Adjusting the spokes consists of alternately loosening and tightening them. To work with them we need a special tool - a spoke wrench. This simple device is a round piece with square holes on the side for different sizes of knitting needles. You can buy a key without any problems at any bike shop.
Attention! You should only change the tension of the spokes with a spoke wrench, and in no case with pliers or adjustable wrenches!
Aligning the figure eight on a bicycle wheel requires patience, especially for those doing it for the first time. The tires must be completely removed.
First you should check the tension of all spokes. Often the rim becomes bent due to their general weakening. It’s easy to check: when the spokes are clearly loose and “listen” to your fingers like strings on a guitar, then they need to be tightened by about 1 turn over the entire wheel. If such a problem is not observed, then there is no need to touch anything: this can only worsen the eight.
We mark the defective area and proceed to the “central” knitting needle – the one located at the convexity. The knitting needle is turned in the direction opposite to the direction of the convexity. The spokes on the sides of it are weakened. With a figure eight on three knitting needles, the straightening scheme is as follows:
- Tighten the central one a quarter turn of the key.
- Loosening the outer spokes by an eighth of a turn: the loosening force is half the tension force in the center.
With a figure eight on 7 spokes, wheel repair is done as follows:
- The center is tightened half a turn.
- Loosen two spokes (second and third) on the sides by ¼ turn of the key.
- The fourth and fifth knitting needles are tightened to 1/8.
- The sixth and seventh (outermost) knitting needles are loosened by 1/8 of a turn.
Alternating tension and stretching is carried out in such a way that the outer spokes on the figure eight are weakened. To check the result, the wheel is hung on a bicycle and tested for residual curvature. If the figure eight is bent in the opposite direction, you should remove all the tension and increase the tightening torque on the loosening knitting needles and repeat the procedure again, but with less tightening and loosening forces.
Despite the fact that you have to tinker a lot, you can achieve the ideal result - straightening the wheel to an even circle. And if the first time the work may take too long, then the next time the eight occurs, the repair will go much faster. Now, if a defect appears on the wheel, you don’t have to put the bike aside, but quickly adjust the spokes yourself and resume your rides.
How to knit a knitting needle with your own hands
Ideally, MK knitting should be entrusted to professionals who will carry out this tricky operation using special equipment. At the end of the event, the assembled electrified wheel is adjusted and tested at the stand. This eliminates out-of-roundness and lateral runout.
But, if you have a strong desire to knit the MK with your own hands, no problem. Only you must have the proper amount of patience and time for this. This process must be treated extremely responsibly, because if you do not follow the correct algorithm, various types of malfunctions can make themselves felt, ranging from rubbing of the spokes when they come into contact with each other, ending with falls that are dangerous for the rider.
Getting ready for the process
Before you start knitting the MK, you need to understand where exactly the knitting needles will be inserted and determine the order of their installation - this is extremely important. Figure out which parts you will fit in parallel and which in a cross pattern. Also, it is necessary to calculate through how many holes each subsequent knitting needle will be inserted.
To make the knitting process easier, you can turn the bike over and use the front fork.
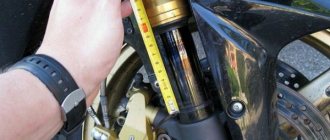
Also, before starting, find out what length of knitting needles should be used. If the electrified wheel is placed on the front axle, then it will be easier to deal with it - the length is identical. But on the rear wheel there are speeds, so alignment is accompanied by difficulties. Its knitting needles differ in length, and their angle of inclination also varies. By the way, to calculate the appropriate length of the knitting needles, there is a special calculator .
Here's what else you need to know: Most hub powertrains are designed with 36 spokes, so a 32-spoke rim won't work for them.
The main principle of knitting: from the right flange - into holes inclined to the right, from the left - into holes inclined to the left.
There are two types of spokes on the flanges - they are equal:
- Tails. They are directed in the direction opposite to the rotation of the rim and are often indicated in red tones.
- Leading. They are directed in the direction of rotation and are usually indicated in blue tones.
Installing the spokes
For the technical maneuver we will need: spokes of a suitable length, an electric motor of the appropriate type, a rim, a bushing, a spoke key and also a screwdriver.
So, we insert a tail-type spoke from the outside of the right-hand flange and fit it into a hole on the rim inclined to the right, located behind the spool. In order to prevent the spoke from falling out, we attach the nipple. We also bridge the next knitting needle into the hole of the right-hand flange, at a distance of three holes after the first.
Then we turn the MK with the left flange towards us. We scroll the rim up with the spool and then introduce tail-type spokes. If the starting spoke is inserted into the first hole behind the spool, then we adapt the first spoke of the left-hand flange to the left. If it is in the second hole behind the spool, then we bridge the first spoke of the left-hand flange to the left of it.
We finish installing the tail elements and move on to the leading ones. We install the motor-wheel with the right-hand flange facing us and fit the spokes into arbitrary holes on its inner side. Having inserted the spoke, turn the bushing clockwise. This action will allow us to achieve the intersection of the leading element with the three tail ones: two spokes will lie on the outside, and the third on the inside. If this becomes necessary, the knitting needles can be slightly bent. We fully implement all the spokes.
Adjusting the tension
This ritual must be performed in order to give the rim maximum roundness, that is, no “egg-likeness”.
So let's get started:
1. We press the MK axis with nuts. Next, we pull the spokes with identical force, turning the nipples alternately by an equal number of turns, but do not tighten them to the limit.
2. Now we need to eliminate the “ovality” - radial runout, which is formed due to unevenly tensioned spokes. Next we need an indicator or an ordinary chalk. We adapt it near the fixed part and provide a gap of 1-2 mm to the end of the rim edge. We begin to rotate the MK. In those places where chalk marks appeared, you will need to slightly tighten the nipples. Here, by the way, you should be careful: on nipples made of various alloys and brass, it is very easy to screw up the threads, but steel products are more reliable in this regard.
3. Getting rid of lateral runout. We press the chalk to a stationary area on the side of the rim and begin to rotate the electrified wheel. We tighten the knitting needles located in the flange on the opposite side of the points marked with chalk. As for the tolerances used in production, discrepancies in runout and ovality should not exceed 1.5 mm. This figure can be reduced to 0.5-1 mm, but this will require special bench equipment.
The spokes are stretched to such an extent that they “ring”, as this affects the reliability of the e-bike, and safety should not be forgotten. You should not think that you will make the adjustment once and then you can safely forget about this event for the rest of the time. In reality, you need to tighten your spokes at least once a month. If you use your electric bike for riding on rough road surfaces, you will need to adjust the spokes even more often. If you have serious impacts with the rim on an obstacle, then the check should be carried out immediately after the incident.
And finally, I suggest watching a video in which you can get acquainted with the personal experience of one user’s motor-wheel spokes:
Conclusion
As you can see, with an electrified bicycle, the issue of spokes is not so simple. Obviously, the increased load will require reinforcement, so the spokes will have to be dealt with in any case, in addition, the rim must also be reinforced. The information provided in the article should ease your pain, if you plan to do everything yourself.
However, if you simply don’t have the appropriate skills, patience or time, then there is no point in torturing yourself - contact good professionals and they will organize everything properly. The only thing that remains for you is to enjoy high-speed rides on an e-bike, without worrying that something will fall off your bike during the hectic rides.
General algorithm for eliminating problems with a deformed wheel
The general algorithm is as follows: we determine in which specific place the figure eight begins and in which it ends (we highlight the lesion). The next step is to find the central spoke in the figure eight and work with it. If our figure eight leans to the left, select a spoke on the opposite side and tighten it to a distance of less than one turn of the spoke wrench. Then we take two adjacent knitting needles - these will be the knitting needles on the opposite side from the previous knitting needle - loosen them by the number of turns a little less (for example, 2 times less) than we tightened the previous knitting needle. And so on until completely straightened. That is, we are already tightening the next two knitting needles (they will be placed on the opposite side) even weaker than the very first knitting needle. As you move away from the central spoke (the lesion), the number of revolutions will also decrease gradually.
If the figure eight is small with three knitting needles.
So again, how do you fix a figure eight on a bike? To fix the wheel, we select a section where there is a figure eight, and along the length of this entire section we loosen and tighten the spokes coming one after another. On one side of the wheel we loosen the spokes, on the other we tighten them. When the required operations have been completed with all the spokes, we rotate the wheel again and check the correct movement of the wheel around the axis. If it gets worse, we return the needles to their previous place and do less tightening and loosening. Thus, the bias to one side leading to a figure eight will gradually level out. To perfectly align the figure eight, you will have to patiently and painstakingly carry out all the above steps slowly (i.e., twist it a little at a time).
A larger eight is treated in the same way as a small one.
The wheel is flattened by an egg, the straightening algorithm is slightly different. Just pull up the right side.
bad landings
Definition of eight
To accurately align the rim, it is necessary to correctly determine the location of the bend. You can do this in two ways:
- Visual;
- Using a tag.
The most traditional method of identifying faults, which every young cyclist has experienced in the yard, is a visual inspection of the wheel.
To do this, you need to turn the unit upside down and rotate the rim strongly. At speed, you will be able to clearly see the curved area.
The main thing is to tighten it harder. However, having identified the defect, it is necessary to remember the area exactly or stop the wheel abruptly with your hand so as not to lose the location of the curvature.
This method has its drawbacks. The main one is the unreliability of our eyes. They cannot always identify small figure eights, especially if there is more than one curved area.
Another disadvantage is remembering the bad sector. Therefore, this method can be used when you don’t have tools at hand or are on the road.
The second method is more accurate. It involves setting marks on a curved section of the wheel. But, if for visual inspection it was not necessary to remove the tire from the rim, then with this method of determining the defect it is necessary to free the wheel.
With your bike upside down, spin the crooked rim and slowly move a chalk or marker toward the back of it. The convex part will touch the chalk, and a mark will be placed on the curved sector.
Continue to slowly move the chalk closer to the wheel until it traces an outline along the entire radius. This is necessary to identify less noticeable eights. The places in the outlined contour where the trace of chalk becomes thicker are the figure eight.
This method of identifying a fault requires more time and preparation, but thanks to it you can more accurately determine even minor changes in the shape of the wheel.